Pages

Monday, September 30, 2013

Mommy Mondays: What We're Still Using

If you've ever been married, you'll know that it's a racket.  Everything related to a wedding costs way more than if it weren't for a wedding.  Like flowers.  You can get a bouquet of flowers to bring to a party for fairly cheap, but need a bouquet for a wedding?  The price goes up exponentially.

Things dealing with babies are similar.  Babies are expensive!  And they're really not babies for very long.  So I thought it might be helpful, as we near 2 years, to share those items we're still using on a regular basis.  So you have an idea of the things that you may want to splurge on since they have a relatively long shelf-life.

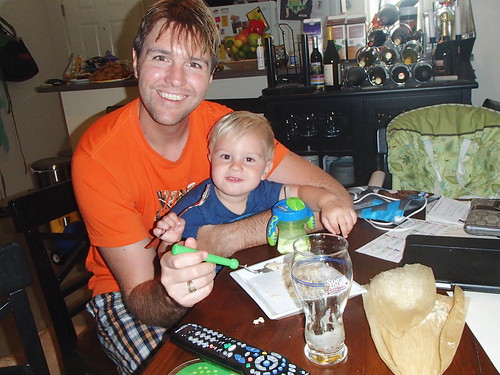
Munchkin bowls and Munchkin spoons


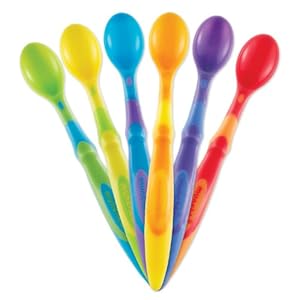
These first two are by Thatbaby's choice.  We actually are more than happy to give him real tableware at this point in time, and he eats off a regular plate, with a regular fork, but anything eaten with a bowl or spoon he requests a "blue bowl" or "orange bowl" and a "green spoon,"  "purple spoon" or "yellow spoon."


Stroller


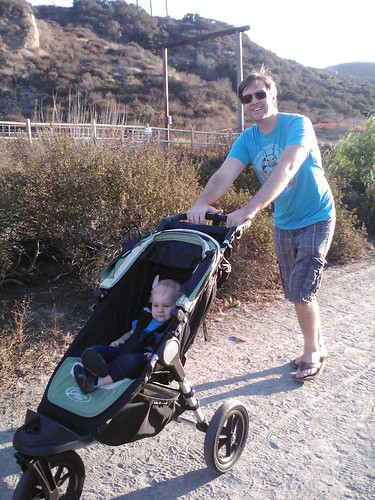
We don't use this every day.  In fact, Thatboy took it out of my car at the end of August and we haven't used it since that time, but we do still use it from time to time.  Like when we're going for a walk on the neighborhood trail.  

Carriers


Probably the reason we don't use the stroller so much.  It's still easier to pack a carrier.  And they're incredibly useful for having a free hand.  I'm sure one day he'll outgrow these, but so far, they've been worth every penny.

Diaper bag


It's not loaded as much as it once was, but I still bring my diaper bag everywhere.  As I once mentioned, it's really just a big purse so it's helpful for carrying my life around.


Crib


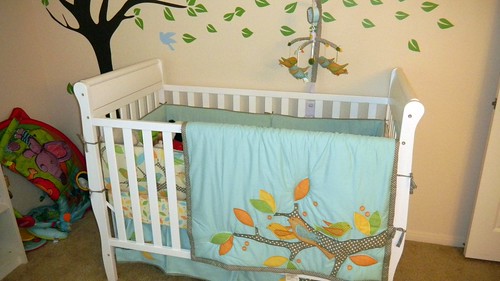
Yup.  Thatbaby is still in the crib.  And he will be for as long as we can keep him there.  We're not anxious to move him into a toddler bed - one without rails to keep him in.  He hasn't shown any interest in climbing out, and until he does, we'll be keeping him in little safe haven.

Glider


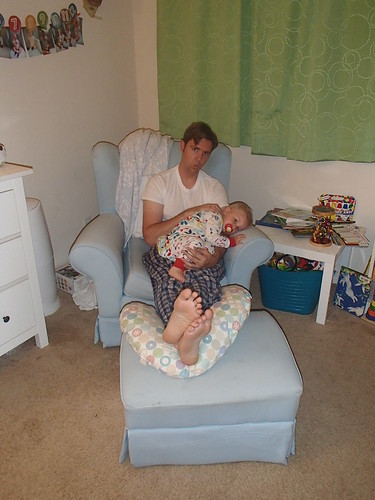
This was our biggest splurge when I was pregnant.  And I have never regretted the purchase for even a second. Even now, it's our bedtime chair.  Thatbaby gets his story in it every night  And during the day he will also climb in and ask for a story. He loves to jump from chair to glider and rock himself too.  I foresee this being one of the best baby investments we've made.

changing pad


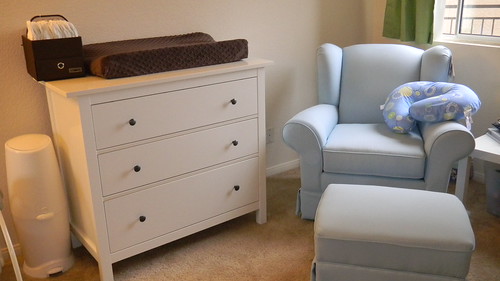
At a certain age, a lot of people stop using the changing pad.  They just use the floor, the couch, any flat surface.  Daycare has been changing the kids standing up for 6 months now.  But I still love my changer.  Mostly because Thatbaby can't crawl away when he's on it the way he tries when we use the floor or bed.  And I'm not adept at getting him clean with wiping while standing up - I use a lot more wipes.

Carseat

This is kind of a no-brainer, we'll be using a car seat for a long time to come.  And given that Thatbaby isn't breaking any records with weight or height, he'll probably be rearfacing in the Recaro for a while.


This one was actually surprising to me.  I thought Thatbaby would have outgrown this by now, but 2 years later and it's still great for a travel bed.  Folds up easily, assembles quickly, and he still fits!

Friday, September 27, 2013

Fancy Dinners Out: Grilled Turkey Reuben


Did anybody notice something missing from my monthly goals this month?  Something that's been on the list for over a year?  Guess what peoples - we found a babysitter!  2 actually, and we're still interviewing, but we have a sure fire, already love her, babysitter!

Last weekend, Thatboy and I took advantage of our newfound freedom and went out to a grown up dinner.  We dressed up, headed to a nice restaurant, drank and ate, and were totally and completely exhausted by 10pm.  Well, I was.  Thatboy convinced me I wasn't too tired to head out for some frozen yogurt after dinner.

Don't get me wrong - I love going out to eat.  I love having some adult time with Thatboy.  I love frozen yogurt.  I am so thankful we have a babysitter.  But at the same time, sometimes I still appreciate just eating an easy comfort food at home with my boys.

Reubens are a quintessential Jewish comfort food.  A sandwich piled high with warm pastrami or corned beef, the tang of sauerkraut, and creamy thousand island dressing.   Traditionally served on a marble rye.  This is not your traditional reuben.  Firstly, because I used turkey instead of pastrami or corned beef.  This makes it a bit lighter of a sandwich, but I love turkey sandwiches and this is a great twist.  The second big change is that instead of serving warm meat, I warmed the entire sandwich - on the grill (or grill pan in my case).  The whole sandwich becomes something warm, gooey, and comforting.  Something you don't need to get dressed up to eat.

Grilled Turkey Reuben 
6 slices of marble rye
6 oz of turkey
3 slices swiss cheese
3/4 cup sauerkraut
sliced dill pickles
thousand island dressing
  1. Place 3 slices of  bread on your work station. Top each slice with turkey, swiss, sauerkraut, and pickles.
  2. Spread thousand island dressing on the remaining 3 slices of bread and place atop your stacked sandwich.
  3. Heat a grill or grill pan over medium heat.  Grill sandwich about 3 minutes per side, or until cheese is melted. 

Thursday, September 26, 2013

Babies and Baskets: Chocolate Almond Meringues


While we were in synagogue for Rosh Hashanna, I got word that Superwoman was heading to the hospital - it was baby time!  By the time we sat down for dinner, the newest Superbaby had arrived.  (Which means I will probably have to start referring to the original Superbaby as Supertoddler!)

As usual, I gave the family some time to adjust to the new arrival before swooping in last week to meet the new squish.  Which ended up being the same day Superwoman's mom headed out of town.  So I'm sure my basket of love was especially well received!


This basket of goodies was made especially for Superwoman, who is breastfeeding Superbaby.  It's really geared toward a breastfeeding mom.  Especially one who is also chasing after a toddler.  The bottom of the basket, which you can't see, has green chile chicken enchiladas.  Which Superwoman informed me were "amazing."  I also made her some citrus punch, since breastfeeding makes you incredibly thirsty.  Like gallons of water thirsty.   There's some granola - containing oatmeal which is supposed to help with lactation, as well as being a great filling breakfast or snack.  Speaking of snacks, breastfeeding makes you constantly hungry, so I stuck in some edamame (high protein, easy to eat with one hand) and chocolate almond cookies (because you can afford to have some extra calories when you're burning 90 calories a breastfeeding session!)

The cookies were a big hit.  They didn't make it through the day according to the email I got from Superwoman the next day.  Although they're not incredibly healthy with the chocolate chips and nuts, as with most meringues, you feel like they're not so bad for you!

Chocolate Almond Meringues
1/2 cup sugar
1/2 lb slivered almonds
6 oz semisweet chocolate chips
3 egg whites
1 1/4 cups confectioners sugar
  1. Preheat oven to 300.  In a heavy saucepan, combine the sugar with 1/4 cup water.  Cook until a candy thermometer reads 240.
  2. Stir in the almonds and remove from heat.
  3. Beat the egg whites in an electric mixer until stiff.  
  4. Add the confectioners sugar to the egg whites and beat for a couple more minutes.
  5. Fold in the almond mixture and the chocolate chips.  Drop by teaspoonfuls on a silpat or parchment lined cookie sheet.  Bake for 20 minutes.  Let cool before removing from the pan.

Wednesday, September 25, 2013

Putting the Pizza in Pasta: Pizza Lasagna


Pizza night is a weekly occurrence in our home.  And I try to spice it up a bit with variety.  Spinach pizza, radish pizza, cheese pizza.  But Thatboy's favorite kind of pizza is a meaty pizza - with sausage and pepperoni.

Really, there's no much difference between a pizza and a lasagna.  One has a crust, the other has noodles.  But both are a conglomeration of cheese, sauce, and whatever other ingredients you care to throw in there.

Sausage in a lasagna isn't really anything new, but I wanted to give this one a pizza-y twist, so I added pepperoni to it.  This was apparently one of the smartest things I've ever done, at least according to the males in my home.  Thatbaby devoured this lasagna for dinner two nights and for lunch one afternoon. Thatboy couldn't wait to get his hands on the leftovers.  I could tell he had been thinking about it all morning when we got back from the pool and he remarked "I know what I'm having for lunch!"

Pizza Lasagna
3/4 lb ground sausage
2 cups of your favorite marinara
no-boil lasagna sheets
16 oz ricotta cheese
1 egg
1/2 lb fresh mozzarella, sliced
1/4 cup parmesan cheese
6 oz pepperoni, chopped
  1. Preheat oven to 350.  Brown the ground sausage. 
  2. In a bowl, combine the ricotta, egg, and salt and pepper to taste.
  3. Pour some of the marinara in an 8x8 dish, enough to cover the bottom.  Place 2 of the lasagna noodles over this sauce.
  4. Place half of the sausage on top of the noodles, then half of the ricotta.
  5. Place 1/3 of the mozzarella over the ricotta and half of the pepperoni over the mozzarella.
  6. Top with 1/3 of the sauce, then another layer of the noodles.  Repeat with remaining sausage, ricotta, 1/2 of the remaining mozzarella, pepperoni and 1/2 of the remaining sauce.
  7. Top with noodles, remaining sauce, mozzarella, and parmesan.
  8. Bake, uncovered for 40 minutes.

Tuesday, September 24, 2013

Meat and Potatoes: Maple Glazed Pork


I used to make pork a lot more often.  It's so easy, and a tenderloin is the perfect size for our little family.  Before Thatbaby was born it was just a smidgen too big, but now it serves the three of perfectly.   We're at the Goldilocks stage of pork tenderloin.

We were out to dinner not too long ago when I ordered a pork chop and I realized it was far too long since pork has graced my table. It was time to make a revival.  Especially since pork seems like such a great fall food.  It pairs well with other fall flavors like apples, cinnamon, and maple.  This is a really basic maple glaze.  As a syrup, it's already a little glazey even without making a reduction of it.  When roasting meats, I like to throw some potatoes on the pan for an easy side.  Because let's face it, I'm fairly lazy when it comes to side dishes.


Maple Glazed Pork
1/4 cup cornstarch
2 Tbsp sugar
1 Tbsp salt
2 tsp ground pepper
1 pork tenderloin
1 Tbsp canola oil
3/4 cup maple
2 Tbsp frozen orange juice concentrate
2 Tbsp bourbon

  1. Preheat oven to 375.  Combine the cornstarch, sugar, salt, and pepper in a shallow bowl. 
  2. Roll the tenderloin in the cornstarch mixture.  Heat oil in a large skillet over medium high heat. Brown the tenderloin on all sides and transfer to a wire rack on a baking sheet.
  3. Combine 1/2 cup of the maple syrup with the bourbon and orange juice in the skillet and cook for 3-5 minutes, until reduced by half.
  4. Brush the tenderloin with the glaze and roast for 20 minutes.
  5. Brush the tenderloin again and cook another 5 minutes.

Monday, September 23, 2013

Mommy Mondays: Got a minute? Or 10?

It's funny the things you take for granted before you have a child.  You know, like having free time to work out?

When I was in school, it was easy.  I could easily fit in some gym time before, between, or after classes.  In law school I'd even do my reading on a bike or elliptical.

When I graduated and was studying for the bar, I still managed to get in a run every day.

And when I started working, I'd hit the gym or go for a run before work.

But now?  I do what I can, when I can.  And I try to do a little something each day.  So for those of you who are in a similar predicament, here are some of my favorite short-on-time exercises.


*  When I was pregnant, I went for a run every morning, but it was a slow run.  I also wanted to work in some strength/cross training so I picked up the 10 minute solutions prenatal pilates.  It's hard to justify not having 10 minutes to spare.


* I used this same philosophy after Thatbaby was born and stuck with short video workouts.  30 minutes a day.  Again, hard to claim you don't have the time.  I'm a fan of the Jillian Michaels regimes.

* If you have on demand or roku, or amazon prime, or even youtube there are tons of short workout videos you can find.  I do a lot of cardio kickbox and yoga in my living room!

* One of my other tricks is to multitask - this past year I've discovered television workouts. They're like drinking games, but with pushups and bicycle curls instead of shots. Google your favorite television show + workout and you'll find loads.  It makes me feel better about television time we spend, and less lazy!

Friday, September 20, 2013

Fever Pitch: Crockpot Chicken Tacos


Over the weekend, Thatbaby developed a bit of a froggy throat.  We canceled plans so that he could stay inside and rest up.  Not because we're such amazing parents, but because Thatbaby's school was closed on Thursday and Friday.  Thatboy and I were already taking time off and neither of us wanted to take more time off if he got sick.

You all know where this is heading, right?  Monday at 4:55pm I got a call from Thatbaby's school to let us know he was running a fever.  Poor kid was miserable when I picked him up, so Thatboy and I arranged our schedules to stay home with him on Tuesday.

Tuesday he was back to normal.  No fever, full of energy, ready to go.  Wednesday he was back to school.  Yesterday I had morning shift and the little guy woke at 4something in the morning.  So it wasn't too surprising that he was ready for a nap around 11am, over an hour earlier than usual.  Thatboy and I switched off around 12:30, and Thatbaby ended up sleeping until 2:30!!!!  But he woke up running a fever again.  Poor guy.  Looks like we'll be laying low today too.

When I'm home with Thatbaby, very little gets done.  It's hard to entertain him and try to clean, cook, or even go to the bathroom by myself.  So I make a lot of use of the crockpot.  Because I can toss things in quickly and be off picking up blocks, or helping finger paint.  Thatbaby didn't enjoy these tacos - he ended up having a smoothie for dinner, because in this house, when you're sick, you get special dinner requests met. Thatboy and I had no problem polishing off the tacos without him.

Crockpot Chicken Tacos
2 tsp salt
2 tsp cumin
2 tsp chili powder
2 tsp garlic powder
2 chicken breasts
1 can of rotel
1/4 cup water
  1. Combine the salt, cumin, chili powder, and garlic powder in small bowl.  Place in bottom of crockpot.
  2. Place chicken breasts on top of the seasoning.
  3. Pour Rotel and water over chicken.  Cook on low for 5 hours.  
  4. Remove chicken and shred with two forks.  Put chicken back in crockpot and cook for another 30 minutes.

Thursday, September 19, 2013

Fall Cleaning - Papas Rellenas


TMIL is coming next week to celebrate Thatbaby's birthday.  Some people do spring cleaning, I do a heavy maintenance fall cleaning in preparation for her visit.  This cleaning has involved me staying up late at nights after Thatbaby has gone to bed and lunches and dinners have been made, scrubbing floors, bleaching sinks, and cleaning out the fridge and pantry.

In the spirit of keeping things clean, I've been trying to use up things in said fridge and pantry.  So when I bought the bag of russet potatoes to make the stuffed baked potatoes earlier this week I knew I needed to find a way to use the rest of the bag.

In reality, this is just another form of stuffed potatoes.  Skinless stuffed potatoes.  Skinless stuffed potatoes filled with cooked, spiced meat.

Thatbaby was a little hesitant to try, but after he saw me sneak a bite of the filling, he wanted to try some too.  And then he was eating the filling by the spoonfuls.  By the time dinner rolled around he was thrilled to get some potato in there also.


Papas Rellenas
2 russet potatoes
2 eggs
canola oil
1/2 lb ground beef
12 green olives, chopped
3 hard boiled eggs
1 onion, diced
1/2 cup raisins, minced
1 jalapeno, diced
3 cloves garlic, minced
1 1/2 tsp cumin
1/2 tsp paprika
1/4 cup beef broth
1 cup flour
1 cup panko

  1. Cover potatoes with water in a pot and bring to a boil.  Boil for 20 minutes.  Once cool enough to handle, peel and mash.
  2. Add 1 egg and some salt and pepper.  Refrigerate overnight.
  3. Heat 2 Tbsp canola oil in a medium skillet. Add onion and cook until translucent, about 5 minutes.
  4. Add garlic and cook for another 30 seconds.
  5. Add jalapeno and cook another 3 minutes.
  6. Add ground beef and cook until browned.
  7. Add raisins, cumin, and paprika and cook for another minute.
  8. Add the beef broth and olives and cook for 3 minutes.
  9. Remove from heat and stir in the hard boiled eggs. Let cool.
  10. Place flour in a shallow bowl, remaining egg, beaten in a shallow bowl, and panko in a third shallow bowl.
  11. Divide dough into 6 even portions.  Take one portion and flatten it.  Spoon filling into the middle and fold the dough over the filling, rolling to create a smooth oval.  Repeat with remaining portions.
  12. Heat 2 inches of canola oil in a pan to 350 degrees.  Dip each potato roll in the flour, then egg, then panko and place in heated oil.  Fry about 2 minutes per side, until golden.

Wednesday, September 18, 2013

My Not So Secret Obsession: Amazingly Creamy Pumpkin Penne


Fall is my favorite time of year.  Growing up it meant crisp weather, cozy sweaters, and changing leaves.

Here in California, the weather doesn't change all that much, but fall still brings with it many of my favorite things.  Apple picking, Halloween, and fall foods - like chili and pumpkin!

I love pumpkin.  I love pumpkin flavors, I love pumpkin in things, and I love all the pumpkin products on the market.  Just this week I picked up pumpkin pop-tarts at Trader Joes and pumpkin cheesecake cookies.  I haven't broken open the pumpkin spice tea Thatmom brought me home from a recent trip, but we're getting close.  And I've already started with the pumpkin cooking.

One of the reasons I was instantly drawn to Cara as a kindred spirit was our shared love of pumpkin.  This was way back before she was a famous writer, blogger, and mother.  And this recipe dates back to that time.  When the two of us tried to force the "pumpkin, it's not just for fall" movement.  It's been in my repertoire since that time and manages to make a yearly appearance.  Much like The Great Pumpkin, without waiting until Halloween.  I don't think I could wait that long for pumpkin!


Amazingly Creamy Pumpkin Penne (From Cara's Cravings)
4 oz penne pasta
2 tsp olive oil
1 small onion, thinly sliced
2 cloves of garlic, minced
about 2T chopped fresh sage
2 links cooked chicken sausage, sliced
1/2 cup low fat cottage cheese (1% milk fat)
1/2 cup pumpkin puree
1/2 cup nonfat milk
pinch of nutmeg
5oz torn spinach, thick stems removed

  1. Heat olive oil in a skillet over medium-low heat. Add onions and cook gently for about 10-15minutes, until softened and beginning to caramelize. 
  2. Add garlic, sage, and chicken sausage; continue to saute.
  3. Meanwhile, cook pasta according to package directions.
  4. In a blender, combine combine pumpkin, cottage cheese, and milk. Blend until no lumps are present. 
  5. Add to sausage mixture in skillet and continue to cook over low heat. 
  6. Season to taste with salt and freshly ground pepper, and a pinch of nutmeg.
  7. Drain pasta and return to pot over low heat. Add sausage mixture and baby spinach, and toss together. Cover for a few minutes to let the spinach wilt. 

Tuesday, September 17, 2013

Going Dark: Stuffed Potatoes


When most people see Thatbaby they instant decry that he looks exactly like Thatboy.  While it's true that Thatbaby bears a resemblance to his father, I think the commentary comes from how very blonde Thatbaby is.  And how very not blonde I am.

Well,  I'm very not blonde most of the year.  In fact, my high school diving teammates referred to me as "Snow White" with my dark hair, pale skin, and blue eyes.   But during the summer, my hair undergoes a drastic transformation.  It gets really really blonde.  Obviously not as blonde as Thatbaby, but blonde enough where I was once in an October wedding where someone asked if I was wearing a fake bun, since my ends were such a drastically different color than my roots.  I wasn't.

Typically you can tell I've resigned myself to the fall when I dye my ends.  It's the opposite of how most people function.  Instead of dying my dark roots to match my light ends, I dye my light ends to match my dark roots.  It's less maintenance that way.   And I can do it at home.

This year I tried a new dye - Garnier's Color Foam.  If any of you dye your hair at home this is the way to go.  It's clean and easy and it doesn't run down your neck/face/ears.  So in 20 minutes I was back to my typical brunette.  And no one has noticed the difference!  Which is really the goal.  Just getting my hair back to a single, matching color.

And since I've decided it's officially fall, I can get back to making fall comfort foods.  Like stuffed potatoes!  These have always been one of Thatdad's specialties that make their way into our mealplan in the fall and winter.  Mashed potatoes are on everyone's idea of comfort food, so taking them and putting them in a potato skin and baking with cheese?  It's just as good as having single colored hair!

Stuffed Potatoes
3 Russet potatoes
1 Tbsp butter
1/4 cup sour cream
1/2 cup cheddar cheese
1/8 cup buttermilk
salt and pepper
  1. Pierce potatoes with a fork, coat with oil and bake at 425 for 1 hour, then cool until you're able to handle.
  2. Slice off the top 1/3 off each potato, lengthwise, and hollow out with a spoon, leaving a thin layer of potato inside.
  3. Combine inside of potato, butter, sour cream, 1/8 cup of cheese, buttermilk, salt, and pepper and mash until smooth.
  4. Fill each potato skin with the "inside" mixture and top with remaining cheese.
  5. Bake at 350 for 15 minutes, or until cheese has melted.

Monday, September 16, 2013

Mommy Mondays: What We're Eating

I feel like at a certain point a lot of mothers hit a stage where they're like "now what?"  when it comes to food.  Most of us worry that our meals might be boring our little ones.  This is especially true when it comes to toddlers, who are notoriously picky to begin with.

I tend not to worry too much about my toddler getting bored with meal options though.  After all, this is the kid who would eat blueberries exclusively for weeks on end.  And the child who asked for cereal for breakfast and lunch this past Saturday.


All that being said, here's a little breakdown of some things we use for breakfast/lunch/dinner if you want to switch it up again.


Breakfast
Cereal -  the number one choice right now.  He asks for it every morning.  I usually give him his own bowl, and then he shares Thatboy's cereal also.  We've been doing a lot of corn flakes and oatmeal flakes lately, although he also loves cheerios and granola.  (Trader Joes makes an almond granola we both really like)

Oatmeal - I do hot oatmeal in the winter, but this summer we've been doing "cold oatmeal" or overnight oats.  Mix milk, oatmeal, peanut butter, and mashed banana in a bowl and let sit overnight in the fridge. In the morning, you have breakfast!  This is also a great idea for little ones who are just learning how to work a spoon, as it's nice and thick, and if they drop it there's no chance of it burning them.

Breakfast Cookies - Another make ahead of time breakfast.  "Cookies" made of oatmeal, nut butter, and almond meal.  No added sugar, so they're high in protein and you don't have to feel too guilty about eating them.  I add chocolate chips, so I do feel a little guilty.

Smoothies -  Thatbaby loves these.  I make them as "natural" and sugar-free as possible, so I don't feel bad about giving them to him daily.  I mix milk, frozen fruit, half a banana, and a handful of spinach in the blender.  The frozen fruit makes it cold and slushy and doesn't water it down like ice would.

Lunch
Sandwiches - I do both wraps or traditional sandwiches.  Thatbaby's class is nut-free, so for the past week I've been subbing in sunflower seed butter in his pb&js and he loves it!  I will also do turkey sandwiches/wraps, or veggie sandwiches wraps with hummus or roasted veggies.

Pasta - macaroni and cheese, ravioli, pasta with marinara and/or pesto

Breakfast for lunch - Thatbaby's classroom is egg-free, so breakfast for lunch is usually oatmeal, bagels, or pancakes.

And I always throw in some fruits like apples, watermelon, grapes, oranges, or whatever else is seasonal, vegetables like tomatoes, cucumbers, green beans, or broccoli.  And snacks like pretzels or raisins.


Dinners
Most of you probably have a pretty good idea about these since most get posted on the blog.  Thatbaby eats the same thing we eat.  So he eats tamales, pizza, tacos, pork, chicken, etc.

Friday, September 13, 2013

First Foray at Filipino: Pancit Canton


I didn't grow up with a vast array of Asian cultures.  I knew they existed, but my small town in Pennsylvania was bereft of any sort of diversity.  My experience with Asian culture was relegated to visits to Chinatown in NYC, the Chinese and Japanese pavilions at Epcot, and the Chinese dishes my dad would prepare.

My world broadened when we moved to California.  In a large way.  I suddenly not only had Asian friends, but diverse Asian friends!  Korean friends, Filipino friends, Thai friends, Chinese friends, Taiwanese friends, Japanese friends, Cambodian friends!  Which also exposed me to various, delicious cuisines.  

I usually think that the best thing that came out of my marriage to Thatboy was my marriage to Thatboy.  But I got an added benefit of marrying into his inlaws.  I love my inlaws inlaws.  And because of them I get fabulous Filipino food multiple times a year.  I can guarantee that at least once when I'm visiting Thatboy's family I'll get to eat lumpia, adobo, and pancit.

But I've never tried to make it at home.  There's something intimidating about making something so far removed from your own sphere.  But last month when Joelen posted this recipe for pancit last month I knew I had to give it a shot.  So I did.  And it was great!  Even Thatboy, who confided that pancit was not his favorite dish, thought this was excellent.


Pancit Canton (From What's Cookin, Chicago?)

2 tablespoons vegetable oil
3 cloves garlic, minced
1 onion, minced
1 cup carrots, peeled and julienned
1 bunch bok choy, thinly sliced
1 cup snow peas
1/4 soy sauce
salt and pepper to taste
1 red bell pepper, seeded and thinly sliced
1 bunch green onions, thinly sliced
4 eggs, hard boiled, cooled, peeled and sliced into wedges

  1. In a large wok over medium high heat, add the oil and garlic. Sauté garlic until golden in oil, about 1 minute. 
  2. Add onions and cook until translucent, about 5 minutes.
  3. Add the carrots to the wok, combining with the garlic and onion. Cook for 2-3 minutes to soften.
  4. Next add bok choy and snow peas. Continue to toss in the wok until bok choy starts to wilt and snow peas soften, about 2-3 minutes.
  5. Run the dried pancit canton noodles until warm water just to wet them. Add the wet noodles to the wok.
  6. Pour the soy sauce over the noodles, Carefully toss the cooked vegetables over the noodles to help soften and incorporate all the ingredients. Continue to stir fry the noodles and vegetables together until the noodles are fully softened and cooked through.
  7. Season with salt and pepper to taste.
  8. Add the bell peppers and toss. The residual heat of the noodles will soften the peppers while maintaining a slight crunchy texture.
  9. Transfer stir fried noodles into a large serving platter and top with green onions and slices of hard boiled egg.

Thursday, September 12, 2013

Tamale Time!: Short Rib Tamales


One of my favorite lines from the cinematic masterpiece that is Legally Blonde is Elle's response about getting into Harvard - "What?  Like it's hard?"  Because sometimes you don't realize something is supposed to be difficult.  I get lucky like that sometimes.

Like the first time I made pie crust.  It was easy and delicious.  I couldn't understand why people complained about homemade pie crust.  And then I tried switching recipes, and understood the raised fists and gnashing of teeth.

I'm experiencing that with tamales right now.  The first few times I made tamales I had resounding success.  How had I been afraid of these for so long?  They're not hard and so delicious.  And so I took it for granted.  But that last few times I made it, I have not been so successful.  Like when I tried to take a shortcut and use the recipe on the masa bag.  Which ended up being a gooey, tasteless mess.  But the boys didn't seem to mind too much.


I decided the problem was that the bag recipe didn't have any form of fat in it, so I tried again, this time going back to the shortening that worked so well.  I still had the same problem this time - not the tasteless part, I added chipotle, so this one tasted great, but still mushier than my previous attempts.  So I think I'm going to go back to the recipes that have worked so well in the past.


Short Rib Tamales
1 8 ounce package of corn husks
Filling:

1 Tbsp canola oil
2 pounds short ribs
4 strips bacon, chopped
1 onion, chopped
4 cloves garlic, minced
1/2 cup diced tomatoes
1/2 cup cilantro
1 bay leaf
1 cinnamon stick
1 tsp cumin
1 Tbsp smoked paprika
1 Tbsp chili powder
2 tsp coriander
2 tsp salt
beef broth

Masa:
4 cups masa
2 1/2 cups warm water
1 Tbsp salt
2 tsp baking powder
1 cup shortening
1 chipotle in adobo, minced
1 cup chicken broth

  1. Completely submerge the corn husks in water and  soak for 12 hours. 
  2. Heat oil in a medium skillet over medium high heat.  Season the ribs with salt and pepper and brown on all sides.
  3. Place the ribs and remaining filling ingredients in a slow cooker.  Add enough beef broth to cover the ingredients.  Cook on low for 8 hours.
  4. When ribs are cool enough to touch/hold, shred the meat.
  5. Make the masa - Combine the masa and warm water in a bowl.
  6. Combine the salt, baking powder, and shortening in an electric mixer.
  7. Add the chipotle and masa mixture to the electric mixer and combine well.
  8. Add the broth and continue to mix until thoroughly combined.
  9. Make the tamales - place a corn husk on your work surface with the narrow end toward you.  
  10. Pat 1/4 cup of masa into a 3-4" square in the center of the husk or foil. Spoon 1-2Tbsp of shortrib in a line down the middle of the masa square. Fold the sides of the husk in, then fold the bottom up.  
  11. Tear a strip off one of the husks and tie around the tamale.  
  12. Place a steamer basket in a large pot over an inch or so of water and bring the water to a boil.  Stand the tamales up vertically in the steamer basket.  Cover the pot with a lid and steam for 15-20 minutes. 

Wednesday, September 11, 2013

Getting to the Meat of It: Mincemeat Pie and Cookies


While we were visiting Thatmom, we decided to take advantage of Irvine Regional Park, a giant park with all sorts of fun things.  Including a train!


Per usual, Thatbaby fell asleep on the way there.  Really, the only time he stays awake in the car is when you're dying for him to fall asleep.  But as soon as he woke up, he shouted "Choo Choo!"  Guess he remembered where we were going.


He sat with Thatmom on the train, whom he gleefully refers to as "A-ma."  And they pointed out all the fun things to each other like the horsies, fishies, peacocks, and lakes.  And every few minutes Thatbaby called out "Alll Aboard!"


And he was ever so brave in the tunnel.


Afterwards, even though it was 1000000 degrees outside, Thatbaby wanted to explore the park, the playgrounds, the ducks, and the ponies.  He found a way to communicate with them.  He would neigh, and the pony would paw his at the ground with his hoof.  And then Thatbaby would paw at the ground with his foot.


Even with the heat, it's definitely feeling like fall.  I even saw some leaves changing color when I went on my run on Saturday.  I wanted to make a harvest type meal, and flipping through the Fannie Farmer cookbook had me land smack dab on Mincemeat.  I know it's typically a Christmas type thing, but with all the dried fruits and apples, it seems autumnal to me.

Mincemeat was originally a way of preserving meat.  Like keeping fruit fresh year round, mincemeat allowed meat to be stored for long periods of time (Thatmom's friend described it as "indefinitely").  Thatboy had a really hard time with the concept of eating meat for dessert.  And I'm not going to lie, the thought of it weirds me out a little too.  But then I started cooking it.  And the aroma of candied fruit, molasses, sugar, cinnamon, nutmeg filled the house.  And you kind of forget about the meat, which is such a small part of the recipe.  And it doesn't taste like meat either, just sweet and spicy (but the cinnamon kind of spice, not the sriracha kind!)  Of course, this recipe makes a boatload of mincemeat (in fact, this is what I made, which cuts the recipe in third.)  And I still have a ton left.  So I'm taking suggestions for great uses for mincemeat!


Mincemeat  (From the Fannie Farmer Cookbook)
1 1/3 chopped lean beef
2/3 chopped beef suet
1 lb dark brown sugar
2/3 cup molasses
2/3 quart cider
1 lb dried currants
1 1/3 lbs raisins
1/6 lbs citron
1 lb apples, peeled, cored, and sliced
1/3 quart brandy
1/3 Tbsp cinnamon
1/3 Tbsp mace
1/3 Tbsp ground cloves
1/3 tsp nutmeg
1/3 tsp allspice
2/3 tsp salt
  1. Put the beef, suet, brown sugar, molasses, cider, currants, raisins, and citron in a large pot.  Cook slowly, stirring occasionally, until the sugar and citron melt.
  2. Add the apples and cook until tender
  3. Add the remaining ingredients and cook 15 more minutes, stirring frequently.  


Mincemeat Cookies (From the Fannie Farmer Cookbook)
1 cup shortening
1/2 tsp vanilla
1 1/2 cups sugar
3 eggs
3 1/4 cups flour
1 tsp salt
1 tsp baking soda
1 cup chopped nuts
1 1/2 cups mincemeat
  1.  Preheat oven to 350.  Cream the shortening.
  2. Add the vanilla, sugar, and eggs and mix well.
  3. Mix the flour, salt, and baking soda together and add to the first mixture, blending well.
  4. Stir in the nuts and the mincemeat.  Arrange by teaspoonfuls on the cookie sheets.  Bake for 8-10 minutes, until lightly browned.


Mince Pie (From the Fannie Farmer Cookbook)
2 balls of pie dough
1 pint of mincemeat
  1. Preheat oven to 425. Line a 9 inch pie pan with 1 ball of the pie dough.
  2. Fill the pan with the mincemeat.
  3. Roll out the other ball of pie dough and make a top crust.  Crimp the edges and cut vents.  Bake for 10 minutes.
  4. Lower the heat to 350 and bake 40 minutes more, until browned.


Tuesday, September 10, 2013

Happy New Year!: Dr. Pepper Chicken


Shana Tova everyone!  As you may or may not know, last Thursday was the Jewish New Year, Rosh Hashanna.  As usual we spent the holiday with Thatmom.  On Thursday, we brought Thatbaby with us to services.  They do something special for the little ones.  About halfway through, anyone younger than 5 is sent outside with one of the assistant Rabbis for a "tot service."


I especially liked this one because the "sermon" was a retelling of Stone Soup!  One of my favorite fables.  The Rabbi had all the kids go find plastic foods that were spread around the yard and come put it in her pot.  Thatbaby found an orange and cautiously joined in.


At home, Thatmom made quite the spread with chicken baked with dried fruits, and her friends contributed mashed potatoes, green beans, and of course, CHALLAH!  In honor of the holiday, Challah on Rosh Hashanna is round, to represent the circle of life.  Back at home, our challah was served in rolls, with chicken sandwiched between them.  Not just any chicken, but Dr. Pepper chicken. It's not a traditional dish, but I like it because the soda adds a sweetness to the chicken, perfect for a "sweet new year,"  the traditional Jewish wish.


Dr. Pepper Chicken
1/2 onion, sliced
2 chicken breasts
1 can of Dr. Pepper
  1. Place the onion slices at the bottom of a crockpot and lay the chicken breasts on top.
  2. Pour the Dr. Pepper over and cook on low for 8 hours.
  3. Remove the chicken and shred.


Monday, September 09, 2013

Mommy Mondays: Weaning from the Breast

The saying "it takes a village to raise a child" is very applicable to breastfeeding.  Now, I'm not referring to an idea that a woman should be nursing her neighbor's child, but breastfeeding information has long been passed down orally, from mothers to daughters.  From community elders to young mothers.  And somewhere along the way, that got distorted.  Changed.  Determined to be the province of medicine.  Somewhere along the line, women were told that what they were producing to feed their children wasn't good enough.  They were told what and how by doctors instead of their community.  And as more formula was used, the secrets of breastfeeding stopped being passed down.  Which leaves many women without a place to turn to ask the questions that plague every new mom.

It seems as though breastfeeding is some complex, difficult, isolating process, when in reality, the truth about its difficulties just isn't part of our common cultural knowledge any more.  Knowing that others are having the same struggles, facing the same battles, that "normal" doesn't necessarily mean "easy" is something that has been lost along the way, but makes all the difference to most of us.

The entire process of breastfeeding seems so secretive and elusive, from the latching to the pumping to the eventually weaning.  It's hard to know if you're doing it right! My weaning journey hasn't been anything I would have anticipated, and I share it here because it's important for us to share our experiences with each other, to try and bring back that community of knowledge.

My initial plan, back when I was pregnant, was to stop breastfeeding when Thatbaby got teeth.  Because teeth meant a baby was ready for real food (obviously) and because teeth + nipples sounded terribly scary.  I was so naive. Because teeth having nothing to do with eating solids, and Thatbaby was never a biter.  Besides, Thatbaby didn't get his first tooth until he was 10 months old.  At that point it seemed silly to quit, when I was so close to a year. 

When Thatbaby turned a year old, it was a milestone in our breastfeeding relationship.  It was also at the beginning of flu season.  It seemed so arbitrary to breastfeed one day, and the next just decide we were done.  So I figured we would continue until he was 18 months and flu season was over.  At that time, we started with "don't offer, don't refuse." in other words, there were no set nursing times.  I didn't nurse him immediately upon waking, or right before meals.  I nursed whenever he asked for it.  And that first month he asked for it, a lot.  More than he usually did.  Meaning, growth spurt! And I was glad I was still nursing since I could provide him with so much of what he needed to grow!

But at that same time, I did wean from the pump.  At 11 months I was pumping on my way to work, twice at work, and once before bed. When Thatbaby turned one, I dropped those sessions, one a week.  I started with the before bed session, then I worked my way "south" dropping each session in order.  That way, any engorgement I felt was relieved by the subsequent pumping session.  (So I didn't pump at 8, but it was only a couple more hours until 11!)  At the end of the month, I had completely dumped the pump.  No pain, no engorgement, no worrying about "drying up."  In fact - I was still able to nurse Thatbaby when we were together, even though I wasn't doing any nursing or pumping during the workday.

Between 12 and 18 months, Thatbaby dropped all but 2 of his nursing sessions on his own.  He just wasn't interested/was interested in solids instead.  So he was nursing first thing in the morning, and last thing before bed.  At 18 months I decided we should start getting rid of those sessions, beginning with the morning one.

It was a disaster.  I naively thought I could just offer him something else instead.  That didn't work.  There was crying.  Demanding to nurse.  Throwing of bottles.  It didn't get any easier for weeks.  I asked all my mom friends who offered support, but no advice on how to make it easier.  Because it isn't easy for any relationship to end when one party isn't ready for it!  By the end of April, we had gotten rid of that first nursing session.  AND then he got sick.  So I reintroduced that nursing session so he could have the extra immunity.  Which was worth it to me to put up that fight again.

And yet, by the end of May, he had dropped that morning session on his own!  Like magic!  No crying, no begging, no throwing of bottles.  Which made me realize how much easier it is to let them self wean.   Not that it dissuaded me from wanting to wean that last, evening session!

We put that off, due to Thatboy being gone for most of June and July for his dad's illness, death, and then his surf trip.  But once Thatboy got back, and life got back to normal, we went into dropping the evening session.  That one was much easier.  I was lucky that Thatboy has been involved in bedtimes from the beginning.  So Thatbaby was just as happy being put to sleep by mom and her breasts as he was by dad and a bottle, then sippy of milk.  So Thatboy just took over bedtime.  Thatbaby didn't even realize there was weaning going on, just that bedtime went back to being "boy time."    And the end of our nursing relationship was easy and amicable on everyone's part.  

Friday, September 06, 2013

Water Baby: Trader Joe's Enchiladas


Well, we finished another round of swim lessons!  For his last class, Thatboy sat on the sidelines and I took to the water.  We worked a little on independent swimming, with pool noodles tied around the kids to help them float.  We also worked on letting them jump in the pool unassisted with the noodles to help them float.   Thatbaby's very last jump was without holding my hands, so I was terribly proud of him.  Thatboy on the other hand was disappointed Thatbaby wasn't swimming on his lonesome.  "The description says they'll swim unassisted by the end of the class."  I pointed out that Thatbaby was at the very bottom of the age bracket for this class, he only attended 3 of the 5 sessions (since he was in the baby class for the first and we missed a week while we were in Yosemite), and only one of the other kids was really "swimming."

After Thatbaby's nap, Thatboy wanted to spend some pool time with him, so we headed down to our pool to play.


Thatboy kept telling Thatbaby to watch him do "submarines" where he swam under water.  Thatbaby was delighted by this, calling them "tunnels" and asking Thatboy to do more.  Then he wanted to do "tunnels" too.  So we'd bring him under the water and back up.

But then Thatbaby wanted to go a step further.  He wanted to do tunnels all by himself.  We had been playing on the stairs, going up and down by himself, when he decided he wanted to do more by himself.  And so he dove into the water, kicking his feet toward Thatbaby who was standing at the bottom of the stairs.  Not a far distance, but hey, for independent swimming you've got to start somewhere!  I had the camera with me, taking pictures of their big jumps, and so I quickly captured the fun on video.


And some stills in case you don't want to watch 8seconds of adorable baby swimming.


We celebrated with enchiladas, because Thatbaby loves enchiladas.  If you've been reading my blog for any length of time, you've seen enchilada recipes before.  And you've probably noticed that I tend to make my own sauce most of the time.  Not for any good reason, just because, why not?  You know why not?  Because sometimes you don't have the time to make your own sauce.  It is a bit time consuming with the roasting of chiles and simmering of sauce.  So as an alternative, I picked up a bottle of Trader Joe's enchilada sauce and used it to make these enchiladas.  It's got a bit of a kick to it, which I like.  And it doesn't taste like bottled sauce, which I love.


Trader Joe's Enchiladas
1 Tbsp canola oil
2 chicken breasts, diced
bottle Trader Joe's Enchilada Sauce
1/4 cup pickled jalapenos, chopped
2 cups shredded cheddar cheese
1 pkg corn tortillas
  1. Heat oil in medium saucepan over medium high heat.  Add chicken and cook about 30 seconds.
  2. Add 1/2 bottle of enchilada sauce.  Bring to a simmer, then reduce heat and simmer until the chicken is cooked through.  About 8 minutes.
  3. Remove chicken from the sauce and refrigerate for 10 minutes.  Pour the sauce into a baking dish. 
  4. Preheat the oven to 300.  Combine the chicken with 1 cup of the cheese and the jalapenos. 
  5. Wrap tortillas in a damp paper towel and microwave for 45 seconds, until pliable.
  6. Place 2 Tbsp of filling in the middle of the tortillas, roll and place seam side down in the baking dish.
  7. Pour remaining enchilada sauce over the enchiladas and sprinkle with remaining cheese.  Cover with foil and bake for 25 minutes.