Pages

Thursday, January 31, 2013

Rain Rain Go Away: Baked Pulled Chicken Taquitos


It started raining last Thursday.  I checked my phone before my run and it looked like it was going to be okay during the day on Thursday, but would continue through the weekend.

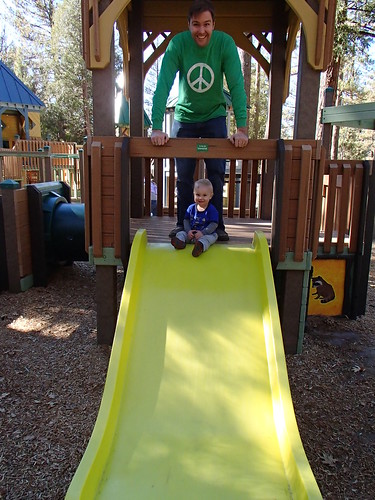
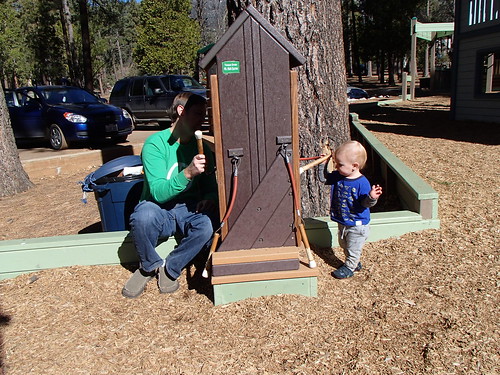
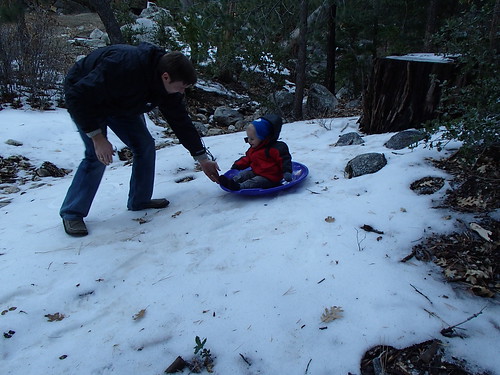
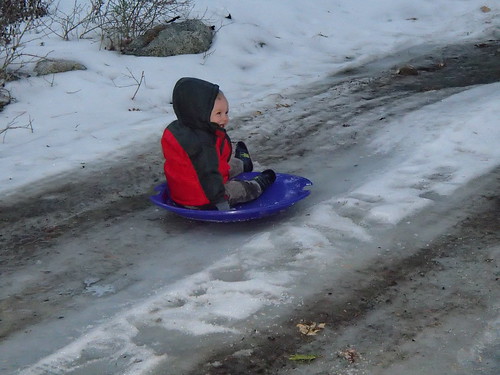
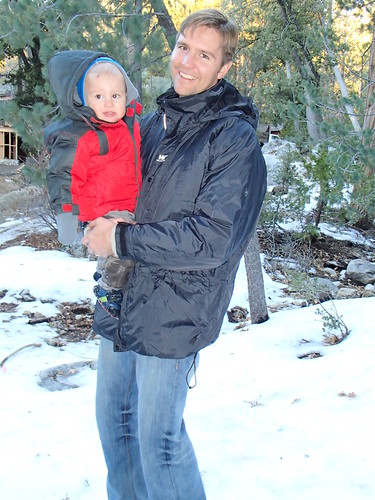
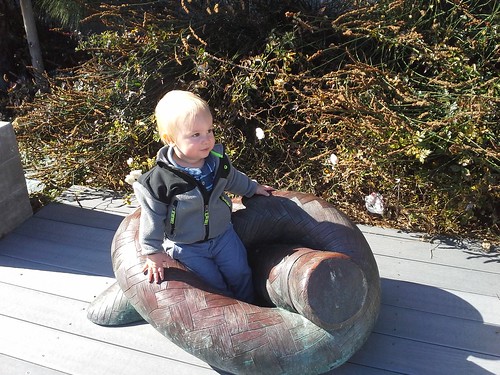
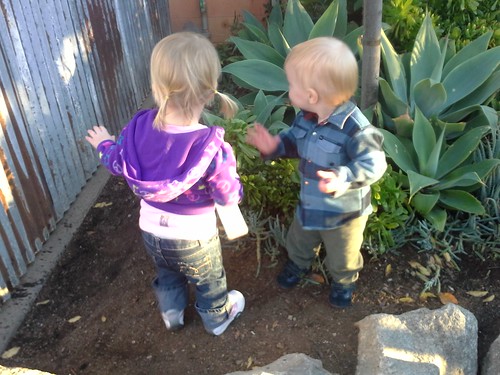
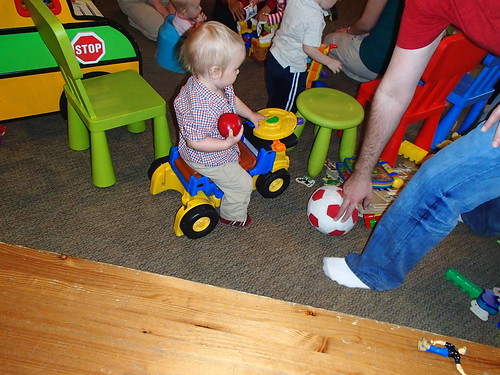
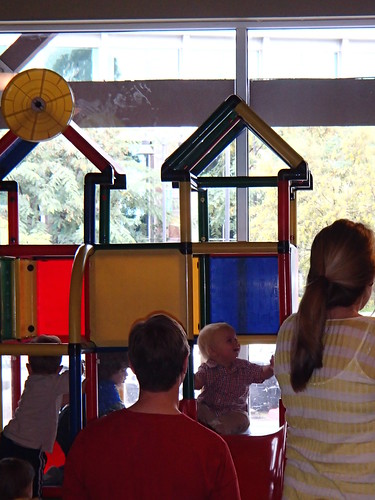
So we weren't surprised when we woke up to showers on Saturday morning.  In discussing our options for the day, I suggested an indoor play area to let Thatbaby run off some of his crazies.   Thatboy liked the sound of Java Mama, so that he could get some coffee while Thatbaby played.  As we left he realized he'd left his book at home he wanted to bring and read.  I looked at him and laughed.


There is no sitting and reading at playspaces.  There is only keeping an eye on your child to make sure he doesn't dive off the upper balcony, or grab toys out of another children's hand, or try to consume a clearly nonconsumable plastic apple.


Thatbaby loves Java Mama and as predicted, fell asleep within minutes of getting back in the car. 


Of course he woke up once we got home and had to be put back to bed, but there was enough left of his nap for Thatboy and I to cuddle up and begin watching The Bourne Ultimatum. 

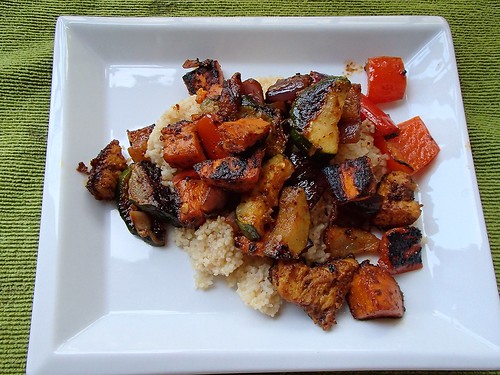
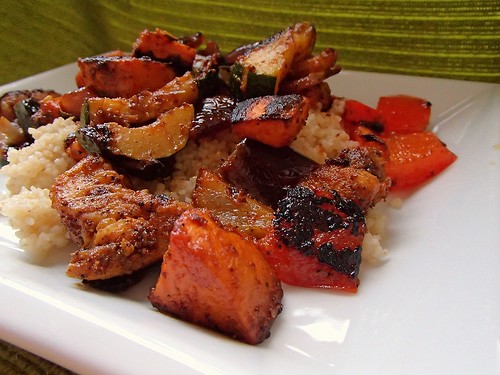
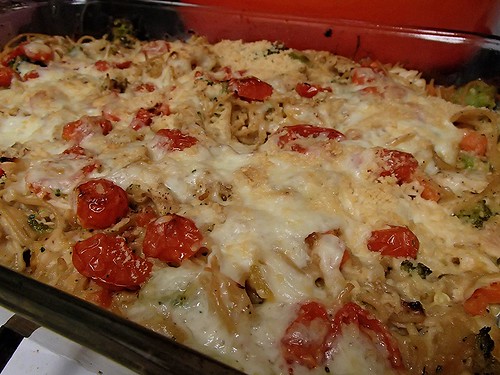
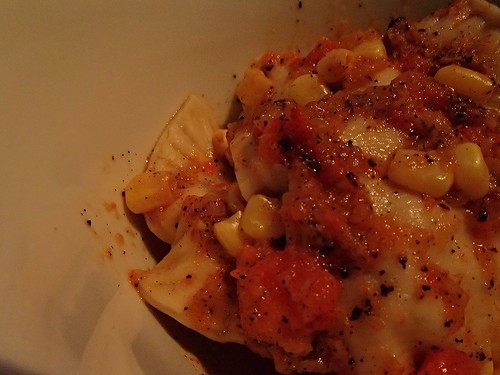
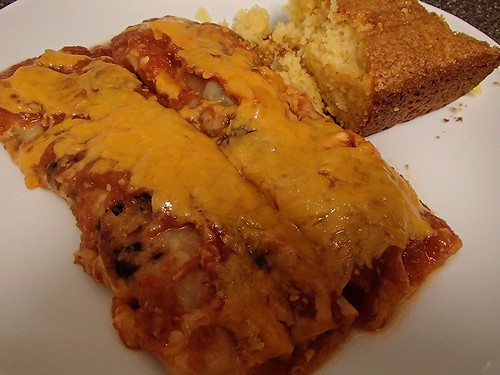
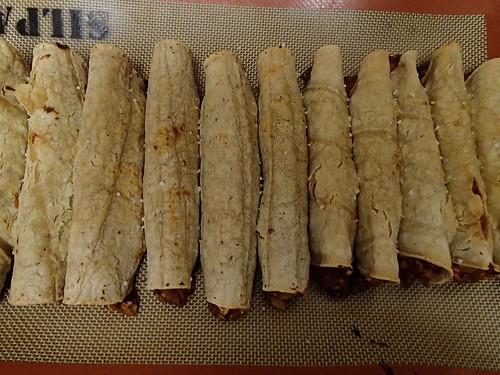
It was nice to have the cuddling time, since I didn't have to worry about preparing dinner.  I got really lucky last week.  I already had pulled chicken on the menu when this recipe popped up on Apple A Day. Kelsey used the recipe as a way to use up leftover pulled pork, but it works equally well with pulled chicken.  These taquitos were fabulous!  I was excited there were leftovers because it meant I got to enjoy them for lunch on Sunday too.

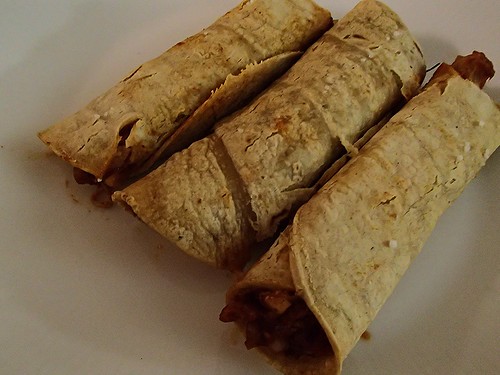
Baked Pulled Chicken Taquitos (from Pink Parsleyas seen on Apple A Day)
3 oz cream cheese
1/3 cup barbeque sauce
1/2 tsp paprika
1/2 tsp chile powder
1/2 tsp ground mustard
1/2 tsp liquid smoke
pinch red pepper flakes
salt and pepper, to taste
1/4 cup diced onion
3 green onions, thinly sliced
1-2 garlic clove, minced
2 Tbsp cilantro, minced cilantro
2 cups pulled chicken
1 cup shredded cheddar
10-12 corn tortillas
cooking spray

  1. Preheat oven to 425.  Line a cookie sheet with foil or a silicone mat.  Combine the cream cheese, barbeque sauce, paprika, chile powder, ground mustard, liquid smoke, red pepper, onions, garlic, and cilantro in a large bowl.
  2. Stir in the pork and cheese.  Season with salt and pepper as needed.
  3. Warm tortillas using your favorite method (y'all know I like to use my gas stovetop for this.)
  4. Spoon the filling in the center of a tortilla and roll tightly.  Place on the baking sheet, seam side down.  Repeat with remaining tortillas.
  5. Spray taquitos with the cooking spray and sprinkle with salt.  Bake for 15-2 minutes until the insides are heated through and the outsides are crispy and golden.

Tuesday, January 29, 2013

How to be really popular: Almond Cupcakes


One of the benefits of working outside of the home is that when I feel like baking, I don't have to have the end product sitting around the house tempting me!

And the other day?  I felt like baking.

I was inspired.

Because something bright and shiny came in the mail.

I won some new baking equipment from Culinary Flavors!


With a new spatula, and adorable new silicone liners, there was only one thing to make - cupcakes!

I'm a fan of frosting, but it's much easier to transport them to work without frosting.  AND I've found my coworkers are more likely to eat cake in the morning if it's frosting free.

And my coworkers were very happy to eat these cakes.  One of my coworkers confided she was grabbing one each time she passed the basket.

 Almond Cupcakes
1/4 lb butter
3/4 cup sugar
2 eggs, beaten
1 1/3 cup cake flour
2 tsp baking powder
1/4 tsp salt
1/3 cup milk
1 cup blanched almonds, chopped
  1. Preheat oven to 375.  Line a muffin pan with silicone liners.  Cream the butter until fluffy.
  2. Add the sugar and and cream until light and fluffy.
  3. Add the eggs, one at a time, beating between each addition.
  4. Combine the flour, baking powder, and salt in a separate bowl.  Add the the wet ingredients.
  5. Add the milk and mix well.
  6. Stir in the almonds.  Spoon the batter into the muffin pan and bake for 15-20 minutes.

Playtime: Date Cake


On our last morning in Idyllwild Thatboy didn't want to hit the road too early.  We had heard about the new playground that was built, so we decided to check it out.

We picked up some coffee and pastries from the nearby European bakery.  Thatdog offered to guard them while we played with Thatbaby.


Thatbaby is getting so brave with the slide lately.  At school, he'll go down them all by himself.  But here, with these new slides and new environment, he was more comfortable sliding down with Thatboy.


 I knew our little drummer would be pleased as punch with this set of tongue drums.  I was right.


And by the end of our time there, he had warmed up enough to head down one of the more familiar looking slides all by himself.


While at the playground we snacked on an eclair with our coffees.  But this date cake is much easier to make.  It's a nice addition to breakfast, and like our pastry, pairs well with coffee.  It's not too sweet, more like a quick bread than a cake.  I love the addition of dates to baked goods.  I much prefer them to raisins, although they provide the same kind of moist sweetness.

Date Cake
5 Tbsp butter
1 cup brown sugar
2 eggs
1/2 cup milk
1 3/4 cup flour
2 tsp baking powder
1/2 tsp cinnamon
1/2 tsp nutmeg
8 oz dates, chopped
  1. Preheat oven to 350.  Spray an 8x8 pan with baking spray.  Combine all the ingredients in an electric mixer and beat for 3 minutes.
  2. Pour into the pan and bake for 40 minutes, or until cooked through.

Monday, January 28, 2013

Mommy Mondays: The Name Game

I'm not going to lie - probably my favorite part of having a baby is getting to name it.  This is an equally enjoyable part of getting a new doll, or a new pet.

BUT, I think there's a big difference in naming your child, versus a doll or a pet.  For instance, one of my all time favorite movie scenes is from Indiana Jones and the Last Crusade: 
Sallah: Please, what does always mean, this-this "Junior"?
Henry Jones: That's his name: "Henry Jones, Junior."
Indiana Jones: I like "Indiana."
Henry Jones: We named the dog Indiana.
Because even fictional movie parents know that "Indiana" is a name better suited to a pet than a child.   Which is why I found it more than a little odd when I heard someone had named their daughter after Indiana Jones.  "You named your daughter Henry?"  Nope - Indiana.  The name of a male dog, being used on a poor, sweet, little girl.

And let's use that as a jumping off point. When I imagine my future unborn potential daughter, I picture a tiny little blonde girl with a pony-tail, looking much like Thatmom as a child.  Obviously as she grows up, she'll be the most popular girl in school, liked by everyone and absolutely beautiful.  Life in high school will be ridiculously easy for her.  And then I start thinking about reality.  Life in high school is easy for no-one.  And given her lineage, there's a great chance she won't be the most popular girl in school.  There's a pretty good chance that at some point she's going to have an awful haircut, braces, glasses, and an unfortunate looking outfit or two - come on, we've all been there.  And how much harder is life going to be if I give her a dog's name?  Or a really masculine name (since Eliot has somehow turned into a name for a little girl)?  Think about the biggest female outcast in your school.  Now picture her name had been Fred.  Cruel, right? 

Names - they're important!  So we put a lot of thought into baby names.  It was a fun pasttime for Thatboy and I.  Heck, it still is!  We love names that are traditional, but not common.  Names that can have a nickname, but don't have to.  Names that are good for both children and adults.

That last one is something that particularly resonates with me.  I work in a very male dominated field.  A field where opposing counsel has referred to me as "Sweetie" on more than one occasion.  A field where most male partners refer to me by a nickname I haven't gone by since before I was in elementary school.

But I'm not the only one who delights in naming and has an opinion on baby names.  Practically one of the first questions you get asked as an expectant parents is "So - have you decided on a name yet?"  Everyone wants to know, because everyone wants to tell you what they think about it, or provide their own suggestion.  For this reason, we kept Thatbaby's name a secret from the start.  Because we didn't want to hear what people thought about it, and we didn't want their suggestions about what name they'd prefer for our child.  It was one of our better parenting decisions.  Because it was clear that when we announced the name, not everyone loved it.  It was easy to separate them out, because those that loved the name gushed.  Those that didn't responded with "Oh, how did you decide on that name?"  But no one told us it was awful, and no one tried to change our mind.  And months later, everyone agreed it was the perfect name for him.

And by the way - if you're looking for a dog name, my favorites are Mowgli, Asta, and - you guessed it, Indiana.

Friday, January 25, 2013

Taking the Tike for a Hike: Roast Indian Chicken and Veggies


The nice thing about the weather being warm on our weekend away was that we could take advantage of lots of outdoor time.  So we picked up some soup and sandwiches from the deli and headed for a picnic.


And after lunch, we strapped Thatbaby on and headed for a little hike to check out more woods.


And we got to see some beautiful views.


And spend some time together as a family in the great outdoors.


We climbed rocks and hills, found some more snow and slush, and wore out Thatbaby.  When he started to fall asleep on Thatboy's back, we headed back to the car and civilization.


 And today's cabin meal is one of those really easy ones I promised you.  Take a bunch of chicken and vegetables, toss them with spices, and throw in the oven.  The warming spices, the warm chicken and vegetables.  It's perfect with some couscous, rice, or even on it's own in a bowl.  Thatbaby loves it, I think because it's flavorful without being too spicy.

 Roast Indian Chicken and Veggies
1 sweet potato, peeled and cubed
2 sprigs of thyme 
1/2 tsp smoked paprika
1 tsp chili powder
1 tsp garlic powder
1/4 tsp coriander
1/2 tsp curry powder
salt and pepper
3 Tbsp olive oil 
1 zucchini, chopped
1 red bell pepper, chopped
1 onion, chopped 
1 chicken breast, cut into bite sized pieces
  1. Preheat oven to 450. Toss sweet potatoes with a tsp of the olive oil and roast for 15 minutes.
  2. While sweet potatoes are cooking, whisk together the thyme, paprika, chili powder, garlic powder, coriander, curry powder and remaining olive oil in a large bowl.
  3. Stir in the chicken and the remaining veggies.
  4. And the chicken and veggies to the sweet potatoes and roast for another 20 minutes.

Thursday, January 24, 2013

Searching for Snow: Baked Lemon Spaghetti With Chicken


The goal of our trip was to bring Thatbaby to the snow, and so we had to find snow.  As I stated, there was snow there, but in patches.  Which meant we couldn't really play in the snow, but we could certainly use it to sled!


Thatbaby loved sledding.  We had a feeling he would given that he loves going fast and already enjoys riding Thatboy's skateboard and practice surfing on the bed.


It was hard to get him to stop sledding in fact.  He wanted "more."  He carried his little sled from snowy patch to snowy patching asking for "more please."  Guess he's a fan of the snow.

Thatboy was in charge of taking Thatdog for walks, and he found a great snowy hill behind our cabin. 


Thatbaby had to bundle up a little more, but he didn't seem to mind.


With this hill, he even got to get his hands in the fluffy stuff a little bit. 


So our first trip to the snow wasn't a total disappointment.  And we know Thatbaby will be even more excited next year!


I don't know about you, but pasta is a definite winter cabin staple for me.  Which is why we ended up with Bolognese.  But if you want to bring something with you, baked pasta is easy to make ahead, travels well, and warms up very easily.  And you don't have to go with your basic baked ziti or rigatoni.  Lately I've been baking all sorts of pastas, like fettuccine and spaghetti.

This one is loaded with chicken and vegetables, but balanced with a lemon sauce, a nod to the ever popular lemon spaghetti.

Baked Lemon Spaghetti with Chicken
1 Tbsp butter
1 Tbsp flour
1 cup milk
1 cup mozzarella, shredded
1/2 cup parmesean, grated
1 sprig thyme
zest and juice of 1 lemon
salt and pepper
8oz spaghetti
1 Tbsp olive oil
2 cloves garlic, minced
2 cups broccoli, chopped
1 carrot, peeled and chopped
1 bell pepper, chopped
1 chicken breast, cooked and shredded
1 pint cherry tomatoes, halved

1. Preheat the oven to 400. Spray a baking pan with cooking spray.  Melt butter in a medium skillet over medium heat.
2. Whisk in the flour and stir until lightly browned.
3.  Slowly whisk in the milk. Keep whisking until the milk is warmed and has thickened slightly.
4.  Whisk in half the mozzarella, half the parmesean, thyme, lemon zest/juice and salt and pepper.
5.  Cook spaghetti according to package directions.
6.  While spaghetti is cooking, heat the oil in a large skillet over medium heat.  Add the garlic and cook just until fragrant.
7.  Add the vegetables and cook until tender crisp. 
8. Toss the veggies with the spaghetti, chicken, and sauce.  Transfer to the baking pan.  Cover and bake for 30 minutes.
9. Uncover and sprinkle the rest of the cheese on top.  Return to oven and bake for for 10 more minutes.

Wednesday, January 23, 2013

Little Cabin In The Woods: Garlicky Chickpea Ravioli with Roasted Red Pepper Sauce


Our little cabin may have been lacking in snow, but it sure was full of charm!  Just check out our view!


 During Thatbaby's naps, Thatboy and I took turns hanging out in the cabin in case of a wakeup, and hanging out on the swing, enjoying the scenery.  We were beside a creek, with the views of Suicide Rock, surrounded by giant evergreen.


 And when he was awake, Thatbaby was more than happy to join us.  The cabin had running water and electricity, but not much else.  No television/cable/radio.  So after Thatbaby went to bed, Thatboy and I entertained ourselves the old fashioned way - Game Nights!


Mille Bourne gets mean, but Pass the Pigs is nonstop entertainment.  To go with our rustic cabin, here is an equally rustic meal! Homemade ravioli is never as perfectly shaped or formed as the storebought version, but that's part of it's charm.  And this one, filled with a chickpea paste, is different than your typical ravioli.  The same is true of the roasted red pepper sauce.  Sweet and smokey, this ravioli is perfect for any form of cabin fever.

 Garlicky Chickpea Ravioli with Roasted Red Pepper Sauce (From Branny Boils Over)
1 cup chick peas
2 tsp olive oil
2 tsp lemon juice
1/2 tsp cumin
3/4 tsp salt
2 Tbsp chopped parsley
3 garlic cloves
1 Tbsp water
1 egg
3/4 cup flour
1 small onion, diced
1 roasted red pepper, chopped
4 oz vegetable stock
1/3 cup sweet corn kernels
1/8 tsp chili powder

  1. Puree chickpeas, olive oil, lemon juice, cumin, 1/4 tsp salt, parsley, and 1 garlic clove in a food processor.
  2. Make a pile out of the flour on a clean work surface.  Make a well in the center and place the egg and water in this well.
  3. Stir the flour into the egg/water well with a fork until the dough comes together.
  4. Use a pasta roller to roll the dough into sheets.
  5. Place 1 teaspoon of the chickpea paste on the dough sheets, about an inch apart.
  6. Dip your finger in water and run along all the edges of the pasta sheet.
  7. Lay another pasta strip on top and press down to create a seal.
  8. Use a fork to crimp the edges and cut into individual raviolis.
  9. Bring a pot of water to a boil and boil 4-5 minutes.
  10. While waiting for water to boil, saute the remaining garlic in olive oil.
  11. Add onion and red pepper and cook until onions are translucent.
  12. Puree in a food processor with the vegetable stock.  
  13. Return to pan and add chili powder and 1/4 tsp salt.  Heat thoroughly and toss with ravioli.

Tuesday, January 22, 2013

To Snow We Go: Chicken Enchiladas

On our way home from Palm Desert I mentioned to Thatboy that I thought it would be really great if we could take Thatbaby to see the snow this year.  Last winter, he was such a little guy, barely able to focus on us, let alone a white wintery world around us.  This year I know he would get a kick out of the wet, cold, fluffy snow.

Thatboy made it his mission from then on out to get us to the snow at the first opportunity.  This long weekend was that opportunity!  We grabbed a cabin last minute and headed up into the mountains.  Only to find....no snow!  Well, very little snow. We had a warm spell on Thursday which melted very much of the white stuff.

We just got back in tonight (I hate when we do this to ourselves, get home from a long weekend just in time to hurry and get ready for the week ahead).  Don't worry, I'll share pictures and stories throughout the week, once I have time to unload my camera.

And this week, I'll share with you some of my favorite winter cabin foods.  None of which we ate while we were at the cabin, for the record we had bacon cheeseburgers and bison bolognese.  But I didn't take any food pictures.  So instead, I'll share other things I've made on other trips past.  Things that are easy to make ahead of time and bring with you, or things that are easy to make when you're there.  What they all have in common is that they are warm and filling after a long day of outdoorsy-ness.

Chicken Enchiladas
1 chicken breast, cooked and shredded
1 can tomato sauce
1 can died green chiles
1 chipotle in adobo sauce
1/2 cup chicken stock
1/2 onion, diced
2 cloves garlic
1 tsp cumin
1 tsp oregano
6-10 soft flour tortillas
4 cups finely shredded cheddar cheese
  1. Preheat oven to 350.  Spray a large baking dish with cooking spray.  Combine tomato sauce, green chilies, chipotles, chicken stock, onion, garlic, cumin, and oregano in a blender and blend until smooth.   
  2. Place this sauce in a medium saucepan and bring to a boil.  Reduce heat and let simmer for 10 minutes.
  3. Remove 3/4 of the enchilada sauce from the saucepan and set aside.   
  4. Add chicken to remaining sauce in saucepan and heat through and stir to coat.   
  5. Take a tortilla and fill with cheese and chicken, roll and place in the baking dish seam side down. 
  6. Top enchiladas with remaining sauce and cheese.  Bake uncovered for 20 minutes.

Monday, January 21, 2013

Mommy Mondays: Hugs and Cuddles

I'll be the first to admit I don't hold a lot of stock in "baby books."  Don't get me wrong, The Happiest Baby on the Block got us through those first few months, and I've got The Happiest Toddler on the Block  on order.  But I think the reason it worked for me, was because it confirmed my basic instincts.

For hundreds of years, prior to the advent of the printing press, parents were able to raise their children.  And although the infant mortality rate was higher back then, I'm pretty sure that was due to illness, not from infanticide when parents didn't know what to do with their screaming child.

I'm not a huge Jungian "collective unconscious" believer, but I have to believe that all that childrearing knowledge, passed down through community efforts, generation after generation, must have rubbed off somehow.  I really wanted to go into parenting trusting my instincts.

So where have my instincts led me? Are they that different from other parents? And how's it working out?
Set Realistic Expectations:
   This is one of my pet peeves.  And I'll admit I was guilty of not setting realistic expectations before Thatbaby arrived.  I remember talking to my friend L about my plan to have Thatboy feed the baby at night sometimes, trading off so we each got sleep.  Which is when L kindly informed me that my plan wasn't going to fly.  Because I'd have to get up and pump at that time anyway.  And then wash the bottles.
     I remember when Thatbaby was born, looking at him and thinking how perfect he was.  I know I'm not the only parent with that feeling.  And yet, for many, it only takes about 2 weeks before they start asking when their "perfect" baby is going to fix him/herself and sleep better at night.  Which isn't a realistic expectation at 2 weeks.  One of the things that everyone around me noted was how much more relaxed and less anxious I was after having Thatbaby.  My usual, anxiety filled self just wasn't worked up about anything, figuring that whatever was happening was probably normal.  Right now, I'm dealing with a mother at daycare who seem completely taken aback that her child gets sick from school.  Realistic expectations people.


Feeding I don't think it's a secret by now I'm an advocate of breastfeeding.  But even my own instincts in this realm have surprised me.  I was fairly certain that I was going to quit at 1 year.  And then 12 months came and went, and my instincts told me not to just deny him because of a number.  The same way I refused to quit night nursing just because he hit a certain weight and age.  Right now, we're still breastfeeding, but he's dropped down to two sessions a day.  And in those two sessions I feel good knowing I'm providing him extra immunity against flu season and extra nutrition during those toddler food strikes.  

     It's also been very important for me that he develop a healthy relationship with food.  He doesn't get rewarded with food treats for good behavior or bad days.  We don't force him to eat what he doesn't want to eat (again, why I'm thankful for nursing).  Thatbaby will have days where he's not very hungry and other days where he has 3 servings of a meal.  It all balances out in the end.

Holding: I actually got into an argument last week because someone tried to say there's no benefit to touch, physical contact, holding. And I don't mean physical benefit.  She basically said there's no emotional benefit to touch.  But we all know there is.  So this was one of my instinct ones.  Thatbaby needed to be held, a lot, when he was younger.  I think this kind of combines with the previous tenant.  In order to address his emotional needs, we held him.  A lot. It used to be said you spoiled a child by holding them.  And that has long been disproven.  Still, it is sometimes hard to balance your needs with your child's needs.  Which is why I am such a big proponent of baby wearing.  Because his needs get met, and so do mine.  And you know what?  Eventually Thatbaby didn't need to be held so much, as he naturally and developmentally became more independent.


SleepThis is a touchy subject for most parents.  Because we all want to sleep, and we all want our children to sleep well.  I'm not an advocate of sleep training, even though all my friends have done it in some respect.  But no one in my family did it, and we're all great sleepers (except when I'm pregnant).  I just can't believe that sleep, something everyone does and needs isn't an innate quality.  There's no "breathing training" or "blinking training."  And Thatbaby has really proven me true.  My friends who have sleep trained were able to brag about their children sleeping through the night much earlier than mine, but mine got there too.  By 11 months he was putting himself to sleep for naps, bed around the same time.  I've also found he sleeps great throughout the night - as long as he's healthy and comfortable, which means when he does wake up, I address his needs because I know something's up.  

 So how do you do it?  Do you go by instinct or by the book?  Are there things you do that are different than your peers?  Aspects of motherhood that you handle differently than you thought you would?

Friday, January 18, 2013

Telling You A Secret: Steak Fajitas


There are a ton of things no one tells you about having children.  Secrets of the parent-hood.  Of course there are things everyone tells you - You'll never sleep again, get rid of anything white, poop WILL end up on your wall.  And yet, people keep quiet about some very important details.

Did you know babies DO NOT sleep in?  Yeah yeah yeah everyone tells you about the sleeping through the night thing, but even once they sleep through the night, they often think that 4:30/5:30 is an acceptable wakeup time.

And once you have a child, you will never be able to order fajitas again.  I mean, sure, eventually you'll be able to order them, but not when you have a baby, or a small child, or a child of any age who thinks that a sizzling platter would be a fantastic place to put his hands.

I miss my fajitas.  I haven't ordered them since Thatbaby's been born for safety reasons, but there's something about mixing and matching fillings, and rolling them up to eat.

So I decided to make them at home.  Much safer that way, and even Thatbaby can enjoy with some help.  Grilled carne asada, sauteed peppers and onions, cheese, guacamole, salsa - the skies the limit!


 Steak Fajitas
2 tsp olive oil
1 bell pepper, sliced thinly
1 onion, sliced thinly
1/4 tsp ground cinnamon
1 tsp cocoa powder
1 tsp paprika
1 tsp kosher salt
1 Tbsp brown sugar
1/2 tsp black pepper
1/2 tsp ground cumin
1/2 tsp garlic powder
3/4 lb carne asada

  1. Heat olive in a large skillet over medium heat.  Saute the bell pepper and onions until soft.
  2. Combine all the spices in a small bowl.
  3. Rub spice mixture onto both sides of the steak.
  4. Grill steak for a few minutes on each side to desired temperature. Most people prepare it medium rare.
  5. Serve with corn tortillas, onions and peppers, and guacamole

Thursday, January 17, 2013

Cuddling Up with the Comforts: Cavatappi with Bacon, Goat Cheese, and Peas

 Yesterday was a looooong day.  I was meeting with a new client, about an hour away at 4pm in the evening.  Knowing I wouldn't be able to make it home in time for our regularly scheduled dinner, I did double duty on Tuesday night, making dinner ahead of time so Thatboy could just heat it up for Thatbaby and himself.

My meeting ended up lasting even longer than anticipated when the client didn't show up.  We headed back and got a phone call when we were halfway home.  Which meant turning around and heading back.  When I got home last night, Thatbaby had been in bed for a long time, and Thatboy had my pasta warming up for me, stovetop.  He passed me a bowl as I curled into the couch, finally through with the day.

That's the beautiful thing about pasta.  It can be made ahead of time, reheats beautifully, and makes you feel better after a long, hard day.  Cavatappi is my go-to favorite pasta right now.  I love the ridges that collect every last bit of sauce.  And the curl that aids in holding a pea perfectly nestled in the shape.  Elly is my go-to pasta recipe-er right now.  Each one she features is simple, yet satisfying.  Rumor has it (since I wasn't there) Thatbaby ate 3 bowls himself last night!

Cavatappi with Goat Cheese, Peas and Bacon (From Elly Says Opa)
8 oz.cavatappi
3 strips bacon, chopped
2 cloves garlic, minced
1/3 cup peas
2 oz. goat cheese
2 Tbsp. toasted pine nuts
freshly ground pepper and salt if needed

  1. Cook the cavatappi according to directions on box.  Drain, reserving 1/2 cup of the pasta water.
  2. While pasta is cooking, cook bacon over medium heat in a large skillet. 
  3. Remove bacon from skillet and place on a paper towel to drain.  Add the garlic to the bacon fat and cook about 30 seconds, until you can smell the garlic.
  4. Add in the pasta, peas, and the reserved pasta water.  Cook until everything is heated through.
  5. Add the goat cheese and stir into the pasta.  Season with salt and pepper and sprinkle pine nuts over before serving.

Wednesday, January 16, 2013

Weekend Treats: Cookies and Cream Cake

Now that Mustang and RB are living in San Diego, we get to see our family more often.  Which is fabulous.  Last weekend Knits and Petman came down to visit RB and we got to meet up with them for Sunday Brunch. 

Since they were staying on Shelter Island, we met up at Jimmy's Famous American Tavern - which I had discovered when dropping Tesseract off one day when she was having brunch there.

The great things about J-FAT include their location, right on the water, the fact that tater tots are served with all brunch entrees, and a giant grassy area beside the restaurant for Thatbaby to run around.


Oh yes, Thatbaby is a full fledged runner-arounder.  With his little arms flapping in the air as he goes.  And there are frequent moments of him being airborne before coming crashing to the earth since his balance has not quite met his desire for speed.


It was such a treat to have brunch with Knits and Petman.  I'm really so thankful they decided to move out to California.  I feel very lucky to have so much of our family close by.

Having some free time this weekend, I also decided to make a cake!  I wanted to tweak the cookies and cream cake I had made for Thatbaby's birthday. That cake had a vanilla base and a chocolate buttercream frosting.  This is the reverse.  A rich chocolate cake (hello secret ingredient coffee!) with a white buttercream frosting.

Without the chocolate frosting, this cake isn't as rich as the other, but the chocolate cake aspect is unbeatable.  And this frosting really has the same flavor as the middle of the oreo - which is everyone's favorite part, right?

Cookies and Cream Cake
2 oz unsweetened chocolate
1 egg
1 1/2 cup sugar
1/3 cup canola oil
1 tsp vanilla
3/4 cup coffee
1 1/3 cup flour
1 tsp baking powder
1 tsp baking soda
1 egg yolk 
1 stick of butter
  1. Preheat the oven to 350.  Spray an 8inch cake pan with baking spray.  Melt the chocolate in a double boiler (or makeshift double boiler) and set aside.
  2. Beat the egg in an electric mixture and add the sugar.  Beat until well blended.
  3. Add the oil, vanilla, chocolate, and coffee and beat well.
  4. In a separate bowl, combine the flour, baking powder and baking soda.
  5. Add the dry ingredients to the wet ingredients and mix for 2 minutes.
  6. Pour into the pan and bake for 40 minutes.  Remove from oven, cool in pan for 5 minutes then turn onto a rack and cool completely.
  7. While cake is cooling,  combine 1/2 cup sugar and 1/4 cup water without stirring in a heavy-bottomed pan until the mixture reaches 240.
  8. Beat the egg yolk.
  9. Pour the heated sugar mixture over the egg while beating.
  10. Cut butter into small pieces and beat until incorporated.  Continue beating the frosting until it's the right consistency.
  11. Frost cake and sprinkle with crushed oreo cookies.

Tuesday, January 15, 2013

Pub and Grub: Turkey Shepherd's Pie


It's no secret that Thatboy and I enjoy beer.  And we're lucky enough to live in one of the craft beer capitals of the nation.  My only complaint with many of the San Diego craft beers is that many of them are heavy on the hops.  This is exactly what Thatboy likes about them!  And one of the super-hoppy breweries that Thatboy likes is Stone Brewery.

Mr. Horse Whisperer loves Stone Brewery too, and there's a new outpost by their home.  So on Saturday we headed out for a triple date - 3 boys and 3 girls.


While the grownups drank beer, the little ones wandered, explored, ran, fell, and danced.


Right here would be a fantastic place to put a recipe that involves the use of beer, but lately we've been drinking rather than cooking with it.  So instead I'll give you some traditional beer drinking fair.  A nod to Thatboy's Irish Heritage, but with a little more healthy vibe.  Shepherd's pie is typically made with lamb (see SHEPHERD!) and mashed potatoes.  This version uses turkey and sweet potato.  It was a huge hit with the family.  Thatbaby at a whole fourth of the pie and Thatboy ate half.  Guess everyone worked up an appetite!

Turkey Shepherd's Pie
4 sweet potatoes, peeled and cubed
2 Tbsp butter
1/4 cup milk
salt and pepper to taste
1 Tbsp olive oil
1 onion, chopped
2 cloves garlic, minced
1/2 lb ground turkey
1 clove 
1 sprig of thyme, leaves only
1 cup of frozen corn
1 cup of string beans, chopped
  1. Place potatoes in a saucepan and cover with water.  Bring to a boil and boil for 20 minutes.
  2. Drain and return to pot.  Mash with butter, milk, salt, and pepper. 
  3. Preheat oven to 375.  Spray a pie pan with cooking spray. Heat oil in a large skillet over medium heat.  Add the onion and garlic.  Cook until onion is translucent.
  4. Add turkey and thyme and cook until turkey is browned through.
  5. Add corn and string beans, and then season with salt and pepper to taste.  Cook until heated through.  
  6. Put turkey in the pie pan and top with the mashed sweet potatoes.  Cook for 30 minutes or until the potato is golden brown.