Pages

Thursday, December 15, 2011

"Chicken Soup" for a rough day

Stick with me to the end on this one and you will be greatly rewarded. Trust me on this - it's worth it to scroll allllll the way down. You can do it now if you want - head down to the end and back up. We'll all wait here for you.

On December 2, Thatbaby turned 2 months old. And anyone with a young child knows what that means - the dreaded 2 month shots!


Thatbaby was a trooper. I mean, obviously he cried - even I cried when I have to get a shot, and I'm older than 2 months. But about 2.5 seconds after we got home, he was back to his normal self.

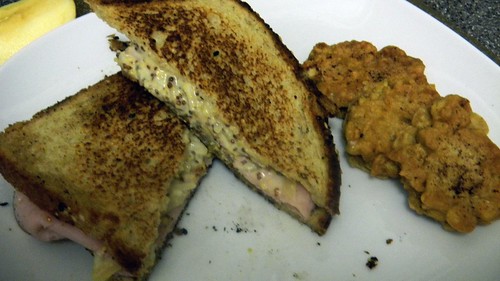
When I get a shot I wallow in the pain and misery. I don't get shots very often for this reason. And even though Thatbaby appears to have not inherited this delightful trait, I still felt like some comfort food should follow up this harrowing ordeal. Enter Chicken Cordon Bleu.


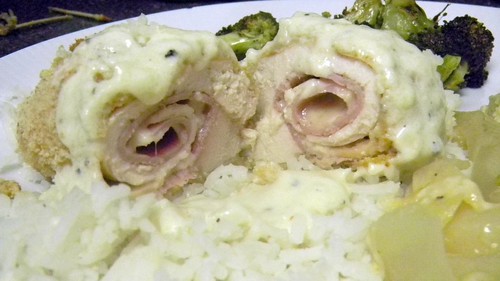
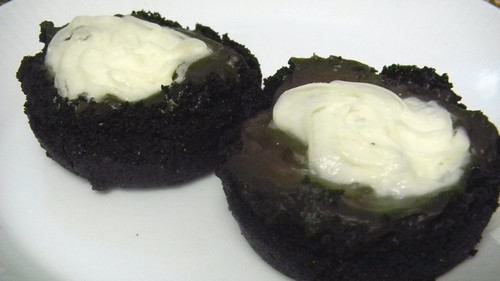
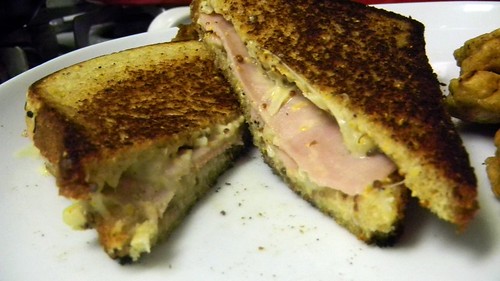
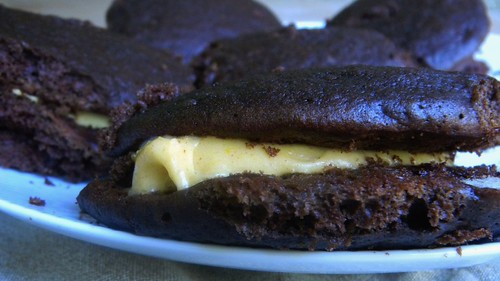
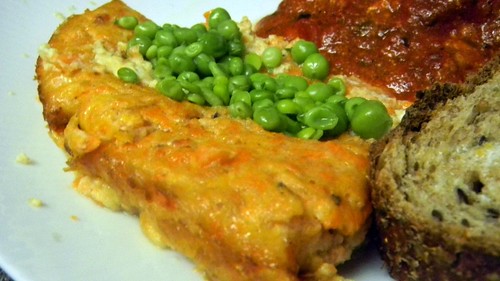
Can you think of anything more comforting than melted cheese? Cutting into a chicken breast and watching it just ooze out? And while most ooze verges on disgusting, oozing cheese is downright amazing. And topping it with an alfredo-like sauce sends it over the edge from ordinary to extraordinary.

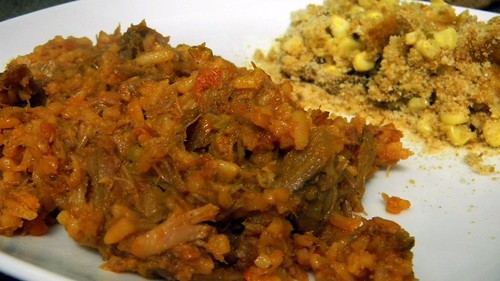
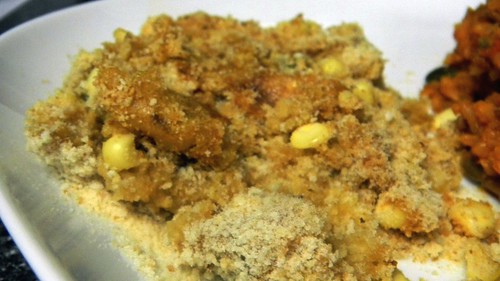
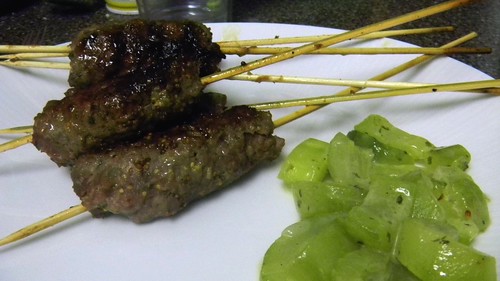
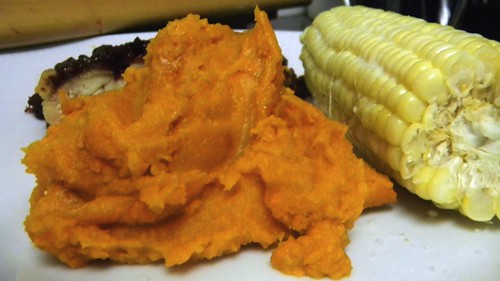
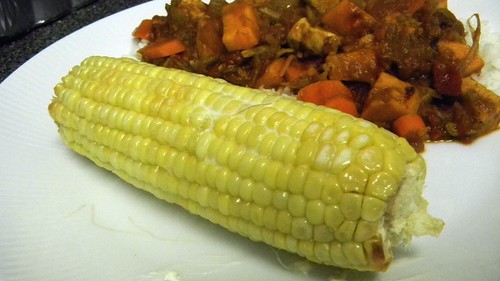
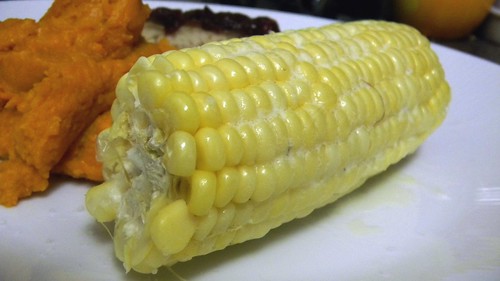
The comfort-fest continues with our side dishes. Granted, I'm the weirdo that thinks pretty much any vegetable is comforting, but it's even more appealing when baked with cheese. I'm going through a fennel phase right now (you'll see more later this week). Raw fennel has a delightful black licorice scent, but when you cook it, it doesn't have that flavor. To me, it tastes like winter - warm and earthy. Like a sweater. And what could be more comforting than that?


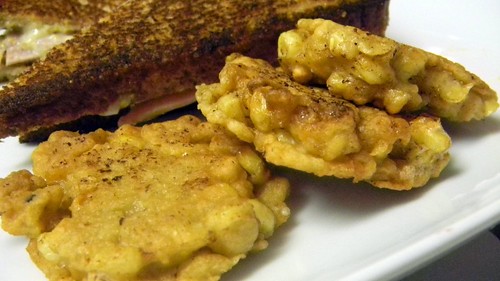
Braised Fennel Au Gratin
1 head of fennel
2 Tbsp butter
chicken broth
salt and pepper
1/4 cup parmesean cheese
  1. Preheat the oven to 375. Wash and slice the fennel in 1/2 inch slices.
  2. Melt the butter in a skillet. Add the fennel slices and saute for 5 minutes.
  3. Add 1/2 inch of chicken broth, cover and simmer about 18 minutes.
  4. Remove fennel to a baking dish and boil down the liquid until only a few tablespoons remain.
  5. Pour the reduced liquid over the fennel, sprinkle the parmesean over and broil until the cheese has melted.


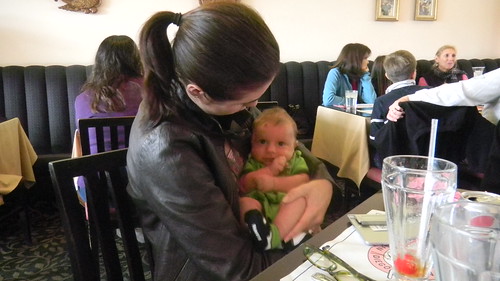
And for those of you that have stuck around - we got back our photos from the sketchy santa shoot. We went because I'm a sucker for free professional pictures, but really, are they much use when they turn out like this?


Tell me that santa doesn't give you the willies? And look how comfortable Thatbaby seems...right?

Let's review:

Good Santa


Bad Santa.


I think we've got one more Santa option this weekend. And I'm counting on this one to be the winner!

Tuesday, December 06, 2011

It's Beginning to Look A Lot Like Christmas


Now that Thanksgiving is over I can start getting into the winter holiday spirit. And we go full swing tilt once that happens.

H had told us that her photographer was doing pictures with Santa at a local car dealership, so Saturday we headed down for another photo opportunity. I don't have the photos back yet, but I'm not expecting much. Thatbaby's first pictures with Santa went really well. He was all smiles and coos. But this time, there was a lot more tears, crying, and general unhappiness. And of course, the Santa seemed a little sketchy. If I could figure out a way to upload the video without sound you would seem him almost drop Thatbaby ass over teakettle.

After the Santa experience we brought Thatbaby over to Balboa Park which is all dressed up for Christmas also. Lights and giant trees. Every year the Old Globe Theater puts on The Grinch that Stole Christmas and so the Whoville Tree is also present. With a host of Whos dancing around the base.


We then went to pick up our very own tree. For some reason, our usual tree lot wasn't there this year, so we went driving around to find a new lot. Which is when Thatbaby decided he didn't like his carseat anymore, and he wanted to go home, and he didn't like these stupid tree lots anyway. Which made the experience a lot less enjoyable.

Undeterred, we picked out the perfect tree and decorated it after Thatbaby went to bed for the night.


He was pretty excited about it when he woke up. He loves looking at it, even when it's not lit. I love going through our ornaments when we put them up - so many have special meaning. Like the ones that hung on Thatdad's tree, or the ones marking trips we've been on, or the ones marking special events in our lives. Like the birth of our son:


This year we also added a couple from our trips this year. Like when we went to Tahoe for Fourth of July.


Or our anniversary babymoon at Cannon Beach.


And since we're in the holiday spirit, I'll take a break from the entrees and veggies and share with you the recipe for the Mexican Chocolate mini-pies I sent in with Thatboy for his birthday.

I found the original recipe in Food Network Magazine, for a full sized pie, but full sized pies are difficult to eat at work. Besides, everyone loves treats they can hold in their hand and eat without a fork or spoon. So I adapted the recipe to make individualized pies. I also switched the crust to an oreo cookie crust which I like so much better than a chocolate wafer crust. With potlucks and holiday parties abounding, these are a sure fire crowd pleaser. They disappeared from Thatboy's office in a matter of minutes.


Mini-Mexican Chocolate Pies (Adapted from The Food Network Magazine)
30 oreo cookies
6 Tbsp butter, melted
2 cups milk
1/2 cup sugar
1 Tbsp cocoa powder
1/2 tsp roasted cinnamon
1/4 tsp almond extract
1 pinch cayenne
1/4 cup cornstarch
1/2 tsp salt
4 egg yolks
2 Tbsp cold coffee
1/2 tsp vanilla extract
4 oz semisweet chocolate chips
  1. Preheat the oven to 350. Crush the oreo cookies in a food processor.
  2. Add melted butter and pulse until moist. Divide between 12 muffin tins and press into the bottom and side of each cup. Bake for 20 minutes. Let cool while preparing the filling.
  3. Heat the milk in a large saucepan until hot but not boiling.
  4. In a separate bowl, whisk the sugar, cocoa powder, cinnamon, almond extract, cornstarch, and salt.
  5. Whisk the egg yolks, coffee, and vanilla into the sugar mixture.
  6. Temper the egg mixture by whisking in half of the hot milk into the eggs until smooth. Then whisk the egg mixture into the rest of the hot milk.
  7. Cook, whisking, 3-5 minutes until it boils and thickens. Remove from the heat, whisk in the chocolate until it is all melted. Let cool slightly. Stir during cooling so a skin doesn't form.
  8. Pour the filling into the muffin-tins and refrigerate until the pudding sets.

Sunday, December 04, 2011

Arroz by any other name


I'm not sure when I discovered Arroz con Pollo. I grew up in a pretty small town without a lot of ethnic diversity when it came to restaurants (or people for that matter).

I do know, however, that I discovered I could make Arroz con Pollo at home this summer. Which was a game changer here. I found a recipe which made the entire thing seem like child's play, because really, the thing that make arroz con pollo what it is, is this magic seasoning in a box - Sazon.


And of course, this little box contains more than one seasoning packet. Which I've been more than happy to make use of. I've started arroz con-ing on a near weekly basis. Almost anything I can get my little hands on because it's just that easy - make a sauce with tomato sauce and sazon, add rice, add protein of choice. It works just as well with chicken as it does with shrimp or pork.

Now that I shared with you my secret of how easy this dish is, I'll tell you a way to make it even easier - use pre-cooked meat! Which makes this a fabulous way to use up leftovers (anyone still have turkey in their fridge? Arroz con pavo!). And if you want to go even easier than pre-cooked meat, use precooked meat someone else cooked! I love some of the prepared meats at Trader Joes - their potroast, pollo asada, and most especially carnitas. I picked up a package of their carnitas, used a fork to pull it apart (okay, I'm not going to lie - I pulled it apart with my fingers, but if I were serving this for company I would most certainly use a fork) and threw it in with my rice. Voila - arroz con carnitas!


Arroz Con Carnitas
3 Tbsp canola oil
1 cup tomato sauce
1 packet Sazon
2 bay leaves
1/ tsp cumin
2 cups of uncooked rice
4 cups water
salt and pepper
12 oz cooked carnitas, fork-pulled

  1. Heat oil in a dutch oven over medium heat.
  2. Add tomato sauce, Sazon, bay leaves and cumin. Cook for 5 minutes.
  3. Add the rice and cook for 1 minute.
  4. Stir in the water. Season with salt and pepper and bring to a boil.
  5. Boil for 10 minutes, then lower heat and simmer for 25 minutes.
  6. Stir in the carnitas and heat until the entire dish is warmed through.


Scalloped Corn (From the Fannie Farmer Cookbook)
3 Tbsp flour
1 tsp salt
1/4 tsp paprika
1/4 tsp dry mustard
pinch of cayenne pepper
3 Tbsp butter
1 small green pepper, chopped
1/2 onion, chopped
1 cup milk
2 cups corn kernels
1 egg yolk, slightly beaten
2/3 cup buttered bread crumbs
  1. Preheat oven to 400. Spray a baking dish with baking spray. Mix flour, salt, paprika, mustard, and cayenne pepper in a small bowl.
  2. Melt the butter in a skillet, add the green pepper and onion and cook until soft.
  3. Stir in the flour mixture and cook, stirring for 2-3 minutes.
  4. Add the milk while stirring. Bring to a boil
  5. Stir in the corn and egg yolk.
  6. Spoon into the baking dish and sprinkle with the bread crumbs. Bake 25 minutes.

Saturday, December 03, 2011

Sufferin' Succotash


Before a couple of years ago, the only time I had ever heard of succotash was when it was uttered, alongside what could only be gallons of spittle, by Sylvester the Cat. I assumed it was one of those nonsense phrases like "Gee Wilikers."

Turns out succotash really is something. A vegetable medley that's a little different than your peas and carrots. My discovery began with Trader Joes - as all good discoveries do. In fact, if Christopher Columbus had a Trader Joes by him, he would have known he hadn't landed in India because - duh, no masala to be found anywhere. However, he would have seen succotash, which should have clued him in that this, my friends, was America. Land of the free and the brave - until the Pilgrims came and took the freedom of the braves.

Trader Joes has an edamame succotash that I pick up every now and again for variety. But traditional succotash, it turns out, is a lima bean dish. And we all know how much I love lima beans. Further research indicates that succotash was originally a Native American dish that was popular during the Great Depression because it was inexpensive to make. Which makes sense, since for many years corn was considered food for livestock, and not people.

Now I'll eat lima beans anyway I can get them, but Thatboy isn't as entirely easy to please in that department. So pairing them with corn and cream seemed like a good way to get him interested. And I was definitely right on the mark with that. This is probably his new favorite way to eat lima beans.


Succotash
1 Tbsp butter
1 cup cooked corn
1 cup cooked lima beans
2 Tbsp cream
salt and pepper
  1. Melt butter in a saucepan. Add the corn and lima beans and heat through.
  2. Add the cream and stir to combine. Heat until the entire dish is warmed.
  3. Season to taste with salt and pepper.

Friday, December 02, 2011

Mid-East Feast


In general, I work from a meal plan. I write out what we'll be having for the week and use that to make my shopping list. It usually cuts down on grocery costs and saves me from that awful "what are we having for dinner tonight" moment where you stare blankly into the fridge willing an answer to emerge from it's frosty depths.

But a couple of weeks ago when we were at the supermarket a couple of extra things made their way into my basket. Like the pound of ground lamb that was marked down to $1. I love playing with ground lamb. More than any other ground meat, this is the one I like to try new things with. Beef almost always gets made into meatloaf, burgers, or meatballs. Ground turkey tends to get thrown into chili. But ground lamb is never pigeonholed.

Instead I use it as an opportunity to scour the internet in search of a new idea, use, or flavor profile. Which is how I landed on Aarti Sequeira's Ground Lamb Kofto Kebabs.


Thatboy, Thatmom and I all watch The Next Food Network Star, so I was familiar with Aarti and the fact that she brings some really great flavor to the table in a very accessible manner. These kebabs certainly highlight that. The baking soda in the meat mixture gives them an almost sponge-like consistency, and the marinade is fantastic. So fantastic in fact, that I would recommend making them much thinner than I did so you get more of a marinade to meat surface area ratio.

Aarti serves her kebabs with potatoes and cucumbers. I served mine with just cucumbers. Because they bring such a nice contrast to the highly spiced meat. Traditionally, the cucumbers would be a cold, salad like dish. But there's nothing traditional about me. And with the colder weather coming in, I've been braising a lot of my vegetables - cooking them down to their essence in a sweet and salty sauce. This time cucumbers got the treatment.


Braised Cucumbers
1 cucumber
3 Tbsp of butter
1 sprig parsley, finely chopped
salt and pepper
  1. Peel the cucumber. Cut in half and use the tip of a spoon to remove the seeds.
  2. Slice each cucumber half and place in a pan with 2 Tbsp butter, 1/2 cup of water, and parsley. Simmer, covered, for about 9 minutes.
  3. Drain the cucumbers and toss with remaining butter and salt and pepper to taste.

Thursday, December 01, 2011

French History


When Thatmom met Thatdad she was an English major in college. Her career ambition was to go to the Sorbonne and translate French poetry. That obviously didn't work out.

Instead she went to nursing school and had a beautiful, smart, charming, and overall wonderful baby girl. And when that baby girl was a child, the family took a trip to Montreal where a sweet waitress, impressed with the girl-child's beginning French offered to take her and raise her and teach her French. That obviously didn't work out.

Instead the girl-child went home with her family, and began taking French classes as soon as she was able. She began reading novels in French, coaching teams for French competitions, and even winning a couple of blue ribbons herself. When she graduated high school, she applied to college in Montreal with the goal of teaching French. That obviously didn't work out.

Instead she has had to make do with eating lots of French food. Like turning a simple ham and cheese sandwich into a gourmet French dinner. Especially since she has currently become obsessed with the pre-grated swiss/gruyere mix at Trader Joe's. The perfect flavor for just about everything and great for melting. Which makes it really nice for any sort of grilled cheese sandwich. C'est magnifique!


Croque Monsieur
1 Tbsp crème fraîche
1 Tbsp dijon mustard
1/4 cup Trader Joe's shredded swiss/gruyere mix
4 slices of bread
2 slices ham
2 Tbsp butter
  1. Stir together the crème fraîche, mustard, and cheese.
  2. Spread this mixture on each slice of bread.
  3. Add ham to half of the bread slices and cover with the other halves.
  4. Melt the butter in a skillet and cook the sandwich, about 2 minutes or until golden brown. Flip and cook the second side for another minute or two.
To keep this truly authentic you should probably serve it with pomme frites, but as I mentioned before, we're corn crazy in this house, so I instead of pomme frites, I made mais frites - or corn fritters.


Corn Fritters
1 cup corn kernels, chopped
1 egg, beaten
1/4 cup flour
salt and pepper
2 Tbsp butter
  1. Combine the corn, egg, flour, salt and pepper.
  2. Shape into small patties. Melt the butter in a skillet and fry the patties for about 4 minutes per side, or until golden.
  3. Flip and cook another couple of minutes on the other side.

Wednesday, November 30, 2011

Repurposing Thanksgiving leftovers


The only difficulty with having Thanksgiving at Thatmom's house is the lack of leftovers to play with. Usually there's enough for "second Thanksgiving" the next night, but that's pretty much it. And leftovers are never fun when you're eating them the exact way as the night before.

Luckily a lack of leftovers on my part doesn't stop me from sharing some great ideas with you. Because while I don't have leftovers from Thanksgiving, I do have the raw ingredients that many of you may have used in your own Thanksgiving feasts - namely, sweet potatoes and cranberries.

I've been using fresh cranberries a lot this year - ever since they showed up at the market. Mainly because last year I started getting cranberry antsy about a month or so after they had disappeared and so I've been storing up some good ideas since then. I made my own cranberry relish a few days before Thanksgiving. Between that and the cranberry butter, I had some leftovers in the bag which I felt would make an excellent topping for chicken. Reduced down to a thick and chunky chutney, this would work equally well over pork or turkey.


Cranberry Chutney
3/4 cup water
1 cup brown sugar
1 Tbsp cider vinegar
1 Tbsp flour
1/2 tsp cinnamon
1/4tsp allspice
1/2 tsp salt
2 cups fresh cranberries
  1. Combine the water, brown sugar, vinegar, flour, cinnamon, cloves, allspice and salt in a saucepan over low heat. Stir until the sugar is dissolved
  2. Add in cranberries and cook slowly about 10 minutes, stirring constantly, until the cranberry skins pop and the mixture thickens.
  3. Serve over chicken, pork, turkey, or use in a sandwich!
This year the sweet potatoes at our table were replaced with delicious butternut squash. But that might not be the case at your house. In years past there has been a bowl filled with baked potatoes - both of the regular and sweet variety. And there are always some leftover. Mashed potatoes are a great way to use up leftover baked potatoes, but these are so great and seasonal you may not want to wait until you have leftovers. Growing up, Thatdad would make squash with brown sugar and cinnamon, so the use of sweet additions to the mashed potatoes isn't too much of a shock. The maple and brown sugar make the sweet potatoes even sweeter, and there's something so perfect about maple syrup this time of year.


Mashed Sweet Potatoes
1 lb baked sweet potatoes OR
1 lb raw sweet potatoes cut into chunks, 1 cup apple cider, and 1 cup water
2 Tbsp butter
1 Tbsp maple syrup
1 Tbsp brown sugar
  1. If using baked sweet potatoes, scoop out the insides and place in a saucepan.
  2. If using raw sweet potatoes, combine the chunks, cider, and water in a saucepan and bring to a boil. Reduce heat to a simmer and simmer about 20 minutes, or until the sweet potatoes are tender. Drain and return to saucepan. Use the back of a fork to mash the potatoes.
  3. Reheat potatoes over a low heat and add the butter, maple syrup, and brown sugar.

Tuesday, November 29, 2011

The Superiority of Women


There is a definite difference between the sexes - and I'm not referring to the physical differentiation.

One only has to take Thatboy and I as a case study. We can turn our focus onto this very weekend.

We'll begin with the basics - multitasking. Thatmom and I can have an entire conversation, while the television is on. However, any attempt to involve Thatboy in said conversation is a futile endeavor. If you were to say, ask him whether his father would like an outdoor walking cap for Christmas, you would be met with silence. Further pressing the question would result in a grunt of some sort which would fail to answer the query. And of course, mentioning the conversation that was held at a later point in time would result in a confused, blank, stare.

Our second example involves illness. On Wednesday night, I wasn't feeling so hot. It was one of those days where I'd gotten very little sleep because of preparations for our trip and Thatboy's birthday. When I woke up Thanksgiving morning it had morphed from "meh" to "bleh." My throat was sore and I felt generally run down. I popped some emergen-c in a glass of OJ and rallied to help with Thanksgiving preparations. By Friday morning I was near 100% with only a runny nose to show for it. On Saturday night, Thatboy claimed that I contaminated him when he started developing a sore throat. By Sunday it had progressed into the bubonic plague. While I was able to pull myself together and function as normal, Thatboy has spent the past 2 days giving the cast of the Walking Dead a run for their money. He has a headache, a fever, chills, a cough that physically hurts him, and sounds like someone should take a wet vac to his chest. Pretty extreme, right? But don't worry, I'm sure he'll be 100% by the time the weekend rolls around.

The last proof I have that the extra X chromosome must be packing some pretty powerful stuff is the difference between Thatboy and I when it comes to pumpkin. See, I can't get enough of the stuff, but I limit my overload to the fall season. And as we approach December, that fall season seems to be slipping away. Thatboy, however has grown tired of the pumpkin pies, cheesecakes, breads, oatmeals, milkshakes, and the many other ways I have used that big orange squash. When he saw the chocolate cake portions laid out to cool he became unbelievably excited that I was making whoopie pies. (Or moon pies as he calls them, even after I've explained that refers to a different kind of treat.) So I probably don't need to tell you about his disappointment when I filled them with pumpkin cream cheese frosting. Which really meant, more for me! And since these freeze up so beautifully, there are a bunch in my freezer to enjoy when pumpkin everything season has passed. Besides, sick people shouldn't be eating a lot of sweets anyway.


Whoopie Pumpkin Pies (From Down Home with the Neelys)
  • 3/4 cup butter, room temperature
  • 1 1/4 cups sugar
  • 1 egg
  • 1 cup buttermilk, room temperature
  • 1 teaspoon vanilla extract
  • 1 3/4 cups flour
  • 3/4 cup unsweetened cocoa powder
  • 1 1/2 teaspoons baking soda
  • 1/2 teaspoon baking powder
  • salt
  • 4 ounces cream cheese, room temperature
  • 2/3 cup confectioners' sugar
  • 1/4 cup canned pumpkin puree
  • 1/4 teaspoon ground cinnamon

  1. Preheat oven to 400 degrees F. Using a stand mixer, add 1/2 cup butter and sugar and beat together until light and fluffy.
  2. Add the egg, then the buttermilk and the vanilla.
  3. Whisk together the flour, cocoa powder, baking soda, baking powder, and salt in a medium bowl.
  4. Add the dry ingredients in increments to the wet ingredients. Mix until just combined.
  5. Drop heaping tablespoons of the batter onto parchment lined sheet trays, leaving a 2-inch space between each cookie. Put in the oven and bake for 8 minutes. Remove from oven and let cool on rack.
  6. Beat together the cream cheese and remaining 1/4 cup of butter, in a small bowl, until smooth.
  7. Slowly add in the confectioners sugar. Once smooth, add the pumpkin puree, the cinnamon and a pinch of salt. Beat until smooth and well mixed.
  8. To assemble the cookie, spread a heaping tablespoon of the filling to the flat side of a cookie and sandwich with another. Repeat with the remaining cookies. Transfer to a serving platter and serve.

Monday, November 28, 2011

How I spent the rest of my vacation

I was really looking forward to the Thanksgiving holiday at Thatmom's house. "Aha!" I thought, "I'll finally get a chance to relax." My reasoning was based on the fact that since I wasn't at my home, there would be no urge to do cleaning, laundry, cooking, etc. Just some good old fashioned catching up on sleeping and vegging on the couch.

In retrospect, this was a ridiculous notion. When I confided in Thatboy what my plans had been he shook his head, bemused I would even consider that. Thanksgiving weekend for us is always jam-packed with activities, most of which involve holiday shopping. There is no rest for the wicked.

Friday morning found Thatmom and I heading out for a run, but not before Prez came over to meet Thatbaby. She moved to San Francisco in August and this was her first chance she was able to meet the little guy. After our run, we headed out to hit up some Black Friday sales. Thatboy and I aren't crazy enough to head out at dawn, and we're not interested in the big ticket items, but we like to wander the aisles, picking up cheap cds, games, and other odds and ends for gifts. As soon as we got home from shopping, we passed Thatbaby off to Thatmom and headed out for Thatboy's birthday dinner at The Side Door - his favorite Orange County restaurant.

Saturday was equally busy since Thatboy had giftcards burning a hole in his pocket. So we headed out to the mall where he unloaded them on shoes and sunglasses. Mario Batali recently opened a new outpost of his Pizzeria Mozza in Orange County, so we ventured there for lunch before heading back to the mall for some more shopping. On the way home we stopped at Roger's Gardens so Thatbaby could have his first meet n greet with the man in red.


He was in awe of the lights and colors so I'm really looking forward to how much he'll enjoy Christmas - the tree goes up next weekend!

Before I knew it, Sunday rolled around. Time for one last breakfast with the family at Pacific Whey! Then Thatmom and I went for another run. After that it was time to load up the car for our trip home. We got home in time to get preparations underway for the week - so we can start all up again.

In honor of the Fall Harvest, and because there was decidedly little cooking this weekend on my part, I thought I'd feature what has been gracing our table often as of late - the last of the summer corn. I think Thanksgiving officially marks the end of corn season, and I'll be sad to see it go since late corn is always the sweetest - don't you think?

The beauty of corn is that when it's good, you don't even need to cook it. You could eat it right off the cob. But that means keeping cooking preparations simple is the rule. Why mess with a good thing?


Oven Roasted Corn
2 ears of corn
butter

  1. Preheat oven to 400. Husk corn cobs.
  2. Coat each cob in 2 tsp of butter and wrap in foil.
  3. Bake 25 minutes.


Broiled Corn
2 ears of corn
butter
salt
  1. Soak unhusked corn in cold water. This will prevent the husks from catching fire.
  2. Broil unhusked corn for 20 minutes.
  3. Pull off the husks and cornsilk and serve with lots of butter and salt.

Sunday, November 27, 2011

Thanksgiving Recap


I hope all of you had a fabulous holiday - is there any holiday more geared toward foodies than Thanksgiving? I mean, technically every Jewish holiday resolves around the holiday meal no matter what the celebration, but Thanksgiving is nationally recognized as the day about a turkey. If you don't have school aged children do you remember the actual Thanksgiving story?

We discussed the Thanksgiving story at dinner. I remember it being a way for the Pilgrims to thank the Indians for helping them make it through a long winter - but if that's the case, then how could it have been held in November? Before the winter even started?

Whatever the reason, now it is a great time to remember what we are thankful for and to join with friends and family in the beginning of the winter holiday season.


As usual, we spent Thanksgiving at Thatmom's house where the food was plentiful. I took a picture of the beginning of laying out the dishes - which is good, because shortly after this picture was taken I completely burnt all the marshmallows atop the candied yams. Which is especially sad since they're my favorite part of the Thanksgiving meal.


We weren't the only ones to make the trek to Thatmom's house - our relatives always know where they'll be spending their holiday. And we always manage to pick up a couple of stragglers in addition.


Thatbaby was so excited to take part in his first Thanksgiving. Although I think next year might be more fun for him, when he can actually eat the turkey.

I completely forgot to take a picture of the dessert table. In addition to my cheesecake, pumpkin pie, and ice cream there was also apple crisp, an ice cream cake in honor of Thatboy's birthday, a cranberry hazelnut loaf, and a 20lb cake.

But Thatmom had also asked me to handle one more thing other than dessert - she wanted me to make a "bread" or, more specifically, biscuits. Eagerly I anticipated making my "crack biscuits" - a drop biscuit loaded with cream and butter. Thatboy and I eat them 2 at a time. But Thatmom didn't want my crack biscuits. She requested baking soda biscuits. Even when I told her that the crack biscuits had baking soda in them, she didn't buy it.

I've never made baking soda biscuits before. They were always Thatmom's thing. And, as always, when I go to make something new I turn first to Fannie Farmer. Thatmom said these exceeded her expectations, and since they were her request that's good enough for me. Although they probably won't replace my crack biscuits. I made some cranberry butter to serve alongside them and loved the flavor it imparted. As a side note, I used the butter on my leftover turkey sandwich the next day which was amazing.


Baking Powder Biscuits (From the Fannie Farmer Cookbook)
2 cups flour
1/2 tsp salt
4 tsp baking powder
1/2 tsp cream of tartar
1 Tbsp sugar
1/2 cup shortening
2/3 cup milk
  1. Preheat the oven to 425. Grease two 8-inch cake pans. Put the flour, salt, baking powder, cram of tartar and sugar in a bowl.
  2. Cut the shortening into the flour with two knives or a pastry blender until the mixture resembles coarse meal.
  3. Add the milk all at once and stir just until the dough forms a ball around the fork.
  4. Turn the dough onto a lightly floured board and knead 14 times. Pat until 1/4 inch thick. Cut into rounds with a 2 inch cookie cutter. Place touching each other in the cake pans and bake for 15-20 minutes.

Saturday, November 26, 2011

The Return of Eat to the Beat!


I'm not going to lie - I play favorites. And Elly? She's one of my favorite bloggers. I would follow her lead the end of the blogosphere and back. So years ago when she announced she was going to do a blog event I of course jumped in with both feet.

Eat to the Beat requested bloggers to make and blog about a food or drink related to a song, album, band - something music related. It was fun to come up with ideas for my favorite songs or bands. And then it stopped. Probably because Elly got busy with that little thing she calls a "son."

This year marks Elly's fifth year blogging, and in honor of her anniversary she brought back Eat to the Beat. Yay! And I wanted to do something really fun. So of course, I sat around doing nothing for near a month. Then I decided I needed to get on it, so I thought of one of my favorite songs - House of the Rising Sun by the Animals. And then I sat around trying to think of a good food or drink to make related to it. Which wasn't going so well. I told Elly I was going to end up copping out and just doing something New Orleans related.

And then, the other morning, I was in the shower when inspiration hit. (Because that's where it always hits, right?) I started singing a song that is running through my head a lot lately - Christina Perri's "Jar of Hearts."

Who do you think you are?
Running 'round leaving scars
Collecting your jar of hearts
And tearing love apart.

And I thought, what if I did that? What if I made a jar of hearts! Heart-shaped cookies that is.


Thatboy agreed it was a great idea - as long as I made them pink like a real heart. Then I just had to figure out what kind of heart-shaped cookie I would make. I do a lot of shortbread cookies - because they're easy. But I wanted to do something different than what I always do.

Lisa recently blogged about Polish pretzel butter cookies, which reminded me of how much I love butter cookies and how much they remind me of my grandfather. He had Alzheimers and every time we visited him in the VA hospital we'd bring him a tin of butter cookies. So I decided to do a jar of butter cookie hearts.

I was going to do a pink frosting over top, and thought buttercream would be delicious on butter cookies, but a little too soft for a jar of cookies. Fannie Farmer (you knew she'd show up again, right?) tops her butter cookies with a meringue. I love meringues and they're the perfect consistency for the jar.

And so - without further ado - because the deadline is, after all, tomorrow: my Eat to the Beat entry.

Jar of Heart(shaped butter cookie)s
2 sticks of butter
1 egg yolk
1/4 + 2 Tbsp of powdered sugar
3 cups flour
1 Tbsp sherry
1 egg white
1/2 cup sugar
red food coloring
  1. Preheat oven to 325. Cream the butter in an electric mixer.
  2. Add the egg yolk and powdered sugar and mix thoroughly.
  3. Slowly mix in the flour.
  4. Add the sherry and make sure all ingredients are thoroughly combined. Refrigerate for at least 30 minutes.
  5. Roll out the cookie dough till it's 3/8 inch thick. Use a heart-shaped cookie cutter to cut cookies and place on cookie sheets.
  6. Beat the egg white until stiff. Gradually beat in half the sugar.
  7. Add a drop or two of food coloring and the other half of the sugar and beat.
  8. Spread the meringue over the cookie and bake for 25 minutes.
  9. Place cookies in a jar!

Wednesday, November 23, 2011

Happy Birthday to the "Other" guy in my life


It's Thatboy's birthday and I'm all ready for him! The banners have been hung and the balloons have been placed. I whipped up some pancakes for breakfast before he headed off to work. Armed, of course, with mini-chocolate pies baked in muffin tins for his co-workers. I mean, I have to keep up with my reputation of super-wife somehow!

At some point before we pack the car up for Thanksgiving he'll open his presents from Thatbaby and me. And when we finally get to Thatmom's house tonight there's going to be cake. Not a bad day overall. I only hope he has an easy day at work. After all, you only have a birthday once a year!

I spent pretty much the entire day in the kitchen yesterday dealing with almost-last-minute preparation for both Thanksgiving and his birthday. (Today I'll be doing the actual last minute prep). In addition to the mini-chocolate pies, I finished up with the ice cream. Every year at Thanksgiving Thatdad always made ice cream. Growing up, it was the only time we had homemade ice cream and it's always been one of my favorite parts of the holidays. So after he died, I took that role over. I even use the ice cream maker he always used when I was a kid. And we learned years ago that the oven gets the kitchen too hot for the ice cream to set up properly, so it's always made a day or two ahead of time. Monday I made the chocolate ice cream with the fleur de sel caramel swirl. Tuesday was all about the classic Thatdad ice cream, no matter how much he played around with the second flavor, he always made a vanilla ice cream with a fudge swirl.

I also made the fancy butter to go with the baking powder biscuits I'll be making today, and some homemade granola for snacking and breakfasts at Thatmom's house. And of course, even with all that prep, I still needed to make something for dinner. (And hit up the gym for a run!)

Not too long ago on my cooking message board someone asked for Trader Joes recommendations and I was reminded it had been a long time since I had relied on one of their simmer sauces - which are perfect for nights when you want something warm, delicious, quick AND easy. No small feat. I grabbed a curry simmer sauce, a chicken breast, and just about every vegetable I had on hand and got to work.


Trader Joe's Chicken and Veggie Curry
1 sweet potato, peeled and chopped
1 jar Trader Joe's Curry simmer sauce
3/4 cup water
1 chicken breast, cut into bite sized pieces
1 tomato, chopped
1 carrot, thinly sliced
1/2 small onion, diced


  1. Boil sweet potato in a pot of water for 6 minutes.
  2. Heat the simmer sauce, water, and chicken chunks and cook for one minute.
  3. Add the carrot and onion and cook 3 minutes.
  4. Add the tomato and cook 2 minutes.
  5. Add the sweet potato, and let simmer for 10-15 minutes.

Tuesday, November 22, 2011

Defying Expectations


Like many places, San Diego has different areas where certain ethnicities are more prevalent than other areas. Last week on our Farmer's Market exploration Thatbaby and I headed to a part of the town that I usually consider to be very Mexican.

So you can imagine my surprise when we pulled into the parking lot of a large Asian market. It started to make a little more sense to me when I thought about it, after all, my favorite Thai restaurant was almost literally across the street.


This farmer's market was different than the typical markets I've been too. Of course they had the usual suspects - oranges, apples, eggs, etc. But there were also stands and stands of atypical farmer's market finds like bitter melon, daikon radishes, and lots of Asian greens. Not that you would know that by looking at my haul.


My $16 haul included:
  • 1 ginormous bag of oranges (which is still in the trunk of my car. Hey - you try lugging around a baby and bags of groceries!)
  • strawberries
  • figs - totally wasn't expecting these! It's been a couple of weeks since I've seen them in the markets, but they're impossible to resist.
  • eggplants
  • onions
  • corn
  • cucumber
  • string beans
Given the amount of produce I brought home, you would expect to see some of it featured in the recipe I'm posting. But there you'd be wrong. Because aside from the strawberries and fruit, most of the produce is actually sitting around waiting for Thanksgiving to be over. For when I've eaten my fill of mashed potatoes and heavy starchy sides. Instead I'll give you one of those impossibly quick and easy meals that is perfect for when your kitchen has become overrun with all the Thanksgiving prep. It's equally fabulous for when you too are sick and tired of turkey and stuffing.

Thatboy and I made a meal of these little taco bites - ground beef cooked with my own personal "taco seasoning". The kick of the ground chipotle powder and the extra kick from the salsa over go over well in Thathouse. But these little finger-friendly treats work well as appetizers for guests or snacks for kids. And, between you and I, they're the perfect way to use up leftover wonton wrappers you may have hanging around your home.


Taco Bites
20 won ton wrappers
1/2 lb ground beef
1/2 tsp cumin
1/2 tsp onion powder
1/4 tsp chipotle chili powder
1/2 tsp garlic powder
1 cup salsa
1/2 cup monterey jack cheese, shredded
  1. Preheat oven to 350. Press won ton wrappers into a muffin tin so that they form little cups.
  2. Brown ground beef in pan over medium heat.
  3. Add cumin, onion powder, chipotle chili powder, and garlic powder to ground beef and continue to cook until cooked through.
  4. Divide ground beef between muffin tins.
  5. Top each with scant Tbsp of salsa. Bake for 10 minutes.
  6. Sprinkle each taco bite with cheese and bake for 5 more minutes until cheese is melted and bubbly.

Monday, November 21, 2011

Goes Together Like Peas and Carrots


Pairings are a funny thing. We were discussing this yesterday when The Actress and Armani came down to visit Thatbaby. As we were walking home from lunch, we reflected upon how different our lifestyles were when we all first met each other.

When I met Thatboy I was looking for a fun college fling. The fact that he'd be graduating in a little over a year meant, for me, that I wouldn't have to worry about anything long term. Unbeknownst to me, he had already had his fill of flings. He was looking for something more serious. And while he certainly wasn't looking for me, he quickly discovered I fit the bill perfectly.

The Actress and I were roommates and while I was trying to suck the life out of every last minute of college, she was incredibly homesick for the first 3 months - flying home almost every weekend. I was out to have a good time, and she was having near hysterical breakdowns over the amount of glitter that ended up on our floor. We laugh about the differences now and I point out that even our worst moments couldn't have been so bad, given how close we remain.

And as for Armani, I never would have put the two of them together - and trust me, I set him up with just about every one of my friends other than The Actress. I mean, she was as far from a party girl as you could get (her self-described "rebellious" period was when she started trying to become more independent from her family by calling them less.) And he was one of the main leaders of his fraternity, out almost every night. So, although I adored both of them, I never would have imagined them dating, let alone married for 3 years now.


It's been over 10 years since we've known each other, and it's amazing to see how we've grown, matured, and yet still remain the same. How this unlikely grouping continues to thrive despite, or perhaps because of our differences.

The pairing of peas and carrots is not nearly as unusual, or uncommon. We're very used to it. Except when you stop to think about it, the two vegetables couldn't be more different. Carrots, a root vegetable. grow underground. They're tough, hearty, and strong. Peas on the other hand grow barely suspended from a tendril. They are small and delicate. Even their vibrant hues are on opposite ends of the color spectrum. And yet, they just work together so well that the combination has become commonplace in households.

The easiest, and most common way to find this pairing is a simple chop and toss of the cooked vegetables. This carrot and pea custard is a little more unusual and a little more elegant. Served in slices like a pie it's both visually appealing and delicious - although that's not surprising given the ingredients. The beautiful colors make it a fine choice for both autumn and spring and it's perfect for a holiday meal.


Carrot and Pea Custard
2 1/2 cups cooked carrots
3 sprigs thyme, chopped
3 Tbsp melted butter
2 eggs, beaten
1 TBSP flour
1 cup milk
1/2 tsp salt
1/4 tsp ground pepper
1/2 cup cooked peas
  1. Preheat oven to 350. Spray a casserole dish with baking spray. Mash the carrots until mostly smooth. Some chunks are okay.
  2. Mix all the ingredients but the peas in a bowl and stir until thoroughly combined.
  3. Spoon into the casserole. Place the casserole dish in a shallow pan of hot water and bake for 45 minutes.
  4. Press down the center of the carrots with the back of the spoon to create a depression. Fill the depression with the peas.