Pages

Showing posts with label A Homemade Life. Show all posts

Friday, November 06, 2015

A Homemade Life: Pickled Grapes with Cinnamon and Black Pepper


Saturday marked one of my favorite days of the year - Halloween!  And it;s so nice to have the holiday fall on a weekend.  We had a leisurely, relaxing day leading up to the main event, instead of trying to rush home from work and eat and change into costumes.

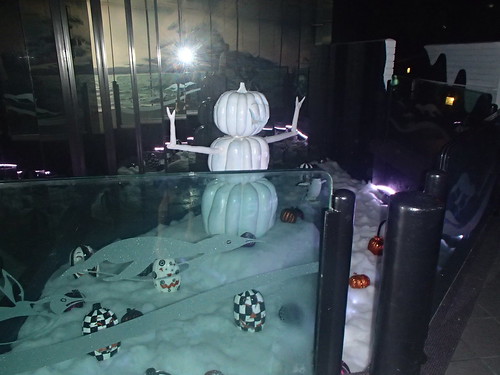
We got our Halloween decorations up the weekend before.


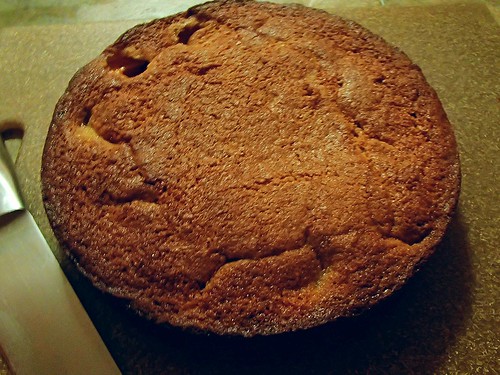
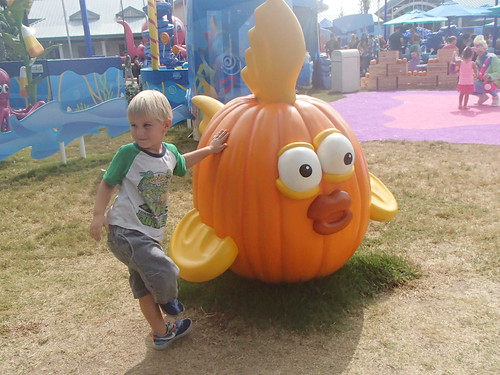
But Saturday found me finishing the last off our pumpkins. (I told you I was behind this year!)


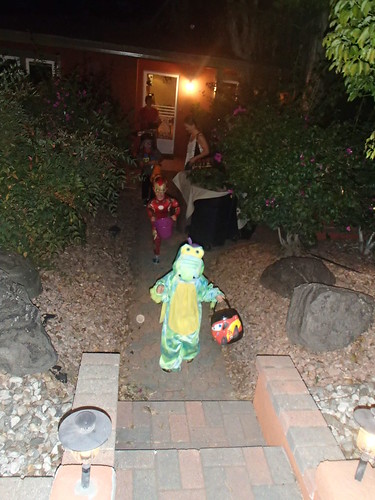
We got our first trick-or-treaters right before 6pm, so we all hurried to get dressed and ready, and get the night started!


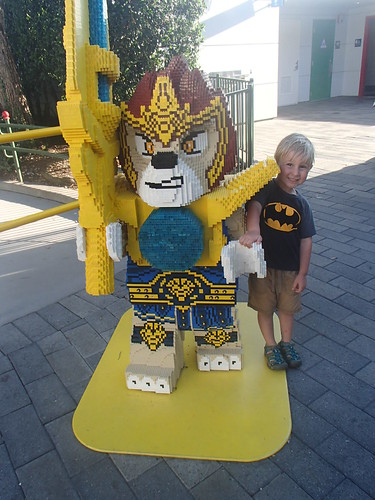
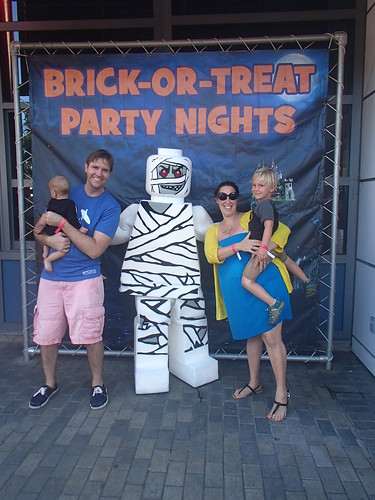
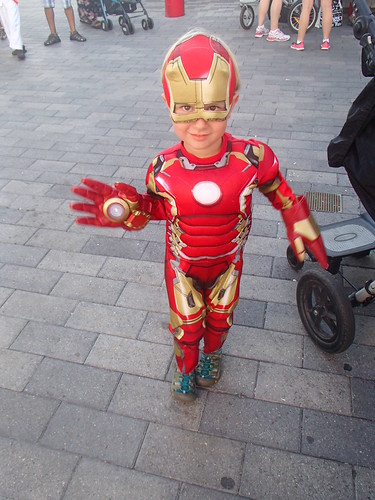
After a number of different costume choices, Thatkid finally decided on Ironman earlier this month.  We decided to go off of his idea and wear costumes that stuck with this theme.


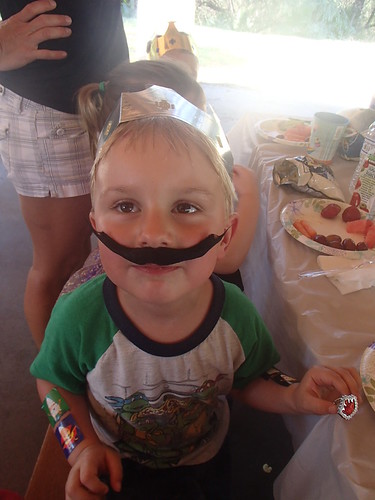
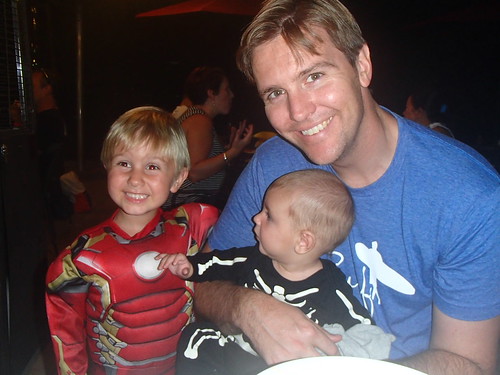
I thought it would be fun for Thatboy to dress as Nick Fury, and he loved the idea.  But then he couldn't get his bald cap to work so well, and he forgot his eye patch.  Personally, I think he looks like Daddy Warbucks.

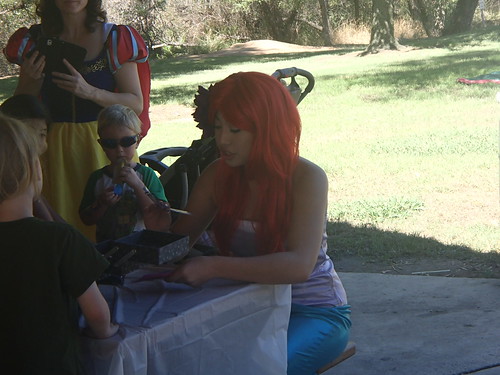
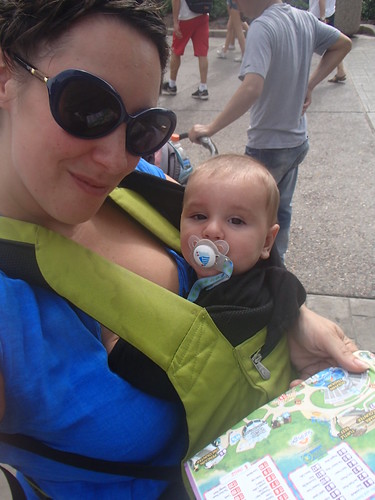
As for Thatbaby and I, Thatkid thought he should be Ironman also, but I took it a different direction.  Since costumes are hard for babies, I figured a simple onesie would be easiest, and dressed him as Iron Man's alter ego - Tony Stark.  Since I'd be "assisting" him all night, I went as Stark's assistant, Pepper Potts.


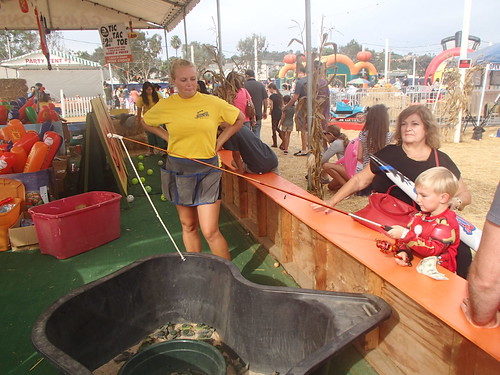
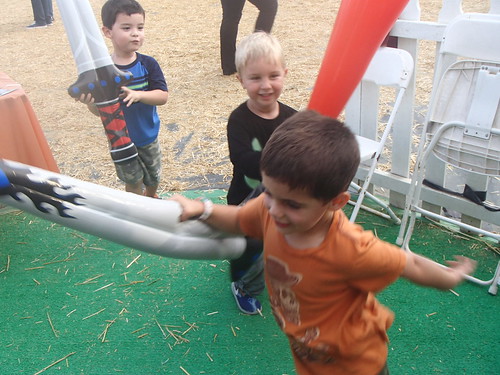
Thatkid has trick or treating DOWN this year.  It warmed my heart to hear him tell every house "Happy Halloween" following his "thank you" after his receipt of candy.


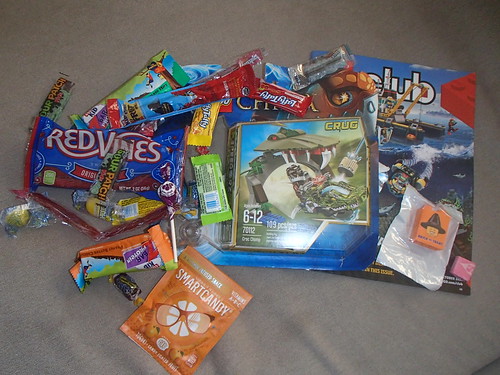
We don't have a ton of houses who participate in trick or treating in my neighborhood - I think due to too many years of inactivity on the part of trick or treaters.  In fact, we saw twice as many other trick-or-treaters this year as opposed to last year, so I think it's starting to pick up.  Which means the houses that do hand out candy are very, very, generous.  Full sized candy bars and the request for Thatkid to take multiple handfuls of candy.


His bucket was filled to the brim!

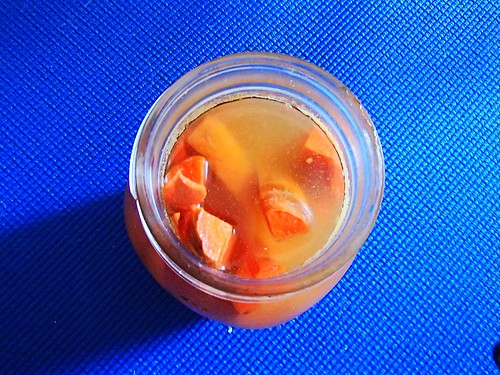
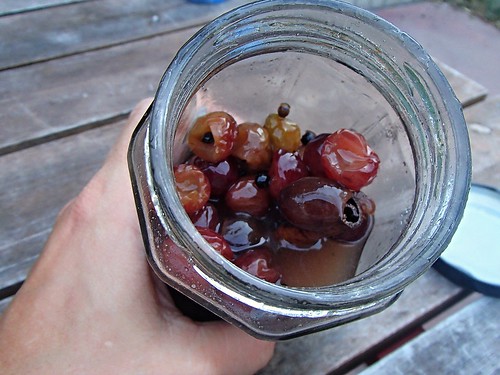
I'm very meh about candy this year.  Which is odd, since nursing usually gives me a sweet tooth.  And in a way I do have a sweet tooth, it's just not geared toward chocolate.  I'm having major fruit cravings as of late.  Which is a shame since this is a terrible time for most fruits.  With the exception of apples, pears, and grapes.  And of the three, grapes are my vice of choice since they're the sweetest.  I love them plain, I love them frozen, and this recipe for pickled grapes is a very interesting alternative.  I was hesitant about trying it, but these suckers are addictive.  They have that easy  quality that all grapes have, where you just throw one after another in your mouth.  And they combine sweetness, spice, and sour vinegar.  I'm always a fan of complementary flavors, so that mix works for me!

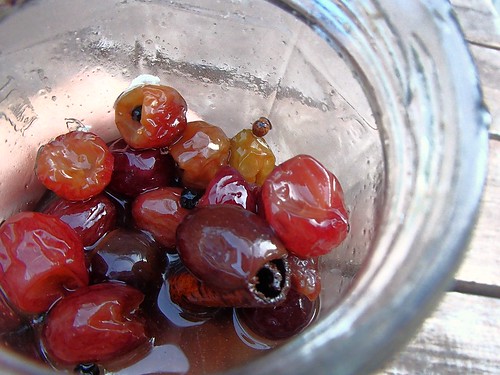
Pickled Grapes with Cinnamon and Black Pepper (From A Homemade Life)
1lb seedless grapes
1 cup white wine vinegar
1 cup sugar
1 1/2 tsp brown mustard seeds
1 tsp whole black peppercorns
1 cinnamon stick
1/4 tsp salt

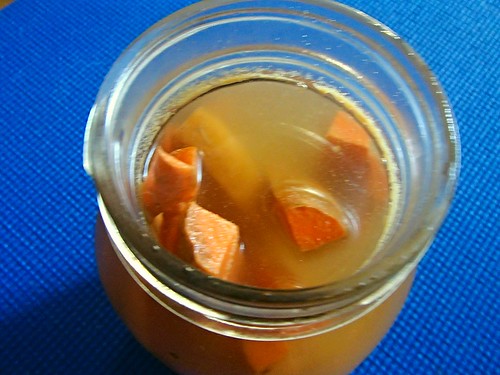
  1. Rinse and dry the grapes, and pull them carefully from their stems.  Using a small, sharp knife, trim away the "belly button" at the stem end of the grape, exposing a bit of the flesh inside.  Put the grapes into a medium bowl and set aside.
  2. In a medium saucepan, combine the remaining ingredients.  Bring to a boil over medium high heat, then pour the mixture over the grapes.  Stir to combine.  Set aside to cool to room temperature.
  3. While the grapes cool, wash 2 pint sized canning jars and their lids in warm soapy water.  When the grapes are cool, ladle them into the jars.  Chill for at least 8 hours or overnight.  Serve cold.

Friday, October 30, 2015

A Homemade Life: Spicy Pickled Carrots with Garlic and Thyme

One more day till Halloween!  And I still feel woefully behind.  Thatboy and I have big plans to carve pumpkins tonight, possibly the latest we have ever carved pumpkins!  But there just hasn't been time between birthday parties, trial, my mother-in-law visiting, adventures in Legoland and Seaworld.  It has been quite the busy month!

Pumpkins aside, we have been doing quite a bit of Halloween activities.  Including listening to Halloween music in the car, and watrhing a Halloween movie every night. We have fully indoctrinated Thatkid into loving the holiday as much as we do.  Perhaps moreso, since he's the one getting the candy, 

And of course, we've been to the pumpkin patch not once, but twice this year!  BA had his birthday party at the pumpkin patch again this year, which is always so much fun for the kids.


 I do love the fact that although we try to get together during the rest of the year, during October these kids see each other almost every week.  And it's always like they were never parted.

The pumpkin patch we go to for pumpkins is very traditional, and we love that about it.  But this patch is all about fun and games.  Thatkid had his first attempt at a carnival game!  And he did pretty well!


And there was plenty of room for these guys to run around trying to kill each other with inflatable toys.

And lots of rides to ride.  Together.  Which is so much more fun than going on rides with mom and dad.


BA's birthday parties always help us get into the Halloween spirit.  I am so ready for tomorrow!  The weather is even cooperating, as it cooled down yesterday a bit, with grey moody skies that just seem right.  I'm still trying to figure out what we're going to have for dinner, given that I can't remember the last time Halloween fell on a weekend and we weren't scrambling to eat before trick-or-treating.  I always think spicy seems right for a spooky holiday, and that means these carrots may play a starring role in tomorrow night's dinner.  I love pickled vegetables, and carrots have that same crunch that cucmbers get when you pickle them - a very satisfying mouthfeel.  These are also the perfect amount of heat.  You feel the burn, but it dissipates within minutes.  They are totally and completely addictive.  A true "trick" and then "treat."


Spicy Pickled Carrots with Garlic and Thyme (From a Homemade Life)
 2 cups apple cider vinegar, plus more for topping jars
2 cups water, plus more for topping jars
1/4 cup granulated sugar
6 sprigs fresh thyme
5 large cloves garlic, thinly sliced
1 1/2 tsp black peppercorns, cracked
1 1/2 tsp red pepper flakes
Heaping 1 1/2 tsp salt
Heaping 2 tsps brown mustard seeds
1 1/2 lbs small carrots
  1. In a medium saucepan, combine 1 1/2 cups apple cider vinegar, water, sugar, thyme, garlic, black peppercorns, red pepper flakes, salt, and mustard seeds.  Bring to a boil over medium high heat, then reduce to a simmer and cook, stirring occasionally for 10 minutes.
  2. Remove the pan from the heat, and let cool for 5 minutes.  Stir in the remaining 1/2 cup vinegar.
  3. Put the carrots in a large, heatproof bowl, and pour the warm brine over them.  Cool to room temperature.
  4. While the carrots cool, wash 2 quart sized canning jars and their lids in warm soapy water.  When the carrots and brine are cool, distribute the carrots evenly among jars.
  5. Using a ladle, divide the brine evenly among the jars, completely covering the carrots with brine.  Seal and refrigerate for at least 3 days.

Happy Halloween everyone!

Thursday, October 29, 2015

A Homemade Life: Vanilla Black Pepper Ice Cream


October 2011 was THE month to have babies.  I noticed that when we first enrolled Thatkid in daycare there were 4 others in his class born within those few weeks. 

When he started at his new school, he made some more friends with October 2011 birthdays.  Which of course means our already full October weekends have gotten even more full!  This past weekend we had a birthday party on Saturday AND Sunday.

Saturday was a princess party.  Because while 3 year old boys love super heroes, 3 year old girls love princesses.

This particular girl loves Ariel.    Who happened to show up at the party.


While the little girls stood in awe of the mermaid, singing with her and adoring her, the boys were a little....unsure of how to react.


Luckily there was a table of goodies which kept the boys occupied.


Because dressing up isn't just for girls.


Because we had the race, we had to leave the party early.  I can only ask you to imagine the abject sadness expressed by Thatkid when he realized we were leaving before having any cake.  Poor kid.  I feel for him.  I mean, it's really not a birthday without cake, right?

Ice cream isn't a fair substitute, but it will have to do.  Especially since we're still dealing with summer heat around these parts.  The parents huddled under the shelter at the party, watching the kids play on the playground and commenting that it is far too hot for October. 

Vanilla gets a bad rap as far as flavors go, but in a lot of ways it's more complex than chocolate.  Done right, vanilla has intricacies and depth.  Paired with black pepper in this recipe helps to heighten the sweetness.  I know that sounds weird, because how can pepper make something sweeter?  That's the beauty of contrast.  Just like how these hot summer days inevitably will make the winter weather feel even colder - if that weather ever comes.


Vanilla-Black Pepper Ice Cream (From A Homemade Life)
1 cup whole milk
2 cups heavy cream
3/4 cup granulated sugar
pinch of salt
6 large egg yolks
1 tsp vanilla extract
1 1/2 tsp finely ground black pepper

  1. In a heavy medium saucepan, combine the milk, 1 cup of the cream, sugar, and salt.  Warm over medium heat, stirring occasionally, until hot and steaming.
  2. Meanwhile, pour remaining 1 cup cream into a large bowl and fill it about a third full with ice cubes.
  3. Add about 1 cup of cold water, so the ice cubes float.
  4. When the milk mixture is hot, remove it from the heat.  
  5. Let it sit for 30 seconds, then gradually, slowly pour about half into the yolks, whisking constantly.
  6. Pour the warmed egg mixture back into the saucepan with the milk mixture.  Cook over medium low heat, stirring and scraping the bottom of the pan slowly and constantly with a heatproof spatula, until the custard thickens enough to very lightly coat the spatula.
  7. Immediately pour the custard through the strainer, and stir well to combine with cream.  Place the bowl carefully in the ice bath.  Let cool, stirring occasionally.  Then remove the bowl from the ice bath, cover it with plastic wrap, and chill it completely.
  8. When you're ready to churn the ice cream, stir in the vanilla and the black pepper.
  9. Pour the custard into your ice cream maker and freeze according to the manufacturers instructions.  Transfer the finished ice cream to a container with a lid and put in the freezer to harden  for at least 2 hours.

Friday, October 23, 2015

A Homemade Life: Pistacho Cake with Honeyed Apricots


Happy Friday y'all!  There is never a week I'm not thankful for Friday, but some weeks I'm more thankful than others.  Like this week.

This week I've had 7 hour long meetings, long days in court, and looming deadlines to take care of.  On top of all of that, my mother in law has been in town. 

Nerves are pretty frayed over here right now.  And fuses are short.  Nothing that a nice relaxing weekend couldn't cure, but there will be no relaxing weekends around here.  It is, after all, October.  Which means we have 2 birthday parties, a race, and....my mother in law is still here.

Since inserting a straw into a bottle of tequila isn't socially acceptable, I vote we bury ourselves in cake.  Nothing too fancy, because the last thing I've got time for now is perfecting layers and fussy frosting.  Just some sweet apricots, made sweeter with honey, in a pistachio base.  And tonight?  We're going out for dinner!


Pistachio Cake with Honeyed Apricots (From A Homemade Life)
3/4 shelled raw pistacios
1 cup flour
2 tsp baking pwoder
1/4 tsp ground nutmeg
1/4 tsp salt
1/2 cup milk
1/4 tsp vanilla extract
1 stick unsalted butter, at room temperature
1 cup sugar
3 large eggs
5 ripe apricots, halved and pitted
1 Tbsp honey

  1. Preheat the oven to 350.  Butter a 9-inch round cake pan, and line the bottom with a round of parchment paper.  Butter the paper, then dust the pan lightly with flour.  In the bowl of a food processor, pulse the pistachios until very finely ground.  
  2. Add the flour, baking powder, nutmeg, and salt, and pulse once or twice to mix.
  3. In a measuring cup, combine the milk and vanilla.
  4. In a large bowl, beat the butter and sugar until pale and fluffy.
  5. Add the eggs one at a time, beating well after each addition.
  6. Add the flour mixture in three batches, alternating with the milk, mixing at low speed to just combine.  Pour the batter into the cake pan, and shake the pan a bit to ensure that the batter is evenly spread.
  7. Arrange the apricots cut side up on a cutting board or countertop.  
  8. Using the tip of your finger, smear a blob of honey into the center of each, dividing it evenly among the ten halves.  Gently arrange them cut side up on top of the batter.
  9. Slide the cake into the oven, and bake 35-40 minutes.  Cool the cake in the pan on a rack for 10 minutes, then run a thin knife around the edge and release the sides of the pan. Continue to cool the cake until ready to serve.

Thursday, October 22, 2015

A Homemade Life: Zucchini Noodles with Pesto

By now y'all know I'm a sucker for a Halloween event.  So when I saw Sea World was doing a Halloween Spooktacular, I knew we had to attend.  Especially after the fun we had at Legoland.

The only problem was, I had to work pretty much all weekend.  So I decided that instead of an evening affair, we would take advantage of the fact that the event started at 11am so I could get a couple hours in before heading to work.

The park was decorated for the Spooktacular, with a special area dedicated to Halloween costumed characters, a dance floor, and Halloween activities.


But it wasn't just limited to this area, there were fun Halloween decorations everywhere!


Even the animal exhibits were all decked out for the holiday.


And throughout SeaWorld were little trick-or-treat stations where they would hand out candy to the kids.


I'm not sure if it was because of how over-the-top Legoland was, but I was a little disappointed by this event.  There were so few kids in costume that Thatkid asked to take his off fairly soon after we got in. 

And while Thatkid was happy with all the candy, I was a little spoiled by the mixture of candy and some healthier snacks we had picked up the week before.

But I did enjoy spending time with my boys.


And in order to hit up all the treat stands, we ended up seeing parts of SeaWorld we'd never ventured to before.  And meeting new animal friends.


I spent the rest of the weekend working, not coming home until late at night, leaving the boys to fend for themselves.  To an extent.  Because when I'm gone, I try to leave food that's easy for Thatboy to heat up and serve, and something I know Thatkid will gobble down.  Like pasta.  Most places are probably at the end of basil season, but since it's been so warm here, I can still pick it up easily.  For the rest of the world, pesto is one of those things that freezes beautifully.  I like to freeze it in ice cube trays so I can defrost just what I need!

"Zoodles" or zucchini noodles are all the range these days with fancy schmancy spiralizers being marketed everywhere you turn.  I actually prefer these easy mandoline version, mixed with spaghetti instead of an alternative to spaghetti.  It adds some great veggies into the meal while keeping the satisfying bite of al dente pasta.

Zucchini Noodles with Pesto (From A Homemade Life)
2 cups tightly packed basil leaves, washed and dried well
1/2 cup olive oil
3 Tbsp pine nuts
2 medium cloves garlic, minced
1/2 tsp salt
1/2 cup Parmigiano-Reggiano
3 medium zucchini, trimmed
3 Tbsp olive oil
3/4 lb dried spaghetti
salt
finely grated Parmigiano-Reggiano for serving
  1. Put the basil leaves in a large heavy-duty ziplock plastic bag.  Press all the air from the bag, and seal it carefully.  Put the bag on the countertop and using a rolling pin, pound the bag until all the leaves are bruised.
  2. Put the pounded basil, olive oil, pin nuts, garlic, and salt in the bowl of  a food processor. Process to a smooth, creamy consistency,.  Transfer the mixture to a medium bowl.
  3. Stir in the Parmigiano-Reggiano.
  4. Put a large pot of salted water over high heat.  While the water heats, prepare the zucchini.  Using a mandoline slicer  fitted with the julienne blade, carefully slice the zucchini into long, skinny noodles, each the width of a strand of spaghetti.
  5. Warm the oil in a large skillet over medium heat.  Add the zucchini "noodles" and cook, stirring occasionally, until tender but not mushy, 5 to 8 minutes.
  6. When the pot of water boils, drop in the spaghetti.  Cook until al dente.  Using a pair of long--handled tongs, scoop the pasta directly from the pot into the skillet of cooked zucchini.Add 1/2 cup of the pesto and toss the mixture well to ensure that each noodle has a thin, even coat of sauce.
  7. Serve immediately with additional salt and lots of grated Parmigiano-Reggiano.


Friday, October 16, 2015

A Homemade Life: Caramelized Cauliflower with Salsa Verde

On October 1 I filled in our monthly calendar.  It was ridiculous.  There was an activity planned for every weekend day this month, with the exception of October 11.  The sole free day of the entire month.  Which meant that was the day we were going to the pumpkin patch!

Nevermind that it was 100 degrees on Sunday.  We ventured out, despite the very unseasonable weather. 


I don't think we've ever gone this early in the season, which meant we had lots of pumpkins to choose from.


Thatkid really pushed him limit with the "you can only take what you can carry" rule."


And after Thatboy decided he wanted multiple pumpkins (because he couldn't choose just one), Thatkid managed to finagle getting more than his allotted "one pumpkin per person."


I had imagined loads of cute pictures of Thatbaby's first pumpkin patch experience, much like we had of his older brother, but it was too hot for the pumpkin beanie we had.  And Thatbaby slept for most of our time there.  He woke up at the end and I managed to get a couple shots in.


Yeah, 100 degrees and Thatkid insisted on wearing a long sleeved shirt, because it had a pumpkin on it.  He obviously gets it from me.  Because I insist on unseasonable things too.  Like this cauliflower.  No one in their right mind cooks things at 450 when it is 100 degrees outside.  Good thing I never claimed to be in my right mind.  It just seems like such a perfect fall side-dish.  In general I think of salsas as being very summery, but certain salsas scream "FALL!"  (Like the harvest salsa at Trader Joes right now - LOVE).  Salsa verde is one of those salsas.  Maybe it's the lack of tomatoes?  Roasting vegetables is very fall for me, so the two combined seem like they should be perfect for this time of year.  Now if only the weather would cooperate.

Caramelized Cauliflower with Salsa Verde (From A Homemade Life)
1 jalapeno, ribs and seeds removed, finely chopped
3 Tbsp finely chopped cilantro leaves
2 medium cloves garlic, minced with a pinch of salt
3 Tbsp fresh lime juice
6-7 Tbsp olive oil
salt to taste
1 cauliflower

  1. In a medium bowl combine the jalapeno, cilantro, garlic, lime juice, and 4 Tbsp olive oil and whisk to combine.
  2. Add 2 pinches of salt and whisk well.
  3. Set aside at room temperature for at least 30 minutes, and up to an hour.
  4. Preheat oven to 450.  Wash and dry the cauliflower well.  Put it on a cutting board, stem side down, and slice it vertically, top down, into 1/4 inch slices.
  5. Put the cauliflower in a large bowl and toss with 2 Tbsp olive oil.
  6. Spread cauliflower in a single layer on a heavy sheet pan.  Salt lightly.
  7. Bake 20-30 minutes, turning once with a spatula.  Salt lightly again.
  8. Serve hot or warm with salsa verde on the side for drizzling.

Thursday, October 15, 2015

A Homemade Life: Frisee with Ham, Eggs, and Mustard Vinaigrette


Now that Thatkid's birthday is over, we are in full-on Halloween mode 'round these parts!  So far Thatkid loves the holiday as much as we do.  He's been wearing his Pumpkin shirt from last year for weeks now.

This year we're really getting our money's worth out of Thatkid's Halloween costume.  We started this weekend by taking him to Brick-or-Treat at Legoland.

During weekends in October, Legoland hosts an after-hours Halloween event where the park stays open and there are all sorts of Halloween activities.  Pirate's Shore, with it's water themed rides is closed during the event, so we showed up early to make sure we got those rides in. 


Temperatures were in the 90s and 100s this weekend, so we had no problem with getting soaked.  And we got soaked.  We tag-teamed rides, trading off who stayed with the baby.  Thatboy and Thatkid went on the squirt everyone ride, and Thatkid and I went on the water flume ride.


One of Thatkid's shows he watches lately is Legends of Chima, so he was pretty stoked to see "his friend."


He also was pretty stoked to see some lego characters for photo ops.  Although he went back to his old habit of wanting to take a picture right until we got to the front of the line where he flipped out and wanted to be far away from the character.  Apparently it just takes him a little time to warm up, because by the end of picture taking he was much more comfortable with interacting with Mr. Mummy.


Seeing the characters come out, and the trick or treat stations starting, we decided it was time to "suit up."  The park filled up with costumed kids and families.

Other than the costumed characters, there were other photo opportunities set up all over the park.


And loads of trick or treat stations.  Kids were given a bag and the various stations handed out candy, juice, magazines, and legos.


Since the park remained open, we could also hit up some rides.


Thatkid also decided he wanted to enter the costume contest.  He was phenomenal.  He didn't want to go up on the stage by himself, but once we got up there I hung back while the MC interviewed him about his superhero abilities. 


He walked away with a pretty good haul!  The highlight for him was the Legends of Chima lego set they gave.

As the candy has already started rolling in, we have to balance with good, healthy choices for the other food we're putting in our body.  At Thatkid's 4 year appointment earlier this week, his doctor asked if he was eating all his fruits and vegetables.  I'm lucky that the answer to that is yes.  Thatkid is a fan of both.  He'll even eat salads from time to time.  Although he is most apt to pick his favorite ingredients out.  In this case it was the egg and ham.  But I can't really fault him, we all have salad favorites, and whether you eat them first, or save them for the last bites, chances are you divide up your salad too.

Bonus points for this salad because it has few ingredients, making it easy to throw together. 


Frisee with Ham, Eggs, and Mustard Vinaigrette (From A Homemade Life)
2 eggs
1 medium head frisee
2/3 cup cubed cooked ham
2 Tbsp Dijon mustard
1 Tbsp plus 2 tsp red wine vinegar
3 Tbsp olive oil
  1. Hard boil the eggs.
  2. While the eggs cook, remove any bruised leaves from the frisee and trim away and discard the stem end.  Separate the leaves and tear long leaves in half.
  3. Place the leaves in the basket of a salad spinner.  Place the basket inside its bowl, and fill it with cold water. Swish the leaves around a bit, and then let soak for a minute or two.  Pull the basket from the bowl, replace the basket, and spin until the leaves are dry.  Place in a serving dish.
  4. When the eggs are ready, place in an ice bath.  When they are cool, crack their shells and peel them.  Coarsely chop them, and add them to the frisee along with the ham.
  5. In a small bowl, whisk together the mustard and vinegar. 
  6. Add the oil and whisk well to emulsify.  Drizzle a large spoonful or two over the frisee, and toss well.  Taste and add more dressing as needed.