Pages

Thursday, February 28, 2013

Carnivale!: Penne with Kale, Carmelized Onions, and Parsnips


Jewish holidays definitely come in seasons.  In the fall it's Rosh Hashannah, Yom Kippur, Sukkot, Simchat Torah, one right after another. In the spring we have Purim leading into Passover. 

Right now we've started rolling into our spring holidays.  Saturday was Purim - which is our festival holiday.  I love the story of Purim, with a smart and beautiful heroine saving the Jewish people.  The holiday celebrates this with feasting, games, and costumes.

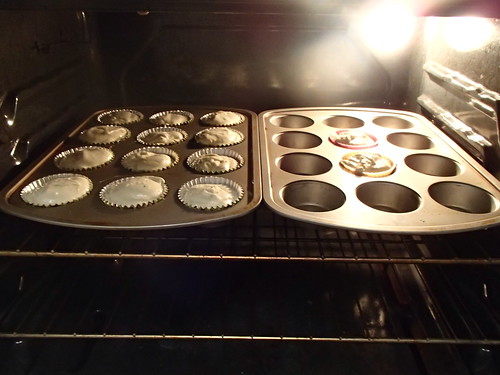
Thatbaby's school hosts a Purim Carnival for all the students.  They bring in a petting zoo, have music and games, and all the kids dress up in costumes. 

Thatbaby was no exception.


When Thatboy picked him up from school, Thatbaby's teachers had great stories to tell.  Thatbaby stole the show with his little mask and headband.  When he arrived at the carnival, he climbed out of the wagon they use to haul the kids around and began dancing to the music in his costume.  There's video I've been told, and I'm anxiously awaiting it.  He loved the petting zoo, and the ride-on horse toys.

The traditional food associated with Purim (because there is always a food associated with Jewish holidays) is the hamantaschen - a three-cornered cookie in the shape of Haman's hat.  I didn't make hamantaschen this year, but I think that in the future it will be something that I share with Thatbaby.  He's going to love it!

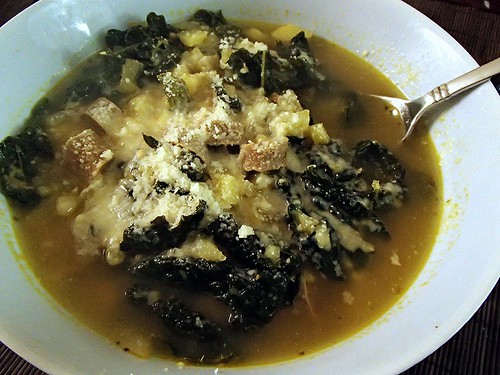
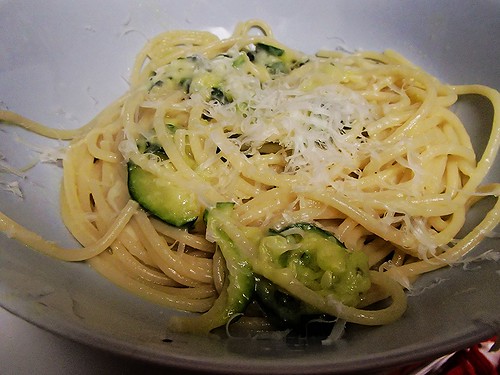
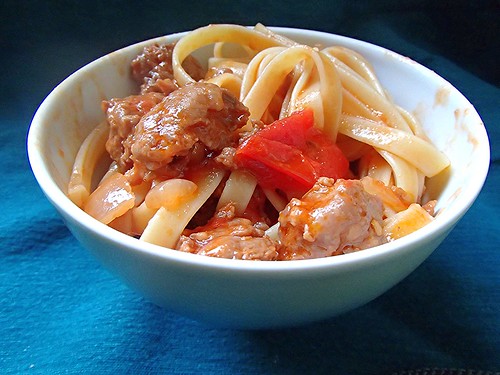
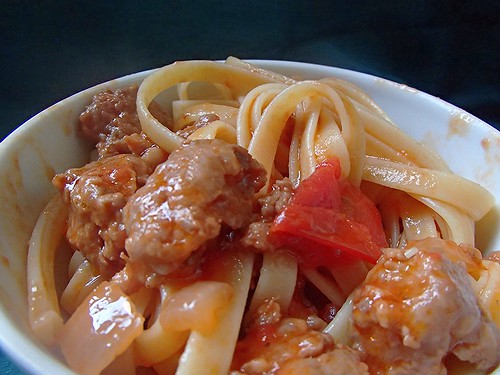
Instead here's a dish as colorful as the Purim holiday.  A pasta with leafy greens and root vegetables.  So seasonally appropriate. Sweet and easy, a nice change from marinara, meat or lemon sauce.


Pasta with Black Kale, Caramelized Onions and Parsnips (From Eats Well With Others)
2 Tbsp olive oil, divided
1 lb parsnips, sliced diagonally
2 1/2 cups sliced onion
1 Tbsp chopped fresh thyme
4 garlic cloves, chopped
1/2 cup red wine
3 bunches kale, trimmed and chopped
1/2 cup vegetable broth
12 oz uncooked penne pasta
1/2 cup grated parmesan cheese, divided
1/2 tsp salt
1/2 tsp ground black pepper
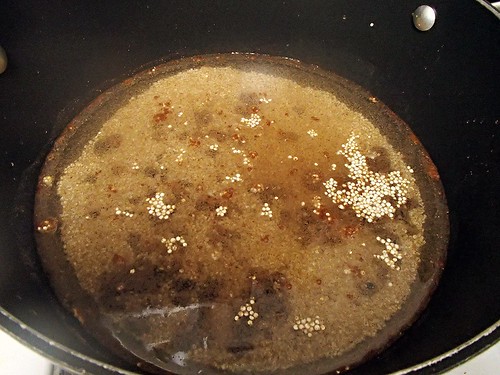
  1. Heat half of the oil in a pan over medium-high heat.  Add the parsnips and cook about 12 minutes, until tender and browned.  Set aside.
  2. Add the remaining olive oil to the skillet and lower heat.  Add the onion and cook until the onion is carmelized, about 20 minutes.  
  3. Stir in the thyme and garlic.  Cook until fragrant, about 30 seconds.
  4. Add the wine and cook for about 3 minutes.
  5. Stir in the kale and broth.  Cover and cook for 5 minutes until the kale is wilted and tender.  Uncover and cook for an additional 5 minutes.
  6. Cook the pasta according to the package directions. Drain the pasta, reserving 3/4 cup of the pasta water. 
  7. Add the drained pasta, parsnips, 1/2 cup of the pasta water, and half of the parmesean to the kale mixture. Cook for 1 minute or until heated through.  
  8. Season with salt and pepper and add more of the pasta water as necessary.  Top with remaining cheese and serve.

Wednesday, February 27, 2013

When a plan goes oh so wrong: Chocolate Chip Cake


Excuse my absence for this past week.  I took a brief hiatus last week, which was the 4th anniversary of Thatdad's death.  I went up to spend the afternoon/evening with Thatmom, Thatbrother, and UDubb. 

There's an interesting paradox when dealing with death and the passage of time.  At once it feels like an instant and an eternity since Thatdad was giving me a hard time, offering advice, or answering useless trivia questions. This past year without him has felt the most "normal" so far.  Probably because I've been a little preoccupied with the other men in my life. 

And I've also been beyond busy with work.  Which has kept me preoccupied, but also made my blogging break a little longer than I was anticipating.  Which means I am just now able to share with you my special Valentine's Day treat I brought in for my coworkers.

Have you ever had a happy accident?  Like the guy who dropped a ball of peanut butter in a vat of chocolate?  That's what happened with me and this cake.  My plan was simple enough - a chocolate chip cake with a carmel-y frosting. 

Except (you knew there was going to be an except, right?) something went wrong with my candy thermometer.  You see, I've been doing a lot of boiled frostings since Thatboy complained that a lot of my frosting tastes like "confectioner sugar."  I love boiled frostings and they're pretty easy to make- if you have a candy thermometer and can take the sugar off the heat when it hits the soft ball stage.

And my candy thermometer died while making this frosting.  Which meant it must have gone past soft ball stage to hard as a rock stage.  The stage where frosting is less spreading it on to the cake and more trying not to rip the cake to shreds.

The weird thing is - this turned into something incredibly delicious.  Thatboy thinks it was one of the best things I've made in a while.  My coworkers loved the "toffee" topping.  So I guess the moral of this story is that even a disaster can be a success.

Chocolate Chip Cake with Caramel Frosting
1 1/2 cups flour
2 tsp baking powder
1/2 tsp salt
1/2 cup sugar
1 stick butter, melted
1/2 cup milk
1 egg
1 cup chocolate chips
2 cups dark brown sugar
3/4 cup heavy cream
1/4 cup raisins
1/3 cup chopped walnuts

  1. Preheat the oven to 400.  Spray an 8x8 pan with baking spray.  Mix the flour, baking powder, salt, and sugar in a large bowl.
  2. Mix the butter, milk, and egg in a separate bowl.
  3. Add the dry ingredients to the wet ingredients and stir, just until combined.  
  4. Stir in the chocolate chips.  Pour into the pan and bake for 25 minutes.  Cool in pan for 5 minutes, then turn out to a rack and cool completely before frosting.
  5. Mix the brown sugar and cream in a heavy bottomed an and boil without stirring until the mixture reaches 234 degrees.
  6. Let cool, then mix until creamy.  Stir in raisins and walnuts and frost the cake.

Tuesday, February 19, 2013

What is Love: The Best Macaroni and Cheese Ever


Valentine's Day was low-key this year, but it was still enjoyable.  We didn't do much in the morning, except give Thatbaby his Valentine's Day gift.  We wanted him to have time to play with it and we knew he wouldn't after daycare.

Why wouldn't he after daycare?  Because we were headed out to dinner! 
We don't do dinner out often, but we both love it.  It's just better for our waistlines and wallets when we eat at home.  And don't get me wrong, I enjoy cooking.  It's a fantastic way to unwind after the day.

And so were the beautiful roses Thatboy brought me home last Thursday!

But it's nice to have someone else cook and do the dishes.  So we headed to our favorite neighborhood restaurant.  A place where the waitstaff dotes on Thatbaby.  And yet, with it's dim lighting and a view of the water, it still has elements of romance.

We exchanged cards and gifts -  how adorable is my new wallet?

And we sat and enjoyed each others' company and delicious food.  Thatbaby has been delightful at restaurants lately which makes things so much easier for us.

I may not have cooked for Valentine's Day, but that doesn't mean I don't have a new food love.  I read about this in last month's Bon Apetit and the idea was so ingenious, I don't know why I hadn't thought of it myself.  The recommendation was to make macaroni and cheese, saving a step by not boiling the noodles first.  I already do this with lasagna - the sauce cooks the noodles while it bakes.  So it makes perfect sense to do this with macaroni and cheese.

First of all, this is my new favorite way to make macaroni and cheese.  Second of all, this is my new favorite macaroni and cheese recipe.  It is so incredibly good.  I promise it's better than anything you've ever had.  It's better than anything I've ever had!  The noodles come out perfectly - tender with some bite.  There are loads of crunchy cheesy "edges" along the top, one of the best parts of mac and cheese.  And the sauce?  It's simple and basic - not a cheese sauce, but a sauce tossed with the noodles and cheese.  And something about that make it so much better.  Now THAT'S amore
.
No-Boil Macaroni and Cheese (From Bon Apetit)
1/2 cup butter, divided
1/4 cup flour
3 cups milk
1 Tbsp kosher salt
1/2 tsp black pepper
1 pound elbow macaroni
2 cups shredded cheddar, divided
2 garlic cloves, chopped
1 cup panko

1.     Preheat oven to 400. Melt 1/4 cup butter in a large saucepan over medium-high heat.
2.     Whisk in the flour, whisking constantly, for 1 minute, until a bubbly paste forms.
3.     Whisk in milk and 3 cups water. Bring to a boil, reduce heat to a simmer, and cook, whisking often, until a very thin, glossy sauce forms, about 10 minutes.
4.     Stir in salt and pepper. Remove sauce from heat.
5.    Toss pasta and 1 1/2 cups cheese in a large baking dish. Pour sauce over, submerging pasta.  Cover and bake about 20 minutes.
6.    Melt remaining 1/4 cup butter in a large skillet over medium heat. Add garlic and panko, toss to combine. Season with salt and pepper.
7.    Uncover the pasta and sprinkle with the remaining cheese and panko mixture.  Bake about 10 minutes longer, until top is golden brown. 

Monday, February 18, 2013

Mama Mondays: Extending a Good Thing

When I started breastfeeding, my initial goal was "until he grows teeth."  The thought of putting my nipple in a mouth with sharp pointies just wasn't appealing.
 
Thatbaby didn't get his first tooth until 10 months.  At that point, I seemed too close to the "finish line" of 12 months to stop.  And I was lucky to not have a biter. 

Part of it was my own stubborn pride.  I worked REALLY hard to breastfeed for those first 10 months.  Being a working mom and breastfeeding is much harder than being home and being able to feed on demand.  Pumping sucks.  Pumping at work sucks even more - taking up every "free moment" I had (no going out to lunch, no working out during the work day, and having to stop in the middle of a workflow because I needed to pump.)  And I was one of the "lucky" ones whose kid ate more than she pumped during the workday.  Which meant I got to add in pumping sessions at home, on the weekend, in the middle of the night, just to keep up with him.  With all that hard work, I just couldn't throw in the towel with 2 short months in front of me.

And then 12 months rolled around all too quickly.  October.  The start of flu season.  And I just wasn't ready to quit yet.  There were so many benefits to "extending" breastfeeding:

* The added immunity - so far (knock on wood), Thatbaby has managed to not catch the RSV that went around his daycare as well as the out-all-week sicknesses that have plagued many of his classmates.  And with the flu season rolling around, I feel good about giving him a little something extra to fight it off.

* The added healing - Thatbaby has been sick this year, but it's been very minor and seems to pass quickly.  When his coughing wakes him up in the middle of the night, I nurse him.  And his doctor has noted that probably helps the illness pass faster.

* The nutrition - I don't believe in "picky babies" at this age.  I think they all go through phases.  Phases where they eat a ton, phases where they hardly eat.  Phases where they don't eat vegetables, phases where they only eat fruit.  This is especially true during times of teething.  I don't have to worry how much (or little) Thatbaby eats, because I know he's getting the nutrients he needs in my breastmilk.

* The added sleep!  Thatbaby sleeps through the night now, usually waking between 5 and 6:00.  However, I nurse him at that time, and he knocks right back to sleep.  On the weekends, we usually get to sleep till almost 7:30!  Which is such a blessing.  Because my friends that don't nurse?  They're up long before 6am.

So at 12 months, I stopped pumping, but kept up with breastfeeding.  I dropped one pumping session a week until I wasn't pumping any more - which was perfect in terms of "weaning" since I never had any engorgement, clogged ducts, mastitis or other painful weaning symptoms.  At first, it seemed like Thatbaby nursed more than before. He was nursing almost every time we were together.  And still getting breastmilk at daycare - I had enough in my freezer to last him till he was 13 months.

At 13 months, I started sending cow's milk in to daycare for him.  But he was still nursing at home. 

And now, at 16 months, he nurses twice a day - first thing in the morning, and right before bed.  Of course, when he wakes up in pain - from teething or illness, I nurse him then too.  And this "night nursing" is strongly encouraged by Thatbaby's doctor.

Nursing for over a year isn't exactly common, but it has given me a wealth of knowledge - so please feel free to shoot any breastfeeding questions my way and I'll do the best to answer based on my experience.

At this point, I plan to start weaning in April, after flu season - stay tuned for those adventures!!!!!

Friday, February 15, 2013

Messy Play: Tri-Tip Enchiladas


On Sunday we headed back to the New Children's Museum for another afternoon of fun.  This time we tried more of the hands on activities.  There was drawing with chalk, stamping Valentines, coloring with colored pencils, and molding clay into...well, Thatbaby is obsessed with balls, so that's what we made.  Lots and lots of clay balls.

The only thing Thatbaby wasn't interested in, was painting.  Vehemently shaking his head no, backing away from the paint area, and clinging to me as though the paint might contain live venomous snakes.

I guess this isn't too surprising, considering that lately Thatbaby has been a little particular about messy hands.  He now requires a napkin with meals, so that he can wipe his hands and mouth.  And yet, at the same time, he apparently plays with slime at daycare and still mostly prefers eating with his hands to a fork.

Especially with enchiladas.  Which might be due to the fact that he likes to pick out his favorite part - the black beans.  No matter what else I put in an enchilada, there must always be black beans.  But that doesn't mean we always eat vegetarian enchiladas.  I love Trader Joe's tri-tip, premarinated and ready to go.  All I have to do is cook it and we have meals for days.  It shreds so beautifully, it works well for any "steak" type dish.  This week alone we've had tri-tip quesadillas and tri-tip enchiladas.

 Tri-Tip Enchiladas
 1 lb tri-tip, cooked and shredded
8oz tomatillo salsa
1 can tomato sauce
1 cup shredded colby jack
1 can of black beans, drained and rinsed
1 can diced green chiles
1 pkg flour tortillas
  1. Preheat the oven to 350. Combine the salsa and tomato sauce in a saucepan over medium heat.  Cook until heated through. 
  2. Reserve 1 cup of the sauce, and stir the tri-tip into the remaining sauce.
  3. Stir in 1/4 cup of cheese.
  4. In a small pan, heat the black beans.
  5. Place just enough sauce in a baking pan to coat the bottom of the dish.
  6. Heat the tortillas in your favorite way.  In the center of each tortilla, place some of the tri-tip, black beans, cheese and chiles.  Roll the tortillas up and place seam side down in the baking dish.
  7. Pour the remaining sauce on top and any remaining cheese and chiles.  Cover with foil and bake for 15 minutes.

Thursday, February 14, 2013

Happy Valentine's Day!


It's that time of year again!  The time of year when I remind you not only love those around you, but let them know how important they are - you know, Valentine's Day!

When you think about it, we should all view holidays from a child's perspective - the magic of Christmas, the fun of Halloween, and the innocence of Valentine's Day.  As we get older, our views change, the holidays twist, but why should they?

When you're in elementary school, Valentine's Day meant a card from all your classmates.  No romantic intentions involved.  It was a way of saying "hey - we're friends and I'm thinking of you!"  At some point, we stop saying things like that to our friends.  Especially in this day and age of facebook and texting.  We barely speak to our friends, let alone tell them how important they are.  I'm a huge proponent of changing that, and Valentine's Day is a great reminder to squeeze it in.

This is Thatbaby's first time to experience Valentine's Day in a school-setting, albeit daycare.  Which to me meant Valentine's for his little friends.  I didn't want to send in any chocolate, goldfish, or anything food related because with 16 month olds, I'm not really sure what their parents deem appropriate for them to eat.  I know Thatboy and I ate the Valentine's Day chocolate that was given to Thatbaby.  Instead, I sent in something that was age appropriate, colorful, and fun - crayons!  But not just any crayons - heart shaped crayons.  So holiday appropriate.  The magic of pinterest led me to a craft I could accomplish in a short time.

First, you chop up a box of crayons.  I used about 28 crayons for my project, which made 14 heart crayons.


Then, you place the chopped crayons in a silicone baking mold sprayed with cooking spray.  You can be as creative as you want here.  Use all colors in the same family, only two colors, every color you can.  I put all the chopped crayons in a bowl and just grabbed handfuls.


Bake the crayons at 275 until they're melted.  It took me about 10 minutes.  When I pulled them from the oven, I did a quick swirl with a toothpick in the melted crayons.  Wait until they're completely cool and pop them out of the mold.


I attached them to a little card, and voila - Thatbaby's first Valentine's ready to go!


Wednesday, February 13, 2013

Toddler Party: Salad with Beets and Blue Cheese


Saturday night we had dinner with the Pirates and the Horse Whispers.  Dinner was held at the Pirate's abode, and it was especially toddler friendly.  Thatbaby headed straight for Little Pirate's cars, and Little HW joined in as soon as she arrived.   It wasn't long before the three of them were running around the home and diving into piles of foam blocks.

Mrs. Pirate, being the genius that she is, set out a special "toddler appetizer" station, which became Thatbaby's home base, which allowed the men to hang out and drink beer, while that women hung out and drank wine.  She served the perfect dinner for children and adults alike - bbq chicken sandwiches, macaroni and cheese, sweet potato fries and tater tots - and a salad filled with leafy greens, clementines, and beets.

I love beets in salads, and Mrs. Pirate's salad reminded me that I haven't thrown beets in my salad in a very long time.  It was about time we rectified that.  I love beets and blue cheese together.  Something about the sharpness of the beets with the tanginess of the cheese.  As with any good salad, I also threw in whatever vegetables were in my fridge at the time.  

 Salad with Beets and Blue Cheese
2 cups mixed spring greens
1 can of hearts of palm, sliced
1 red bell pepper, sliced
1 pint of cherry tomatoes, halved
3 beets, roasted and quartered
4 oz blue cheese crumbles
1/4 cup balsalmic vinaigrette
  1. Toss together the greens, hearts of palm, bell pepper, tomatoes, beets, and blue cheese.
  2. Dress with the salad dressing and serve.

Tuesday, February 12, 2013

Indian in Pajamas: Chicken Tikka Masala

I love Indian food.  It's one of my favorite types of food.  Thatboy and I were talking about it, and the last time we went out for Indian was when I was heavily pregnant.   That was a very long time ago.  How did we go this long?

Probably because I placed an in-home boycott on our local Indian restaurant and our other favorites are all the way downtown - a place we rarely venture for dinner due to timing, traffic, and a 32 inch troublemaker.

And in general, Indian food you make at home just doesn't compare.  Unless you're my friend Tesseract.  The Indian food she makes at home is delicious, thanks to family recipes passed down from her mother over the phone as she prepares them.

This is especially true of chicken tikka masala, one of my favorite dishes.  It's complicated and even the storebought variety rarely holds a candle to the kind you get at restaurants. 

But I decided to give this version a shot.  I trust Joelen implicitly.  She really knows what she's talking about.  So if she gave this recipe a good review, it must be good.

And you know what?  It is good.  REALLY good.  Thatbaby, who can be a little lukewarm on chicken gobbled it up.  I gobbled it up.  Thatboy gobbled it up.  And the best part of the whole thing?  We didn't have to go out anywhere for it.  Restaurant quality in our pajamas.

Now, does anyone have a recipe they love for saag paneer?

Chicken Tikka Masala (From What's Cooking Chicago)
Chicken Tikka:
1 tsp ground cumin
1 tsp garlic powder
1/2 tsp cayenne pepper
2 tsps table salt
4 large boneless, skinless chicken breasts
1 cup plain whole-milk yogurt
1 Tbsp vegetable oil
3 garlic cloves , minced
1 Tbsp grated fresh ginger

Masala Sauce:
2 - 3 Tbsp canola oil
1 onion , diced fine
2 garlic cloves , minced
2 tsps grated fresh ginger
1 Tbsp tomato paste
1 Tbsp garam masala
1 can crushed tomatoes
4 tsps sugar
1/2 tsp table salt
2/3 cup heavy cream
  1. Combine cumin, garlic powder, cayenne, and salt in small bowl. 
  2. Sprinkle both sides of the chicken with spice mixture. Place chicken in a baking dish, cover, and refrigerate 1 hour.
  3. In large bowl, whisk together yogurt, oil, garlic, and ginger. 
  4. Remove the chicken from the fridge and pour the yogurt over, tossing to coat.  Cover and refrigerate overnight. 
  5. Heat oil in saucepan over medium heat until shimmering. Add onion and cook until golden. 
  6. Add garlic, ginger, tomato paste, and garam masala. Cook, stirring frequently, until fragrant. 
  7. Add crushed tomatoes, sugar, and salt; bring to boil. Reduce heat cover, and simmer for 15 minutes, stirring occasionally. Allow the sauce to cool, cover, and refrigerate overnight.
  8. Heat chilled sauce in a large dutch oven over medium heat. 
  9. Stir in cream and return to simmer. Remove from heat and cover to keep warm.
  10. While sauce is simmering, heat broiler.  Place chicken on a lined baking sheet and broil 10-18 minutes flipping halfway through.
  11.  Let chicken rest for 5 minutes, and then cut into bite sized pieces and stir into the sauce.

Monday, February 11, 2013

Mommy Mondays: Sweet Little Sixteen

It's that time again - time for an update on what daily life is like with a 16 month old.  Or at least what my daily life is like!

6:28 am: Thatbaby wakes up for the day.  Which means Thatboy and wake up for the day.  Thatboy hops in the shower while I nurse Thatbaby.

6:42: Thatbaby hangs out with Thatboy while I take Thatdog and head for a run.  Ever since the early winter nights cut down on my running after works, I've returned to my old habits of running in the morning.

What my trail looks like on a foggy Monday morning
7:06: My turn to get ready!  I shower, blowdry my hair, and get dressed.  Around this time, Thatbaby starts asking for breakfast, so I put my getting ready on hold and we head to the kitchen.

7:38: Thatbaby helps me make breakfast.  This morning we have smoothies (frozen fruit and yogurt).  He likes to press the buttons on the blender.


And he LOVES to drink his smoothie.


8:09: We're done with breakfast and I head back to finish doing my hair and makeup.

8:22: I put up our laundry.  Mondays I do a load of whites.

8:25: Time for Thatbaby to get dressed so we can head out for the day.

8:34:  Leave for daycare/school!


9:02: I arrive at work.  Today is filled with going over a client's documents and preparing for one of the gagillion depositions I have this month.

12:00: lunch time!

chicken parmsean with saffron rice and roasted broccoli, apple slices, and a nutrigrain bar
3:49: Surprise visitor!  Thatboy had a dentist appointment and decided to surprise me with a caramel apple cider.


5:05: The workday is over!  I head home.  Normally I pick up Thatbaby from daycare, but because Thatboy had the dentist appointment, he picked up Thatbaby.  Which meant I got to enjoy a nice, long phone conversation with a friend.

5:18: Arrive home from work and give Thatdog a little walk.

5:30:  Make dinner!  It's soup night - sausage, potato, and kale to be exact.  While the soup cooks on the stove, I throw the whites in the dryer, make our lunches for the next day and wash all the dishes.

Grownups get sandwiches with spinach, cheese, hummus and pesto, banana, apples, a granola bar and goldfish crackers.  Babies just get the sandwich, apples, and banana.
 6:36:  Dinner Time!
 Sausage, Potato, and Kale Soup
1 Tbsp olive oil
1 onion, chopped
2 garlic cloves, minced
8 cups chicken broth
1lb Yukon gold potatoes, peeled and diced
1/4 tsp salt
1 1/2 tsp Italian seasoning
1/2 tsp chipotle chile powder
1 head of kale, ribs removed and chopped
6oz chicken sausage, sliced
grated Parmesan
  1. Heat oil in a large pot. Add the onion and cook until transluscent.  
  2. Add the garlic and cook until fragrant, just about another 30 seconds.  
  3. Add chicken broth, potatoes, salt, and Italian seasonings.  Bring to a boil and cook for about 20 minutes.
  4. Mash the potatoes into the broth with a fork (or a potato masher if you havev one - I don't). 
  5. Stir in the chile powder, kale, and sausage. Bring back to a boil, simmer and cook for another 10 minutes, or until the kale is tender. 
  6. Sprinkle with Parmesan before serving. 
6:57: I clean up the dinner plates and make cupcakes and frosting for Thatboy to bring in to work.


I also get breakfast ready for us for the next morning - overnight oatmeal!
Thatbaby is gaga for this stuff.  He put away 3 bowls the next morning

Thatboy does bedtime routine with Thatbaby: bath, pajamas, and storytime.


7:39: Bed time for babies!  I head in and give Thatbaby one last nursing session before bed and then put him to sleep.

 
8:01: I finish up with the cupcakes - frosting them and getting them ready to go.


8:26:  It's me time!  Thatboy's already on the couch, so I join him and we catch up on The Mentalist while I surf the internet and catch up on my blog.

9:30: We head to the bedroom.  Night y'all!

Friday, February 08, 2013

Summer in Feburary: Spaghetti con Zucchine Alla Nerano


Mother Nature sure pulled one over on us here in Southern California.  It's been so cold the past few days that everyone's complaining. Because we've forgotten it's still winter.  Because the past few weeks the weather has been warm and downright balmy!

Oh how quickly we forget.

It's always fun to get a warm spell in winter.  To head to the beach and remind yourself it's January.  Or to make a pasta dish that screams summer. A pasta dish with a light sauce (that doesn't involve lemon!)  A pasta dish with a great summer vegetable.  A pasta dish that, according to Thatboy tastes a million times better than it looks.  No matter how long we've been together, he still is hesitant when he sees a dish relying heavily on a green veggie.  Bu this was delicious enough for him to seek seconds.


Spaghetti con Zucchine alla Nerano (From More Than Burnt Toast)
1-1/2 pounds zucchini, sliced into 1/8-inch-thick rounds
salt
olive oil
1 pound spaghetti
2 - 4 cloves garlic, thinly sliced or minced
1/3 cup coarsely chopped fresh basil
black pepper
1/2 cup grated Provolone

  1. Put the sliced zucchini in a bowl and sprinkle with 1 teaspoon salt. Toss to coat.
  2. Heat 1/4 inch of olive oil in a pan and fry the zucchini until lightly colored.  Transfer the fried zucchini to a paper towel to drain, but reserve the oil.
  3. Cook pasta according to package directions. Right before the pasta is done, add half of the zucchini.  Drain pasta, but save 1 cup of the pasta water.
  4.  While pasta is cooking, add the garlic to the olive oil and cook for 30 seconds, until fragrant.
  5. Add basil and the other half of the zucchini to the oil and garlic.  Cook for another 30 seconds.
  6. Toss the sauce with the cooked pasta.  Add the cheese and toss, adding as much of the pasta water as necessary.

Thursday, February 07, 2013

Meat for My Men: Fettuccine with Sausage Ragu


My boss and I were heading home from a client meeting when he apologized for keeping me away from my family on the nights I work late.  In truth, I don't mind it when I know in advance, so I can plan meals for the boys.  And I told my boss as much.  We discussed the types of meals I usually leave for them, and a lot of times it's pasta. I confided that lately I've been doing a lot of lemon pasta, even though Thatboy doesn't like it, because it's a little different from the typical marinara.

My boss asked if I ever made meat sauce, and I realize that I don't. Since that time, I've started working some meat sauces into our menu.  Thatboy loves sauces with meat and it's a nice change for him! 

Sausage seems like a natural choice for a meat sauce.  Maybe that's because growing up we often had sausage with our pasta.  This is a great, easy, sausage sauce and it made enough for dinner and a couple of lunches!

Fettuccine with Sausage Ragu (as seen on Journey of an Italian Cook)
1 pound fettuccine
3 ounces dried porcini mushrooms
14 oz beef broth
3 tablespoons butter
1 cup chopped onion
1 pound sweet Italian sausage, casings removed
1/2 cup dry red wine
2 teaspoons tomato paste
1 28-ounce can San Marzano whole tomatoes, drained
 1/4 teaspoon nutmeg
1/4 cup milk 
  1. Cook the fettuccine according to package directions. 
  2. Soak the mushrooms in the beef broth for 30 minutes. 
  3. Melt the butter in a large skillet.  Add the onions and cook until transluscent.
  4. Add sausage and cook until browned.
  5. Add the wine, mushrooms and broth, tomato paste, and tomatoes.  Bring to a boil, then reduce heat and cook for an hour.
  6. Stir in the nutmeg and milk and simmer 10-15 minutes.
  7. Toss with the fettuccine and serve.

Wednesday, February 06, 2013

Super Snacks: Faux-Ritos


Our Superbowl traditions are probably our least healthy of the year.  To begin, it's one of the very few times we order pizza to be delivered to the house.

Secondly, Thatboy uses it as a time to indulge in soda and Doritos.  We really don't keep junkfood in the house.  Our freezer is completely devoid of ice cream.  There are no chips and cookies in the pantry.  And the only drink in our fridge is milk.

But for the Superbowl?  Well, it's an easy concession to make when it occurs once a year.   The only problem is Thatbaby is much more aware this year than last year.  And he wants whatever we have.  And while I am more than willing to make a concession for Thatboy, I don't think my young son needs Doritos and soda, even once a year.

So I got it into my head to try and make my own Doritos - so I could control the ingredients.  It sounded easy enough, all I had to do was make tortilla chips and coat them with a cheese powder.  I just had to figure out how to make cheese powder from real cheddar cheese.

Luckily someone responded to my query on a message board and pointed me in the right direction.

  1. Preheat your oven to 200.  Spread about 2 cups of shredded cheddar cheese on a cookie sheet.  Bake for 1 hour, then blot with a paper towel and bake for another 2 hours.

2.   When it's done you'll have a nice, hard, cheese crisp


3. Break up the cheese crisp and pulverize it to a powder in your food processor or coffee grinder.


4. Raise the heat of the oven to 350.  Cut up some corn tortillas into eighths.  Place them on a baking sheet and spray with cooking spray. (If you're not serving these to your toddler, sprinkle with salt) Bake for 10-15 minutes.


5. Remove the chips from the oven and place in a brown paper bag with the cheese powder.  Shake to evenly coat the chips.  (You can also add some other spices like chili powder, cumin, whatever you'd like!)


So Thatboy had his Doritos and rootbeer, and Thatbaby had some coconut water and Faux-ritos.


And the verdict?


Well, to be honest, most of the chips were dumped on the couch or fed to Thatdog, but at least he showed no interest in the Doritos!

Tuesday, February 05, 2013

It's Electric: Date Muffins


Thatboy is not a runner.  When he was just a crazy kid he tore apart his knee skating.  After surgery he never went to physical therapy and so to this day...well, let's just say he's a good person to know during a zombie attack, because you'll definitely be able to run faster and longer, leaving him behind for the hoardes.

So usually his participation in races is limited to cheering from the sidelines.  And he does a fantastic job of that.  He's participated in a couple of runs with me if we go in a group that's walking, or if I walk with him.

When I got an email about The Electric Run, I knew it would be one Thatboy would be interested in.  A night race, filled with glowing, neon, and blacklights.  Music, night, and lights, Thatboy has been calling it The Rave Run for weeks.

It took us FOR-EVER to get to the race.  We live 6 miles from the course, and it took us almost an hour and a half to get in.  And then there was another hour waiting as each wave was let on to the course.  By the time we got to the start line we were all kind of in foul moods.  Luckily the course perked us right up.


We were all decked out in our glowing apparel - even Thatbaby!


In addition to glow wands, sticks, bracelets, necklaces, and glasses we also had fun with light up LED accessories.


Thatbaby loved looking around and taking it all in.


A lot of these kind of races have weird mascots (like the creepy Unicorn at the Color Run).  The Mascot for the Electric Run is "Stick Man."


There were different "zones" throughout the course that played with various aspects of light.  I loved this shadow area that changed different colors.  I kept trying to get a good picture of the shadows, but ended up with a pretty cool picture of Thatboy instead.


Unfortunately because it took us so long to get started, Thatbaby fell asleep shortly after the race started and slept the whooooooole way through.


There were giant tubes to run through that lit up and changed colors.


And they made a very big deal about the upside-down parasols.  Actually there was quite a bit about the course that was a little "Alice in Wonderland."


Like the glowing orbs in trees.


Which made for an excellent photo opportunity.


And Thatboy loved the warehouse - he had been hoping we'd get to go through it as soon as he saw those giant balls in the window.


And we also got to go through two different tunnels that were lit with black lights or flashing lights.


And the finish line was glittered with disco balls!


The race was tons of fun - even if Thatbaby did miss out on it.  Thatboy and I had a great time, but paid for it the next morning. We felt like kids again, but we can't really be kids again.  Because after a late night filled with lights and music, we couldn't sleep in like we were used to.  Thatbaby was up and at 'em at his normal early hour.

Thank goodness I didn't have to worry about breakfast!  If you're trying to keep a toddler entertained so you don't have to get out of bed, then it is best to keep muffins at the ready.  These date muffins are one of Thatbaby's favorites.  I love dates instead of raisins and apparently my son has followed suit.


These were inspired by the date cake I had made earlier, but in muffin form they are far more convenient.  And I was pretty glad I had these handy.  Because Thatboy and I?  We are getting old my friends.

Date Muffins
1 tsp baking soda
1 cup dates, chopped
1 Tbsp butter
1 cup sugar
1/2 tsp salt
2 eggs
1 cup flour
  1. Preheat oven to 325.  Line a muffin pan with cupcake liners.  Mix 1 cup of boiling water with baking soda and dates.  Let cool.
  2. Combine butter, sugar, salt, eggs, and flour in an electric mixer.
  3. Add the cooled date mixture and beat until well blended.  Fill each muffin cup 2/3 full and bake for 45 minutes.