Pages

Wednesday, July 31, 2019

Lavender Love: Honey Lavender Plum Ice Cream


Last year I attended a yoga retreat at Keys Creek Lavender Fields and it was amazing.  So when I heard that Saerin was going to be doing it again, I was very interested.

But life is busy, and it was the day before Thatbaby (and therefore my) birthday and I kept putting off signing up.  

This has been a really rough year for me mentally and emotionally and Thatboy really encouraged me to sign up and make the time for myself, to center and regroup.  And so, I got up early the morning of the retreat, made a batch of cupcakes to frost when I got home, and headed out to the lavender farm.


I had a much harder time focusing this year and didn't find the same sense of peace as last year, but that was definitely on me.  Sometimes we're wound so tight, it takes a lot more to loosen the knots. The scenery remained beautiful, the weather was perfect, and Saerin is a fantastic instructor.  Her yoga is very woman-centered, aiming for the parts of the body that affect us the most, and positions that listen to how our bodies work.


There was a lovely lunch laid out for us after the yoga, and then it was time for our tour of the farm.

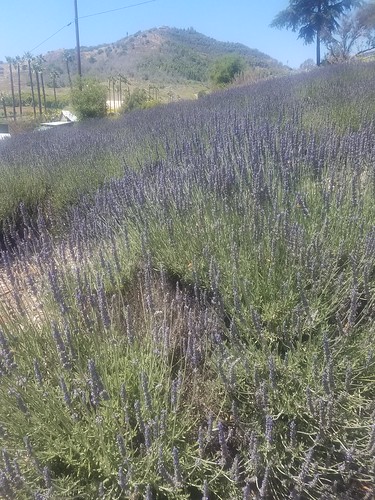
Last year the retreat was at the end of June, and most of the lavender was already harvested or at the end of the season.  This year, in early June, we got to see all the different varieties that grow at the farm.  What was most intriguing for me were the varieties that weren't the typical lavender color you expect.

Like the Spanish Lavender - which is a really vibrant shade of pink.


Sweet Lavender was up and down the hillside.  This is a pretty familiar variety to most of us.


French Lavender - which is the typical variety you might find growing in...my backyard...and front yard.

Pukehou Lavender, a New Zealand Variety which is bright purple.


Winter Bee Lavender, which is short and round, like a little bumblebee.


And Yellow Lavender, which is, well, yellow.  It also has a less flowery smell.  More citrusy, or herbal.  I really liked it.


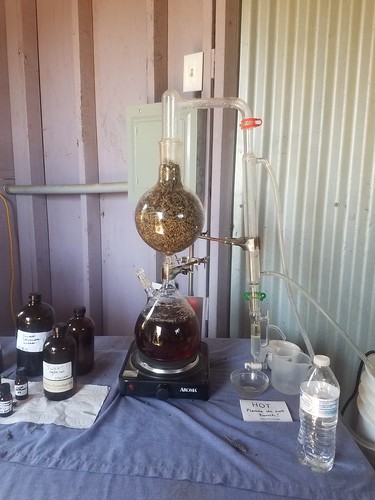
We also got to see the distillery in action.  This little baby converts those lavender flowers into lavender oil.


As we took the tour, our knowledgeable tour guide grabbed cuttings from many of the different varieties and passed them out.  After the tour, we spent the rest of the afternoon poolside, wrapping the cuttings to make lavender bundles.


Even if the retreat wasn't the reset that I was hoping it would be, it was a welcome break from the day to day.   And the setting never fails to make me happy. In an attempt to recreate it, I've been trying to use more lavender in my day to day life.  I made a littlelavender spray that I've been using on our pillows and the kids pillows, as well as for those pesky mosquito bites we've been getting.  Did you know lavender oil stops the itching?  I brought home some lavender sleep balm.  And of course, using lavender in drinks and desserts.  After having some amazing Salt and Straw lavender ice cream last year, I knew I wanted to attempt to make my own.  But right now, I just can't bring myself to make ice cream without fruit in it.  It's Summer for goodness sakes!  My initial plan was lavender ice cream, swirled with a blueberry syrup.  But Thatkid suggested plums instead.  Goodness knows we have no shortage of plums.  We eat them like crazy!

Although Thatkid is the one who made the plum suggestion, he actually was not a fan of this ice cream.  I get it, it's kind of a grown up flavor.  The overwhelming flavor is honey.  Not surprising given that it's in both the base and the plum syrup.  But the lavender adds a nice floral taste, which is I think where we lost the kids.  The plums?  Well they aren't necessary and you're welcome to skip them, but like I said, we're plum crazy over here and I really like what they bring to the dish.

Honey Lavender Plum Ice Cream
2 cups milk
1/4 cup lavender
1/2 cup honey (divided)
5 egg yolks
1/4 cup sugar
1 cup heavy cream
3 plums, peeled, pitted, and chopped
1 Tbsp water

  1. Combine milk, lavender, and 1/3 cup of honey in a medium saucepan over medium heat.  Heat until almost boiling, then cover and remove from heat.  
  2. Let sit for 5 minutes.  Strain the mixture through a mesh sieve, reserving the milk and discarding the solids.
  3.  Beat egg yolks and sugar in an electric mixer on medium high speed until pale and creamy.
  4. Add half of the milk to the egg yolks and whisk until blended.
  5. Add remaining milk and then pour the entire egg/milk mixture back into the saucepan and cook over low heat, stirring constantly, until thick enough to coat the back of a spoon.
  6.  Remove from heat and stir in cream.
  7. Strain again through the sieve and into a bowl set into an ice-water bath.  Let cool completely.  (or place in refrigerator until cold)
  8. Place cold milk mixture into an ice cream maker and process according to instructions.
  9. While the ice cream is processing, combing the plums, water, and remaining honey in a small saucepan over medium heat.  Cook until the plums fall apart, stirring occasionally to keep the plums from burning.   Let cool for 5 minutes.
  10.  Once the ice cream has reached a semi-solid state (think the consistency of soft serve) pour the plum syrup into the ice cream maker.  Continue to process the ice cream until it reaches the desired consistency. 


Wednesday, July 24, 2019

Summer Theater Fun: Peach and cherry ice cream


We started the summer theater season a little early this year, while the boys were still in school, because that's when Charlie and the Chocolate Factory came to town. 


And to really fit with the theme, we took the boys to Sugar Factory before hand and loaded them up with their very own version of the chocolate factory - milkshakes loaded with chocolate and candy.


The very next night we went to see our own little performer.  His very first play, he entertained us all with his stunning performance as Big Bertha Lee in the first grade's production of "The Three Nanny Goats Gruff."


Thatboy and I also took in some shows of our own - at our neighborhood theater as well as heading out to see Puffs in it's first California production.


There's no summer theater without hitting our favorite outdoor venues for picnics and musicals.  This summer we saw Matilda, which was phenomenal.


And we saw Wizard of Oz, which is always a favorite in our house.


And when I found out that a local children's theater was doing James and the Giant Peach?  Well we hit that up too. 


Which was the inspiration for this peach ice cream.  Well that and the fact that I bought these amazing smelling peaches, that tasted only "alright."  It was disappointing.  But alright peaches are great for baked goods, which was my plan.  Until Thatkid suggested ice cream instead.  And those cherries?  They're more than alright.  So they had to go in too.  Stone fruits all go together so well.  

Peach and Cherry Ice Cream
2 eggs
1 cup sugar
1/4 tsp salt
2 cups heavy cream
2 cups half and half
2 peaches, peeled and diced
1 cup cherries, pitted and chopped
  1.  Combined eggs, sugar, salt, cream and half and half in a saucepan over medium low heat.   Use a candy thermometer and cook until the mixture is 160 degrees.
  2. Remove from the heat and stir in the peaches and cherries.  Cover and refrigerate overnight.
  3. Pour the cold mixture into an ice cream maker and freeze according to your maker.

Wednesday, July 17, 2019

Blueberry Picking: Blueberry Pie


If you're a long time reader of the blog you know that we love fruit picking around here.  If you're a new reader of the blog,  Hi!  We love to pick fruit!

Blueberry season started a little later here than usual, but the payoff was incredible.  It lasted for a long long time.  Which gave us enough time to head to the blueberry farm, a month later than we usually do.


The thing that I really like about blueberry picking is that it's the easiest one for the kids to do.  There aren't any thorns like blackberries, and there's no twisting and pulling like strawberries.  


The berries literally just roll right off into your hands.


It's also really easy for the kids to figure out which berries are ripe - dark blue berries only!  Don't pick them if they're purple, red, or green.  


It wasn't long before we had buckets of berries.


The other thing I like about blueberries, is that they last a very short time in our house.  The kids devoured a pint before we even left the farm.  And then the remaining pints were gone so quickly I almost didn't have time to make anything with them.  I had to commandeer enough to make this pie.  Because berry pie is a necessity in the summer.  Don't you think?  And it really doesn't get any easier than blueberry pie.  No cooking the berries, no parbaking the crust.  Really it's a dump and bake kind of dish, which is what you want on those hot days.  We brought this over to a friend's house for dinner and there were no leftovers.  Out of berries.  Out of pie.  That's a successful berry picking adventure.

Blueberry Pie
4 cups blueberries
3/4 cup sugar
5 Tbsp flour
1/4 tsp salt
1 Tbsp butter
  1. Preheat oven to 450.  Roll out half of the pie dough and line the pie pan with it.
  2. Combine blueberries, sugar, flour, and salt.  
  3. Place berries in the pie pan.
  4. Dot the berries with butter.
  5. Roll out the remaining half of the dough and place over the berries, crimping the bottom and top edges together.  Cut slits in the top dough for steam.  
  6. Sprinkle the top pastry with sugar and bake for 15 minutes.
  7. Lower the heat to 350 and bake for an additional 15-30 minutes, until golden brown.  Cool on a rack before serving.


Wednesday, July 10, 2019

Mother's Day Adventures: Tortilla Snacks


I registered Thatkid and I for the Minions race, not even realizing that it was Mother's Day weekend.  Which meant I got to spend my Mother's Day away from home.

We headed up to Universal Studios on Friday night and after picking up our bibs at Universal City Walk, we stayed for dinner.


After the race, Thatkid and I went back to the car to change into regular clothes and met up with Thatboy and Thatbaby, who had taken the shuttle from our hotel to the park.  

We got discounted tickets to the park with our race entry, and they also included an early admission.  So we headed right in to the Wizarding World of Harry Potter.


This was HUGE for Thatkid, who is reading the series right now.  He loves everything Harry Potter.  And getting early admission meant that we could walk right on to rides and attractions.  Our first stop was Olivander's, to pick out wands.  Or rather, to have wands pick you.  

At Olivander's Wand Shop, you enter in a small group and one person is picked to have a wand fitting with Mr. Olivander.  I researched and found some tips on how to get picked and passed them along to Thatkid.  It worked!


Getting to have his wand specially picked for him was a really special moment for him, and definitely played into the magic which surrounded the attraction.  He had to try several different wands until finally, he found the right wand. "Aha," said the wizard, "I think this wand was waiting for you."

After the show, we moved into the general store so Thatbaby could pick out a wand too.  All day he kept whispering to me - "Mom, I think this wand was waiting for me."

They tested out their wands all over Hogsmede, and then, as the park opened and it started to get crowded, we grabbed a butterbeer and headed out to explore the rest of the park.


I had talked to a friend before we went about what was kid friendly at Universal Studios, and she told me it was really hard.  They definitely aim at an older audience.  Even cuddled between Thatboy and I, Thatbaby was not a fan of the Studios Tour, with dinosaur attacks, floods, and car chases.  It was too scary for him.


After the tour, I knew he was getting a little tired.  This, friends, is why we bring the stroller with us to theme parks, even though we hate lugging it around.  


Stick him in the stroller and he's out.  Thatkid was the same way.  And this is especially helpful at theme parks, because naptime is the perfect time for Thatkid and Thatboy to tackle the bigger scarier rides.

And when he woke up, I had him already parked and ready to play in the most kid-friendly portion of the park.


After a couple more rides we headed back to Hogsmede to grab dinner at the Three Broomsticks.  We closed the park down and then headed back to the room where Thatkid and I collapsed after our especially long day.

The next morning, we packed up and headed down to Anaheim.


As you can see, Thatkid was in a bit of a mood.


Thatbaby, however, was living it up.


So why the stop in Anaheim?  Well, I decided to take control of Mother's Day a bit.  I decided I wanted to go to the House of Blues Gospel Brunch, and the House of Blues in Anaheim is much closer to Thatmom than the one in San Diego.  And since we were already in Los Angeles, it didn't seem like it would be difficult to stop in Orange County on the way home.

And so we met up with Thatmom so we could celebrate Mother's Day together.


Thatmom was a little wary of what the brunch was going to be like, but it was wonderful and we both really enjoyed the food and the entertainment.  We were up on our feet, dancing.


And then we parted ways and we headed home.  We headed out for Mexican for dinner that night because the best way to top off Mother's Day is with a margarita.  Which my kids have figured out.  When Thatkid had to fill out his "all about mom" sheet at school he wrote that my favorite food is "Mexican."  Which isn't true.  Anyone who knows me, knows that my favorite food is popcorn.   But Mexican food is one of the few cuisines I never tire of.  And I do love margaritas.  And how easy it is to interpret Mexican cuisine in your old home.   Like these little tortilla snacks.  Everything is pre-prepared so it's just a matter of heating and stacking.  They make a great afterschool snack, but they're also filling enough for a dinner if you have a couple.

Tortilla Snacks
small tortillas (around here we get the "street taco" size)
1 can refried beans
1 rotisserie chicken, shredded
salsa
  1. Heat the tortillas over an open flame until crisp. 
  2. Heat refried beans in a saucepan until they're bubbling.
  3. Heat shredded chicken until warm.
  4. Top each tortilla with refried beans, chicken, and a spoonful of salsa.