Pages

Friday, May 29, 2015

A Homemade Life: Rum Cream Pie with Graham Cracker Crust


Our second party of the weekend was a Memorial Day potluck at the home of the HorseWhisperers.  Our entrance had never been so well received.  The rest of the guests were HW's classmates she recently graduated with.  Mr. HW was thrilled to see Thatboy and Little HW had been eagerly awaiting a peer of her own.


The two of them ran off to create all sorts of trouble.  While the Mr. HW and Thatboy retired outside to drink beer and play guitar.   I sat around with the college kids feeling instantly old.  But in reality it was the perfect audience for a rum pie.  Because there's nothing a recent college graduate likes better than alcohol.  In fact, we had come just late enough to miss the shots of Hypnotiq.

They were uber appreciative of this pie with it's creamy consistency and strong rum flavor.    Within moments of slicing it, it was completely gone.

Rum Cream Pie with Graham Cracker Crust (From A Homemade Life)
9 graham crackers broken coarsely into pieces
2 Tbsp sugar
5 Tbsp melted butter
1/4 cup cold water
1 1/4 tsp gelatin
1 cup heavy cream
3 egg yolks
1/2 cup granulated sugar
2 Tbsp dark rum
  1. Preheat oven to 325.  Process the graham crackers in a food processor until they are very fine.
  2. Add the 2 Tbsp sugar and pulse to combine.
  3. With the motor running, slowly add the melted butter and process until the mixture resembles wet sand.  Scrape the mixture into a 9 or 9 1/2 inch pie plate and press along the bottom and up the sides.  Bake for 15 minutes.  Let cool completely.
  4. Pour the cold water into a small microwaveable bowl.
  5. Sprinkle the gelatin over the water.  Set aside to soften for a few minutes.
  6. Pour the cream into the bowl of an electric mixer.
  7. In a separate bowl beat the egg yolks until they are pale yellow.
  8. Add the 1/2 cup of sugar to the eggs and whisk until thick.
  9. Microwave the gelatin for 20 seconds and then pour into the egg mixture.
  10. Whip the cream to soft peaks with the whisk attachment to the mixer. 
  11. Gently stir the whip cream into the egg mixture.
  12. Add the rum.  Chill until it starts to set. Scrape into the prepared crust.  Chill 4-6 hours.
  13. Top with chopped pistachios and bittersweet chocolate.

Thursday, May 28, 2015

A Homemade Life: Dried Fruit Pie

So far my biggest complaint about A Homemade Life is that it is very dessert heavy.  Don't get me wrong, I adore dessert, but making one every night means my house is full of more sweets than we can handle.  So when I noticed that a chapter had not one, but two pie recipes in it, I felt like last weekend, when we had two parties to go to, was the perfect excuse to make them.  That way I could bring them to parties and everyone could enjoy them, instead of Thatboy and I trying to finish two pies by ourselves.

The first party of the weekend was a barbeque held in our honor.


It was so unbelievably beyond perfect.  You see, we didn't really want a shower - and we have everything we need for Oppo-baby.  But this wasn't a shower, it was a family party!  You see, the hosts of the party were Lexus's parents.  And the guests were the families of Thatkid's old daycare friends.  Our little group.  It was a like a playdate for the kids and parents!

The youngest members of the group, the round 2s are still babes in arms.  Thatkid and his friends tore around the house, playing pirates, monsters, and dig-in-the-mud.


Meanwhile the grownups, got a chance to catch up and chat with each other.  And we got loads of good advice about adding a second into our brood.  I really am so very thankful for Thatkid's experience in daycare/preschool and the wonderful people we've met through there.  Both the sweet kids and their wonderful parents.

It only seemed right to share this pie with them.  Dried fruit may not be a common filling, but right now I feel like I'm making loads of things with dried fruit.  I have dried fruit dishes in my freezer, fridge, and on my counter right now.  As I was commenting to Thatboy earlier, there's something about it that makes you feel like you're eating something healthy, even when there is the addition of chocolate, sugar, or other unhealthy ingredients.


Dried Fruit Pie (From A Homemade Life)
1/2 cup ice water
1 1/2 tsp apple cider vinegar
3 cups flour
2 Tbsp sugar
1 1/2 tsp salt
2 1/2 sticks cold butter, cut into cubes
2 cups pitted prunes, coarsley chopped
2 cups dried apricots, coarsely chopped
1 cup golden raisins
1/2 cup dried apples, coarsely chopped
3/4 cup sugar
1 stick unsalted butter, melted
1/2 cup walnuts, chopped
1 egg
  1. In a measuring cup combine the ice water and the cider vinegar.
  2. Combine the flour, sugar, and salt in a food processor and pulse to blend.
  3. Add the 2 1/2 sticks of cold butter and pulse until the mixture resembles coarse meal.
  4. With the motor running, slowly add the water-vinegar mixture and process just until moist clumps form.
  5. Turn the dough out onto a wooden board or clean countertop and gather it until it just holds together.  Shape into a ball, cut in half, and press each half into a disk.  Wrap each disk in plastic wrap and refrigerate at least 2 hours.
  6. Combine the dried fruits in a large saucepan, and add cold water to cover.  Bring to a boil over medium high heat, then simmer for 10 minutes, stirring occasionally.  Drain the fruit well in a colander and return to the saucepan.
  7. Add sugar and melted butter.  Stir well.  Set aside to cool, stirring occasionally. 
  8. Preheat oven to 425.  Roll 1 disk of the dough into a circle wide enough for a 9-9 1/2 inch pie plate.  Transfer gently into the pie plate.
  9. Roll out the second disk of dough into a circle about the same size.
  10.  Stir the chopped walnuts into the cooled filling.  
  11. Scrape the filling into the prepared pie plate, distributing it evenly.  
  12. Place the second circle of dough atop the filled pie, and fold and pinch the edges over the bottom crust to seal completely and form a high fluted rim.
  13. In a small bowl, beat the egg with a fork and brush lightly over the top and rim of the pie.  Bake for 30 minutes.  Reduce heat to 375 and bake for an additional 10 minutes.

Wednesday, May 27, 2015

Crave Wednesday: Fresh Tomato-Feta Pizza

In the town I grew up in pizza was predominately Pizza Hut, with the occasional Papa Johns or Dominos thrown in.

And then there was Tom's.  Tom's was a little family run place, on the second story of a building off the main street.  It's had the quintessential red and white checked tablecloths to let you know it was authentic.  Not that we ever ate there.  Pizza from Tom's meant picking it up and bringing it home.  Always.  And it also always meant the same pizza - the Greek white pizza - with garlic, olive oil, tomatoes, and olives.  It was my first experience with a non-tomato sauce based pizza.  I think it was Thatmom's idea originally, but one we all latched onto.

It was salty, not sweetened by the tomato sauce, and very cheesy.  And with the fresh tomatoes always tasted like something straight from the garden.  I'm not sure if there's a special nostalgia because it was a first experience, or the pizza was just really that good, but I've never had anything similar since.

I remember as a kid trying to recreate the pizza on sleepover nights, with Boboli and it just wasn't the same.  Tom's was special.

This pizza doesn't classify itself as a Greek pizza, but it has all the same elements - maybe even more!  It brings back memories of that little kitchen and checked tablecloths.  And with summer approaching, it's almost the perfect season for tomatoes to shine.

Fresh Tomato Feta Pizza (From Cooking Light)
1 lb refrigerated fresh pizza dough
cooking spray
4 plum tomatoes, sliced
2 1/2 Tbsp olive oil, divided
2 garlic cloves, minced
1 Tbsp cornmeal
3 oz feta cheese
1/3 cup pitted kalamata olives, halved
1/4 cup basil leaves
  1. Place dough in a bowl coated with cooking spray. Let dough stand, covered, 30 minutes or until dough comes to room temperature.
  2.  Arrange tomato slices on a jelly roll pan lined with paper towels; top with more paper towels.  Let stand 30 minutes.
  3.  Place a pizza stone or heavy baking sheet on bottom rack in oven.  Preheat oven to 500.
  4. Combine tomatoes, 2 Tbsp oil, and garlic. 
  5. Sprinkle cornmeal on a lightly floured baking sheet without raised edges.  Roll dough into a 14 inch circle on prepared baking sheet.  Pierce dough liberally with a fork.  
  6. Arrange tomato mixture over dough.  
  7. Crumble cheese, sprinkle over pizza.  Slide pizza onto preheated pizza stone or heavy baking sheet, using a spatula as a guide. Bake for 19 minutes or until crust is golden and cheese is lightly browned.
  8. Remove from oven and top with olives and basil.
  9. Brush edges of crust with 1 1/2 tsp oil.  Cut pizza into 6 wedges.

Monday, May 25, 2015

Mommy Mondays: 38 weeks

Last night I was lying with Thatboy on the couch watching a movie.  "Is that you or the baby?" he asked me.  Confused, I asked what he meant.  "Is the baby moving a ton right now?"  Yup.  It's the new normal so much so that I can phase it out a bit.  Especially since the movements have become less violent - a product of the fact there's less room to move around in there.

Both my kids have been big movers on the inside.  And frankly, Thatkid rarely stops moving on the outside too, so I'm sure to have my hands full with two.  What's interesting is that the movement has differed between the pregnancies.

Most women don't start feeling movement until around 16-20 weeks, with 16 being on the early side.  With an anterior placenta, the movement isn't felt until later because the placenta between the baby and the uterus wall in front blocks out the movement until it becomes bigger/stronger.  With Thatkid, I first felt movement around 16 weeks.  Nothing major, it felt like holding a goldfish - inside.  Which is weird, because I discovered earlier this year that I had an anterior placenta with him.  Apparently it wasn't anything they mentioned at my appointments back then.  His movements quickly became constant and consistent, but generally mild, which in retrospect I attribute to that anterior placenta.  Thatboy wasn't able to feel movement until around 25 weeks.  We also didn't see much movement, usually just a body part pushing out, like a butt, head, or foot.

This time around I've got a posterior placenta, so maybe that's the difference?  Although I felt movement later, not until around 18 weeks.  And instead of a fish, it felt like someone blowing bubbles.  Oppo-baby is still constant and consistent with movement, but until recently I would hardly call them mild.  I have a definite bruise on the inside of my abdomen below my sternum from the constant jabbing there.  And I've lost my breath to a kick more than once.  Not only has Thatboy been able to feel the movement earlier, we've both been seeing it since around 24 weeks.  SEEING it.  This kid moves like crazy back and forth and we've taken some fun videos of the crazy waves that causes my stomach.

Movement hasn't slowed down as I've gotten farther along, but I'm thankful it's starting to get calmer.  It makes it easier to relax, get work done, or even sleep.  And I can go back to being excited about it, instead of annoyed by it!

Total weight gain/loss: +26
Next Appointment: Friday
Maternity clothes? Yup.
Stretch marks: Yup
Sleep: This is the weird thing. I've been getting plenty of sleep, but still had two days where it felt like I'd been drugged in terms of being so very ridiculously drowsy.  Like I was almost unable to keep my eyes open.
Best moment this week:  Potentially having contractions?  I'm excited to get this show on the road.
Movement: Yup.
Food cravings: Nothing
Food aversions: Nothing
Gender: Not finding out
Belly Button in or out: In.  But basically it's flat.
What I miss: Not taking 15 minutes to get up from seated.
What I am looking forward to: At this point I'm just eagerly anticipating the arrival of the baby.
Contractions: I think?  On Saturday at lunch I realized I was getting cramps with intensity peaks.  They were lasting a minute and coming every 3 minutes.  This continued on for most of the day.  Not painful, just uncomfortable. 
Milestones: 
-Baby's eyes are almost adult size
- Baby now has regular, rhythmic breathing -the same as at birth
- Eye movements (REM/rest) have matured

Sunday, May 24, 2015

Sunday Runday: Running in the Third Trimester

As I'm nearing the end of the pregnancy I'm not sure how much more running I'll be doing, so I thought this would be a good time to talk about how running has been these past few weeks.


The beginning of third trimester was some of my best running of the pregnancy.  I was more comfortable and I had the time to run.  My breathing was under control, no aches and pains.  Granted, I wasn't running as fast as I did before, but at least I was still getting out there!

I ran 2 races and walked another, I got in less of my weekday runs, but still managed to get out there for longer weekend runs.

The past couple of weeks have been harder.  The past two weekends I missed my long weekend runs, but yesterday I headed out again.  And I'm not sure if it's the stage of pregnancy or the fact I took off two weeks, but it was a much less comfortable run!  Luckily I was with friends who run/walk instead of just running, so we took it nice and easy.  But I definitely had a run interval I couldn't do...bladder issues!  Which is the bane of running during pregnancy.  I still managed to get in almost 5.5 miles, so perhaps I shouldn't complain too much.


In general, my recommendations for running during pregnancy remain the same - listen to your body!  Running this time has been a completely different experience from my last pregnancy, and I've definitely taken it a lot easier in several respects.  Which is fine.  And I might not make it all the way to 39+3 like I did last time, but really, running over 5 miles at 38 weeks pregnant is nothing to be ashamed of.  Neither is running any mileage at 20 weeks, or 16 weeks, or 10 weeks.  I do think it's important to stay active during pregnancy, but not at the expense of your health.  And whatever you're doing, for however long, is definitely something to be proud of!

Friday, May 22, 2015

A Homemade Life: Coeur a la Creme with Raspberry Puree


Saturday was not a pretty day in Thathouse.  After being out of town the previous weekend, I suddenly felt the pressure of getting things under control before our newest member made their arrival.  Which meant it was a very full day, filled with running around, hysteria, and lots of fighting.

Thatboy and I played errand tag.  We weren't both home at the same time until 2:30 in the afternoon.  At which time we had to shower and get ready to head out to HorseWhisper's graduation party.

The party was actually a great chance for me to unwind.  I got to hang out with my friends and catch up.  It always make me feel better seeing M.  She's due a week after me, so great for commiseration.  I spent all day cramping on Saturday, which made me nervous until she told me she had been especially crampy that day too.  Misery loves company.   I also got to sit down for the first time that day and relax.

We came home to more house prep - and I stayed up late fixing the bedskirt I ripped.   But by the end of the weekend, the house was clean, our freezer was stocked, and the nursery was completed.  So success!  Which definitely deserves a celebration.  Between HorseWhisperer and I, you'd think there'd be some cake.  But there wasn't.  That's okay, because we're grown ups, and this is a much more grown up celebration recipe.  This is Wizenberg's mother's recipe, which she brought to her French class.  This is far more grown up than anything we ate or made in my French classes, which was limited to crepes and croque monsieurs.  In fact, I don't think I'd ever even heard of a coeur a la creme until I was well into my adult hood.

It's a dessert that's right up my alley, given my love for panna cotta.  This is like a panna cotta in that it's an easy dessert to put together that magically turns into something "fancy" once it's put in the fridge overnight.  It's a lot cheesier though, due to the cream cheese.  (Which makes it like a cross between cheesecake and panna cotta). 

Both Thatboy and Thatkid dug into this.  Wizenberg writes about eating it straight from the serving platter, which is what we did.  Each of us with a spoon, surrounding the dessert and scooping the sweet, creamy treat into our mouths.

Coeur a la Creme with Raspberry Puree (From A Homemade Life)
3 oz white chocolate, finely chopped
1 pkg cream cheese, room temp
1 1/4 cup heavy cream
3/4 cup powdered sugar, sifted
10 oz frozen raspberries, thawed
3 Tbsp sugar

  1. Prepare a coeur a la creme mold or a small colander by placing 2 sheets of wet cheesecloth inside and pressing them along the base and walls.  Let the overhang fall over the sides.
  2. Microwave the white chocolate on high for 20 seconds at a time, stirring between each, until smooth.  Let cool slightly.
  3. Beat the cream cheese, 1/4 cup of the cream, and powdered sugar in an electric mixer at medium speed until light and fluffy.
  4. Add the white chocolate and beat until very smooth, about 2 minutes.  
  5. In another bowl, beat the remaining 1 cup cream to stiff peaks.  
  6. Gently fold the cream into the cream cheese mixture.  
  7. Spoon the finished batter into the prepared mold, smoothing the top with a spatula.  Fold the cheesecloth over to enclose it completely.  Place the mold on a rimmed sheet pan or another rimmed dish.  Refrigerate overnight.
  8. Meanwhile, combine the raspberries with their juice and the sugar in a blender and blend until smooth.  
  9. Press the puree through a sieve into a small bowl to remove the seeds.  Cover and chill for up to 4 hours.
  10. Remove the mold from the refrigerator and discard the liquid that has collected beneath it.  Pull back the cheesecloth and carefully invert onto a serving platter.  Gently pull away and discard the cheesecloth.  Serve in generous dollops in shallow bowls, topped with a spoonful of raspberry sauce.

Thursday, May 21, 2015

A Homemade Life: Burg's French Toast


I'm going to tell you about a magical morning we had a couple of weeks ago, but first, some backstory.

Thatkid started out as a normal baby.  Sleeping normal baby amounts.  Meaning he'd wake up early, but end up going back to sleep again till a reasonable hour.  Until he didn't.  At first, we tried bringing him into bed with us.  And it worked.  It gained us an extra hour or so.  And then that stopped working.  We were officially stuck with an early riser.  6am is sleeping in.  This is even true on the weekend.

So you can imagine our amazement when one Sunday morning last month we were awoken not at 6am, not at 7am, but at 8:30am.  Let me say that again - 8:30.  A. M.   It is the latest Thatboy and I have slept in probably 2 years.  It was absolutely amazing,  Except for one small problem.  It had to be the one Sunday (maybe ever) that we had someplace to be at 9:30am.   A birthday party in fact.  N's birthday party!

N's birthday was a gymnastic party.  Which was great because the kids could expend a lot of energy.


The staff was great about helping the kids use the equipment.


And leading them through an obstacle course.  It was actually kind of impressive to see the 3 and 4 year olds following directions!


It took Thatkid a bit of time to warm up to the foam pit.  But once he did, he was a happy camper.  Funny that he's more than happy to jump into a pool, but a put filled with super soft, super safe pieces of foam?  Scary.


The kids had a great time.  And you'd think that Thatkid would have been tired out by his active morning.  But he wasn't.  He never is.


Because of our super short getting ready period that morning, breakfast consisted of cereal bars.  Something we could eat in the car on the way.  We keep them on hand for weekday breakfasts too.  I try to keep breakfast simple on those days, the fanciest I get is French Toast.  Which Thatkid will request so often that I'm teaching him to make it himself.  I don't have a real recipe - just a mix of eggs, milk, sugar, cinnamon, and vanilla.

When I saw the recipe for French Toast in A Homemade Life, I figured it would be perfect to try with Thatkid.  It has most of the same ingredients, but the method of making it is completely different.  Typically with French Toast I use cooking spray, just enough to keep it from sticking.  Burg's French Toast is practically deep fried.  Which gives it a really interesting consistency.  It's got a crispy outside, and a soft and tender inside.  I thought it made a nice change from the usual French Toast and Thatkid definitely enjoyed it.

Burg's French Toast (From A Homemade Life)
3 large eggs
1 cup whole milk
1 Tbsp sugar
1 tsp vanilla extract
1/4 tsp salt
pinch of freshly ground nutmeg
canola oil
6 to 8 slices of day old bread 
Pure maple syrup, for serving

  1. Break the eggs into a wide, shallow bowl or pyrex dish.  Whisk to break up the yolks.
  2. Add the milk, sugar, vanilla, salt, and nutmeg and whisk to blend.
  3. Place a heavy, large skillet over medium-high heat, and pour in enough oil to completely coat the bottom of the skillet.  Heat the oil until you can feel warmth radiating from it when you hold your hand close over the pan.
  4. When the oil is almost hot enough, put 2 to 3 slices of bread into the egg mixture, allowing them to rest for 30 seconds to a minute per side.  They should feel heavy and thoroughly saturated, but not falling apart.
  5. Using tongs, place the slices in the skillet. Cook until the underside of each slice is golden brown, one to 2 minutes.
  6. Carefully flip and cook until the second side is golden, another 1 to 2 minutes.  Remove to a plate lined with a paper towel, and allow to sit for a minute or two before serving. 
  7. Repeat with remaining bread.  Serve hot with maple syrup.

Wednesday, May 20, 2015

Crave Wednesday: Four Cheese Pizza


When it comes to pizza, I'm not too picky about my sauces.  Tomato sauce, barbeque sauce, buffalo sauce, heck, even just a drizzle of olive oil. I don't prefer one over the others.  The only thing a pizza needs to make me happy is cheese.  I can go completely sauceless, but there's no point in pizza if it's not loaded, over the top, with cheese.

Most people are fine with your standard old mozzarella.  And I'm not going to lie, that makes me pretty happy too.  Especially fresh mozzarella, soft and creamy.  But mozzarella is just a gateway cheese when it comes to pizza.  Quiet and unassuming, but you can do better.  WE can do better.

Our favorite pizza place makes their own ricotta.  It's the highlight of their pizzas in my book.  (Are you getting that I love creamy salty cheese on my pizza?)  Ricotta on pizza is a nice transition from mozzarella.  Not too big of a step.  It's safe.  Trust me.

Once you take that next step, it's not too far from some of the more...flavorful cheeses.  This four cheese pizza features two of them.  Taleggio and Gorgonzola.  Taleggio is a little milder, a soft cheese like brie, without as much of the sweetness.  Gorgonzola can be a deal breaker.  I know in my family Thatboy isn't a fan of blues.  Thatkid and I love them though.  And pairing the gorgozola with these milder cheeses tones it down a bit.


Four Cheese Pizza (From Cooking Light)
1 cup warm water
10 oz bread flour
1 pkg dry yeast
7 tsp olive oil, divided
1/2 tsp salt
cooing spray
1 Tbsp cornmeal
2 Tbsp chopped garlic
1/3 cup ricotta 
3 Tbsp gorgonzola cheese
1 oz taleggio cheese, thinly sliced
1/4 cup finely grated Parmigiano-Reggiano chese
2 Tbsp chopped fresh chives
  1. Pour 3/4 cup warm water in the bowl of a stand mixer with dough hook attached.
  2. Weigh or lightly spoon flour into dry measuring cups and spoons; Add to warm water.  Mix until combined.  Cover and let stand 20 minutes.
  3.  Combine 1/4 cup warm water and yeast in a small bowl; let stand 5 minutes or until bubbly.  
  4. Add yeast mixture, 4 tsp oil, and salt to flour mixture; mix 5 minutes or until a soft dough forms. 
  5. Place dough in a large bowl coated with cooking spray.  Cover surface of dough with plastic wrap lightly coated with cooking spray.  Refrigerate 24 hours.
  6. Remove dough from refrigerator.  Let stand covered, 1 hour or until dough comes to room temperature.  Punch dough down.  Sprinkle cornmeal on a lightly floured baking sheet without raised edges.  Press dough into a 12 inch circle on prepared pan.  Crimp edges to form a 1/2 inch border.  Cover dough loosely with plastic wrap.
  7. Place a pizza stone or heavy baking sheet on bottom rack in the oven.  Preheat oven to 550, while keeping a pizza stone or baking sheet in oven as it preheats.)  
  8. Remove plastic wrap from dough.  Combine 1 Tbsp oil and garlic.  Gently brush garlic mixture evenly over dough, leaving a 1/2 inch border.
  9. Spread ricotta over dough.
  10. Arrange gorgonzola and taleggio over ricotta.
  11. Top with Parmigiano-Reggiano.  Slide pizza onto preheated pizza stone or heavy baking sheet.  Bake for 10 minutes.  Cut into 5 wedges.
  12. Sprinkle with chives and pepper.

Monday, May 18, 2015

Mommy Mondays: 37 weeks

Let's talk names.  Since we didn't find out the sex, no one knows whether Oppo-baby is a boy or a girl.   To be fair, we don’t know either, so it’s not like we’re hiding the ball on that one.  But we’re also giving a double surprise at birth, because that's also when we're first sharing the baby's name.

To be fair, like the sex, we're not exactly sure what the name is going to be.  We have two girl names that we go back and forth on, on almost a weekly basis.  But boy names?  We're mostly totally stumped.  Although I think we finally came up with one last weekend.  We'll see if it sticks.  

We’re VERY picky with names.  Thatboy more than I.  Especially boys' names.  We've vetoed  friends’ childrens’ names, names of friends, and names of family members.  As someone with two cousins that share a first name, I get annoyed having to qualify whether I mean Sam X or Sam Y when talking to family members.
 
With Thatkid, we knew his name and still didn't share though, so the not being sure isn't the only reason we're not telling people the possibilities.  Another reason – we don’t really want opinions.  No “Well have you thought of this name instead?” or “How come you don’t want to use your great-aunt Murgatroyd’s name?” or “Really?  You want to name your baby THAT?”  And it happens.  Naming is one of those fun perks of being a parent.  Or a pet owner.  Or having a doll.  And everyone wants a piece.  And everyone has an opinion that is quite obviously better than yours. But once it’s done, it’s done.  And no one wants to tell you that Fergus is an awful name once you introduce the adorable pink bundle with blinky eyes and wee little yawn.  And I'm definitely a little concerned about our boy name.  Especially since the family wasn't terribly receptive to the last boy baby name that came out - Thatboy and I were the only people in the family who cheered when the name was revealed. Obviously our tastes differ from the rest of the crowd.
 

I know people judge baby names, because I’m as guilty of judging as the next person.  I have friends who have fabulous baby names.  Some of my faves.  And I have other friends who have named their children names that raise eyebrows when I talk about them behind their backs.  And yes, I do talk about them behind their backs (how could they name their child that? Don’t they want their children to be successful? Do they want their children to be beat up on the playground? –although, to be fair, my favorite boy names are the really nerdy sounding ones that make me picture little boys in glasses getting wedgies during recess.)  


Total weight gain/loss: +24

Next Appointment: Today!
Maternity clothes? Yup.
Stretch marks: Yup
Sleep: I do well at night, still getting up early in the morning.
Best moment this week:  Getting the nursery done.  And all the cleaning.
Movement: Yes. And I'm now getting hiccups in my crotch.  Good times!
Food cravings: Nothing
Food aversions: Nothing
Gender: Not finding out
Belly Button in or out: In.  But basically it's flat.
What I miss: Being comfortable.
What I am looking forward to: Last hearing this week!
Contractions: I think I'm getting Braxton Hicks, but I have no idea if I am or not.  Your stomach is supposed to get tight, but mine is tight all the time.
Milestones: 
- Baby's behavior is now exactly the same as a newborn.

Friday, May 15, 2015

A Homemade Life: Blueberry Raspberry Pound Cake


We met James the day after we moved to our current home.  Due to one mishap after another, we ended up doing the physical move in the middle of the night.  Well, practically.  It was around 10pm when the moving truck pulled into our driveway.

The next morning we met James.  He lived across the street and was awoken by our midnight move.  Rather than be annoyed, he was worried.  He knew that the house had just been purchased and seeing a moving truck pull in at such a late hour made him fear that someone was stealing the new family's stuff.  When he saw that things were being moved INTO the house, he went back to sleep.  It's nice having neighbors who look out for you.  And we're very lucky to have James across the street.  He's lived in his house since the 70s and knows all the history, which he's happy to share.  And they have a killer view of the Fourth of July fireworks from their front yard.

James is an artist,  A glass blower to be exact.  He used to have a studio at a San Diego winery, but earlier this year he started working on his own space.  The grand opening of Stone and Glass was earlier this month.  We couldn't NOT go.

The large space is divided between the front room, showcasing the work, and a back room, which is where the real magic takes place.  In addition to being the space where James works, it's also where he teaches classes or hosts events.

On the evening of the grand opening, the space was set up as a demonstration so that we could watch James at work, creating one of his signature pieces - a sea turtle.


Baking is an entirely different form of artistry.  I'm probably not the best to compare it with glass blowing, since I have absolutely no experience in the latter.  But I do know that both rely on a specific blend of ingredients, the perfect amount of heat, and patience.

In Wizenberg's family, her father was the cook and her mother was the baker.  My family was similar.  It wasn't that my father couldn't bake, but according to him my mom wanted something that she could shine with.  So she was the baker.  Her signature baked good (back then, now she prides herself on biscotti) was her 20 lb cake.  A recipe she had culled from a cookbook years earlier.  For Wizenberg, her mother's signature baked good was also a pound cake.  Though slightly lighter and fruitier than the chocolate and butter one I grew up with.   Right now I am oh so into fruit, so the berries were a very welcome addition to this golden dessert.  Each berry is a burst of color, similar to the designs in the blown glass we had seen at the gallery.  But less delicate.


Blueberry Raspberry Pound Cake (From A Homemade Life)
2 cups plus 8 Tbsp cake flour
1 tsp baking powder
1/2 tsp salt
5 large eggs
1 2/3 cup sugar
2 1/2 sticks butter at room temperature
2 Tbsp kirsch
1 cup blueberries
1 cup raspberries
  1. Preheat oven to 300.  Butter a 9 cup bundt pan and dust with flour.  In a medium bowl, whisk together 2 cups plus 6 Tbsp flour, baking powder, and salt.
  2. In the bowl of a food processor, blend the eggs and sugar until thick and pale yellow, about 1 minute.
  3. Add the butter and kirsch and blend a minute until the mixture is fluffy.
  4. Add the dry ingredients and process to just combine 
  5. In a large bowl, toss the berries with the remaining 2 Tbsp flour.  
  6. Pour the batter over the berries, and, using a rubber spatula, gently fold to combine, taking care that all the flour is absorbed.
  7. Pour the batter into the prepared pan, spreading it evenly across the top.  Bake until a toothpick inserted in the cake's cetner comes out clean, 1 - 1 1/4 hours.
  8. Transfer the cake to a rack and cool in the pan for 5 minutes.  Carefully invert the cake out of the pan onto the rack, and cool for at least 20 minutes before slicing.

Thursday, May 14, 2015

A Homemade Life: Hoosier Pie


 Molly's Hoosier Pie is a tribute to her aunt, who made the pie yearly for Thanksgiving meals.  The introduction to the chapter is one of loss.  The loss of her uncle to AIDS, the loss of her aunt to cancer.  Both taken far too young.  It seemed a fitting recipe to share in discussion of my own recent loss.

My first cousins and I are "stepping stones."  I don't know if that's an actual term, but it's how I always thought of us.  I'm the eldest.  My mother's sister had a daughter the year after I was born.  Thatbrother was born the following year.  My mother's sister had a son the year after that.  And the year after that, China was born.   We were bookends.

China and I were both named to honor our grandmother.  After high school, she decided to go by her middle name.  "I can't call you that,"  I once told her.  "If I call you that, it ignores the special connection only you and I share."  And I got special dispensation to use the name that united us.

The age difference seemed so vast at first.  In truth, growing up, Thatbrother was always closer to China than I was.  They were "the kids" to me.   But 4 years isn't such a difference as a grownup, and we grew closer when she wasn't a pigtailed munchkin.  Especially after she moved to California to attend college.

My family is small.  My father's side of the family especially so.  It consisted of his sister and China.  So when she moved to California, China got enveloped in my mother's side of the family.  Which was small enough that they were happy to include another.  And so China became a staple at Passover, Thanksgiving, and other family gatherings. 

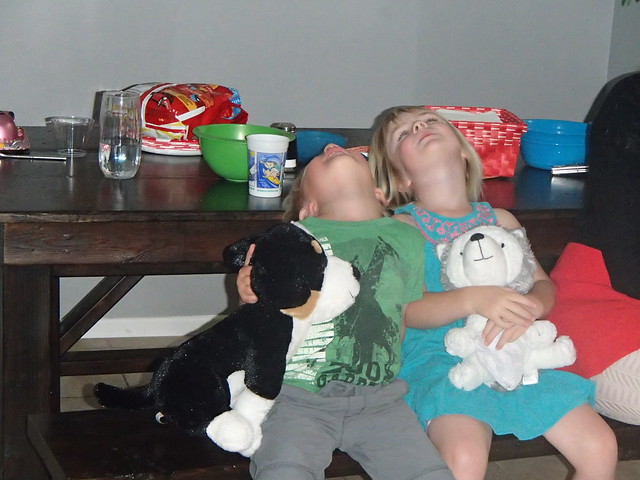
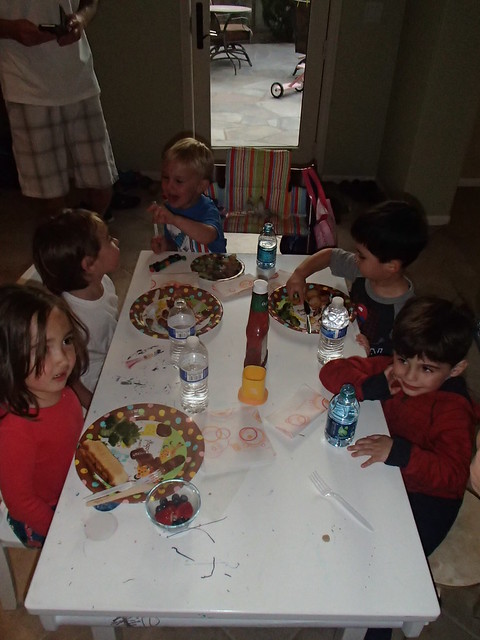
She delighted in the "other" with a fascination for Mormonism and anything Chinese.  She studied and taught in China, a passion which earned her the moniker used here, but also created a bond she shared with Thatdad.  But China's number one interest was children.  Every avenue she desired to pursue involved kids.  And she couldn't wait to have children of her own.  Until then she took such delight in Thatkid and Baby B. 

Just last month, China flew out for my grandmother's memorial.  Even though it wasn't her grandmother.  Because, like I said, our family is small.   We talked about her upcoming 30th birthday and how she wasn't exactly looking forward to it.  Like most of us before such a big milestone.  Her birthday was a special one, since she turned 30 on the 30th. Thatkid sent her a special birthday video and we laughed over his insistence on wearing a mask.

Last Wednesday I got a weird text from my mom, asking me to call her at my earliest opportunity.  I knew something was up, but I wasn't expecting what awaited me at the other end of that call.  China, less than a week after her 30th birthday, had passed away. 

We traveled to Arizona last weekend to attend the funeral, one of the hardest things I've had to do. 
Our family still hasn't gotten over the loss.  It's hard to rationalize the death of someone so young, and the future she will miss out on.  And our future without her.  And I feel not only the loss of my cousin, but also the loss of another part of my father.  I am devastated not only for myself, but for my aunt, who has already lost so much.


Like I said, this seemed a fitting time to share a recipe that is in memory of someone.  Reading this chapter after the death of my cousin seemed to come at just the right time.  Because food can evoke such memories of people. 

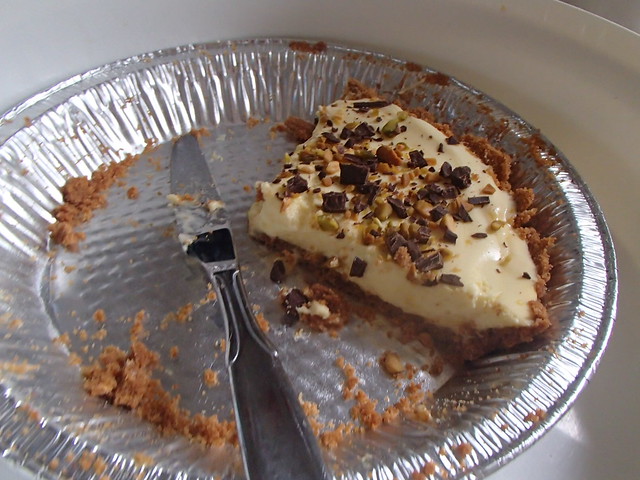
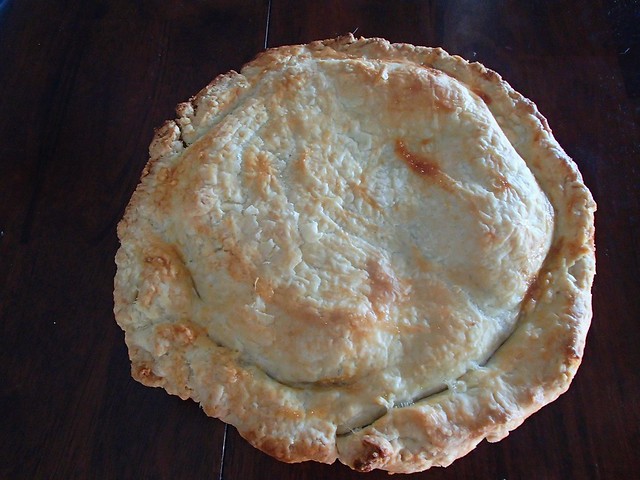
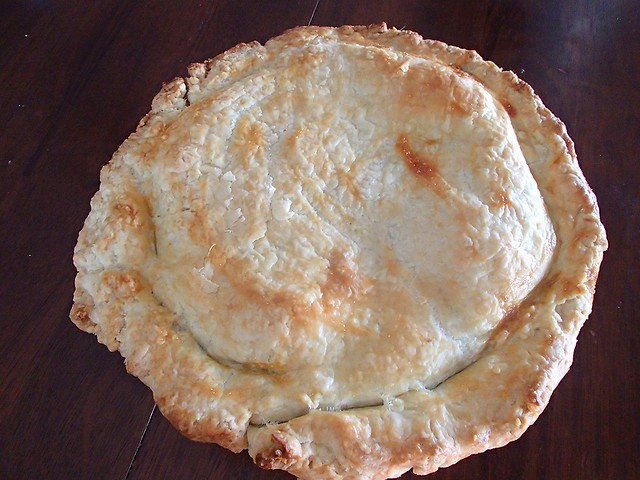
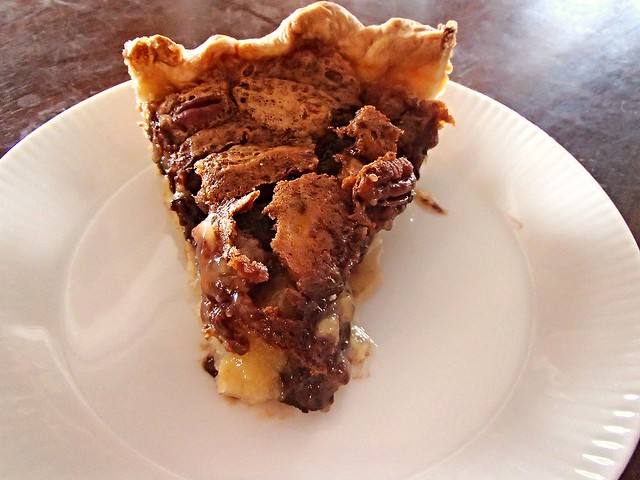
 Hoosier Pie (From A Homemade Life)
4 Tbsp ice water
3/4 tsp apple cider vinegar
1 1/2 cups flour
1 Tbsp sugar
3/4 tsp salt
1 stick + 1 Tbsp cold butter, cut into cubes
 4 Tbsp butter, room temp
1 cup sugar
3 eggs
3/4 cup light corn syrup
1 tsp vanilla extract
1/4 tsp salt
2 Tbsp bourbon
1/2 cup chocolate chips
1 cup pecan halves
  1. In a small bowl combine the ice water and cider vinegar.
  2. Combine the flour, sugar, and salt in a food processor and pulse to blend.
  3. Add the cold butter and pulse until mixture resembles a coarse meal.
  4. With the motor running, slowly add the water-vinegar mixture, processing until moist clumps form.
  5. Turn the dough out onto a wooden board and gather it until it holds together.  Shape into a ball and press into a 1 1/2 inch thick disk. Wrap the disc in plastic wrap and refrigerate for at least 2 days.
  6. Allow the dough to soften slightly at room temperature.  Preheat the oven to 375.  
  7. Roll the dough into a circle wide enough to fit a 9 inch pie plate.  Transfer the dough gently into the pie plate, fold and crimp the edges to form a high fluted rim.  Put the prepared pie plate in the refrigerator.
  8. In a medium bowl, beat the room temperature butter on medium-low speed until soft and creamy. 
  9. Gradually add the sugar, beating all the while.  
  10. Add the eggs one at a time, beating well after each addition.
  11. Add the corn syrup, vanilla, and salt.  Beat well.
  12. Beat in the bourbon.
  13. Remove the pie plate from the refrigerator.  Scatter the chocolate chips and nutes evenly over the base of the crust.
  14. Pour in the batter.  Bake for 35-40 minutes, until the eddges are firm, the top is a deep brown, and the center seems set but jiggles ever so slightly.
  15. Transfer the pie to a wire rack to cool to room temperature.

Wednesday, May 13, 2015

Crave Wednesday: Double Mushroom Pizza

Have you ever stopped to analyze the food we eat?  Like who first thought certain products would be consumable?  Most fruits are fairly easy.  They grow where we can see them and are easy to pick.  But who thought of digging below ground for tubers?  And why do we eat certain parts of animals but not others?

Take the mushroom for instance.  As most of us learned in elementary science class, the mushroom is in the Fungi Kingdom - not a plant or animal.  Like mold.  And in general, we don't eat mold.  In fact, most of the time if we see mold on food we purposely don't eat it.  So what sets mushrooms apart?  Who decided these were the fungi we'd eat?

I have no answer to these questions.  All I know is that I'm glad the great food-decider decided on mushrooms. Their meaty texture and earthy flavor work in so many dishes.  They complement meats, chicken, pasta, and of course, pizza.

This pizza combines two different kinds of mushrooms, and lots of cheese.  As I've mentioned before Thatboy is a fan of meats on his pizza, but mushrooms serve as a great substitute.  I also like the fact that instead of a heavy sauce, this pizza just uses tomatoes, which don't take away from the true star of the meal.

 Double Mushroom Pizza (From Cooking Light)
1 1/2 tsp olive oil
8 oz sliced crimini mushrooms
6 oz portobello mushrooms, chopped
1/4 tsp black pepper
3 garlic cloves, minced
1 Tbsp cornmeal
whole wheat pizza dough
1 plum tomato, thinly sliced
1 1/4 cups shredded mozzarella cheese
1 1/2 tsp chopped fresh thyme
 
  1. Preheat oven to 500.  Heat oil in a large nonstick skillet over medium-high heat.  Add mushrooms and pepper to pan; cook 8 minutes or until liquid evaporates, stirring occasionally.
  2. Stir in garlic, saute 30 seconds.  Remove from heat.
  3. Sprinkle cornmeal on a large baking sheet.  Roll dough into a 12 inch circle on prepared pan.  Arrange tomato slices over the dough, leaving a 1/2 inch border.
  4. Spread mushroom mixture over tomatoes.
  5. Sprinkle with cheese.  Bake for 14 minutes or until cheese melts .
  6. Remove pizza from oven and sprinkle with thyme.  Cut into 4 wedges.

Monday, May 11, 2015

Mommy Mondays: 36 weeks

This was supposed to be the post where I told you all about my wonderful friends.  You see, we have a tradition in my moms group.  We don't do baby showers, or sprinkles, instead we have a last hurrah night out for the mom to be where we get together and do something fun, just the girls.  Since there are two of us due within a week of each other, we decided to up the game this time and do a girls' spa day.  Which was to take place on Saturday.

Except I got some terrible news on Wednesday, which cancelled my day out with the girls.  Instead, we headed to Arizona over the weekend to attend a funeral.  

So in order to keep this light and easy - which is what I really need right now, let's talk about my belly.  A little different from last week's weight conversation.  This is more like an appointment update.

Plus, you know, pictures.

So at my appointment last week everything looked great, my blood pressure, weight, baby's heartbeat.  And my doctor had me lie back to do some measurements and check on the baby's positioning.  As I lifted my shirt she exclaimed "woah" about the size of my belly.  "Nothing to worry about," she said "It just means your placenta is doing a great job.  How big was Thatkid when he was born?"  When I told her that he was 7lbs 6 oz, she let out a hmmmm.  "Average is about 7lbs 8oz, so he was smaller than average.  Do you feel bigger this time around?"  And the truth is, I do!

I didn't at first.  Comparing pictures between pregnancies had me looking 2-4 weeks smaller for the first two trimesters.  And then all of a sudden, this belly took on a life of its own.  A couple weeks ago Thatboy noted that I was probably as big as I ever got with Thatkid.  And it's true, at 36 weeks I'm larger than I was at 39 weeks with my first pregnancy!

But it's not just the size that's different.  This belly really moves.  I think because of the anterior placenta we never really saw movement when I was pregnant with Thatkid.  This time you can see it from across the room.  All the time.

And after all this talk, I'm sure you're dying to see what I'm talking about.  So now, without further ado, my 36 week belly.  About the size of a honeydew!


Total weight gain/loss: +22
Next Appointment: Today!
Maternity clothes? Yes, but those shirts are getting short! 
Stretch marks: Yup
Sleep: Not bad this week.  Just not enough of it!
Best moment this week: Last week's appointment went really well.  It's been a rough week since then.
Movement: Yes.although I'm noticing that if I'm moving around, the baby seems quieter, just waiting for me to sit down and kick into gear.
Food cravings: Nothing
Food aversions: Nothing
Gender: Not finding out
Belly Button in or out: In.  But it's getting super shallow.
What I miss: Being able to breathe and be comfortable.
What I am looking forward to: Since I missed my girl's spa day, seeing my friends next weekend.
Contractions: None this week
Milestones: 
- Ears are fully formed on the outside and inside.
- Lanugo is starting to shed. 

Sunday, May 10, 2015

Sunday Runday: FroYo 5k

San Diego is a beer town.  There are no questions about it.  It's actually one of the perks of the races here as most of them have a fabulous beer garden with free local beer.  Which is actually not such a great perk when you're pregnant.  I miss my post-race beers.


So when I found out there was a 5k with a frozen yogurt theme, I signed up almost immediately.  I mean, who cares that I would be 35 weeks pregnant at the time.  There would be ICE CREAM at the finish!  And right now, that's way better than beer.

Which is how I ended up running what will be the last 5k of this pregnancy.  The Fro-Yo 5k.


It was held at down at the San Diego Bay.  Which it quickly becoming one of my favorite race courses.  It's the same course I ran during the Fit Foodie 5k, back when I was 11 weeks pregnant.  Which I also thought would make this a fun comparison in terms of my time.

The goody bag was filled with some great swag - a hat, sunglasses, a slap bracelet, and a coupon for free yogurt!  


The funness of the race meant I was expecting there to be a lot of non-runners.  Which can be frustrating.  I thought the race coordinators did a really great job of trying to avoid some of the common pitfalls.  They organized the racers into waves based on time.  They also made several announcements about staying to the right so that faster runners can pass.


Unfortunately, the non-runners didn't heed the good advice.  I placed myself in the last wave of runners, right before the run/walkers.  And even with my super slow speed lately I still ended up passing so many walkers, who walked in the middle of the path, that I got very frustrated.  If an 8 month pregnant lady is passing you, then you probably put yourself in the wrong wave.


The weather was absolutely perfect and overcast for a run.  Which meant the "cool zones" which were giant misters weren't terribly necessary, but they were still fun!


My only complaint was the lack of mile markers, but I'm beginning to know the course and really, before too long, the finish line loomed before me.


After running straight to the restroom, I made my way over to the frozen yogurt line for my sweet reward at the end.


We got our pick from a couple flavors and a bunch of toppings.  I went with the regular tart and lots of gummy bears!

Just for fun, these are my 5k races times from this pregnancy:

September 2014, my last non-pregnant 5k:  27:29

November 2014, 11 weeks pregnant:  31:42

March 2015, 29 weeks pregnant:  37:33

May 2015, 35 weeks pregnant:  38:37

Friday, May 08, 2015

A Homemade Life: Burg's Potato Salad


It's that time of year again - time for me to cook through another book.  I mean, it's not like I have anything going on.  And everyone should take on major projects their last month of pregnancy. 

This time around it's Molly Wizenberg's A Homemade Life.  I have a little affection for Ms. Wizenberg, given that in my frame of reference she was the first food blogger to "go legit."  I mean, prior to the novel, I'd never heard of Julie and Julia.  But I knew Orangette long before it became a column in a real, honest to goodness magazine.

I'm only a couple chapters into the book, but so far it's very different than the other works I've cooked through.  The other books were memoirs or stories, with the recipes serving as call backs or punctuations.  This seems to be much more of a cookbook, with more detail before the recipes.   It doesn't read linearly each chapter really revolves around the recipe itself.  It's an interesting read in that it reads like a blog.  You can imagine each chapter to be a separate post.

The first chapter centers around Wizenberg's father's recipe for potato salad.  It was the perfect weekend to try it out, since it was nice and warm.  In fact, we spend a lot of it outside, getting sunburned.  Saturday morning we headed to a birthday party for one of Thatkid's school-friends.  We could see the bouncy house as we drove up, which was a good sign.


They also had all manner of balls to play with, which kept Thatkid ever so occupied.


And Thatkid is also becoming a pro with the pinata. 


But the hit of the party was the food.  It was a summer-fest, with sweet cold watermelon and otter pops.  The kids had a field day.  Thatkid might have eaten his weight in watermelon.  And Thatboy and I each took advantage of the pops - which I haven't had since I was in the hospital having Thatkid.  It was the perfect prelude to our summer night meal which featured pulled pork and potato salad.


The salad itself was good.  Different from my typical potato salad in that the star ingredient was ranch dressing.  I will say that the methodology for making it did not work for me.  The potatoes somehow ended up cooking unevenly, so they were either undercooked or falling apart mushy.  And boiling the eggs?  This is a terrible method.  Following the instructions I ended up having the eggs in water for an hour that never came to a boil.  So I removed them thinking that probably wouldn't be good for the eggs.  And it wasn't.  They had that icky grey color from being overcooked and shelling them was a big pain in the butt.

So here's the recipe, with my method for the potatoes and eggs - which works so much better!


Burg's Potato Salad (Adapted from A Homemade Life)
1 1/2 lbs red potatoes, scrubbed
4 eggs (room temperature)
8 green onions, finely sliced
1/4 tsp salt
3/4 cup mayonnaise
4 Tbsp ranch dressing
2 Tbsp finely chopped dill
1-2 tsp caraway seeds
  1. Cut the potatoes into quarters and place in a large saucepan.  Cover with cold water and bring to a boil.  Boil for 15 minutes.  Drain and cool.
  2. Bring a pot of water to a boil.  Add the eggs and boil for 12 minutes.  Remove eggs and place in icewater bath.
  3. When eggs and potatoes are cool, chop and combine.  
  4. Add the scallions and salt.
  5. In a small bowl, combine the mayonnaise, dressing, dill and caraway seeds.  
  6. Pour over the eggs and potatoes, stirring to coat.  Refrigerate overnight.

Thursday, May 07, 2015

Flashback:Chocolate Ice Cream Soda


On Friday I got a text from Thatboy asking if we had plans for the night.  Usually on Friday nights my only plan is to get home, get into pajamas, and get on the couch.  Last Friday was no different.  Which is to say, we had no plans. 

And this is how we ended up going to Crusin' Grand with the Pirates.   Cruisin' Grand happens every Friday night in Escondido from April to September.  The streets fill with pre-1974 cars and the side streets are closed off to showcase the vehicles.  Apparently the Pirates were heading up to check it out and wanted to see if we wanted to meet them there.  We did.  We met them for dinner and then turned the boys loose on the streets to check out the "cool cars."


Mrs. Pirate managed to capture a bunch of pictures of my hammy ham kid.  And Little Pirate trying to keep up.


We stopped and got some ice cream for our little guys and ran into one of Thatkid's classmates.  The one who wants to marry him.  So all in all, it was a pretty good evening for him.


I'm combining these two ideas - that old school feeling of the cars, and ice cream.  Looking at these classic cars brings to mind sock hops and drive ins.  The warm weather was right out of "Summer Lovin'" in Grease.    This is probably the easiest throwback drink ever.  Straight from the soda fountain, because that's all it is - ice cream and soda.  Of course a healthy squirt of chocolate syrup never hurt anyone.

 Chocolate Ice Cream Soda
3 Tbsp chocolate syrup
1 cup sparkling water
1-2 scoops ice cream

  1. Mix everything in a tall glass and stir.