Pages

Wednesday, November 30, 2011

Repurposing Thanksgiving leftovers


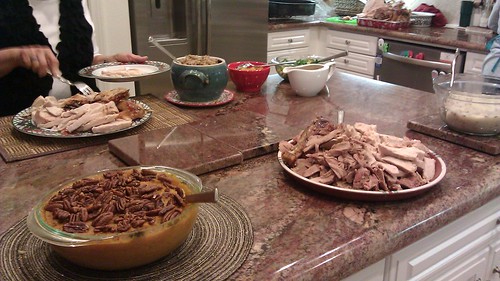
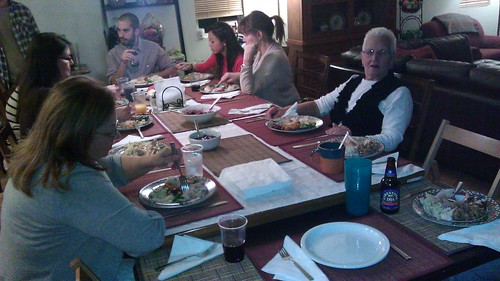
The only difficulty with having Thanksgiving at Thatmom's house is the lack of leftovers to play with. Usually there's enough for "second Thanksgiving" the next night, but that's pretty much it. And leftovers are never fun when you're eating them the exact way as the night before.

Luckily a lack of leftovers on my part doesn't stop me from sharing some great ideas with you. Because while I don't have leftovers from Thanksgiving, I do have the raw ingredients that many of you may have used in your own Thanksgiving feasts - namely, sweet potatoes and cranberries.

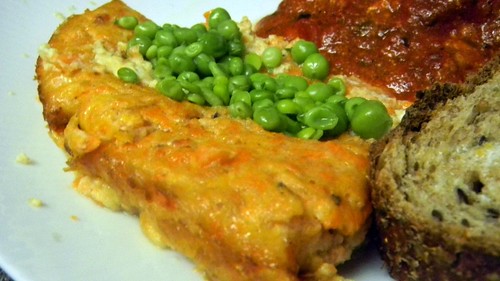
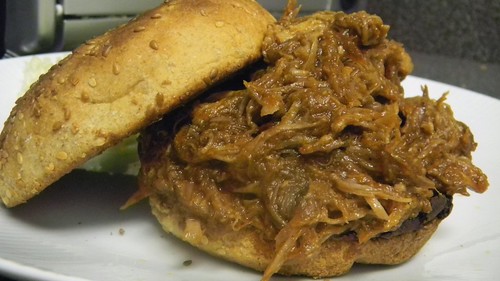
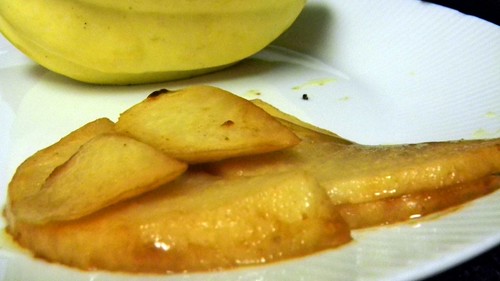
I've been using fresh cranberries a lot this year - ever since they showed up at the market. Mainly because last year I started getting cranberry antsy about a month or so after they had disappeared and so I've been storing up some good ideas since then. I made my own cranberry relish a few days before Thanksgiving. Between that and the cranberry butter, I had some leftovers in the bag which I felt would make an excellent topping for chicken. Reduced down to a thick and chunky chutney, this would work equally well over pork or turkey.


Cranberry Chutney
3/4 cup water
1 cup brown sugar
1 Tbsp cider vinegar
1 Tbsp flour
1/2 tsp cinnamon
1/4tsp allspice
1/2 tsp salt
2 cups fresh cranberries
  1. Combine the water, brown sugar, vinegar, flour, cinnamon, cloves, allspice and salt in a saucepan over low heat. Stir until the sugar is dissolved
  2. Add in cranberries and cook slowly about 10 minutes, stirring constantly, until the cranberry skins pop and the mixture thickens.
  3. Serve over chicken, pork, turkey, or use in a sandwich!
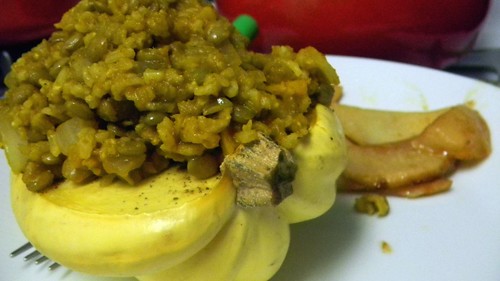
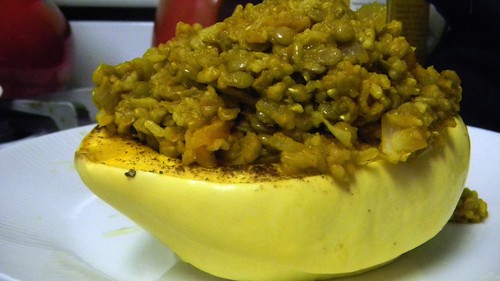
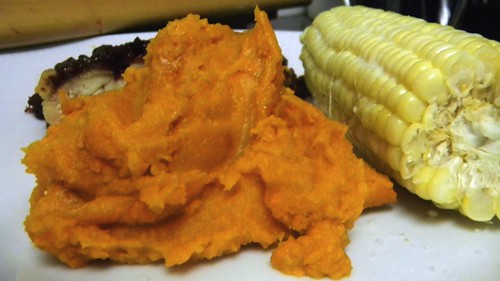
This year the sweet potatoes at our table were replaced with delicious butternut squash. But that might not be the case at your house. In years past there has been a bowl filled with baked potatoes - both of the regular and sweet variety. And there are always some leftover. Mashed potatoes are a great way to use up leftover baked potatoes, but these are so great and seasonal you may not want to wait until you have leftovers. Growing up, Thatdad would make squash with brown sugar and cinnamon, so the use of sweet additions to the mashed potatoes isn't too much of a shock. The maple and brown sugar make the sweet potatoes even sweeter, and there's something so perfect about maple syrup this time of year.


Mashed Sweet Potatoes
1 lb baked sweet potatoes OR
1 lb raw sweet potatoes cut into chunks, 1 cup apple cider, and 1 cup water
2 Tbsp butter
1 Tbsp maple syrup
1 Tbsp brown sugar
  1. If using baked sweet potatoes, scoop out the insides and place in a saucepan.
  2. If using raw sweet potatoes, combine the chunks, cider, and water in a saucepan and bring to a boil. Reduce heat to a simmer and simmer about 20 minutes, or until the sweet potatoes are tender. Drain and return to saucepan. Use the back of a fork to mash the potatoes.
  3. Reheat potatoes over a low heat and add the butter, maple syrup, and brown sugar.

Tuesday, November 29, 2011

The Superiority of Women


There is a definite difference between the sexes - and I'm not referring to the physical differentiation.

One only has to take Thatboy and I as a case study. We can turn our focus onto this very weekend.

We'll begin with the basics - multitasking. Thatmom and I can have an entire conversation, while the television is on. However, any attempt to involve Thatboy in said conversation is a futile endeavor. If you were to say, ask him whether his father would like an outdoor walking cap for Christmas, you would be met with silence. Further pressing the question would result in a grunt of some sort which would fail to answer the query. And of course, mentioning the conversation that was held at a later point in time would result in a confused, blank, stare.

Our second example involves illness. On Wednesday night, I wasn't feeling so hot. It was one of those days where I'd gotten very little sleep because of preparations for our trip and Thatboy's birthday. When I woke up Thanksgiving morning it had morphed from "meh" to "bleh." My throat was sore and I felt generally run down. I popped some emergen-c in a glass of OJ and rallied to help with Thanksgiving preparations. By Friday morning I was near 100% with only a runny nose to show for it. On Saturday night, Thatboy claimed that I contaminated him when he started developing a sore throat. By Sunday it had progressed into the bubonic plague. While I was able to pull myself together and function as normal, Thatboy has spent the past 2 days giving the cast of the Walking Dead a run for their money. He has a headache, a fever, chills, a cough that physically hurts him, and sounds like someone should take a wet vac to his chest. Pretty extreme, right? But don't worry, I'm sure he'll be 100% by the time the weekend rolls around.

The last proof I have that the extra X chromosome must be packing some pretty powerful stuff is the difference between Thatboy and I when it comes to pumpkin. See, I can't get enough of the stuff, but I limit my overload to the fall season. And as we approach December, that fall season seems to be slipping away. Thatboy, however has grown tired of the pumpkin pies, cheesecakes, breads, oatmeals, milkshakes, and the many other ways I have used that big orange squash. When he saw the chocolate cake portions laid out to cool he became unbelievably excited that I was making whoopie pies. (Or moon pies as he calls them, even after I've explained that refers to a different kind of treat.) So I probably don't need to tell you about his disappointment when I filled them with pumpkin cream cheese frosting. Which really meant, more for me! And since these freeze up so beautifully, there are a bunch in my freezer to enjoy when pumpkin everything season has passed. Besides, sick people shouldn't be eating a lot of sweets anyway.


Whoopie Pumpkin Pies (From Down Home with the Neelys)
  • 3/4 cup butter, room temperature
  • 1 1/4 cups sugar
  • 1 egg
  • 1 cup buttermilk, room temperature
  • 1 teaspoon vanilla extract
  • 1 3/4 cups flour
  • 3/4 cup unsweetened cocoa powder
  • 1 1/2 teaspoons baking soda
  • 1/2 teaspoon baking powder
  • salt
  • 4 ounces cream cheese, room temperature
  • 2/3 cup confectioners' sugar
  • 1/4 cup canned pumpkin puree
  • 1/4 teaspoon ground cinnamon

  1. Preheat oven to 400 degrees F. Using a stand mixer, add 1/2 cup butter and sugar and beat together until light and fluffy.
  2. Add the egg, then the buttermilk and the vanilla.
  3. Whisk together the flour, cocoa powder, baking soda, baking powder, and salt in a medium bowl.
  4. Add the dry ingredients in increments to the wet ingredients. Mix until just combined.
  5. Drop heaping tablespoons of the batter onto parchment lined sheet trays, leaving a 2-inch space between each cookie. Put in the oven and bake for 8 minutes. Remove from oven and let cool on rack.
  6. Beat together the cream cheese and remaining 1/4 cup of butter, in a small bowl, until smooth.
  7. Slowly add in the confectioners sugar. Once smooth, add the pumpkin puree, the cinnamon and a pinch of salt. Beat until smooth and well mixed.
  8. To assemble the cookie, spread a heaping tablespoon of the filling to the flat side of a cookie and sandwich with another. Repeat with the remaining cookies. Transfer to a serving platter and serve.

Monday, November 28, 2011

How I spent the rest of my vacation

I was really looking forward to the Thanksgiving holiday at Thatmom's house. "Aha!" I thought, "I'll finally get a chance to relax." My reasoning was based on the fact that since I wasn't at my home, there would be no urge to do cleaning, laundry, cooking, etc. Just some good old fashioned catching up on sleeping and vegging on the couch.

In retrospect, this was a ridiculous notion. When I confided in Thatboy what my plans had been he shook his head, bemused I would even consider that. Thanksgiving weekend for us is always jam-packed with activities, most of which involve holiday shopping. There is no rest for the wicked.

Friday morning found Thatmom and I heading out for a run, but not before Prez came over to meet Thatbaby. She moved to San Francisco in August and this was her first chance she was able to meet the little guy. After our run, we headed out to hit up some Black Friday sales. Thatboy and I aren't crazy enough to head out at dawn, and we're not interested in the big ticket items, but we like to wander the aisles, picking up cheap cds, games, and other odds and ends for gifts. As soon as we got home from shopping, we passed Thatbaby off to Thatmom and headed out for Thatboy's birthday dinner at The Side Door - his favorite Orange County restaurant.

Saturday was equally busy since Thatboy had giftcards burning a hole in his pocket. So we headed out to the mall where he unloaded them on shoes and sunglasses. Mario Batali recently opened a new outpost of his Pizzeria Mozza in Orange County, so we ventured there for lunch before heading back to the mall for some more shopping. On the way home we stopped at Roger's Gardens so Thatbaby could have his first meet n greet with the man in red.


He was in awe of the lights and colors so I'm really looking forward to how much he'll enjoy Christmas - the tree goes up next weekend!

Before I knew it, Sunday rolled around. Time for one last breakfast with the family at Pacific Whey! Then Thatmom and I went for another run. After that it was time to load up the car for our trip home. We got home in time to get preparations underway for the week - so we can start all up again.

In honor of the Fall Harvest, and because there was decidedly little cooking this weekend on my part, I thought I'd feature what has been gracing our table often as of late - the last of the summer corn. I think Thanksgiving officially marks the end of corn season, and I'll be sad to see it go since late corn is always the sweetest - don't you think?

The beauty of corn is that when it's good, you don't even need to cook it. You could eat it right off the cob. But that means keeping cooking preparations simple is the rule. Why mess with a good thing?


Oven Roasted Corn
2 ears of corn
butter

  1. Preheat oven to 400. Husk corn cobs.
  2. Coat each cob in 2 tsp of butter and wrap in foil.
  3. Bake 25 minutes.


Broiled Corn
2 ears of corn
butter
salt
  1. Soak unhusked corn in cold water. This will prevent the husks from catching fire.
  2. Broil unhusked corn for 20 minutes.
  3. Pull off the husks and cornsilk and serve with lots of butter and salt.

Sunday, November 27, 2011

Thanksgiving Recap


I hope all of you had a fabulous holiday - is there any holiday more geared toward foodies than Thanksgiving? I mean, technically every Jewish holiday resolves around the holiday meal no matter what the celebration, but Thanksgiving is nationally recognized as the day about a turkey. If you don't have school aged children do you remember the actual Thanksgiving story?

We discussed the Thanksgiving story at dinner. I remember it being a way for the Pilgrims to thank the Indians for helping them make it through a long winter - but if that's the case, then how could it have been held in November? Before the winter even started?

Whatever the reason, now it is a great time to remember what we are thankful for and to join with friends and family in the beginning of the winter holiday season.


As usual, we spent Thanksgiving at Thatmom's house where the food was plentiful. I took a picture of the beginning of laying out the dishes - which is good, because shortly after this picture was taken I completely burnt all the marshmallows atop the candied yams. Which is especially sad since they're my favorite part of the Thanksgiving meal.


We weren't the only ones to make the trek to Thatmom's house - our relatives always know where they'll be spending their holiday. And we always manage to pick up a couple of stragglers in addition.


Thatbaby was so excited to take part in his first Thanksgiving. Although I think next year might be more fun for him, when he can actually eat the turkey.

I completely forgot to take a picture of the dessert table. In addition to my cheesecake, pumpkin pie, and ice cream there was also apple crisp, an ice cream cake in honor of Thatboy's birthday, a cranberry hazelnut loaf, and a 20lb cake.

But Thatmom had also asked me to handle one more thing other than dessert - she wanted me to make a "bread" or, more specifically, biscuits. Eagerly I anticipated making my "crack biscuits" - a drop biscuit loaded with cream and butter. Thatboy and I eat them 2 at a time. But Thatmom didn't want my crack biscuits. She requested baking soda biscuits. Even when I told her that the crack biscuits had baking soda in them, she didn't buy it.

I've never made baking soda biscuits before. They were always Thatmom's thing. And, as always, when I go to make something new I turn first to Fannie Farmer. Thatmom said these exceeded her expectations, and since they were her request that's good enough for me. Although they probably won't replace my crack biscuits. I made some cranberry butter to serve alongside them and loved the flavor it imparted. As a side note, I used the butter on my leftover turkey sandwich the next day which was amazing.


Baking Powder Biscuits (From the Fannie Farmer Cookbook)
2 cups flour
1/2 tsp salt
4 tsp baking powder
1/2 tsp cream of tartar
1 Tbsp sugar
1/2 cup shortening
2/3 cup milk
  1. Preheat the oven to 425. Grease two 8-inch cake pans. Put the flour, salt, baking powder, cram of tartar and sugar in a bowl.
  2. Cut the shortening into the flour with two knives or a pastry blender until the mixture resembles coarse meal.
  3. Add the milk all at once and stir just until the dough forms a ball around the fork.
  4. Turn the dough onto a lightly floured board and knead 14 times. Pat until 1/4 inch thick. Cut into rounds with a 2 inch cookie cutter. Place touching each other in the cake pans and bake for 15-20 minutes.

Saturday, November 26, 2011

The Return of Eat to the Beat!


I'm not going to lie - I play favorites. And Elly? She's one of my favorite bloggers. I would follow her lead the end of the blogosphere and back. So years ago when she announced she was going to do a blog event I of course jumped in with both feet.

Eat to the Beat requested bloggers to make and blog about a food or drink related to a song, album, band - something music related. It was fun to come up with ideas for my favorite songs or bands. And then it stopped. Probably because Elly got busy with that little thing she calls a "son."

This year marks Elly's fifth year blogging, and in honor of her anniversary she brought back Eat to the Beat. Yay! And I wanted to do something really fun. So of course, I sat around doing nothing for near a month. Then I decided I needed to get on it, so I thought of one of my favorite songs - House of the Rising Sun by the Animals. And then I sat around trying to think of a good food or drink to make related to it. Which wasn't going so well. I told Elly I was going to end up copping out and just doing something New Orleans related.

And then, the other morning, I was in the shower when inspiration hit. (Because that's where it always hits, right?) I started singing a song that is running through my head a lot lately - Christina Perri's "Jar of Hearts."

Who do you think you are?
Running 'round leaving scars
Collecting your jar of hearts
And tearing love apart.

And I thought, what if I did that? What if I made a jar of hearts! Heart-shaped cookies that is.


Thatboy agreed it was a great idea - as long as I made them pink like a real heart. Then I just had to figure out what kind of heart-shaped cookie I would make. I do a lot of shortbread cookies - because they're easy. But I wanted to do something different than what I always do.

Lisa recently blogged about Polish pretzel butter cookies, which reminded me of how much I love butter cookies and how much they remind me of my grandfather. He had Alzheimers and every time we visited him in the VA hospital we'd bring him a tin of butter cookies. So I decided to do a jar of butter cookie hearts.

I was going to do a pink frosting over top, and thought buttercream would be delicious on butter cookies, but a little too soft for a jar of cookies. Fannie Farmer (you knew she'd show up again, right?) tops her butter cookies with a meringue. I love meringues and they're the perfect consistency for the jar.

And so - without further ado - because the deadline is, after all, tomorrow: my Eat to the Beat entry.

Jar of Heart(shaped butter cookie)s
2 sticks of butter
1 egg yolk
1/4 + 2 Tbsp of powdered sugar
3 cups flour
1 Tbsp sherry
1 egg white
1/2 cup sugar
red food coloring
  1. Preheat oven to 325. Cream the butter in an electric mixer.
  2. Add the egg yolk and powdered sugar and mix thoroughly.
  3. Slowly mix in the flour.
  4. Add the sherry and make sure all ingredients are thoroughly combined. Refrigerate for at least 30 minutes.
  5. Roll out the cookie dough till it's 3/8 inch thick. Use a heart-shaped cookie cutter to cut cookies and place on cookie sheets.
  6. Beat the egg white until stiff. Gradually beat in half the sugar.
  7. Add a drop or two of food coloring and the other half of the sugar and beat.
  8. Spread the meringue over the cookie and bake for 25 minutes.
  9. Place cookies in a jar!

Wednesday, November 23, 2011

Happy Birthday to the "Other" guy in my life


It's Thatboy's birthday and I'm all ready for him! The banners have been hung and the balloons have been placed. I whipped up some pancakes for breakfast before he headed off to work. Armed, of course, with mini-chocolate pies baked in muffin tins for his co-workers. I mean, I have to keep up with my reputation of super-wife somehow!

At some point before we pack the car up for Thanksgiving he'll open his presents from Thatbaby and me. And when we finally get to Thatmom's house tonight there's going to be cake. Not a bad day overall. I only hope he has an easy day at work. After all, you only have a birthday once a year!

I spent pretty much the entire day in the kitchen yesterday dealing with almost-last-minute preparation for both Thanksgiving and his birthday. (Today I'll be doing the actual last minute prep). In addition to the mini-chocolate pies, I finished up with the ice cream. Every year at Thanksgiving Thatdad always made ice cream. Growing up, it was the only time we had homemade ice cream and it's always been one of my favorite parts of the holidays. So after he died, I took that role over. I even use the ice cream maker he always used when I was a kid. And we learned years ago that the oven gets the kitchen too hot for the ice cream to set up properly, so it's always made a day or two ahead of time. Monday I made the chocolate ice cream with the fleur de sel caramel swirl. Tuesday was all about the classic Thatdad ice cream, no matter how much he played around with the second flavor, he always made a vanilla ice cream with a fudge swirl.

I also made the fancy butter to go with the baking powder biscuits I'll be making today, and some homemade granola for snacking and breakfasts at Thatmom's house. And of course, even with all that prep, I still needed to make something for dinner. (And hit up the gym for a run!)

Not too long ago on my cooking message board someone asked for Trader Joes recommendations and I was reminded it had been a long time since I had relied on one of their simmer sauces - which are perfect for nights when you want something warm, delicious, quick AND easy. No small feat. I grabbed a curry simmer sauce, a chicken breast, and just about every vegetable I had on hand and got to work.


Trader Joe's Chicken and Veggie Curry
1 sweet potato, peeled and chopped
1 jar Trader Joe's Curry simmer sauce
3/4 cup water
1 chicken breast, cut into bite sized pieces
1 tomato, chopped
1 carrot, thinly sliced
1/2 small onion, diced


  1. Boil sweet potato in a pot of water for 6 minutes.
  2. Heat the simmer sauce, water, and chicken chunks and cook for one minute.
  3. Add the carrot and onion and cook 3 minutes.
  4. Add the tomato and cook 2 minutes.
  5. Add the sweet potato, and let simmer for 10-15 minutes.

Tuesday, November 22, 2011

Defying Expectations


Like many places, San Diego has different areas where certain ethnicities are more prevalent than other areas. Last week on our Farmer's Market exploration Thatbaby and I headed to a part of the town that I usually consider to be very Mexican.

So you can imagine my surprise when we pulled into the parking lot of a large Asian market. It started to make a little more sense to me when I thought about it, after all, my favorite Thai restaurant was almost literally across the street.


This farmer's market was different than the typical markets I've been too. Of course they had the usual suspects - oranges, apples, eggs, etc. But there were also stands and stands of atypical farmer's market finds like bitter melon, daikon radishes, and lots of Asian greens. Not that you would know that by looking at my haul.


My $16 haul included:
  • 1 ginormous bag of oranges (which is still in the trunk of my car. Hey - you try lugging around a baby and bags of groceries!)
  • strawberries
  • figs - totally wasn't expecting these! It's been a couple of weeks since I've seen them in the markets, but they're impossible to resist.
  • eggplants
  • onions
  • corn
  • cucumber
  • string beans
Given the amount of produce I brought home, you would expect to see some of it featured in the recipe I'm posting. But there you'd be wrong. Because aside from the strawberries and fruit, most of the produce is actually sitting around waiting for Thanksgiving to be over. For when I've eaten my fill of mashed potatoes and heavy starchy sides. Instead I'll give you one of those impossibly quick and easy meals that is perfect for when your kitchen has become overrun with all the Thanksgiving prep. It's equally fabulous for when you too are sick and tired of turkey and stuffing.

Thatboy and I made a meal of these little taco bites - ground beef cooked with my own personal "taco seasoning". The kick of the ground chipotle powder and the extra kick from the salsa over go over well in Thathouse. But these little finger-friendly treats work well as appetizers for guests or snacks for kids. And, between you and I, they're the perfect way to use up leftover wonton wrappers you may have hanging around your home.


Taco Bites
20 won ton wrappers
1/2 lb ground beef
1/2 tsp cumin
1/2 tsp onion powder
1/4 tsp chipotle chili powder
1/2 tsp garlic powder
1 cup salsa
1/2 cup monterey jack cheese, shredded
  1. Preheat oven to 350. Press won ton wrappers into a muffin tin so that they form little cups.
  2. Brown ground beef in pan over medium heat.
  3. Add cumin, onion powder, chipotle chili powder, and garlic powder to ground beef and continue to cook until cooked through.
  4. Divide ground beef between muffin tins.
  5. Top each with scant Tbsp of salsa. Bake for 10 minutes.
  6. Sprinkle each taco bite with cheese and bake for 5 more minutes until cheese is melted and bubbly.

Monday, November 21, 2011

Goes Together Like Peas and Carrots


Pairings are a funny thing. We were discussing this yesterday when The Actress and Armani came down to visit Thatbaby. As we were walking home from lunch, we reflected upon how different our lifestyles were when we all first met each other.

When I met Thatboy I was looking for a fun college fling. The fact that he'd be graduating in a little over a year meant, for me, that I wouldn't have to worry about anything long term. Unbeknownst to me, he had already had his fill of flings. He was looking for something more serious. And while he certainly wasn't looking for me, he quickly discovered I fit the bill perfectly.

The Actress and I were roommates and while I was trying to suck the life out of every last minute of college, she was incredibly homesick for the first 3 months - flying home almost every weekend. I was out to have a good time, and she was having near hysterical breakdowns over the amount of glitter that ended up on our floor. We laugh about the differences now and I point out that even our worst moments couldn't have been so bad, given how close we remain.

And as for Armani, I never would have put the two of them together - and trust me, I set him up with just about every one of my friends other than The Actress. I mean, she was as far from a party girl as you could get (her self-described "rebellious" period was when she started trying to become more independent from her family by calling them less.) And he was one of the main leaders of his fraternity, out almost every night. So, although I adored both of them, I never would have imagined them dating, let alone married for 3 years now.


It's been over 10 years since we've known each other, and it's amazing to see how we've grown, matured, and yet still remain the same. How this unlikely grouping continues to thrive despite, or perhaps because of our differences.

The pairing of peas and carrots is not nearly as unusual, or uncommon. We're very used to it. Except when you stop to think about it, the two vegetables couldn't be more different. Carrots, a root vegetable. grow underground. They're tough, hearty, and strong. Peas on the other hand grow barely suspended from a tendril. They are small and delicate. Even their vibrant hues are on opposite ends of the color spectrum. And yet, they just work together so well that the combination has become commonplace in households.

The easiest, and most common way to find this pairing is a simple chop and toss of the cooked vegetables. This carrot and pea custard is a little more unusual and a little more elegant. Served in slices like a pie it's both visually appealing and delicious - although that's not surprising given the ingredients. The beautiful colors make it a fine choice for both autumn and spring and it's perfect for a holiday meal.


Carrot and Pea Custard
2 1/2 cups cooked carrots
3 sprigs thyme, chopped
3 Tbsp melted butter
2 eggs, beaten
1 TBSP flour
1 cup milk
1/2 tsp salt
1/4 tsp ground pepper
1/2 cup cooked peas
  1. Preheat oven to 350. Spray a casserole dish with baking spray. Mash the carrots until mostly smooth. Some chunks are okay.
  2. Mix all the ingredients but the peas in a bowl and stir until thoroughly combined.
  3. Spoon into the casserole. Place the casserole dish in a shallow pan of hot water and bake for 45 minutes.
  4. Press down the center of the carrots with the back of the spoon to create a depression. Fill the depression with the peas.

Sunday, November 20, 2011

A Few of His Favorite Things


We usually celebrate Thatboy's birthday with his friends the weekend before Thanksgiving since the weekend after people are inevitably either out of town or hosting out of towners. So last week I told Thatboy not to make any plans for Saturday, because it was going to be birthday extravaganza time.

Since I had waited too long to throw him a real birthday party, I decided to devote the day to doing things he loves. Thatmom came over to babysit since most of Thatboy's favorite things are not baby friendly.

I began the day by addressing his love of cars and driving fast by taking him to K1 Speedway for some go-cart racing.


Thatboy had done this once before, but it was my first time and something outside of my comfort zone. But I hadn't chosen this place for me.


It was very different than Mario Kart, which I excel at.


Thatboy, who does not excel at Mario Kart, came in second during our 14 lap race. He was happy, but that happiness grew even more when he discovered that the person who came in first place had the best lap time of the entire week. As for me? Well I was expecting to come in dead last, so I was just pleased as punch when I didn't.

Our second stop on the tour of Thatboy's favorite things was supposed to be at a place that serves the best burgers in San Diego. But we were running a little late, so instead we grabbed In N Out on our way to the main event of the day, Thatboy's mini-surprise party!


When trying to figure out what to do for Thatboy's birthday I stumbled across a new beer shop in town, Bottlecraft. Like a wine bar for beer (although how weird does a "beer bar" sound?), Bottlecraft is a beer shop with a "drink me here" philosophy. In addition they also offer flights of beer for tastings. Thatboy loves beer, especially craft beers which the shop specializes in, and so I thought it would be the perfect venue for celebration.

I emailed a couple of his friends asking them to join us, but warned them not to say anything to Thatboy. When we arrived at Bottlecraft, Thatboy was excited just to be there, but he lit up as he saw some of his friends start arriving. He does love drinking buddies.

He was like a kid in a candy store as he wandered through the store picking up beers for the table to sample. Bottlecraft has a healthy collection of our favorite local brews, as well as many craft beers completely new to us. And there were many small batch/limited edition beers they carried that of course we just had to try. We came home with a ridiculous amount in addition to the bottles we sampled while there.

And of course, it wouldn't be a party without cake. When I asked Thatboy what kind of cake he wanted for his birthday, he said he would like either Thatmom's 20lb cake, her ice cream cake, or a storebought red velvet cake. Thatmom had promised to take care of the first two for his birthday and Thanksgiving, so I thought I would take care of the third for his party.


Thatboy's favorite red velvet cupcake comes from Elizabethan Desserts, so I naturally turned to them for his cake. It came out perfectly!

And thought this would be a good time to share my go-to cole slaw recipe I had promised to share weeks ago. Mostly because this is one of Thatboy's favorite meals I've made in a long time, so it's a great place to share it!


I started making pulled pork a couple years ago. It's great for dinner for two with loads of leftovers that freeze well, but it's also an easy dinner for a crown. But it's one of those things I didn't grow up with, and so, of course I didn't know where to begin.

So when I stumbled across the Cooks Illustrated as seen on Bridget's Blog I decided to give it a shot. Especially since it was a crockpot version that meant very little effort on my part. It quickly became my pulled pork staple and the one I made at home and brought to friends. I usually alter it very little, my main change being to add extra BBQ sauce at the end and mixing it in before serving because we like our pulled pork saucey round here. This time I made an additional, accidental alteration.

One of the first rules of cooking is not to measure your ingredients over the workbowl. I never follow that rule. Which is one of the reasons I enjoy cooking more than baking. Cooking is pretty forgiving when it comes to that extra bit of sugar or cumin that falls into the pot. But this time as I was mixing the spice rub, the cayenne came out much faster than I was expecting, leaving me with far more than the recipe called for. And I knew we would have some spicy pork on our hands. I tried to counteract the anticipated burn with extra brown sugar and something must have worked out with the proportions because it was the best pulled pork I've made yet. The extra cayenne gave it a delicious kick that had Thatboy asking for leftovers for days.


And with my pulled pork I usually serve coleslaw. In fact, I tend to put my coleslaw on my sandwich with the pulled pork. Thatboy likes his beside his sandwich - you can do whichever you prefer. I use an old school boiled dressing with my coleslaw which I prefer to mayonnaise (although it contains some of the same elements). Something about that vinegar kick just does it for me and the dressing makes for a less creamy side dish.


Coleslaw
1 small head cabbage, shredded
2 egg yolks, lightly beaten
1/4 cup cold water
1 TBSP butter
1/4 cup apple cider vinegar

  1. Mix the egg yolks with water, butter, and vinegar in a saucepan over low heat.
  2. Continue heating, stirring until thick and creamy.
  3. Toss the coleslaw with the dressing and serve.

Saturday, November 19, 2011

The beginning for birthday boy


A couple of weeks ago, when we were both still home with the new baby, Thatboy went surfing with one of his friends. When they came back, the two were talking about Thatboy's upcoming birthday. The friend noted that Thatboy had already declared that this year his birthday "was going to suck."

His birthday has always been a little on the sucky side. It's hard having a birthday the week of Thanksgiving. It is always overshadowed. And his parents never really did anything to celebrate his birthday separately from Thanksgiving. Instead they just added an ice cream cake onto Thanksgiving dinner. Even when we used to go up at the beginning of November to celebrate his brother's birthday, Thatboy's birthday was never acknowledged.

And then, of course, he met me. While dating, we still did separate family Thanksgivings, but once we were married he started attending the one my family hosted. And I started making a big deal of his birthday. The first year I decorated our entire apartment with balloons and streamers while he was out surfing. And when we reached my parent's home for Thanksgiving dinner, it was similarly outfitted. Since then, I've always made a big point of making his birthday extra special - whether that meant a surprise trip to Vegas to see one of his best friends, or driving around Thatboy and 14 of his favorite friends on a beer extravaganza.

This year, however, I really dropped the ball planning-wise. I blame the whirlwind that was our life in October, but at the same time, feel like I certainly had enough time to do something. And so last weekend the call went out. I emailed a couple of his friends to see if we could get together as a mini-surprise for his birthday and planned a day of fun for him. I'll fill you in on that tomorrow.

One of the people I reached out to was Workwife, who then decided to take it upon herself to make sure there was also a work celebration for Thatboy. (See - that's why she's his Workwife.) She initially emailed me to see if Thatbaby and I could make it to a lunch next Tuesday, but when I pointed out that Thatboy would be out of town for work that day she moved the lunch to Friday.

And so Thatbaby and I headed downtown yesterday to join in the frivolities with Thatboy and his coworkers at Extraordinary Desserts. Thatboy was very excited to try their dulce de leche cake which he had seen on Food Network's "Best Thing I Ever Ate." What? Your husband doesn't watch the Food Network when left to his own devices? There must have been nothing on Fuel TV. So after our lunches he ordered a slice and it was passed along the table. The consensus was that although the cake was delicious and decadent, it was a bit of a misnomer to call it a dulce de leche cake. More like a "chocolate cake with a smear of dulce de leche on top."

When Thatbaby and I got home, I set about making a quick and easy dinner. I know, you're all anticipating pasta, but I thought I would change it up a bit. It'd been a while since we'd had chicken, so I decided now was as good a time as any to start working it back into our meal plan. The original Tuesday lunch plan was at a Mexican restaurant, so when we switched over to Extraordinary Desserts I still had a hankering for something with a bit of Mexican flavor. Good thing I keep tortillas in the freezer! A casserole style dish is one of the easiest ways to make an easy dinner - since I can get all the flavors without having to stand over the stove playing with spices and heat. Just layer it all up and let the oven do the work.

And, like I said before, I'm going through a mild obsession with celery root. This one does require some standing over the stove time, but it cooks so quickly that I could wait until Thatboy came home and took over the baby to make it. And it combines some fantastic fall flavors - celery root, apple, and grape. With the cider and grape it's also good for those of you with a sweet tooth. Maybe not an extraordinary dessert, but definitely an above average side.


Taco Lasagna
1 chicken breast, cooked and shredded
1 can diced green chiles
16 0z of salsa
1 cup sour cream
12 corn tortillas
1 cup shredded "Mexican style" cheese
  1. Preheat oven to 375 degrees. Combine chicken, chiles, salsa, and sour cream in a bowl.
  2. Heat the corn tortillas. I place them over a burner on my gas stovetop till they get fire roasted. Use 4 of the tortillas to cover the bottom of an 8x8 square baking dish.
  3. Place half of the chicken mixture over the tortillas and sprinkle with 1/3 cup of cheese.
  4. Repeat with 4 more tortillas, the rest of the chicken mixture, and another 1/3 cup of cheese.
  5. Place the final four tortillas on top and sprinkle with remaining cheese. Bake 30 minutes


Celery Root with Grapes
1 celery root
1 cup apple cider
juice of 1 lemon
3 Tbsp of butter
1 Tbsp of parsley, minced
1 cup of green grapes
salt and pepper
  1. Peel and slice the celery root. Place the celery root, cider, lemon juice and butter in a saucepan, cover and cook over low heat for 10 minutes, or until the celery root is tender.
  2. Add the butter, parsley, grapes, and salt and pepper to taste. Heat through.

Friday, November 18, 2011

The smell of success


We're not really a cinnamon bun kind of family. Thatboy grew up with pancakes for special occasion breakfasts and I grew up with blueberry muffins. I know that for many people, cinnamon buns are one of those Christmas morning breakfasts, but the inlaws never do anything quite as fun. I've actually offered to make Christmas morning cinnamon buns and been shot down - because they'd rather stick with the usual fare. Know what the inlaws do for breakfast Christmas morning? Cold cereal. Merry Christmas one and all!

And yet, here I am recommending a cinnamon bun recipe to all of y'all. So something must be up, right? Well these rolls have a very easy explanation. They smell good.

I think it's a fairly common housewarming trip. one that certainly has been co-opted by realtors over the year, that baking cinnamon imparts a warm, welcoming, and lasting scent throughout any home. And so, when we were preparing for Thatbaby's open house, when Thatboy turned to me and said "I wish it smelled like something was baking in here," I knew exactly what had to be done.


Sure, I could have taken the easy way out and just stuck some cinnamon sticks in the oven. That would impart the warm fragrance with minimal work on my part. But roasting cinnamon sticks doesn't give you something to eat for breakfast for a full week. I had seen a copy-cat recipe for Cinnabon's Cinnamon Rolls a couple months ago in Food Network Magazine, and thought they would make a much better alternative.

See - I have this thing about Cinnabon. It's one of my secret guilty pleasures. Problem is, I very rarely get to indulge. Mostly because - have you seen the size of those things? I could never finish one in a sitting and I can't stand throwing a good portion away. So I've only ever gotten them if I can rope Thatboy into sharing one with me. When we were first dating, I could usually convince him anytime we were in an airport. But the San Diego Airport doesn't have a Cinnabon, so really it's been years. And if I was going to make cinnamon rolls - there is no other recipe I'd rather call upon, and making them myself I could make them smaller.

The recipe below originally said it made 6 cinnamon buns. But when I saw the uncut cylinder I knew that would make them far too big, so I decided to cut the roll into 8 pieces. Frankly, those were still a little large for my taste - but you make the decision for yourself.

As for the results? As the guests arrived they all commented on how good it smelled. Which was the purpose after all. And then of course, there was the secondary benefit. Thatboy had one of these babies every day for breakfast before his first week of work. Usually as he ate, he commented to either Thatbaby or Thatdog about how "mom sure makes a delicious cinnamon roll." And when they were gone, he was sad. He mused about it a couple of days later as we sat watching television one night. Seemingly out of nowhere he turned to me and stated that those cinnamon rolls I made were really good. This year we're spending Christmas just us, no inlaws. I think I know what's going to be on the table Christmas Morning, and though it probably will be served with milk, it's a far cry from cereal.


Almost Famous Cinnamon Buns (From Foodnetwork.com)
1 cup milk
1 packet yeast
3/4 cup plus 1/4 tspn granulated sugar
8 Tbsp melted butter
1 egg yolk
1 1/2 tspn vanilla extract
2 3/4 cup flour
3/4 tsp salt
1/2 teaspoon ground nutmeg
12 tablespoons butter at room temperature
3 tablespoons ground cinnamon
2 cups confectioners' sugar
1/3 cup heavy cream
  1. Make the dough: Warm the milk in a medium saucepan over low heat until it reaches about 100. Remove from the heat and sprinkle in the yeast and 1/4 teaspoon sugar (don't stir). Set aside until foamy, 5 minutes.
  2. Whisk in 4 Tbsp melted butter, egg yolk, and vanilla.
  3. Whisk the flour, 1/4 cup sugar, the salt and nutmeg in the bowl of a stand mixer.
  4. Make a well in the center and pour in the yeast mixture. Mix on low speed with the dough hook until thick and slightly sticky.
  5. Knead on medium speed until the dough gathers around the hook, 6 minutes.
  6. Remove the dough and shape into a ball. Grease the bowl and return the dough to the bowl. Cover and let rise in a warm, draft free location until doubled, 1 hour 15 minutes.
  7. Roll out the dough into a 12-by-14-inch rectangle with the longer side facing you.
  8. Spread the room temperature butter over the rectangle, leaving a 1/2-inch border around the edge.
  9. Mix the remaining 1/2 cup of sugar and cinnamon; sprinkle over the butter.
  10. Brush the far edge with water. Roll the dough away from you into a tight cylinder and press on the long edge to seal.
  11. Cut the cylinder into 8 pieces. Spray a large baking pan with baking spray and place the buns cut-side down in the pan, leaving space between each. Cover and place back in that warm, draft free space and let rise until doubled, 40 minutes.
  12. Preheat the oven to 325. Bake the buns until golden brown, about 35 minutes. Cool in the pan 15 minutes.
  13. While buns are cooling, sift the confectioners' sugar into a bowl, then whisk in the cream and remaining 4 Tbsp melted butter.
  14. Transfer the buns to a rack and spoon the glaze on top while still warm.

Thursday, November 17, 2011

A new tradition?


Every year during the fall season I end up making a pumpkin cheesecake. I think it goes back to when I was in college. Every fall The Cheesecake Factory would have pumpkin cheesecake as their seasonal menu choice and 2 of my girlfriends and I would mark the date it came out on our calendar. We'd find a way to get to the nearest outpost and indulge.

For some reason, I remember it marking the celebration of some annual event - but given the time of year it could hardly be finals. It might have been midterms. Then again, it might have just been an event to celebrate the annual arrival of pumpkin cheesecake.

I don't think I've been back to The Cheesecake Factory to sample their pumpkin cheesecake in years - definitely not since college and that was many many moons ago. But once I started living on my own and cooking and baking pumpkin cheesecake seemed to make an appearance despite the fact.

It started out with Peabody's Pumpkin Swirl Cheesecake. Which evolved into a version that was less swirl, and more pumpkin. And then a couple of years later I discovered my go-to cheesecake recipe, Ruth Reichl's New York Cheesecake. Over the years I've worked to make a pumpkin cheesecake that was more similar to that than the original.

I don't usually bring a pumpkin cheesecake to Thanksgiving, mostly because it's been made and eaten by that time. But this year has been a little different and I haven't had time to get my pumpkin cheesecake fix in. So I'll be sharing this with family at our Thanksgiving table. For those of you who want something a little different than Pumpkin Pie, this is a great alternative. Although in my mind you can never have too much pumpkin anything, so might as well serve both! After all, pumpkin is certainly cause for celebration.


Pumpkin Cheesecake
1 1/2 cups graham cracker crumbs (about 6 ounces)
1/4 cup sugar
1/2 cup melted unsalted butter
1 1/2 pounds cream cheese
4 eggs
1 cup light brown sugar
1/2 cup heavy cream
1/2 cup flour
1/2 teaspoon cinnamon
1 teaspoon vanilla
2 cups pumpkin puree
  1. Preheat oven to 350 degrees.
  2. Mix the graham crackers with 1/4 cup sugar and the melted butter and press into bottom and sides of a 9-inch ungreased springform pan. Chill while preparing filling.
  3. Beat the cream cheese, brown sugar, and eggs until smooth. Add the heavy cream, flour, cinnamon and vanilla and blend until smooth. Add the mashed pumpkin and blend until smooth. Pour into chilled crust and bake for an hour, or until the cheesecake is set. It should be a little jiggly in the middle.

Wednesday, November 16, 2011

Pie Prepping


Next week is a big week in Thathouse. The most obvious is Thatboy's birthday. I've been prepping for it all week. In fact, today Thatmom came over today to babysit so I could run around picking up presents for Thatboy.

But most of you won't be celebrating Thatboy's birthday (although all presents can certainly be directed here if you're interested in this very important event). For the rest of the nation, the big event for next week is Thanksgiving.

Don't worry - I'm prepping for that too. As usual, I assign myself dessert for our family Thanksgiving. Partly because I've taken over Thatdad's role of making ice cream. Partly because I make the best pumpkin pie.

Every year I try to do a little something different with the pumpkin pie. Last year the request was to make the crust with graham crackers instead of a traditional pie crust. I've done a pumpkin caramel pie and a pumpkin pecan pie. This year I decided to again play with the pie crust. Instead of the traditional pie crust, or even the graham cracker crust, this year I went with a chocolate crust.

Since I don't do a lot of chocolate crusts, I went over my options:
1 - chocolate wafer crust, which is usually what I do for pies. But it's a little dry and not too flavorful.
2 - oreo cookie crust, which seemed like it would be weird with pumpkin pie
3- chocolate shortbread crust, something I've never tried before, but comes from Dorie Greenspan's book and she knows her desserts.

So as you all know, the best time to try something new is when you're making it for a large group of people. This is why you'll see most people decide to host Thanksgiving and make a giant turkey for 50 people and start preparing the night before. Luckily, even though it wasn't a good idea I seem to take this risk every Thanksgiving, so why stop now? New untested crust it is!


Pumpkin Pie with Chocolate Shortbread Crust (adapted from Baking: From My Home to Yours by Dorrie Greenspan)
  • 1 1/4 cups flour
  • 1/4 cup unsweetened cocoa powder
  • 1/4 cup confectioners’ sugar
  • 3/4 tsp salt
  • 9 Tbsp unsalted butter, cut into pieces
  • 1 large egg yolk
  • 2 1/2 tsp ground cinnamon
  • 3/8 teaspoon ground cloves
  • 4 oz semisweet chocolate chips
  • 3 eggs
  • 1 can of pumpkin puree
  • 1/2 cup heavy cream
  • 1/2 cup light brown sugar
  • 1 tsp ground ginger
  1. Make the crust. Combine flour, cocoa, 1/2 tsp cinnamon, 1/4 tsp ground cloves, confectioners’ sugar and 1/4 tsp salt in a food processor and pulse a couple of times to combine.
  2. Disperse the butter into the mix and pulse until the dough turns into pea-sized lumps.
  3. Add the egg and pulse until the gets clumpy. Turn the dough out onto a work surface and knead just until all the ingredients are incorporated.
  4. Press the dough into a buttered tart pan. Freeze for at least 30 minutes.
  5. Preheat the oven to 375. Cover the crust with aluminum foil and bake 20 minutes.
  6. Sprinkle the chocolate chips over the bottom of the crust. As the chocolate melts, smooth it with a spatula. Let cool while you prepare the filling.
  7. Whisk the eggs, pumpkin, cream, brown sugar, ginger and remaining cinnamon, ground cloves and salt.
  8. Pour into the cooled pie shell and bake for 45 minutes until the filling is set.

Tuesday, November 15, 2011

Living for the weekend


Weekends are a totally different beasts round these parts. With both of us around I can do my runs outside. And we can get out ourselves!

Thatboy had a 3-day weekend because of Veteran's Day. We spent Friday running some errands. Saturday the rain came down and we were housebound. So by Sunday we were ready to get out.

We headed to one of my favorite San Diego locations - Cabrillo National Monument.


I especially love coming here after a rain. The sky is bluer, the grass is greener, and the air just feels crisper.


But it was very very cold. Not at first. In fact, when I went on my run Sunday morning it was warm and gorgeous out. So much so that I accidentally added an extra mile onto my run. We picked up lunch on our way to Cabrillo and somehow in the middle of our picnic, the sun got scared and went away.

We had plenty of warm options for Thatbaby, but Thatboy and I got pretty freaking cold. So we called it a day early and headed home to fill up with something warm.


I made us Tyler Florence's Moroccan Stew. Basically it's a lentil and rice dish served in an acorn squash. The acorn squash added nothing to the meal. If you're going to make it I would leave it out entirely. In fact, today for lunch I took some of the leftover rice and lentils and mixed it in with some collard greens and bacon and that was a far superior dish.

Other than squash (and pumpkin) my current fall obsession is celery root. I love root veggies in general, but celery root has that great earthy taste with a little sweetness and a little green-ness that you don't find in turnips, rutabagas, or potatoes. You'll probably be seeing it popping up a lot since we've been eating it a lot. Here's a real easy recipe to try it for yourself.


Celery Root
1 celery root
2 Tbsp butter
2 cups beef broth
  1. Peel the celery root and cut into slices. Place in a pan with the butter and beef broth.
  2. Cook, partially covered 10 minutes. Remove the celery root from the pan.
  3. Reduce the remaining beef broth and pour over the celery root.