Pages

Wednesday, October 31, 2012

Halloween Week Day 2- Tricks and Treats


 Happy Halloween everyone!

I was so excited for Thatbaby to wake up and get in his costume this morning.  Even though I was a little worried about how he would react.  Things here have been rough.  Thatbaby has a rash.  A red, angry rash.  A rash in an area that without a doubt he will cringe at the fact I'm sharing it with you here.  And he's getting in another tooth.  So he hasn't been the happiest of campers lately.

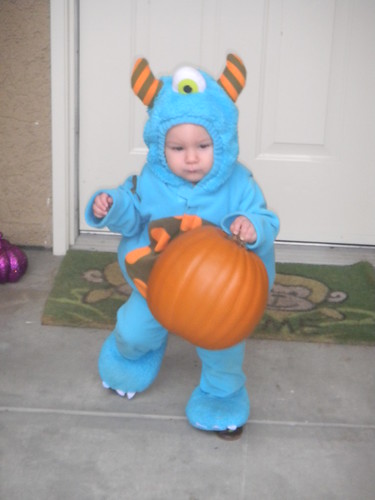
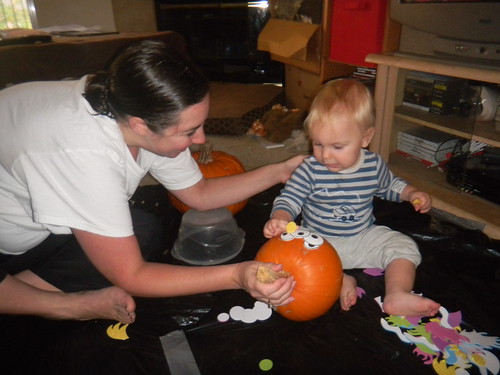
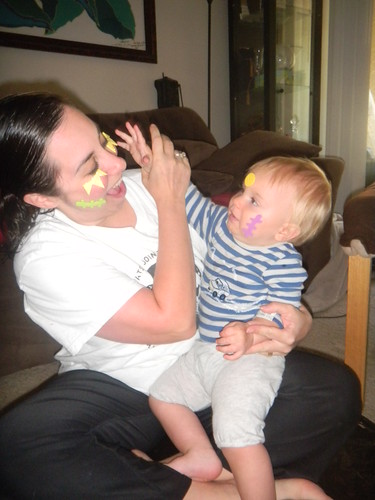
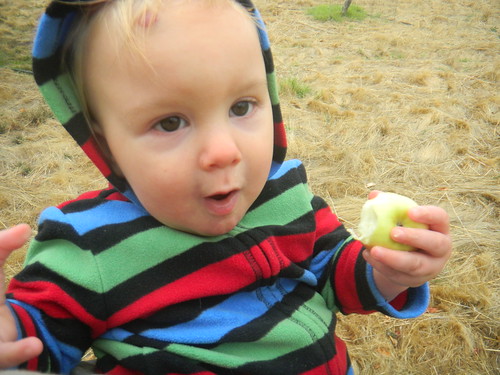
But he was more than cooperative to get ready for school.  Especially when we got dressed in front of the mirror so he could see how cute he looked.  Thatbaby LOVES playing dress up.


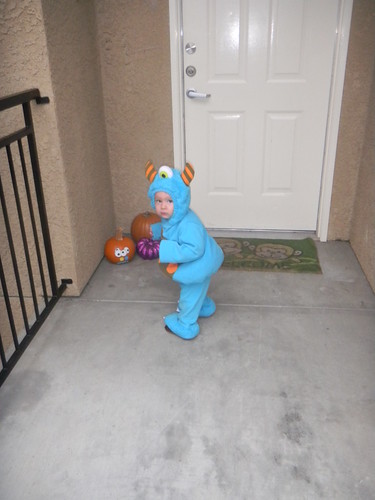
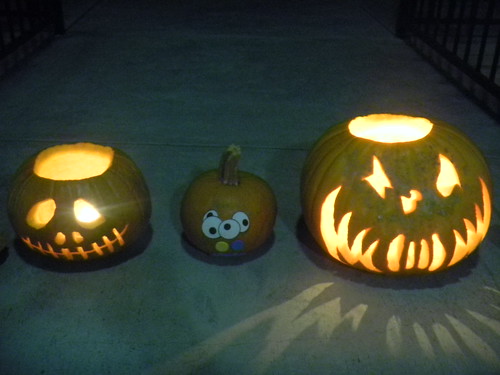
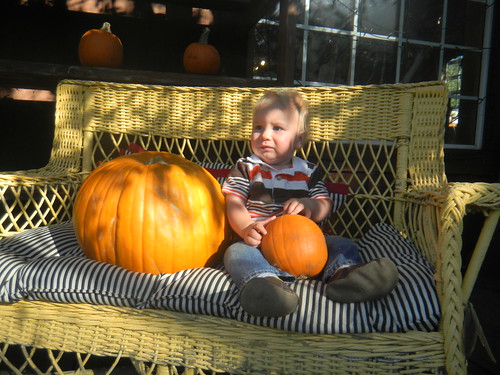
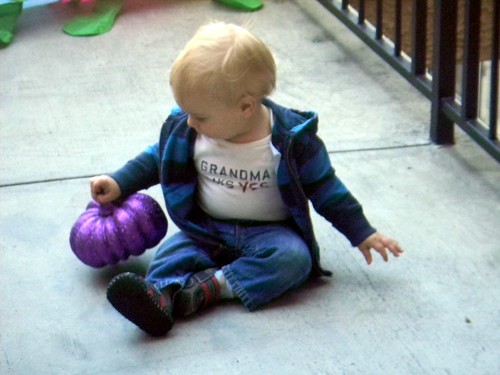
Almost as much as he loves carrying that silly foam pumpkin around. 


I ended up picking him up from daycare early for a trip to the doctor to have his rash checked out.  My poor miserable baby.  Which had the added benefit of getting us home early enough to get ready for Trick or Treating tonight!


I honestly didn't see the point in bringing Thatbaby door-to-door at this age.  We all know he's not eating the candy, and it seems silly to bring him around for strangers to ooh and ahh.  Instead we decided to take him store-to-store.

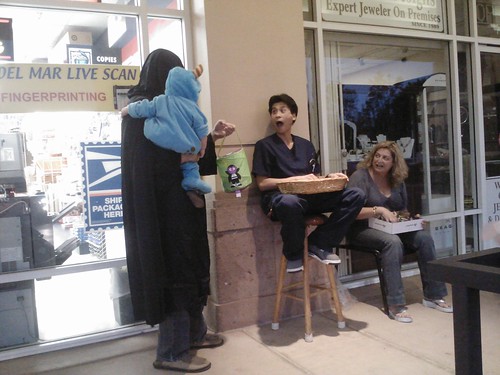
I know I've mentioned how much I love our community, and how we're within 3 miles of pretty much everything we need (the store, daycare, postoffice, our doctors, etc.).  Which meant we could walk down to our shopping center where they were hosting their own trick-or-treat event.


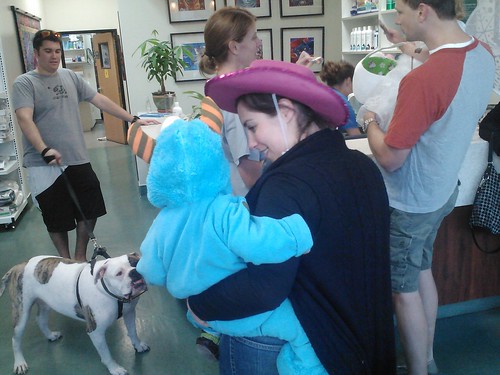
Each store was handing out candy - like the veterinarian.
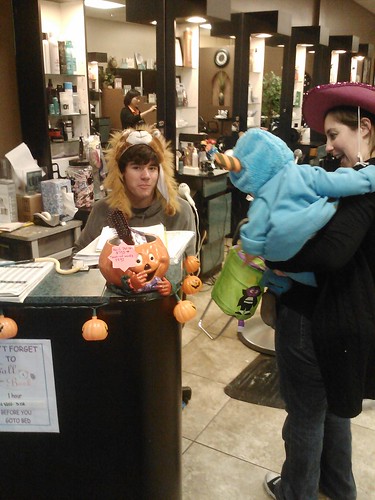

And the hair salon.


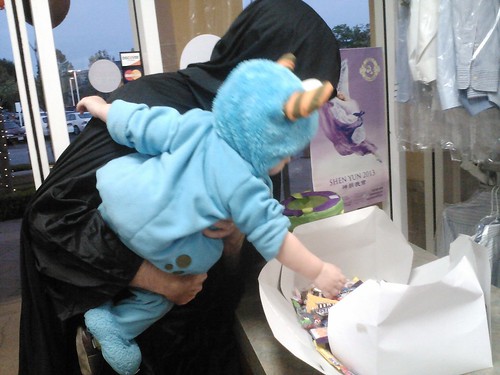
And the dry-cleaners.  I wasn't expecting much from Thatbaby, but I was pleasantly surprised that he figured out what to do right away.  Taking a piece of candy from the baskets and placing it in his trick-or-treat bag.


There was only one time when I had to remind him we were only taking one piece of candy.  Guess my kid has a thing for fun dip.


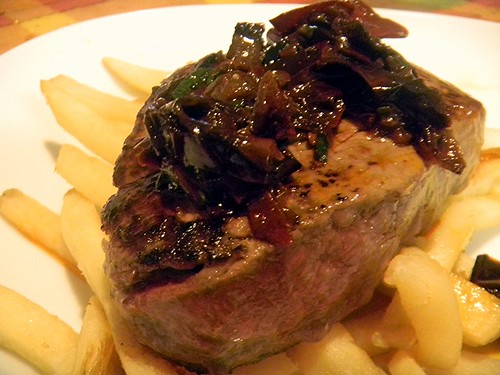
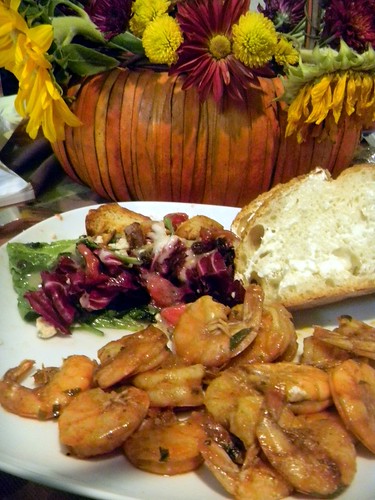
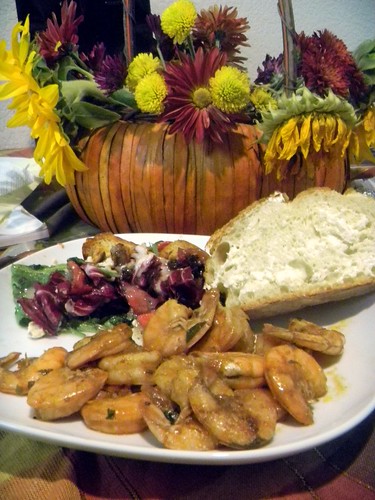
And because we're not totally heartless, we did let him have 1 piece of candy - or one package, since we thought the candy dots were the best choice for him.  I mean, he did do all that work.  And while we trick-or-treated, dinner simmered away in the crockpot.  All ready for us when we got home.


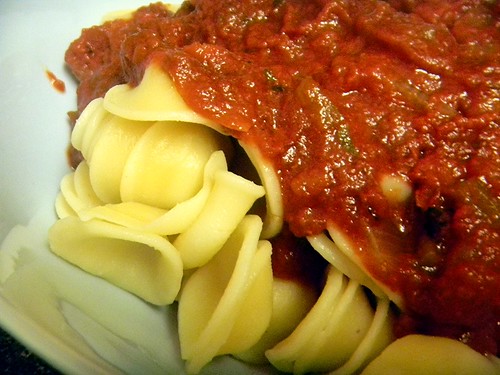
Because a baby cannot live on candy alone.

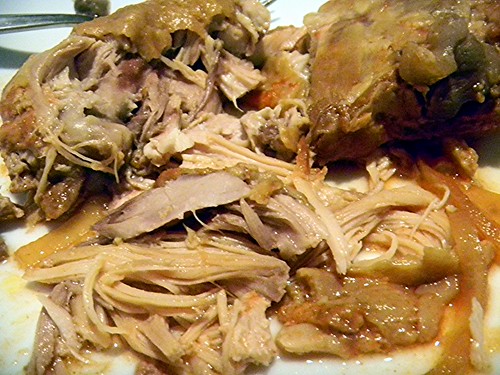
Beer Braised Chicken
1 lb chicken (I used some leftover thighs and drumsticks)
1 cup beer (I used some leftover Pacifico from Thatbaby's birthday)
1 cup ketchup
1/2 cup apple cider vinegar
1 tablespoon soy sauce
1 tablespoon Worcestershire sauce
2 teaspoons mustard
1 small onion, sliced
2 cloves garlic, smashed with the flat part of a knife

  1. Combine the beer, ketchup, vinegar, soy sauce, worcestershire sauce, mustard, onion, and garlic in the crockpot.
  2. Add the chicken and spoon sauce over.  Cook on high for 4-6 hours.


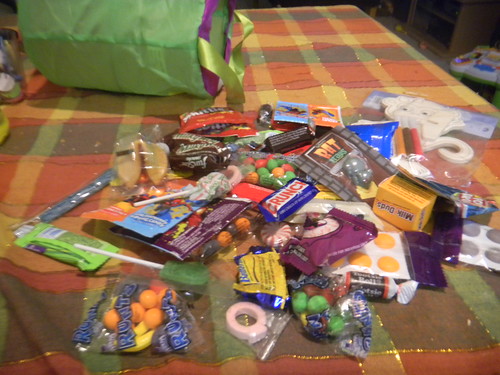
PS. - After Thatbaby went to bed, we examined his loot.  I think next year we may have a little more guidance over what he picked.  There's hardly anything good in this pile.   Unless that was his big "trick" he pulled on Thatboy and I.

Tuesday, October 30, 2012

Halloween Week - Day 1: Pumpkins and Pasta

It's the most wonderful time of the year!  Halloween is my all time favorite holiday.  The weather is fantastic in October, crisp and bright.  There's costumes and candy, and pumpkins galore!  So I'm dedicating all the posts this week to Halloween!

Remember those pumpkins we picked out at the pumpkin patch a couple weekends ago?  It was time to turn them into jack-o-lanterns.  Thatboy and I wanted to continue our annual pumpkin carving tradition, but knew it might be a little difficult with Thatbaby.  His knife skills are sorely lacking.

So we decided we'd help him decorate his pumpkin first, using foam stickers, so he could actively participate.


 Active participation included picking out what shapes he wanted to put on, 


And placing them on the pumpkin.


Or mommy.


Thatboy and I waited till Thatbaby had gone to sleep before we carved ours while watching our Halloween movie pick.  And then Thatboy brought them all outside.


This space is  where a normal person would include a pumpkin recipe, or a recipe for roasted pumpkin seeds.  Good thing we all know I'm not normal!  In addition to showcasing Halloween activities, I thought I would share some of the crockpot recipes that I've been relying on.  Because I noticed that I'm using my crockpot a lot these days.  Especially since it's getting darker lately, and I want to get my runs in before dinner.  The crockpot allows us to have a fully cooked meal ready when we get home.

Marinara is perfect for the crockpot.  My mom's best friend since they were teenagers comes from a stereotypical Italian by way of New York family.  She taught my mom to make the best red sauce, and that where I learned it.  Cooked for hours with sausage, meatballs, spices, and tomato it's an all day affair.  The crockpot allows for all day simmering without leaving the oven on.


Crockpot Marinara 
1 Tbsp olive oil
1 onion, chopped
1/2 Tbsp sugar
3 cloves of garlic, smashed with the side of a knife.
1 tsp dried oregano
1/2 tsp salt 
1/4 tsp dried basil
1/4 tsp dried marjoram 
1/4 tsp dried thyme
1/4 tsp pepper
pinch red pepper flakes 
1/4 cup zinfandel
6-oz tomato paste 
1 can crushed tomatoes
1 can diced tomatoes (you know I use the fire-roasted muir glen)

1.  Heat the olive oil in a saucepan over medium high heat.  Add onions and sugar and cook until the onions start to caramelize (about 30 minutes).

2. Add garlic, oregano, salt, basil, marjoram, thyme, pepper, and red pepper flakes.
3. Stir in the wine and cook for a minute.
4. Pour the onion mixture, tomatoes, and tomato paste in the crockpot.  Cook on low for 8-10 hours.

Monday, October 29, 2012

Mommy Mondays: Getting Things Done - The Early Days

I'm sure we've all heard stories of the frazzled new mom.  Wearing clothes that are days old, because it's been days since her last shower.  There is 3 day old oatmeal in her hair, which is coincidently the last time she remembers having solid food.  She survives on a diet of coffee, anxiety, and new-mom adrenaline.

This was never me.  From the moment I got home from the hospital, life worked much the same as it always had.  There were daily showers and three meals a day.  Until I went back to work, laundry was washed and folded on a regular basis.

I'm not superhuman, so how was I able to accomplish such a feat?  Well, like Batman, I have some pretty useful tools.

1) An amazing partner.  This one is the most important thing, because you can't pick one up from a store, or a garage sale. For the first six weeks, the reason I was able to get so much done was because Thatboy is a rockstar.  He took baby duty so I could shower, and he heated up all our meals so we could eat.  He helped with household chores and made sure we got out daily so neither of us went stir crazy.

Aaaand then Thatboy went back to work and I had to use other tools.


2) Tiny Love Activity Gym. This was great for getting short chores done, chores in the same room, or chores where I could sit on the ground beside the little guy (like folding clothes).  Also essential for bathroom runs.  This works really well up until you have mobility.  Since Thatbaby never rolled, this lasted for us until he just got too long for it.


3) Fisher Price Infant to Toddler Rocker.  This, my friends, is how I was able to shower every day, even after Thatboy went to work and I was home alone with a baby. This puppy sat right in our bathroom, and Thatbaby sat right in it.  With me serenading him from the shower, and the vibrating chair, I was able to get in a shower and blow dry my hair before any fussing set in.  Now he loves climbing in and out of this chair, so it's great for the long term.

4) Bright Starts Comfort and Harmony Swing. My kitchen buddy.  Anytime there was any cooking to be done, Thatbaby got his own front-row seat to "Mommy's Cooking Show!"  Some gentle rocking and constant dialogue allowed me to put dinner on the table every night.  For most babies, the rocker and the swing are godsends because babies sleep so well in them.  But not Thatbaby.  Both the rocker and swing were only do-able until he started to get tired and then he wanted OUT NOW.  Because for the first 3 months of his life, Thatbaby only wanted to sleep while being held.  Which brings me to -

5) The Moby wrap.  I've already written about my love for carriers, the Moby was essential for allowing me to function daily.  Because it meant I wasn't trapped under a sleeping baby.  Instead I was still able to get things done while he slept.  Things like laundry, or cleaning, or going to the bathroom.

Now that Thatbaby is more mobile and suffering from separation anxiety I'm still trying to figure out better ways to get things done at this stage.  But for the first few months, this is the arsenal that allowed life to carry on in Thathouse.

Friday, October 26, 2012

The Difference in a Day


Today was almost the opposite of the rest of the week.  Opposite in that I actually got to leave work at 5pm.  Opposite in that tonight it's Thatboy who wouldn't be home until late.  Not opposite in that there was last minute scrambling to get things done and out the door.

Friday evenings when I leave work is always a high point of my week.  Sometimes I have trouble turning off during the week.  There is a neverending pile of things to be done during the work week.  A balancing of what needs to be done and what I want to get done.  During the week, when I'm not at work, I'm often thinking about what I need to do the next day.

But Fridays?  Fridays I know that nothing is going to be asked of me for two whole days!  (Okay, that's not entirely true given that I've had to work every weekend this month, but in theory....)  And this weekend I don't have to work.  So I was looking forward to coming home, snuggling up with something cozy and a nice glass of red wine.

The wine had to wait until after I put Thatbaby to bed.  But the something comforting, that I could take care of right away.  As the weather cools, soups and stews, like warm woolly sweaters are the hallmarks of fall.  This pozole was the perfect way to end the week.  Just spicy enough to make your nose run, but still baby-friendly.  The flavors jump with a squeeze of lime, and are far more complex than your classic tortilla soup.

Pozole Rojo (From Gourmet as seen on Elly Says Opa)
1 large head garlic
10 cups water
4 cups chicken broth
2 cups beef broth
4 pounds country-style pork ribs
2 teaspoon dried oregano (preferably Mexican), crumbled
2 ounces dried New Mexico red chiles
1 .5 cups boiling-hot water
1/4 large white onion
2 tsp. salt
2 (30-ounce) cans white hominy, drained and rinsed
8 corn tortillas
cooking spray oil/canola oil


  1. Peel garlic cloves, reserving 2 for chile sauce and slicing the remaining garlic.  
  2. In a 7- to 8-quart heavy pot/Dutch oven, bring water and broth just to a boil with sliced garlic and pork. Skim surface and add oregano. Gently simmer pork, uncovered, until tender, about 1.5 hours.
  3. While pork is simmering, discard stems from chiles and in a bowl combine chiles with boiling-hot water. Soak chiles, turning them occasionally, 30 minutes.
  4. Cut onion into large pieces and in a blender purée with chiles and soaking liquid, reserved garlic, and 1.5 tsp. salt until smooth.
  5. Transfer pork with tongs to a cutting board and reserve broth mixture. Shred pork, using 2 forks, and discard bones.  
  6. Return pork to broth mixture and add chile sauce, hominy, and remaining 1/2 tsp. salt. Simmer pozole 30 minutes and, if necessary, season with salt. 
  7. While pozole is simmering, preheat the oven to 425 and cut the tortillas into thin strips.  Brush or spray the strips with oil and then bake until crispy, about 8-10 minutes.

Thursday, October 25, 2012

Another Lazy Meal


It's funny, last year at this time, it was as though time had stopped.  I was home with Thatboy and our new baby and nothing was expected of us.

This year, I am beyond busy.  I was once again working late tonight, stuck in arbitration till after the sun went down.  And because I was in arbitration, I couldn't run home to prep dinner.  Instead I had to go with an easy crowd pleaser- steak frites.  The other aspect of tonight's dinner was trying to get some of Thatbaby's favorites. He's been waking a lot these past few nights, and not eating as much as he normally does during the day, so we're hoping that a fuller stomach will keep him down longer.  Steak and french fries are both objects he rarely turns from.

To dress up the steak, I turned to a delicious sauce I discovered long ago on Mary Ellen's blog.  This versatile topping works on so much more than just steak.  It's already on the meal plan for next week as dressing for some grilled corn.


Three Chile Butter (From Mary Ellen's Cooking Creations)
Ingredients
  • 2 dried guajillo chiles, stemmed, seeded, thinly sliced
  • 2 dried ancho chiles, stemmed, seeded, thinly sliced
  • 1/2 cup (1 stick) butter
  • 3 shallots, chopped
  • 2 whole chipotle chiles (from can), drained, stemmed, seeded, sliced
  • 1 cup water
  • 2 tablespoons chopped fresh chives
Directions
  • Heat large skillet over medium-high heat.
  • Add guajillo and ancho chile slices. Toast until fragrant and beginning to darken, stirring often, about 30 seconds.
  • Add butter, shallots, and chipotle chiles. Stir just until chiles are coated with butter and shallots begin to soften, about 2 minutes.
  • Add 1 cup water and simmer until dried chiles are soft and all water has evaporated, about 15 minutes.
  • Mix in chives; season with salt.
  • Can be made 1 day ahead. Cover and chill. Rewarm before using. (I just gave my leftover sauce to my dad to pour over his London Broil tonight - we'll see how well it reheats, but I'm guessing it will be fine based on how it looked this morning)

Wednesday, October 24, 2012

Prep Work Pays Off


Today was a looooooong day.  At 4pm I had to text Thatboy and see if he could pick Thatbaby up from daycare because it was clear I wouldn't be leaving any time soon.

At 5:45 I sent another text - "One more brief to write!  Go ahead and have dinner without me."

I hate missing dinner with the boys, but it's nice to know that I can ensure they have a delicious dinner, even when I'm not there.  On days when I know I'm going to be late, I run home and prep something easy for Thatboy to throw in the oven, or on the stove.  Pizza, meatloaf, steak - all with little notes on how to reheat or cook.  Things that don't take long for me to throw together, and don't require much effort on his part when he gets there.

This shrimp dish is one of the easiest out there.  Throw together some spices and butter, pour over the shrimp, and let them marinade until dinner time.  The idea comes from shrimp boils, where shrimp in shell are boiled with seasoning, and then dumped unceremoniously on the table for everyone to reach in and grab.  Unceremonious shrimp dumping is a little messy for a weeknight at home, and I don't trust Thatboy with boils, so in this recipe the oven does the work.  The butter, garlic, and spice though are things that are right at home with southern shrimp.


 Cajun Shrimp
  • 2lbs unpeeled shrimp
  • 1/4 cup butter
  • 1/4 cup olive oil
  • 2 Tbsp cup chili sauce
  •   2 Tbsp Worcestershire sauce
  • 4 garlic cloves, chopped
  • 1 tablespoons Essence of Emeril
  • 1/2 tablespoon chopped parsley
  • 1/2 teaspoon paprika
  • 1/2 teaspoon oregano
  • 1/2 teaspoon cayenne
  • 1/5 teaspoon tabasco

  1. Spread shrimp in a single layer on a shallow baking dish.
  2. Combine remaining ingredients in a saucepan over low heat, stirring until butter melts, and pour over shrimp. Cover and refrigerate 2 hours.
  3. Preheat oven to 400.  Uncover shrimp and bake for 20 minutes, turning halfway through. 

Monday, October 22, 2012

Mommy Mondays: Safety First

Welp, we have a walker!  Last week Thatbaby took his first steps. Which brings on a whole new level of terror.  Because it means we now have to babyproof even higher than we did before!

So let's talk a little about baby proofing and all things safety related.

In the beginning, baby safety was pretty easy.  They don't move around all that much.  Our "safety" products included:


*Video monitor - I love this.  Some people think it's unnecessary, but I can't imagine life without it.  Mostly because babies are noisy little son-of-a-guns.  And just because they're making noises, doesn't mean they're awake. This kept Thatboy and I from jumping up every 3 minutes to check and see what was going on in the nursery.


*Tub thermometer - Probably also not necessary, but as first time parents we were a little cautious.  I still use this, but Thatboy has long since graduated to the "feel" test.

When Thatboy started crawling and cruising, we babyproofed a bit more. Our slate and wood coffee table which was all sharp edges needed help. 


*A table topper turned our coffee table into a giant cushioned-topped surface, perfect for cruising around.

*Cabinet locks!  I don't know what we would have done without these.  Thatbaby LOVES to explore our cabinets in the kitchens and bathroom.  And we don't always want our pots/pans/pantry items thrown to the floor.  The cabinet locks keep him from getting where he's not supposed to be.  And trust me - he's tried.


* When Thatbaby graduated to the regular tub, this spout cover came in very handy.  Although we have a "no standing in the tub" rule, it doesn't stop him from trying, or slipping, or trying to grab at the spout.  According to the main bath-giver in Thathouse, this has proven quite useful.

And that's pretty much it.  For everything else we used the same philosophy we did with doggie proofing - set the baby up for success.  Which means we removed all temptations from reaching distance.  All books, cds, dvds, and things that could be pulled down from the shelves got placed in fabric drawers, making their contents less desireable.  Anything with a cord was no longer left out.  All reachable surfaces were cleared. 

We instituted a few "no" rules - no touching the oven, no standing in the bathtub, no eating the dog's food - and continue to reinforce those.

And at the same time, we created a lot of things to him explore at his level.  The bottom shelves got books and toys added to them, to keep him more interested in things he can play with.  And for the most part, he has free reign in the house with something to play with in every room.  Because no one responds well to hearing "no" all the time!

Apple of My Eye


It happens every year.  Somehow or other I always end up battling the clock.  The apple picking clock.  Most of the time it's because around mid-September I realize we haven't planned our trip to the orchards and I battle the clock trying to find a time to head out before the orchards close.

Last year, Thatboy wouldn't even let me head out.  Our birth class gave us the basics of how to deliver your own baby in case "you end up stuck on the road to Julian where there are no phones and poor cell service."  He took that as an omen that we shouldn't head out to the Julian orchards, in case I were to go into labor and he'd have to be Doctor Daddy.

This year, I was on top of the situation.  Planning our apple-picking trip WAY early with my mom's group.  But by the time we could all find a weekend that worked, that clock battle was upon us with a vengeance.  Rather than missing out, Thatboy and I bundled up our munchkin and headed to the orchard for a quick pick. 


It was a little disappointing, with most of the trees picked over, but we still managed to find enough to fill up a bag and give Thatbaby his first orchard experience.


 There is nothing quite like apples fresh from the tree.  And now the little guy is just as hooked.  Even though I didn't get as many apples as I'd like, I still can't wait to get cooking with them.  As soon as I knock some thank you cards out of the way, I've got a nice applesauce on the list.  Applesauce - probably the easiest thing you can make with apples, and it goes with just about everything.

Until then, I share with you one of my easy night dinners.


Making the most of the last of the late summer produce - zucchini and corn, this recipe is easily adaptable to any seasonal veggies.  Like apple and squash for the fall, potatoes and leeks in the winter, leafy greens in the spring.


Chicken Tostadas
1 tsp ground cumin
1/4 tsp salt
1/4 tsp black pepper
2 tsp olive oil
1 chicken breast, cut into chunks
1 cup chopped shallot
1 cup corn kernels
1 cup chopped zucchini
1/2 cup salsa
1 tsp dried cilantro
3 tostada shells
1 cup shredded Monterey Jack cheese
  1. Preheat oven to 350.  Combine the chicken chunks with the cumin, salt, and pepper.
  2. Heat oil in skillet over medium heat.  Cook chicken for 3 minutes.
  3. Add shallot, corn, and zucchini to pan and cook for an additional 2 minutes.
  4. Stir in salsa and cilantro and cook for 2 more minutes.
  5.  Place tostada shells on a baking sheet and spoon chicken mixture into the center.
  6. Sprinkle the tostadas with cheese and bake just until cheese melts.

Friday, October 19, 2012

My Little Punkin'


Last Friday when I dropped Thatbaby off at daycare, he didn't really want me to leave.  "We're going to have so much fun today Thatbaby!" his teacher said as she tried to coax him from my arms.  "We're going to paint pumpkins, and go on a wagon ride!"

Thatbaby must have had a great time painting his pumpkin, because he was hooked from that moment on.  When helping Thatboy decorate our entry way, he immediately was drawn to our decorative pumpkins, which actually do a fair job of bouncing.

But, lest he should come to believe all pumpkins are made from glitter, paper, and foam we decided a trip to an actual pumpkin patch was in order.

As soon as we got there, he made a bee-line for the pumpkins.


 He wanted to pick each one of them up.


 He had more success with some than others.


And in addition to the pumpkins, there was lots of other stuff to explore.  Like hay tunnels.


We brought Thatdog with us for some fresh air.  And to help babysit.


There is nothing that Thatbaby enjoys more than rolling around.  As soon as he saw the carts he started pointing to them and asking for "more" which is pretty much his way of asking for anything.  We were more than happy to accommodate, since  it's hard to carry a bunch of pumpkins and a baby.


Do you see Thatbaby's lips in this picture?  How they're pursed?  That's because when you wheel him around he tries to make a "vroom vroom" sound, but it comes out more like "mmmmm mmmmm" or raspberry blowing.

He was a sport for a little while, so I could get some pictures.


But before long, he had had enough of the spotlight.


Luckily he cheered up as soon as he was back in his racecar, holding his pumpkin, and watching the alpacas.


This would be the perfect place for a pumpkin recipe, wouldn't it?  Well then you will surely be disappointed.  It's October and I've already delved into my stack of chili recipes, but haven't bought a can of pumpkin yet.  Don't worry, I'm sure there will be many pumpkin recipes on their way.  Until then, I'll leave you with a cake that is more attune to the type of weather we've been having - summer weather. 

Up until today, it has been unseasonably warm, which puts me in the mood for a light dessert.  And this ranks up there with something truly airy.  This Daffodil cake is a twist on an angel food cake, with most of the batter being comprised of egg whites, flour, and sugar.  But some of the batter has egg yolk stirred in, giving bright, sunny, yellow bursts of color in the otherwise white cake.  The amount of egg whites in this cake make it light and almost guilty free.  Perfect for these last days of warm weather.

Daffodil Cake (From the Fannie Farmer Cookbook)
 

Preheat oven to 375°F.
1/4 tsp salt
1 1/2 tsp cream of tartar
2 tsp vanilla
9 egg whites
1 1/4 cups sugar
1 1/4 cup flour
4 egg yolks
2 tsp grated orange rind


Frosting:
4 Tbsp butter
1 1/2 cups confectioners sugar
2 egg whites
1/2 tsp lemon extract
2 tsp grated orange rind 
  1. Preheat oven to 375.  Combine salt, vanilla, and egg whites in bowl of electric mixer.  Beat until the egg whites hold a soft peak.
  2. Slowly add 1 cup of the sugar and beat just until the sugar is blended.
  3. Fold in the flour in 4 additions.
  4. In a separate bowl, beat the egg yolks and orange rind until thick.
  5. Add the remaining sugar and beat until thick and light in color. 
  6. Fold a third of the egg white mixture into the yolk mixture until blended.  Fill an ungreased tube pan, alternating large spoonfuls of the white batter with the yellow batter. Bake 35 minutes.
  7. For the frosting, cream the butter and 1/2 cup sugar until light and fluffy.  In a separate bowl, beat the egg whites until foamy, then add the remaining sugar and beat until stiff.  Combine the egg whites and butter and blend.  Stir in the lemon extract and orange rind.

Thursday, October 18, 2012

Winners!


October has long been one of my favorite months - even before Thatbaby's arrival.  I love the clean, crispness to the air.  Even here in Southern California where there are only 2 seasons (dry and wet) it's beginning to get a little cooler.

And we started preparing for my favorite holiday - Halloween!

Thatbaby helped Thatboy put up the outside decor.


Now all we have to do is carve pumpkins and get costumes and we're all set!

In other YAY news - a couple weeks back I found out that I won a new set of pans from Sarah's Cucina Bella


And these couldn't have come at a better time.  Since I was desperately in need of a new set of pans.  Desperately. 


And so far, I'm loving these.  They're Teflon's Technique Enamel Light Weight Cast Iron Frypan Set.   First off, I adore the fact they're red.  When we got married, I let Thatboy control the registry, and he picked out everything in our kitchen to be silver and black.  Bleh.  Reds and oranges are my kitchen colors of choice.

Second, I they combine the benefits of cast iron (my favorite way to cook, least favorite thing to clean) with the benefits of non-stick cookwear (my favorite thing to clean)!  Needless to say, they're getting lots of use in my kitchen.


I decided to break them in with an easy taco recipe.  Look how little oil I'm using and still getting a nice, crispy taco shell!  These are a great vegetarian taco recipe, combining black beans with salty feta.  Thatbaby, as usual, loved these since they're filled with beans.  Thatboy and I enjoyed a change from our typical tacos since we usually use meat and don't typically fry our shells.

Crispy Black Bean Tacos with Feta and Cabbage Slaw (From Bon Apetit)
  • 1 can black beans, drained (I actually used the leftover beans from the tamales)
  • 1/2 teaspoon ground cumin
  • 5 teaspoons olive oil, divided
  • 1 tablespoon fresh lime juice
  • 2 cups coleslaw mix
  • 2 green onions, chopped
  • 1/3 cup chopped fresh cilantro
  • 4 white or yellow corn tortillas
  • 1/3 cup crumbled feta cheese
  • hot sauce
1.   Place beans and cumin in small bowl; partially mash. 
2.   Mix 2 teaspoons olive oil and lime juice in medium bowl.
3.   Add coleslaw, green onions, and cilantro and toss to coat. Season slaw to taste with salt and pepper. 
4.  Heat 3 teaspoons olive oil in large nonstick skillet over medium-high heat. Add tortillas in single layer. 
5.  Spoon 1/4 of bean mixture onto half of each tortilla; cook 1 minute.
6.  Fold tacos in half. Cook until golden brown, about 1 minute per side. 
7.  Fill tacos with feta and slaw. 
8.  Serve with hot sauce.