Pages

Monday, November 18, 2013

Mommy Mondays: Party Time

I love planning parties.  I love planning them for Thatboy and I love planning them for Thatbaby. I thought I'd share some of my favorite party planning tips with you - of course, geared to the younger set.


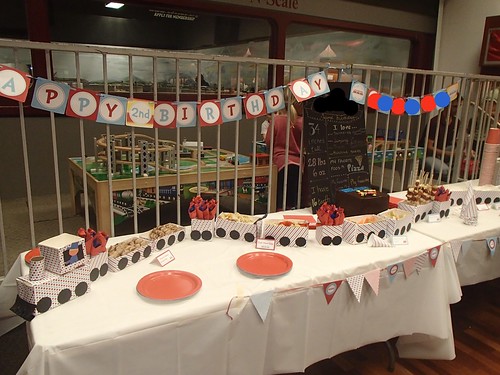
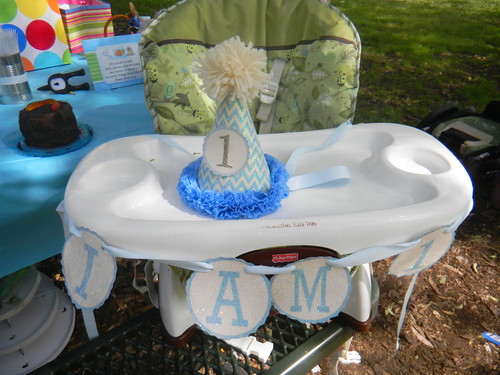
Theme:  I blame the internet for this.  Pinterest, social media, blogs - all with adorable, fun ideas that make you feel like this is a necessity.  It's not.  I know some one who's theme for her daughter's first birthday was "Birthday Party."  And you know what?  There's nothing wrong with that.  A theme is not a necessity.  That being said, I adore themes.  I love the fun element they add to a party.  For Thatbaby's first birthday we used a "Snips and Snails and Puppy Dog Tails."  His second birthday was "Choo Choo, Look Who's Two!"  Other parties we've attended over the past year had themes of Dr. Seuss, Hungry Caterpillar, Surfing, Legos, and Construction Trucks.


Location:  Horse Whisperer and I had a big discussion about this when she was planning her daughter's birthday.  There are benefits to having the party at your home, as well as benefits to having it elsewhere.  So think about it - which is more important to you?  Not transporting things?  Not having to clean?  Not worrying about set up?  Not worrying about cleanup?  If you have the time and the space, your home can be a fantastic option.  Other great options include parks (we did this last year), museums (like we did this year), zoos, community centers, play spaces, restaurants, and local attractions.


Food: My basic rule of thumb is "3 entrees," a veggie, a fruit, and dessert!  Mrs. Pirate is fantastic about  providing special toddler snacks.  I'm not as concerned with that.  I figure kids will eat fruit, right?  Although, I love having food fit with a theme.  So if something like teddy grahams or goldfish crackers worked with my theme, they would surely find a place on my table. I also follow the philosophy that the food should be easy.  If that means catering - then so be it (and that includes ordering pizza if that's what works).  If that means making sure they fit with your little one's food allergies/intolerances, the that's what you've got to do.


Activities: Little kids are easy.  The younger they are, the less you need to plan.  For the under 1 crowd, all you really need is a soft space for them to lie/crawl on.  For Thatbaby's second birthday, all we had was the train table.  But if you're at home, the birthday child's toys are more than enough activity.  And of course, you can't ever go wrong with bubbles and balls.


Timing:  There's really one person you need to cater to with the time.  The birthday child!  For me, that means planning around their naps.  I mean, it's all well and good to make it convenient for friends and family, but no one really wants to go to a party where the guest of honor spends the whole time asleep, or is a missed-nap monster.  At the same time, be smart about it.  Just because your child is awake at 5:30am, does not make a 7:30am party time appropriate. Even those of us with early risers don't want to have to hustle to make ourselves presentable and out of the door that early.


Who to Invite: The good news is, there is no wrong answer!  Immediate family only?  Sounds good.  Every person your child has ever met?  Why not!  It's really up to your venue, budget, and comfort level.  For Thatbaby's first birthday, we invited our families, the moms from my group and their kids, and our family friends with similarly aged kids.  For his second, it was the same, with the addition of his daycare class.


Some of my favorite party planning sites:
Hostess with the Mostess: This is a great place for inspiration.  There are so many different party themes, ideas for decor, games, etc.

Gaddie + Tood: I love this site for printables.  I used it for Thatbaby's first birthday.  It's got banners, toppers, hats, and invitations.

Etsy: If you do come up with a theme, etsy is the place you should turn.  Because it will do everything for you.  As I said, I love Gaddie and Tood, but etsy is fantastic if you don't want to do all that work.  This year I just downloaded a package from NickWillJack!

Amazon:  Amazon is where I go for party favors.  Because whatever you can get from Oriental Trading Company, you can get from Amazon.  And with free 2 day shipping through Prime, you don't have to worry about a headcount too far in advance.

Luna Bazaar:  Need paper decorations like lanterns or fans?  This is the place to go.

Party City:  My food paper products all come from Party City.  Plates, silverwear, serving utensils - it's my one stop shop.

Friday, November 15, 2013

Oh How We've Changed: Almond Crescents


Prior to Thatbaby, Thatboy and I had our Palm Springs weekends down to a science.  Lots of pool time, shopping, and dining out at nice restaurants.

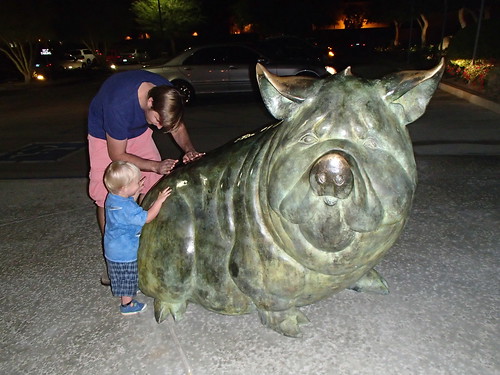
This trip, catered to Thatbaby, meant we didn't stick with our usual food choices (with one notable exception).  Since we were going to be out at zoos and museums during the day, we decided to pack lunches, so we wouldn't have to worry about overpriced crap.  Which meant our first stop of the weekend was Trader Joes.  (This was also good so I could load up on cereal bars - which is the second thing out of Thatbaby's mouth when he wakes up- and fruit for snacking.)  I figured there would be a restaurant in the same shopping center, and I was right!  So we found our first breakfast at The Palms Cafe.


The great thing about most breakfast places is that we don't have to order Thatbaby his own breakfast.  Portions are always so large he can share ours.  My omelet came with a side of pancakes and fruit, and those sides became Thatbaby's breakfast.  We don't do pancakes very often, so they're a definite favorite when we eat out. 

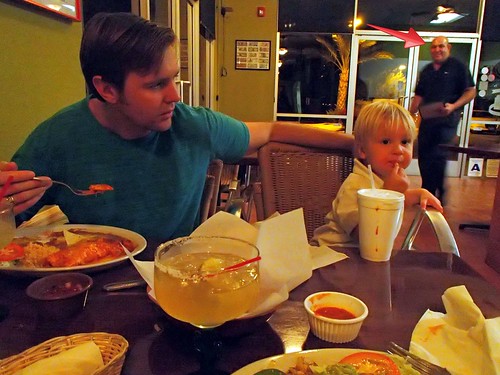
For dinner, Thatboy and I were debating between a couple of easy sounding, toddler friendly options and decided to give La Perlita a shot.  


This small, unassuming, family run restaurant is located in a strip mall, which was deserted on a Saturday night.  But don't let that dissuade you.  It really is a "little pearl" in the desert.  The food was wonderful.  Thatboy had a relleno and enchilada he raved about.  I had my typical fajitas, and Thatbaby had a quesadilla - which he had been talking about all evening in anticipation.  It wasn't just the food that impressed us, but also the atmosphere.  The man in the background is the owner, and he personally spent a great deal of time ensuring Thatbaby's happiness and providing entertainment in the form of "magic tricks" and masks.   He spoke with us about our meals, what brought us in, and a little about the restaurant itself. 

The one restaurant we knew we would continue to return to, regardless of Thatbaby's preferences, was Norma's.  


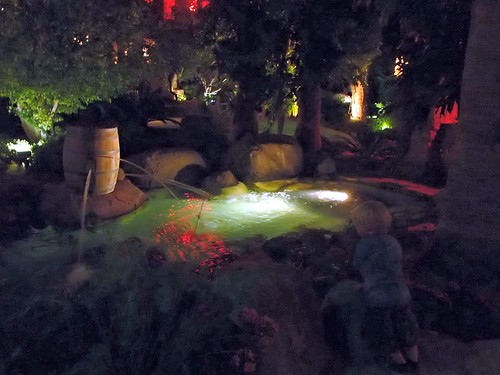
This is one of Thatboy's favorite restaurants, so it stays on schedule.  Thatbaby is a big fan for a couple of reasons.  Firstly, because as soon as you're seated they greet you with a smoothie shot.  Thatbaby is a huge fan of smoothies.  So much so that we ended up getting him a full size one to work on.  Thatbaby also loved sharing Thatboy's chocolate and peanut butter waffles.  But I think the highlight of breakfast at Norma's for Thatbaby was being able to run around and explore the grounds.


With hammocks, chairs, swings and fountains, he found plenty to keep him entertained while Thatboy enjoyed his coffee.

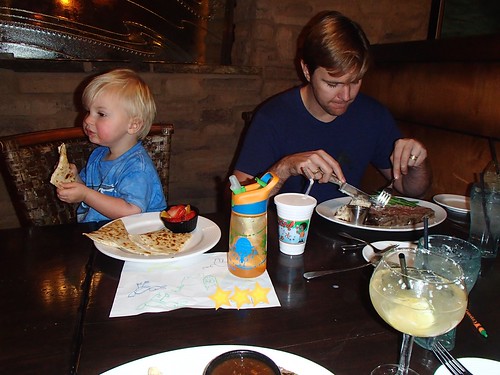
We saved the "most fun" restaurant for our last night.  And it lived up to all our expectations.  Jackalope Ranch is more like Disneyland than a restaurant.


To be fair, the atmosphere almost reminds me of a restaurant IN Disneyland - like the Blue Bayou.


There is something in every corner of the space to look at and distract young diners.  


Thatbaby was so happy munching on his quesadilla and looking around, that Thatboy and I were able to have a full, uninterrupted conversation at dinner.  Which hasn't happened since we started dining with Thatbaby at 6 months.


So our dining experiences may not be what they once were, but we're finding new and different ways to enjoy ourselves when going out.  One is definitely to manage expectations by catering a bit to our youngest dining companion.

In truth, we often opt for the path of least resistance when it comes to Thatbaby.  It's not so much a matter of spoiling him, but setting him up for success.  Like instead of fighting him when I'm in the kitchen, I find ways to have him help me.  Lately he's been helping with cookies.  Which means I'm usually making easy recipes with few steps and ingredients.  He has become the master of turning on and off the Kitchen Aid.  And there is nothing he likes better than "dump[ing] it out" with the ingredients.

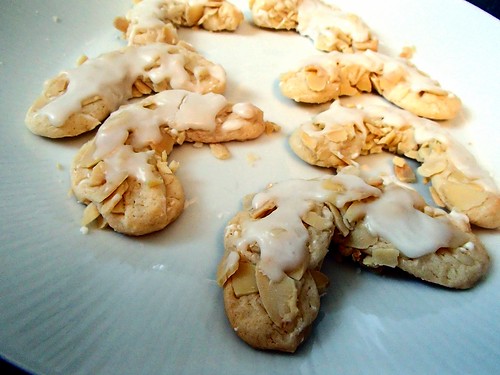
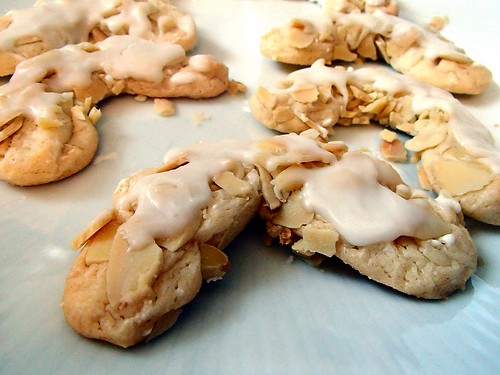
These almond crescent cookies are one of those few steps/ingredient type recipes.  Almond paste is one of those ingredients that needs very little else.  Adding more almonds only heightens the great flavor.  I made a little glaze by mixing confectioner's sugar and water, but they are just as tasty without.


Almond Crescents
1/2 lb almond paste
1/2 cup confectioner's sugar
1 egg white
1/2 cup blanched, slivered almonds, chopped
  1. Preheat oven to 300.  Place almond paste in an electric mixer and mix until the paste is soft and pliable.
  2. Add the confectioner's sugar and egg white and beat until combined.
  3. Place the mixture in a ziplock bag and snip off the end.  Use this makeshift pastry bag to pipe out tubes, bending the ends to create a crescent on a parchment or silpat lined cookie sheet.
  4. Sprinkle the almonds over these crescents.  Let stand for 20 minutes.
  5. Bake for 20 minutes.  Cool, then remove from pan.


Thursday, November 14, 2013

Up Up and Away: Chicken Pot Pie Soup


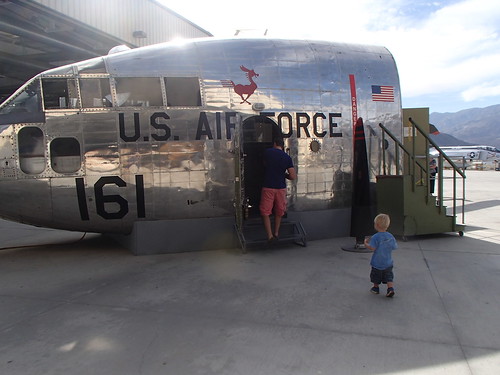
I'm pretty sure I've said it before, but I am so thankful for L&O.  I'm thankful that she got pregnant right before me, so I always knew what to expect and had some awesome advice on what to expect as the big day neared.  And I'm thankful that Little LO is a couple months older than Thatbaby so she can give me lots of good recommendations for my guy.  Like when she told me about the Palm Springs Air Museum and how much Little LO loved it.

We'd never been before, and frankly, I didn't know it existed!  But when we were planning our trip, I suggested it to Thatboy and he agreed Thatbaby would enjoy it.


Almost as soon as we entered the parking lot, Thatbaby gasped and pointed, calling out "planes! planes!"  He wanted to run up and see each one.  But once we got inside there was even more in store.


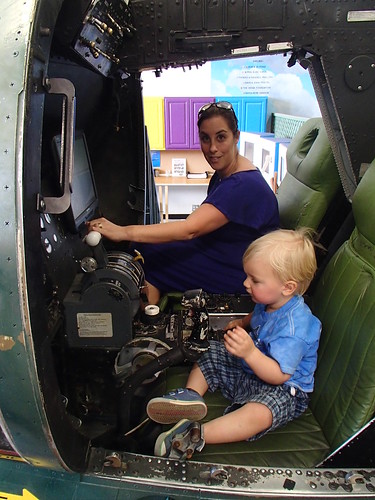
Like the ability to actually go inside the planes!


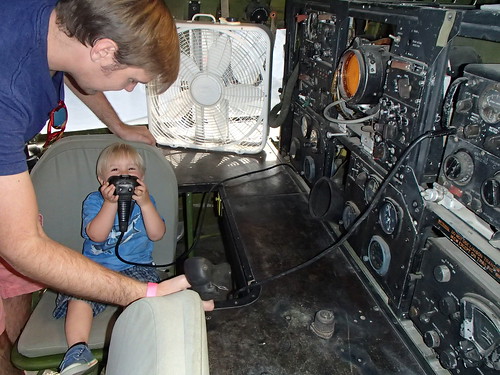
And Thatbaby loved the cockpit.  All those buttons!


And he got a chance to radio the tower.


Of course, once he realized he could go in one plane, he wanted to go in all of them. 


Luckily there were plenty of opportunities for him to do just that.


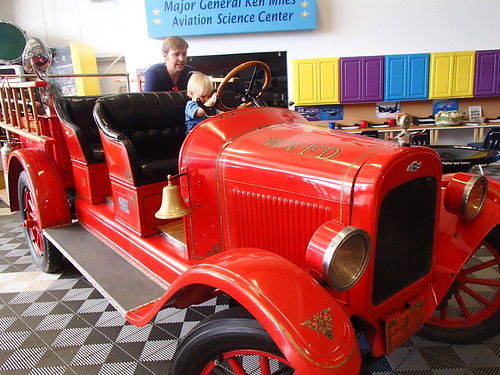
The museum is staffed by veterans, one of whom told us there was a great fire engine for Thatbaby to play in.  Thatbaby went running around the museum looking for a fire engine.  And he found it!


And he also got to try his hand at the flight control tower.


Thatboy got to tour "The Flying Fortress" and claims he might have had a better time than Thatbaby!  I have  a feeling this museum will probably become a new regular stopping place on our future Palm Springs trips.

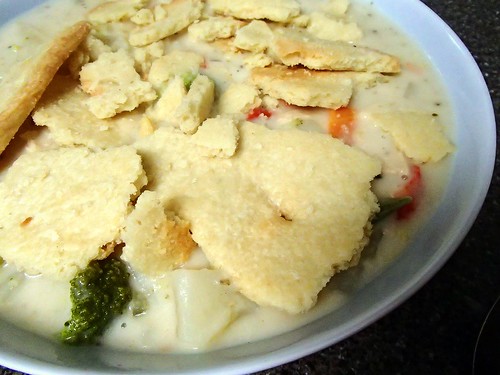
The museum, with its WWII airplanes, brings back memories of a different era.  And so does this soup. Chicken Pot Pie makes you think of a Norman Rockwell painting, diners, or automats.  It was a staple. This is a modern take on the dish, and a lighter version.  Because instead of baking the entire thing in a pie crust. you just sprinkle some pie crust on top.  The crust was definitely Thatbaby's favorite part, and I found him sneaking in the kitchen to scoop some off the tray whenever I wasn't looking.
Chicken Pot Pie Soup
4 potatoes, peeled and diced
8 cups chicken broth
1 chicken breast
2 Tbsp canola oil
1/2 onion, diced
2 stalks celery, diced
1/2 cup flour
1 tsp oregano
1 tsp thyme
1 bag of frozen veggies
1 cup milk

  1. Preheat oven the 425.  Roll out pie dough and bake for 10 minutes.  Remove and let cool.
  2. Bring chicken broth to a boil in a large pot.
  3. Add the chicken and cook for 10 minutes.  Remove chicken from broth and let cool, then dice or shred.
  4. Heat the oil in a large skillet.  Add the onions and celery and cook until translucent, about 3 minutes.
  5. Sprinkle the flour over and stir until paste forms.
  6. Add the oregano, thyme, and a sprinkle of pepper and cook for another couple of minutes.
  7. Whisk the onion and celery mixture into the chicken broth and bring to a boil.
  8. Reduce to a simmer and add the chicken, potatoes, and frozen veggies.  Cover and cook 15 minutes.
  9. Stir in the milk and cook for another 5 minutes.  Season to taste with salt and pepper.
  10. Break the pie crust into pieces.  Ladle the soup into bowls and top with pie crust pieces.

Wednesday, November 13, 2013

Lions and Zebras and Trains, Oh My!: Easiest Crispiest Chicken


We arrived at night, in the dark.  So I was pleasantly surprised in the morning when Thatbaby announced there were duckies right outside.


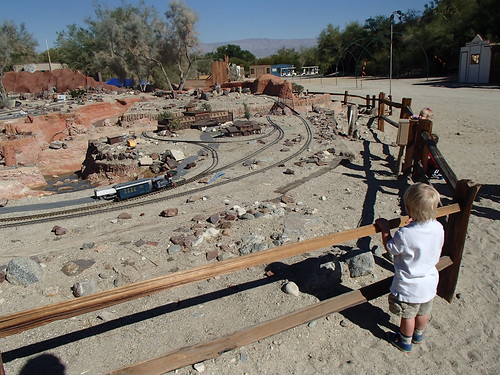
It was our first animal sighting of the day.  But it wouldn't be our last!  We were spending the day at The Living Desert.  Based on how much Thatbaby enjoyed it the last time we were out there, we figured it would be a hit.  It was.  But really, with trains, animals, and a carousel, what's not to love?

Our first stop of the morning were the trains.  Thatbaby didn't want to leave.  Even with the promise of animals.  When we finally managed to drag him away, he made us promise to bring him back before we left.


He did love the animals though.  The giraffes, the antelope, the zebras.


Although he claimed his favorite was the wolf.  I think a combination of the fact that we've been working on wolf howls from his Halloween books, and the wolf he met over the summer in Yosemite. 


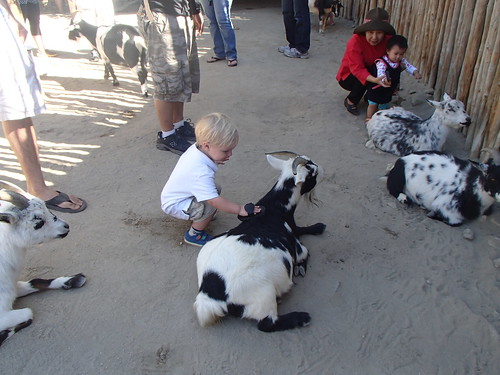
And of course, there were nice goats to brush and pet.


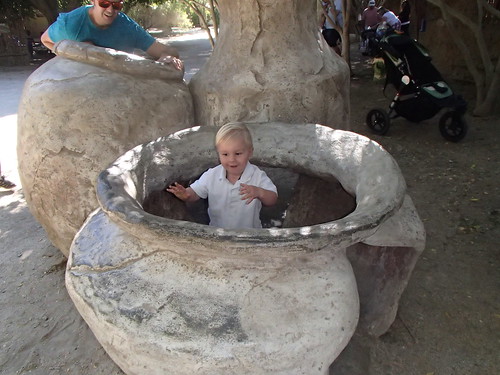
And there were loads of statues and activities to climb on and play in.


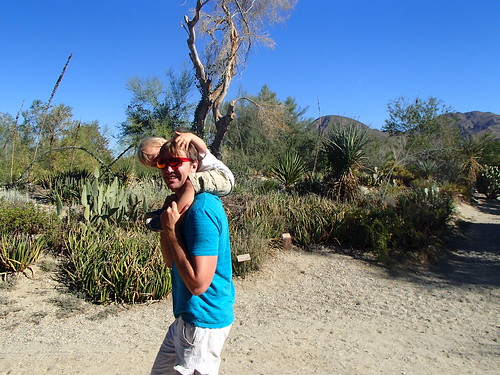
To get to see the wolf, we got to experience the gardens - which we haven't gotten the opportunity to do for years.  Thatbaby was especially impressed with the giant cacti.  He let out a big gasp, pointed, and then said "OH MY!"  When we asked where he picked up this phrase, he informed us that BA says Oh My.  So now I'm a little concerned that BA lied about being 2.  He is quite obviously 62.


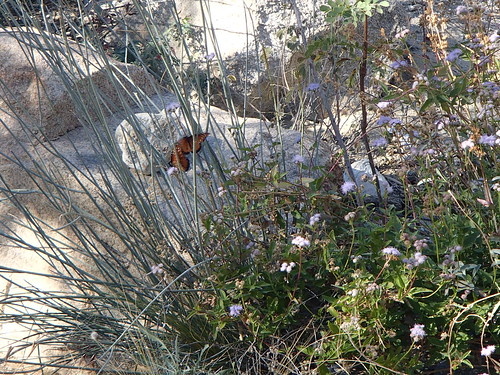
We also stopped in the butterfly garden on the way home.  It was neat to see so many butterflies flying all around us.


Following the cardinal rule of "never wake a sleeping toddler" we all ended up taking a nap in the car when Thatbaby fell asleep on the way back to the hotel.  When he awoke, we headed to the pool.


Thatbaby loved the big pool, but the highlight was probably the slide.  I thought he would get scared going down, but he didn't.  As soon as they hit the bottom, he was screaming "MORE!"


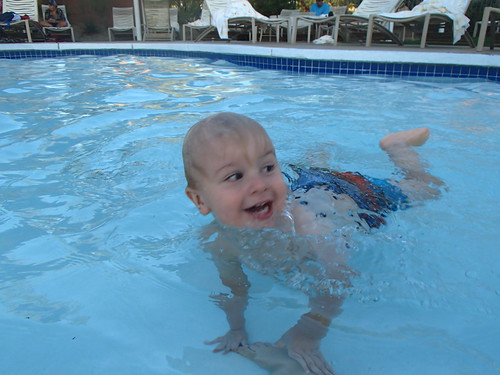
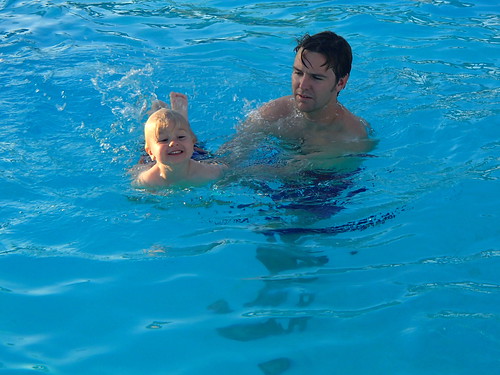
He also loved the baby pool.  This was his first experience with a pool his size, where he didn't need us to support him.  And he was in heaven.  Thatboy kept trying to get him to go back in the bigger, warmer pool, but Thatbaby kept insisting he wanted to stay in the "little pool."


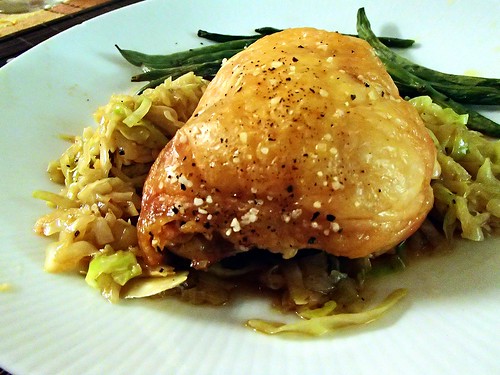
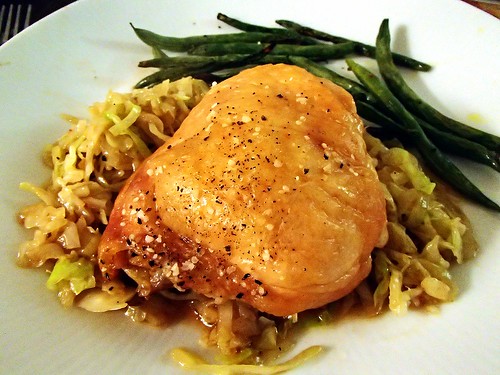
I'll cover the food we ate later, but tonight I share with you one of my all time easiest, so-you-just-got-back-from-vacation meals.  The secret?  Chicken thighs.  Chicken thighs with skin.  Something that I rarely make.  I'm a white meat kind of girl.  But chicken thighs, with their darker meat, maintain moisture in a way chicken breasts don't.  And although we usually go skinless for health reasons, if you want something easy, leaving the skin on provides all the flavor you need.  Crank up the oven, season with salt and pepper, and you've got yourself a crispy skinned, moist and easy dinner.


Easiest Crispiest Chicken
4 bone-in chicken thighs with skin
salt and pepper

  1. Preheat oven to 450.  Season chicken with salt and pepper.  Bake for 30 minutes.

Tuesday, November 12, 2013

Fun in the Desert Week! Pasta Primavera


As I mentioned, September starts a non-stop busy time in Thathouse.  So I decided to plan a little weekend away for the three of us.  Something close and convenient - Palm Springs!  (or Palm Desert to be more exact)

This was the first trip we've done as a family!  We've taken other vacations, but they've been with Thatmom, TMIL, or all of Thatboy's family.  We decided to really tailor this trip to Thatbaby - because we could.  Because there was no one else to complain about doing something else, or to whine over naptime breaks, or to hurry to get ready to eat dinner at a toddler friendly time.

We began with working with Thatbaby's innate ability to sleep in the car and make travel convenient for all of us.  We came home from work/school on Friday and ate a lovely dinner together as a family.  Something that used up a lot of the produce in our fridge - since I hate leaving produce when we go out of town.  Or rather, I hate coming home to wilty, drippy, produce.  

Then I packed our bags while Thatboy gave Thatbaby a bath and got him in pajamas.  What does one pack for a weekend in the desert in November?


Boots - Button Down Shirt - Pajamas - Running Clothes
Undergarments - Shorts - Pool Coverup
Bathing Suit - Scarf - Dresses

Once we were packed and pajamaed, we piled into the car.  A few short hours later, we were there!

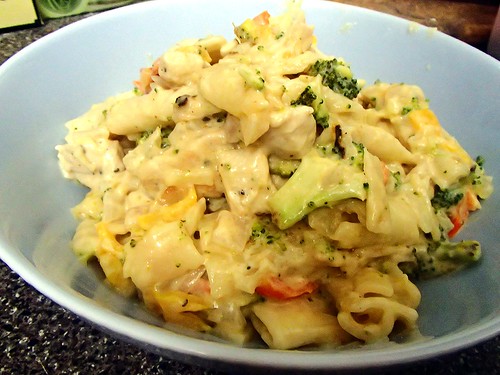
Pasta Primavera
1 chicken breast, cooked and chopped
8 oz of penne pasta
1 Tbsp olive oil
1/2 red onion, diced
1/2 yellow bell pepper, diced
1 head of broccoli, chopped
1 cloves garlic, minced
1 pint cherry tomatoes, quartered
1 Tbsp butter
1 Tbsp flour
1 cup milk
1/2 cup Parmesan
  1. Cook pasta according to package directions.
  2. Heat olive oil in large skillet.  Add the onions and cook until transluscent, about 3 minutes.  
  3. Add the bell pepper and broccoli and cook for another 2 minutes.
  4. Add the garlic and cherry tomatoes and cook for another minute.  Remove from pan.
  5. Add the butter to the skillet and melt.  
  6. Whisk in the flour and continue whisking until a thick, bubbly paste forms.
  7. Whisk in the milk and continue to cook until thick.
  8. Stir in the parmesan.
  9. Add the chicken, veggies, and cooked pasta, tossing to coat.

Monday, November 11, 2013

Mommy Mondays: Honor Thy...

I never got a chance to meet my paternal grandparents.  Thatdad's father died when Thatdad was 7 years old.  His mother died a month after my parents were married.  I never got to know them, and they never got to watch me grow, compare how similar I was/am to Thatdad.  Remark at how I would carry on the family lineage.

My grandmother was a remarkable person, or so the stories go.  Widowed with two small children, she managed to be one of the first women in our family to pursue secondary higher education.  She was a full time nurse, a full time mother, and had to manage with one person what many struggle to do with two.

Which is why I am so proud to share a part of her.  My middle name is her first name.  And so I carry a part of this strong matriarch with me wherever I go.

In the Jewish tradition, we don't name after the living.  It's superstition that if two people share the same name, the angel of death might accidentally take the wrong one, and by naming your child after a living relative, you are almost inviting such an occurrence to happen.   In order to honor a relative, Jewish families often use the first initial of the deceased loved one, and pick a new name starting with that letter.  My family has obviously taken that a step farther, by using the exact name.

When I was pregnant with Thatbaby, we knew that we would continue this tradition started by my parents.  And it was very clear what middle name we would use if Thatbaby ended up being a boy.  My father yearned to be a grandfather.  At our rehearsal dinner, the night before our wedding, he took me aside and told me that Thatboy and I had the night off, but after we were married we should start trying for a child right away, so he could have a grandchild.  We didn't.  One of my few regrets in life is not giving my dad that small wish - to be a grandfather.

Thatbaby shares his middle name with my father, because in a small way, I hope that he will carry that piece of his heritage with him, the way I carry my grandmother with me.  He is already developing my father's sense of humor and ability to charm his way out of tight situations.  And I hope that he will share other attributes, like my father's strength and determination.  I hope he grows to feel proud of this legacy he maintains, and feels a connection to a man he will never get the chance to know.  A man who will never throw him in the air, or take him to the movies, or fill him in on the intricacies of comic book lore.  Because sometimes, a name is more than just a combinations of pleasant sounding syllables.

Friday, November 08, 2013

Roll Me: Shrimp Tempura Rolls


We haven't been out for sushi in a very long time.  In fact, the last time I went out for sushi, I think Thatbaby was about 8 months old.  Sometimes I'll make sushi at home, but given that I don't like fish, we usually have California rolls.  Which isn't too exciting for Thatboy. 

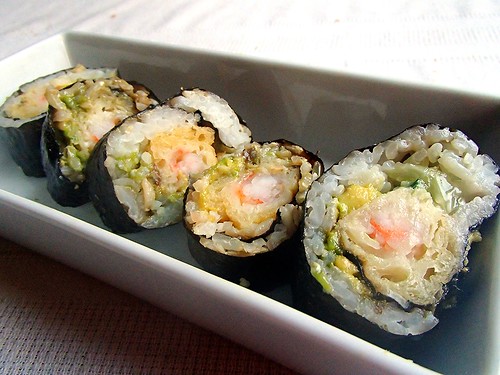
I decided to give him a little treat and jazz up our at home sushi.   I'm still not bringing raw fish into the house, but cooked shellfish?  I can definitely get behind that!  Crab and shrimp rolls are another standard of mine when we go out for sushi, and tempura shrimp is relatively easy to find in the freezer case of the grocery store.  Which makes this just as easy as a California roll.  

I added my favorite sushi accompaniments - avocado and cucumber.  I pretty much love avocado with everything, and cucumber adds a nice crunch.  And I make my sushi with brown rice.  Because that's the kind of rice we keep on hand.

This isn't an especially toddler friendly meal - unless your toddler likes sushi.  My guy wanted me to unwrap his first.  Then he picked out and ate the avocado.  Then we convinced him the shrimp was the way to go and he had a couple bites of that too.  Then he discovered you could dip the whole thing in soy sauce and he was sold.


Shrimp Tempura Rolls
1 cup brown rice
1 Tbsp rice vinegar
1 Tbsp sugar
1 tsp salt
8 squares of nori
1 cucumber, cut into matchsticks
1 avocado, cut into thin strips
8 shrimp tempura.  (I like the frozen ones from Trader Joes.)
  1. Cook rice using your preferred method (I like the rice cooker).
  2. Combine the vinegar, sugar, and salt in a small bowl.  Heat in a microwave for 30 seconds.
  3. Stir the vinegar mixture into the cooked rice.  Let cool.
  4. Cook the shrimp according to package directions.
  5. Take a square of nori.  Place a spoonful of rice in the middle.
  6. Top with a shrimp, some cucumber, and some avocado. Roll!

Thursday, November 07, 2013

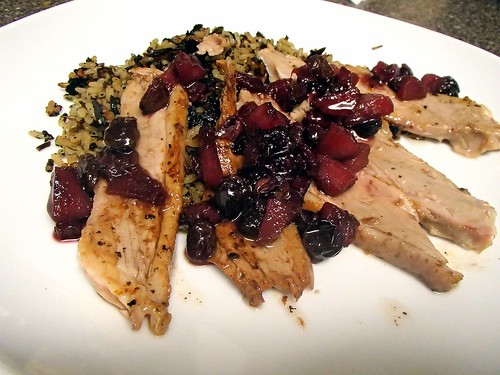
Duck, Duck, GOOSE!: Roasted Duck with Ginger Blueberry Chutney


Growing up, I was a spoiled child.  Not in the sense that I got whatever I wanted, but in the sense that seemingly exotic foods were relatively commonplace in my house.  I was shocked to learn that not every child was privy to lobster several times of year.  And duck?  Well duck also made a fairly regular appearance in our home.

But duck was always prepared in the Chinese style - Peking Duck was one of Thatdad's specialties.  I'm a little more simple, if one can call duck a simple dish.  I like mine roasted.  So roast duck is one of my "special treat" dinners.

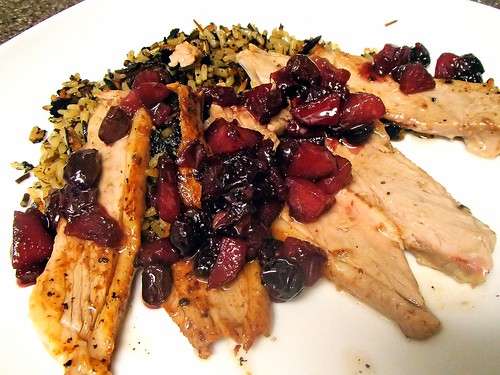
Roast duck on it's own is phenomenal.  The fatty skin imparts such great flavor into the rich duck meat - a flavor I always feel is a mix between chicken and steak.  Topping it with a sweet and savory chutney that also has a bit of spice only plays off of these rich flavors.

And Thatbaby is certainly on his way to becoming just as spoiled as his mother.  He gobbled down this duck (gobble?  duck?  you don't quack down a duck, right?) as fast as he could get his little hands on it.  In fact, he completely ignored his rice, which is something that never happens.


Roasted Duck with Ginger Blueberry Chutney (From Bean's Bistro)
1/4 cup cider vinegar
2/3 cup onion, finely chopped
1 tsp ground ginger
1 tsp ground mustard
1/2 tsp red pepper flakes
2 tsp lemon juice
1/4 cup raisins
1 cup blueberries
2 pears, peeled, cored, and diced
1/4 cup brown sugar
1 duck, organs removed, rinsed, and patted dry
2-4 cloves of garlic, partially crushed


    1. In a small saucepan, heat the vinegar over medium heat.
    2. Add the onion and spices.  Bring the mixture to a boil and cook until the onions are soft.
    3. Stir in the lemon juice, berries, raisins, pear, and sugar.  Bring back to a boil.  Cook until it thickens.  
    4. Add red pepper to taste.
    5. Preheat the oven to 400.  Place the duck in a large roasting pan.  Pierce the skin all over.
    6. Insert garlic cloves in the cavity.
    7. Drizzle the chutney over the skin and put 2 Tbsp in the cavity.
    8. Roast until internal temperature of the thigh is 180 degrees.  (For me this was 1.5 hours)

    Wednesday, November 06, 2013

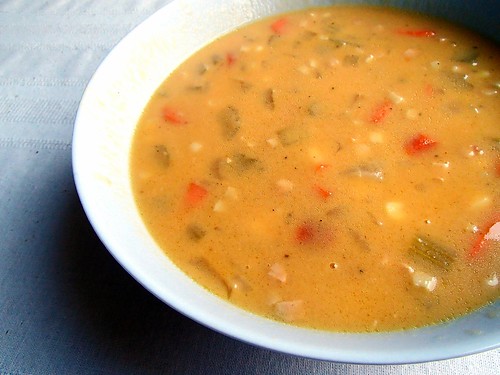
    Never Disappointed: Crockpot Corn and Potato Chowder


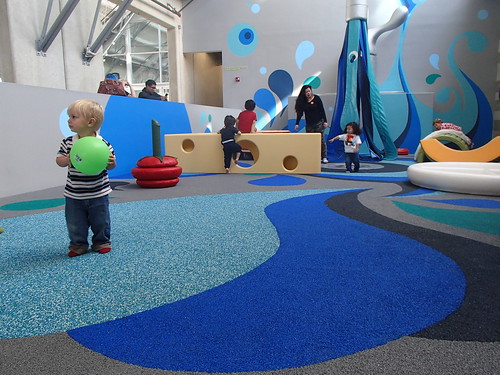
    We don't go to the Children's Museum nearly enough.  I realize this every time we visit.  It's the perfect place to let Thatbaby run wild.  Every exhibit captures his attention and imagination.  It's so hard getting him to leave.  He would live there if he could.  

    One of the perks of being members of the Model Railroad Museum is that we have free entry to the Children's Museum this month.  On Saturday we went to check out their current exhibit:  Feast, The Art of Playing With Your Food.

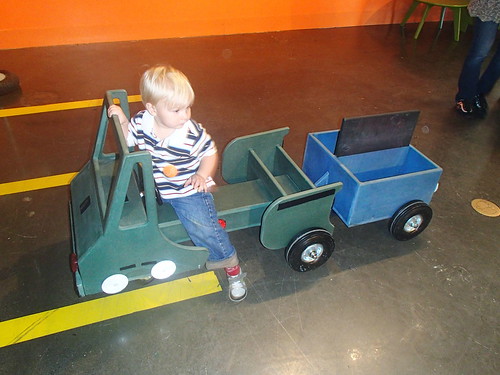
    For a kid that loves cars and trucks, their "Design Your Own Food Truck" exhibit is sure to be a hit.  Thatbaby wasn't too interested in designing his truck, but he loved driving it around.

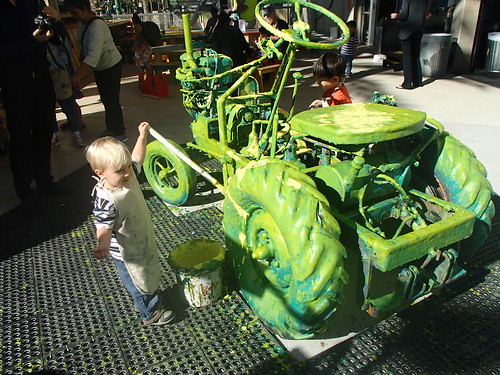
    As usual, there is always something gigantic for painting.  Because of the current exhibit, this time it was a farm scene.  Complete with a tractor.  It's so much fun to let Thatbaby play with paint in a big way without worrying about my house getting destroyed.


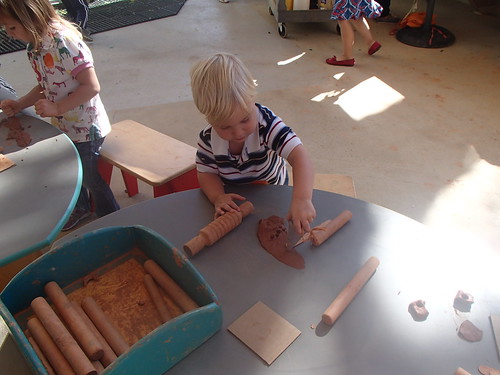
    At the clay station we got a chance to get someone else's tables covered in sticky stuff.  Thatbaby liked making balls and airplanes. 


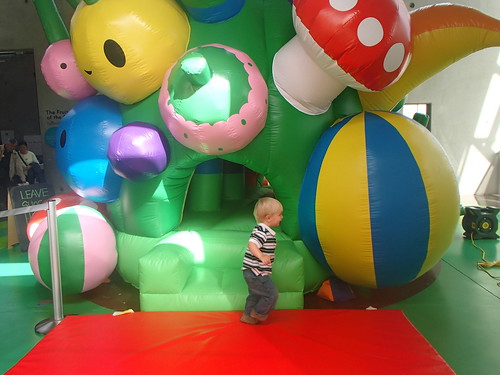
    There was a giant bounce house, which Thatbaby loved (surprise surprise).


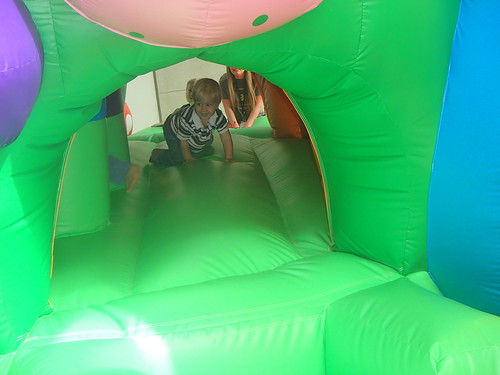
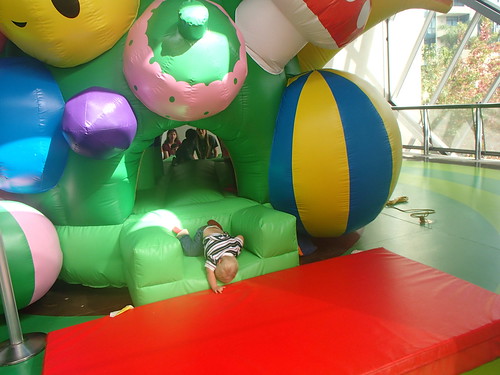
    Except he didn't quite understand how it worked.  Usually he loves to bounce in a bounce house, but perhaps because this one had an entrance on both sides, he spent the entire time crawling through it, then throwing himself out of it.  


    And then running around to do it again.


    The indoor playground was full of fun things to climb on and through.  There was a melon rocker, a watermelon boat, a giant faucet, a celery stalk tunnel, a slice of swiss cheese.  But because my child is nothing if not predictable, he managed to occupy himself with one of the many balls that were floating around.  In a "wow, maybe he's smarter than I thought" move, he figured out that if he sat on the ball in the giant orange slice, he would be tall enough to look out, instead of spending his time staring at the walls.


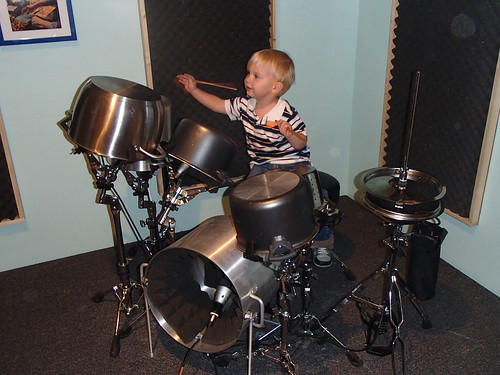
    When we got to the music room, a room filled with instruments made from kitchen objects, Thatbaby honed in on the drum set.  We had to wait around until it wasn't being used, but as soon as the seat was open, Thatbaby made a run to play on the pots.

    It was a long day for Thatbaby, but a lot of fun.  And the weather ended up being very cooperative.  Bright and sunny while we were at the museum (which was especially good after Thatbaby doused himself with the soap from the bubble station).  As we left, it started getting cold and dark.  Which was fine with me since I had planned soup for dinner.  I feel like it's a fitting fall soup since it's filled with root veggies like potatoes and carrots.  And I liked that I could leave it in the crockpot while we were at the museum and just add the creamy part of it once we got home.

    Crockpot Corn and Potato Chowder
    3 yukon gold potatoes, peeled and diced
    3 stalks celery, diced
    1/2 onion, chopped
    4 oz pancetta
    1 carrot, diced
    1 cup corn kernels
    1 clove garlic, minced
    3 cups chicken broth
    5 Tbsp butter
    5 Tbsp flour
    2 cups milk
    1. Combine the potatoes, celery, onion, pancetta, carrot, corn, garlic, and chicken broth in a slow cooker.  Cook on low for 8 hours.
    2. Melt butter in a saucepan over low heat.  
    3. Whisk in the flour and cook for another couple of minutes until thick and bubbly.  
    4. Slowly stir in the milk.  Cook until thickened.
    5. Stir into the soup and cook on low for another 30 minutes.  Season to taste with salt and pepper and serve.