Pages

Tuesday, March 12, 2013

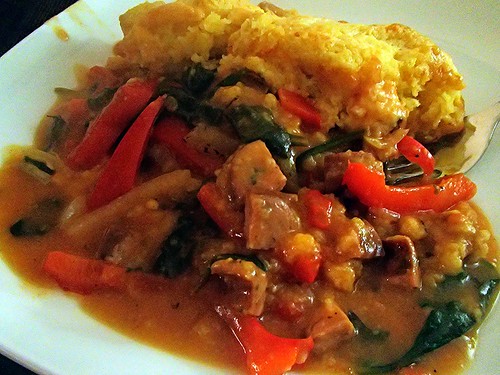
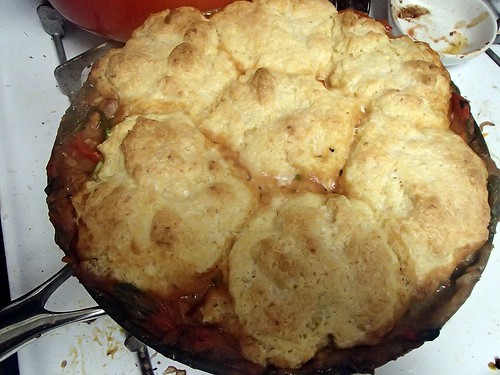
Beach Playdate: Sausage and Red Pepper Polenta Cobbler


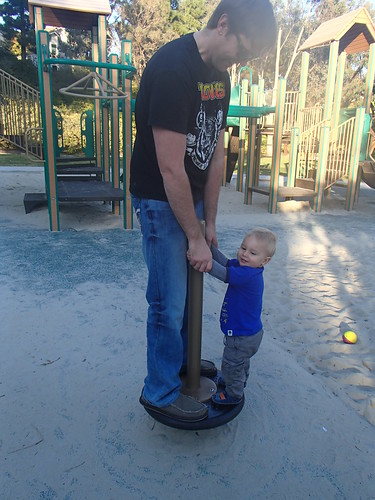
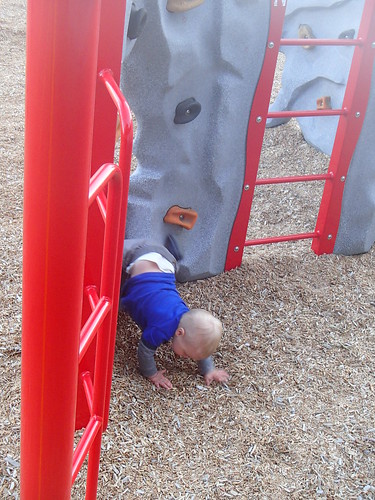
The other night, as I was driving to dinner with the girls, I glanced to my left and watched the sun set over the ocean.  And I thought about how incredibly lucky I am.  It's something Thatdad used to talk about all the time, being lucky to live in such a beautiful place.  Lucky that I'm close enough to go on weekly runs to the beach.  Lucky to have a great group of friends to go to dinner with.  Lucky that Thatbaby already has a group of friends to grow up with.  Lucky that we have playgrounds right on the beach for him to enjoy all of them above!


Thatbaby is going through a swing phase right now.  He loves swinging and gets pretty upset when his turn is up.  As for me, I think I can give you a pretty fair rundown of every park within a 15 mile radius of our home.

Also?  I'm going through a polenta phase right now.  It's like Thatbaby's swing phase, except everyone benefits.  And I don't get too upset when we eat something other than polenta.  In general, most polenta recipes involve cooking it until it's nice and creamy, then stirring in something delicious like cheese.   So I was very excited to see this polenta recipe pop up on Jeff's blog.  A savory, polenta cobbler!  This feels like such a southern dish with the corn, sausage, and bell pepper.  And it is incredibly delicious.  It's a definite comfort dish, all rich and stew-y.  And the polenta topping is the perfect biscuit-y addition.


Sausage and Red Pepper Polenta Cobbler (From Jeff's Plate)
1 Tbsp Olive Oil
4 chicken sausage, chopped
Salt and Pepper
1 onion, sliced
2 bell peppers, sliced
1 3/4 cup flour
2 cups chicken broth
2 Tbsp tomato paste
3 cups spinach
1/2 cup polenta
1 tsp Baking Powder
1 tsp Baking Soda
1 cup grated Parmesan Cheese
6 Tbsp Butter
1 3/4 cup Heavy Cream
  1. Preheat the oven to 375. Heat olive oil in a skillet over medium-high heat.  Add the sausage and cook until browned.  Remove and set aside.
  2. Add the onion and cook for about 5 minutes or until softened. 
  3. Add the pepper strips and cook for 5 more minutes.
  4.  While the onions and peppers are cooking, whisk together 1/4 cup of flour and tomato paste.
  5.  Slowly whisk in the chicken stock until combined. 
  6. Add to the onion mixture along with the spinach and reserved sausage. Stir in to combine, and cook for about 2 minutes until thickened and the spinach is lightly wilted.  Remove from heat. 
  7. In a medium bowl, whisk together the remaining 1 1/2 of flour, cornmeal, baking powder, baking soda and a pinch of salt.
  8.  Cut in the butter until the mixture resembles course crumbs. 
  9.  Add the Parmesan cheese and stir in to combine. 
  10.  Add the milk, stirring until a rough dough forms.
  11.  Drop 6-8 large mounds of the cornmeal mixture onto the sausage mixture with about an inch of spacing between them.
  12.   Brush the top of the biscuits with milk, then place in the oven for about 25 minutes, or until the top is golden brown and the mixture is bubbling.

Monday, March 11, 2013

Mommy Mondays: Pump It Up!

 The smart, beautiful and fast Auds recently started back at work after having her sweet baby boy.  Before she started, she asked for some pumping at work tips.  Don't worry, I didn't make her wait it out till now, but I thought I would share it with the rest of the class now.  Because I know she's not the only person out there who will have to pick up a pump.

Even when breastfeeding is easy - it's still a job that requires time and dedication.  And this is especially true about pumping.  I'm not going to lie - pumping sucks.  For me, it was the most-worstest part of breastfeeding (which is why I was ever so happy to quit doing it at 12 months).   I want to preface this with the fact that Thatbaby was born full term, without any medical issues and had the standard infant latching issues (having to learn how to do it, falling asleep at the breast, eating ALL the time).  If this doesn't sound like your baby, some of these tips are not going to apply.  Without further ado, my tips for the evil pump.

When? 
Assuming there is no medical reason to pump, you should wait until your baby is 4-6 weeks old before introducing the pump.  There are a host of reasons for this, but the big ones are:
* Waiting to introduce the pump means your baby is nursing from the breast only, and this really helps to build and strengthen the breastfeeding relationship.
* Nursing is based on supply and demand.  The more you nurse, the better your supply.  And those first couple of weeks are all about building a supply.  The pump is a fabulous tool - especially for us working moms, but it is a "baby substitute" and not nearly as effective as the baby is at building supply.  Babies are much more powerful/efficient at getting milk out, because that's what they were created to do!  There will be days that it feels like your little bundle of joy never unlatches and is constantly eating.  Especially during that 3 week growth spurt.  But that constant nursing is exactly what your body needs to create a great supply for your baby.
* As I said, there will be days when you seem to nurse constantly.  Which makes finding time to pump a big issue.  This gets a little better after the 3 week growth spurt.  I'm not saying that at 3 weeks 1 day your child will go for hours without eating, but they will space out a little.  Enough where you can squeeze in a pumping session.
* The dreaded "oversupply."  This sounds like such a great thing, right?  Loads of milk.  Except when it comes to breastfeeding, oversupply is awful.  In general, breastmilk is a mixture of watery milk and fatty milk.  This helps the baby grow big and strong.  But in cases of oversupply, a woman makes too much of that watery milk, and not enough of that fatty milk.  Without the fatty milk to help slow it down, the watery milk rushes through a baby's digestive system.  This is really painful.  It causes cramping, gas, discomfort, and a very fussy and unhappy baby.  And it takes a lot of work to correct itself.  Some women naturally have this problem, but many others create it by pumping too early and sending the wrong message to their body that they need more milk, and because the pump isn't quite the same as the baby, sometimes this means the body just produces the watery stuff.

How often?
This is a personal thing - you have to do what works with your schedule/needs.  For me, I started pumping once a day.  After his first morning feed.  (Because you produce the most milk in the morning)  For me, that was around 2:30 A.M.   At that time, I would pump for 20 minutes, through 2 letdowns, or until I stopped producing milk (and then just a smidge longer). 

At 6 weeks, Thatboy went back to work.  And we introduced a bottle every night as part of their daddy-son bedtime bonding routine.  And I added in a pump session at that point, because it is REALLY important to pump every time you miss a nursing session.  So at that time, I was pumping every morning and every evening. 

How much?
 You're not going to get much at first.  For 2 reasons.  First, because you're nursing AND pumping.  So baby is getting a majority of the milk.  Which is good, what you want.  Secondly, you won't get much at first because your baby is an itty-bitty, and doesn't eat that much to begin with.  Remember - stomach the size of their baby fist!   So you may only get half an ounce at first.  But keep with it and you'll condition your body to make more at that time.  And once you go back to work, you'll be pumping instead of nursing, so you'll get a whole heck of a lot more.

Pumping at Work?
 When I went back to work, L&O passed along her fantastic pumping at work advice.  This is pretty much what she told me, with my own experience added in.

1) Bring a receiving blanket. (I like the Aiden and Anais ones for this purpose, I just kept one in my pump bag).  Before you begin, put it across your lap so you don't end up with milk stains on your pants.

2) I don't know which pump you have  - I had/have the Medela PISA.  It came with 4 bottles.  I brought all four with me.  After the first pumping session I combined both bottles into one, and that went in the cooler in the fridge.  After my second pumping session, I combined both bottles into one, and that joined the first.  Etc. Etc. Etc.  This will give you 2-3 bottles (depending on how often you're pumping)

3) Don't worry about washing the dirty/empty bottle between pumping sessions (because remember, each pumping session will give you one bottle of milk, and one dirty bottle).  Place the dirty bottle/pumps/flanges/etc. in a ziplock bag and throw those in the fridge with your cooler of breastmilk.  (I didn't attempt to hide my ziplock of breastfeeding paraphernalia, but if your squeegy about it, then you can throw them in a lunchbag or something to camouflage.) 

*Things to invest in if you don't already have:
- Hands free pumping bra.  Seriously.  The only thing I couldn't do while pumping (workwise) was meet with my boss/clients, and talk on the phone (because of the obvious pump noise).  Other than that I could review documents, draft motions, send emails, whatever.

- car charger.  Sometimes I had to pump on the way to/from work/meetings/depositions, so I had to pump in the car - and the car charger is much more efficient than the battery charger it comes with.

- along the same lines, a kept a nursing cover in my pump bag just in case I needed to pump in the car.

Not Pumping Enough?
When I first started pumping, I was feeding Thatbaby right before I left for daycare - that gave me 3 hours once I got to work before I had to pump.  I pumped over my "lunch" and then around 2:30 in the afternoon.  I'd then feed him as soon as we got home from daycare. But he always ate more at daycare than he did at home, and consequently, more than I pumped.  So I had to add in pumping sessions.  I pumped in the car on the way to work, and then at night after he went to bed.  And I also added in a morning pumping session on the weekends.  Between all these pumping sessions, I had enough to feed him every day, and build up enough of a freezer stash to keep him on breastmilk for a full month after I stopped pumping!

Friday, March 08, 2013

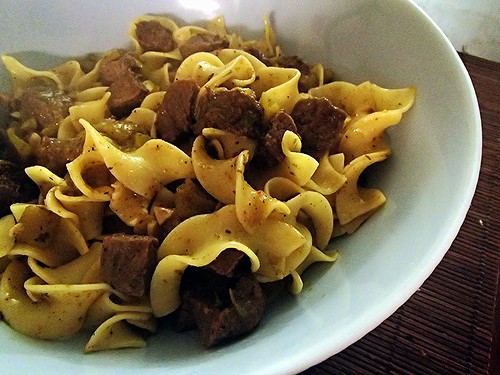
Tea for All!: Tri-tip with Green Chiles


Well folks, it has been one HECK of a week here at Thathouse. A week that has left me feeling worn down and worn out.

Which was why I was extra special thankful to have received this box of goodies from Traditional Medicinals.  I won the box from Cate - who used their Mother's Milk tea while she was breastfeeding.  Which is funny, because I used the same tea when I was pumping!

This is a serious box of awesome.  A wide variety of teas to combat all sorts of "what ails ya."  I made a little bundle for L&O when she was feeling under the weather.  Thatboy has been having some of the echinacea plus almost every night.  And I've been dipping a little here, a little there.  On top of that, they packed in a nice, heavy mug, and a reuseable shopping bag!

My other solution to a long week is a super easy dinner.  I know I've already told you about my newfound love for Trader Joe's Tri-tip.  Already seasoned, ready to go, and big enough for several meals.  So for a super easy meal, all I have to do is chop it up, cook with some garlic and chiles, and toss it with some egg noodles. 

Tri-tip with Green Chiles
8 oz egg noodles
1 Tbsp olive oil
1 Tbsp butter
1 clove garlic
4 oz diced green chiles
2 cups diced cooked steak
  1. Cook pasta according to package directions and drain.
  2. Heat oil and butter in a large skillet.  Add garlic and saute until fragrant (about 30 seconds).
  3. Add the chiles and steak and saute until warmed through.
  4. Add the cooked noodles to the skillet and toss to coat.

Thursday, March 07, 2013

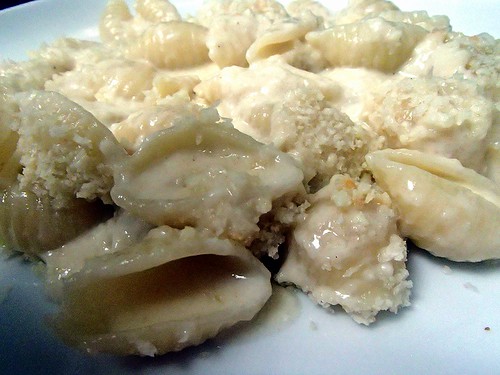
Go Fly A Kite: White Truffle Macaroni and Cheese


I've been wanting to attend the Ocean Beach Kite Festival for years now.  But we've always had something going on the first weekend in March, when it is typically held.  So this year I was overjoyed to find we had no plans the day of the festival.  And it was even better, because Thatbaby was old enough to enjoy it.

The Kite Festival has professional kite flyers performing shows, but it also is open for your random every day hobby flyer or even babies with no kit flying experience.  There were carnival rides, artisans selling goods, and this "bubble man" who had Thatbaby enthralled, captivated, and probably could have walked off with our child if he wanted.


For the young kite enthusiasts, there was a tent where they could make their own kite.  Thatbaby participated in this as far as picking out what color kite he wanted and then coloring it.  Then he decided he was "all done" and let Thatboy finish up.  He was ready to go again once the kite was done.


Until he decided that the bubble man was more fun than standing around holding a string.


So Thatboy took over.  And he had a great time.


It was a beautiful day to be out.  Watching the colored kites in the bright blue sky.  We'll be back next year - with a picnic lunch so we can stay later and play longer.

Our dinner was not nearly as colorful as the kites, but it was ridiculously delicious.  Thatbrother had given me some white truffle oil that I really don't use often enough.  It mostly gets pulled out when I make pizza, for a little brush on the crust.  When I saw this recipe on Kelsey's blog, I thought it would a be fantastic use for my oil.  And a good way to try out my new macaroni and cheese technique.  The verdict?  The technique is fabulous and this macaroni and cheese is creamy perfection.  I've never had a white mac and cheese before, but it was a delicious change of pace.

 White Truffle Mac and Cheese (from Apple A Day)
1 cup panko
1/2 cup Parmesan cheese, grated
1 Tbsp white truffle oil
2 Tbsp butter
2 Tbsp flour
2 cup half and half
8 oz white cheddar cheese, grated
8 oz Fontina cheese, grated
salt and pepper, to taste
8 oz conchigile

1.  Preheat the oven to 400.  Spray an 8x8 dish with cooking spray. Combine the panko, parmesan and 1/2 Tbsp truffle oil in a medium bowl.
2. Melt butter in a large saucepan. 
3. Whisk in flour and continue to whisk until it forms a thick paste. 
4. Slowly whisk in half and half until mostly smooth.  Bring to a simmer and let cook, stirring occasionally, about 3 minutes.
5.  Slowly stir in the cheeses until completely melted.  
6.  Add remaining truffle oil and salt and pepper, to taste.
7.  Place the uncooked pasta in baking dish and pour the sauce over. Cover and bake for 20 minutes.
8.  Uncover, sprinkle panko on top and cook 5 minutes, until bubbly and golden.

Wednesday, March 06, 2013

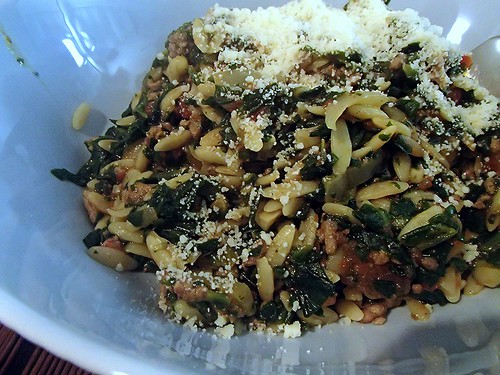
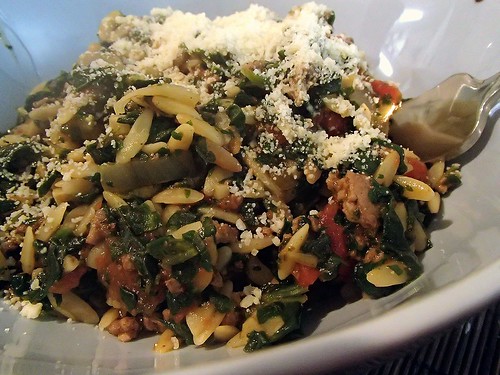
13 years down: Beef, Spinach, and Tomato Pasta


On Monday, Thatboy and I celebrated our 13th anniversary.  13 years ago, I decided Thatboy was the guy for me, and he reluctantly agreed.  Little did either of expect back then that a fun fling would turn into something so much more.

We went about our day like usual, marked only by a sweet text from Thatboy wishing me a happy anniversary.  It was a busy day for me, and before I knew it, it was 4pm with a ton of work left to be done.  I sent Thatboy a quick message asking him to pick up Thatbaby and assuring him I would be home for dinner.

4pm quickly turned to 6pm, and I didn't seem to be showing a clear end in sight. So I gave Thatboy a call asking if he wanted me to pick something up since it was getting late.  Instead he offered to take over dinner duties for the night.  While juggling a toddler.  My hero.


I managed to get home right as Thatboy was serving dinner.  While he portioned it out, he pointed me toward the table, to see what he had brought home for me to celebrate our 13 years.


It was wonderful to have dinner all ready to go for me, without having to lift a finger.  I have to thank Kylee for a recipe that's easy enough for a husband to make.

Beef, Spinach and Tomato Pasta (From Kylee Cooks)
1/2 tsp salt
1 lb ground beef
1 onion, chopped
4 cloves garlic, minced
1 can diced tomatoes
1 3/4 cup beef broth
1 tsp dried oregano
1/4 tsp pepper 
8oz orzo
10 oz frozen spinach
1/4 cup basil, chiffonade
parmesean cheese


  1. Cook beef in a saute pan over medium heat until browned.
  2. Reduce heat and stir in onions, cooking until onions are translucent, about 5 minutes.
  3. Add garlic, tomatoes and their liquid, broth, oregano, and pepper.  Bring to a boil.
  4. Stir in pasta, reduce heat, cover and simmer 10 minutes.
  5. Stir in spinach and cook until heated through.
  6. Sprinkle with basil and parmesean and serve.

Tuesday, March 05, 2013

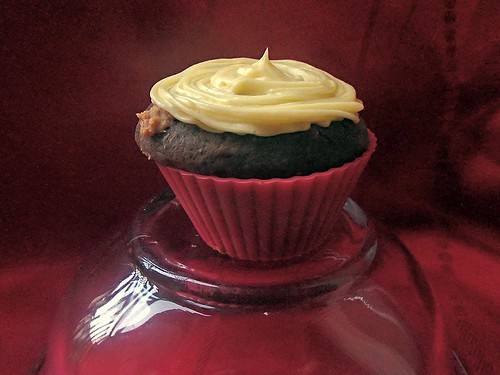
Child's Play: Chocolate Peanut Butter Cupcakes


Yesterday I told you about how I like to let Thatbaby be a kid, since we don't get a long time to experience that time of life, and in the words of George Bernard Shaw, "Youth is wasted on the young."

In reality, I'm terribly jealous of Thatbaby's life.  I mean, sure I tell him all the time how hard it is to be a toddler, mostly when he's in hysterics about not being able to consumed massive amounts of sand or dirt, but I'm lying to him.  It's not hard to be a toddler - it's fantastic!  Wouldn't you love for someone to tell you to go back to sleep in the morning?  Prepare all your meals?  Have no responsibilities other than to play with your toys? The kid doesn't even have to wipe his own bottom!

The good thing about being a parent, is that it forces you to join in every now and again.  Before Thatbaby came around, weekends were a time to clean, organize, run errands, prepare for the week.  That doesn't happen so much anymore.  Now we try to make time to take him to one of the multitudes of parks and playgrounds in our area every weekend.  My house is a disaster area, and Monday mornings come far too soon, leaving me scrambling to get ready, but as I said before, this is only a short period of time, right?  There'll be years to clean the house - and eventually the little guy will be able to shoulder some of the mess, since he is the one who makes a majority of it.


And I still try to find time for some weekend baking - lately I've been all about the cupcakes.  Playing with "fun" flavor combinations, instead of the same old ones that I typically make.  My most recent cupcake exploration took me back to one of my favorite flavor combinations - chocolate and peanut butter.  Thatboy isn't as big a fan of this combination in general, but he's never one to shy away from a cupcake!


Chocolate Peanut Butter Cupcakes
1 2/3 cup flour
3/4 cup dutch processed cocoa powder
1 tsp baking soda
1/2 tsp salt
1 cup sour cream
2 Tbsp milk
1 1/2 tsp vanilla extract, divided
16 Tbsp butter, divided
1 1/2 cups sugar
2 eggs and 1 egg yolk, divided
2 cup confectioners’ sugar, divided
3/4 cup peanut butter

  1. Preheat the oven to 350.  Line muffin pans with cupcake liners. Cream 8 Tbsp butter in an electric mixer.
  2. Add the sugar and bet until light and fluffy.
  3. Add the 2 eggs, one at a time, beating between each addition. 
  4. Combine the flour, cocoa powder, baking soda, and salt in a bowl.
  5. In a separate bowl, combine the sour cream, milk and 1 tsp vanilla extract.
  6. Alternately add the dry and wet ingredients, beginning and ending with the dry ingredients.
  7. Fill muffin cups about 2/3 full with batter.  Bake for 20 minutes, or until cooked through.  Cool in pan for 5 minutes, then turn out to wire rack and let cool completely.
  8. Combine 1 cup confectioners’ sugar, peanut butter, 4 Tbsp butter and 1/2 tsp vanilla extract in an electric mixture and beat until thoroughly combined. Place in a pastry bag, or ziplock with a corner cut off.
  9.  Cut a cone into the top of each cooled cupcake.  Remove the cone and cut off the pointy end.
  10. Squirt the peanut butter filling into the hole you've cut into each cupcake and replace the top (round) part of the cone.
  11. Beat the remaining 4 Tbsp butter until light and creamy.
  12. Stir in the egg yolk and continue to beat, adding remaining confectioners' sugar, 2 Tbsp at a time.
  13. Beat until all the sugar is added and the frosting is fluffy.  Frost the cooled and filled cupcakes.

Monday, March 04, 2013

Mommy Mondays: 17 Months


(Leftover from 15 months)
Weight: 24lbs 8oz (+ 17 lbs, 1 oz)
Height: 32" (+ 12")
Head: 18.75" (+ 5.45")


Sleep:  We've hit a pretty smooth spot with sleeping - that makes it much easier for me to get out in the morning for my runs, but probably not as great for Thatboy.  He manages to wake right after I leave for my run in the morning, which means we both get a full night's sleep, but Thatboy ends up waking earlier than he'd really like.  I'm lucky he's such a good sport about it!

Eating: Eating is pretty much the same - still eating everything but green leafy vegetables.  He also added in an extra nursing session in the mornings for some reason.  I'm thinking growth spurt because he has grown SO much in the past month.  We're already transitioning him into 18-24 month clothing, something I thought we wouldn't be doing for another 2 months!

Best Moment: Thatbaby has started singing.  I LOVE IT.  Most of the time he sings his own non-recognizable song that has a lot of bluh-blah-bluhs.  But he also sings along with a couple of songs we sing to him.  He has his "parts."


Monthly Wisdom: This has been such a fun month.  Thatbaby is a total goon, and I love every moment of it.  I love when he puts random things on his head and calls them "hats."  I love when he spins himself around until he gets dizzy and falls down.  I love when he crawls around, pretending to be a dog.  I love that he has such a sense of humor.  He loves being silly, and he loves having fun.  And I nurture that as best as I'm able.  I let him run like a goofball, splash in the tub, and anything he wants that doesn't result in the possibility of grave bodily injury.  Because this is his time to be a kid!

Goals for the Upcoming Month:
- Still the babysitter. One day... one day.
- Survive another plane ride and visit with the inlaws!

Things Thatbaby is doing:
-  More new words!  His vocabulary continues to grow.
- Thatbaby is able to recognize himself and his daycare buddies in a book that daycare sent home.  He attempts to say their names, and knows his own name, although he still has a tough time saying it.
- Another new tooth, we've got 11!
- Thatbaby now signs "food" when he wants a snack.
- Singing.  As said above, he loves when we sing to him, and he likes to sing along to certain songs.
- Soccer!  Thatbaby dribbles a ball by kicking it, something Thatboy couldn't be prouder of.
- Thatbaby loves his stripey cat stuffed animal and can be found carrying it around from time to time.

Friday, March 01, 2013

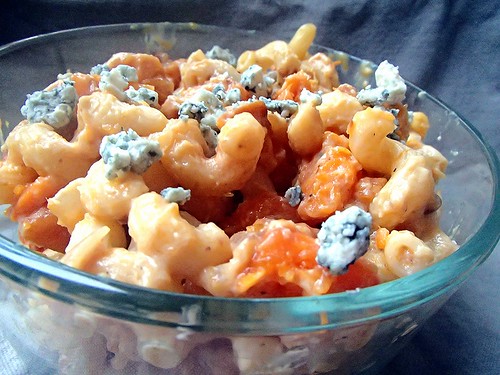
Lake love: Creamy Butternut, Blue Cheese, and Walnut Cavatappi


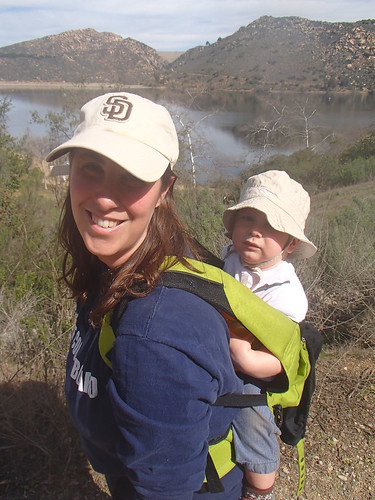
Thatboy has been pushing for a hiking trip to Lake Poway for a while now.  But we've had such busy weekends, we never got around to it.  And then a couple of weekends ago, we finally had a free day, so we headed out to the lake.


The lake is a great, family friendly destination, because it has easy trails, large grassy spaces, playgrounds, and lake itself.


We love being able to take Thatbaby places where he can run free without us worrying about him somehow hurting himself. 


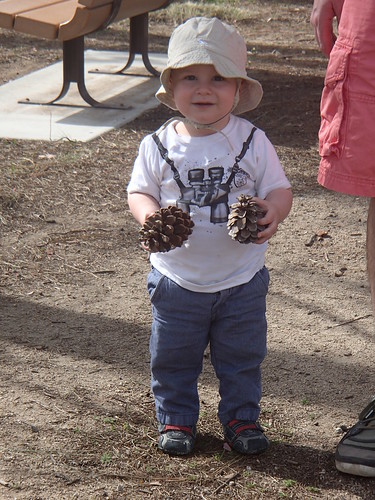
And Thatbaby loved being able to run around collecting pinecones.


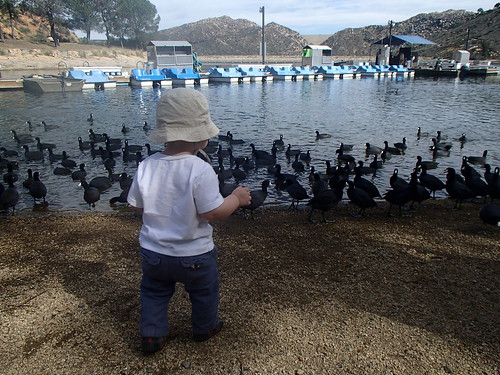
And chasing/feeding ducks.


Of course, all that running and walking can wear little legs out, so part of our hike we let Thatbaby take a break.  And then even more of a break when we got back to the car and he knocked out.  Exhausted. A day at the lake will do that to you.

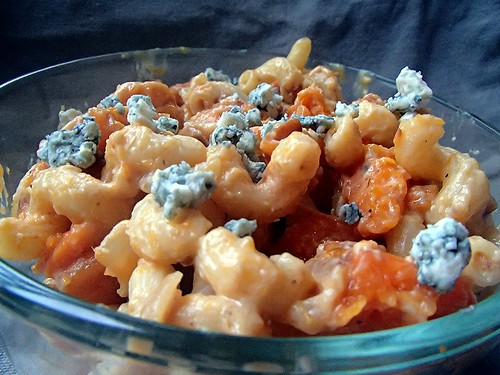
We did some backwards carb-loading. Like a restocking of energy.  Pasta is obviously the go-to for carb-loading.  This is another winter-pasta recipe, making use of my favorite winter squash: butternut.  As soon as I saw this dish on Nicole's blog, I knew I had to make it.  And it didn't disappoint.  It is so unbelievably creamy and rich - a combination of the egg yolks and the squash.  It's like a macaroni and cheese, without an actual cheese or cream sauce.

Creamy Butternut, Blue Cheese, and Walnut Cavatappi (From Prevention RD)
4 cups cubed peeled butternut squash
2 1/2 tsp olive oil, divided
1/2 tsp kosher salt, divided
1/2 tsp freshly ground black pepper, divided
Cooking spray
8 oz uncooked cavatappi
1/2 onion, chopped
2 cloves garlic, minced
1 cup milk, divided
1 Tbsp flour
2 large egg yolks
2 oz blue cheese, crumbled
3 Tbsp chopped walnuts
  1. Preheat oven to 425. Spray a baking pan with cooking spray.  Combine squash, 1 1/2 tsp oil, 1/4 tsp salt, and 1/4 tsp pepper on pan and bake for 24 minutes.
  2. Cook the pasta according to package directions and drain.
  3. Heat remaining oil in a medium saucepan over medium-high heat. Add onion and garlic; sauté 3 minutes. 
  4. Reduce heat to medium-low and stir in 1/2 cup milk, remaining 1/4 teaspoon salt, and remaining 1/4 teaspoon pepper. 
  5. Whisk remaining 1/2 cup milk, flour, and yolks in a small bowl.
  6. Slowly whisk egg mixture into the pan. Cook 5 minutes or until thickened.
  7. Combine squash, pasta, and milk mixture in a large bowl and toss.
  8. Sprinkle with cheese and nuts and serve.

Thursday, February 28, 2013

Carnivale!: Penne with Kale, Carmelized Onions, and Parsnips


Jewish holidays definitely come in seasons.  In the fall it's Rosh Hashannah, Yom Kippur, Sukkot, Simchat Torah, one right after another. In the spring we have Purim leading into Passover. 

Right now we've started rolling into our spring holidays.  Saturday was Purim - which is our festival holiday.  I love the story of Purim, with a smart and beautiful heroine saving the Jewish people.  The holiday celebrates this with feasting, games, and costumes.

Thatbaby's school hosts a Purim Carnival for all the students.  They bring in a petting zoo, have music and games, and all the kids dress up in costumes. 

Thatbaby was no exception.


When Thatboy picked him up from school, Thatbaby's teachers had great stories to tell.  Thatbaby stole the show with his little mask and headband.  When he arrived at the carnival, he climbed out of the wagon they use to haul the kids around and began dancing to the music in his costume.  There's video I've been told, and I'm anxiously awaiting it.  He loved the petting zoo, and the ride-on horse toys.

The traditional food associated with Purim (because there is always a food associated with Jewish holidays) is the hamantaschen - a three-cornered cookie in the shape of Haman's hat.  I didn't make hamantaschen this year, but I think that in the future it will be something that I share with Thatbaby.  He's going to love it!

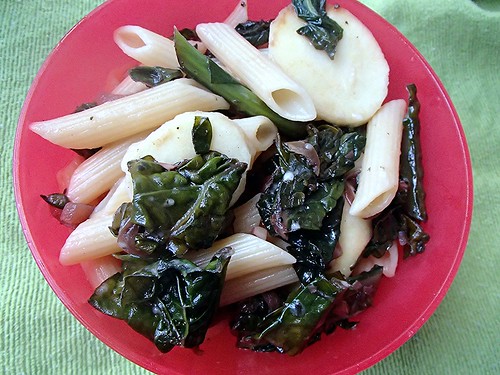
Instead here's a dish as colorful as the Purim holiday.  A pasta with leafy greens and root vegetables.  So seasonally appropriate. Sweet and easy, a nice change from marinara, meat or lemon sauce.


Pasta with Black Kale, Caramelized Onions and Parsnips (From Eats Well With Others)
2 Tbsp olive oil, divided
1 lb parsnips, sliced diagonally
2 1/2 cups sliced onion
1 Tbsp chopped fresh thyme
4 garlic cloves, chopped
1/2 cup red wine
3 bunches kale, trimmed and chopped
1/2 cup vegetable broth
12 oz uncooked penne pasta
1/2 cup grated parmesan cheese, divided
1/2 tsp salt
1/2 tsp ground black pepper
  1. Heat half of the oil in a pan over medium-high heat.  Add the parsnips and cook about 12 minutes, until tender and browned.  Set aside.
  2. Add the remaining olive oil to the skillet and lower heat.  Add the onion and cook until the onion is carmelized, about 20 minutes.  
  3. Stir in the thyme and garlic.  Cook until fragrant, about 30 seconds.
  4. Add the wine and cook for about 3 minutes.
  5. Stir in the kale and broth.  Cover and cook for 5 minutes until the kale is wilted and tender.  Uncover and cook for an additional 5 minutes.
  6. Cook the pasta according to the package directions. Drain the pasta, reserving 3/4 cup of the pasta water. 
  7. Add the drained pasta, parsnips, 1/2 cup of the pasta water, and half of the parmesean to the kale mixture. Cook for 1 minute or until heated through.  
  8. Season with salt and pepper and add more of the pasta water as necessary.  Top with remaining cheese and serve.

Wednesday, February 27, 2013

When a plan goes oh so wrong: Chocolate Chip Cake


Excuse my absence for this past week.  I took a brief hiatus last week, which was the 4th anniversary of Thatdad's death.  I went up to spend the afternoon/evening with Thatmom, Thatbrother, and UDubb. 

There's an interesting paradox when dealing with death and the passage of time.  At once it feels like an instant and an eternity since Thatdad was giving me a hard time, offering advice, or answering useless trivia questions. This past year without him has felt the most "normal" so far.  Probably because I've been a little preoccupied with the other men in my life. 

And I've also been beyond busy with work.  Which has kept me preoccupied, but also made my blogging break a little longer than I was anticipating.  Which means I am just now able to share with you my special Valentine's Day treat I brought in for my coworkers.

Have you ever had a happy accident?  Like the guy who dropped a ball of peanut butter in a vat of chocolate?  That's what happened with me and this cake.  My plan was simple enough - a chocolate chip cake with a carmel-y frosting. 

Except (you knew there was going to be an except, right?) something went wrong with my candy thermometer.  You see, I've been doing a lot of boiled frostings since Thatboy complained that a lot of my frosting tastes like "confectioner sugar."  I love boiled frostings and they're pretty easy to make- if you have a candy thermometer and can take the sugar off the heat when it hits the soft ball stage.

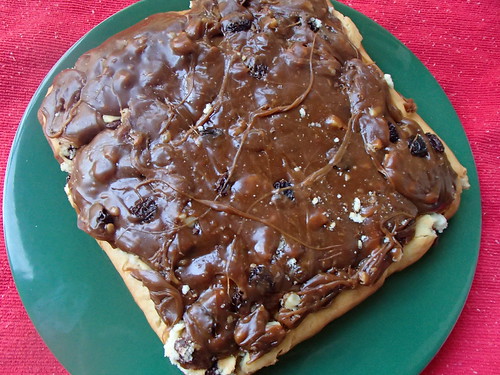
And my candy thermometer died while making this frosting.  Which meant it must have gone past soft ball stage to hard as a rock stage.  The stage where frosting is less spreading it on to the cake and more trying not to rip the cake to shreds.

The weird thing is - this turned into something incredibly delicious.  Thatboy thinks it was one of the best things I've made in a while.  My coworkers loved the "toffee" topping.  So I guess the moral of this story is that even a disaster can be a success.

Chocolate Chip Cake with Caramel Frosting
1 1/2 cups flour
2 tsp baking powder
1/2 tsp salt
1/2 cup sugar
1 stick butter, melted
1/2 cup milk
1 egg
1 cup chocolate chips
2 cups dark brown sugar
3/4 cup heavy cream
1/4 cup raisins
1/3 cup chopped walnuts

  1. Preheat the oven to 400.  Spray an 8x8 pan with baking spray.  Mix the flour, baking powder, salt, and sugar in a large bowl.
  2. Mix the butter, milk, and egg in a separate bowl.
  3. Add the dry ingredients to the wet ingredients and stir, just until combined.  
  4. Stir in the chocolate chips.  Pour into the pan and bake for 25 minutes.  Cool in pan for 5 minutes, then turn out to a rack and cool completely before frosting.
  5. Mix the brown sugar and cream in a heavy bottomed an and boil without stirring until the mixture reaches 234 degrees.
  6. Let cool, then mix until creamy.  Stir in raisins and walnuts and frost the cake.

Tuesday, February 19, 2013

What is Love: The Best Macaroni and Cheese Ever


Valentine's Day was low-key this year, but it was still enjoyable.  We didn't do much in the morning, except give Thatbaby his Valentine's Day gift.  We wanted him to have time to play with it and we knew he wouldn't after daycare.

Why wouldn't he after daycare?  Because we were headed out to dinner! 
We don't do dinner out often, but we both love it.  It's just better for our waistlines and wallets when we eat at home.  And don't get me wrong, I enjoy cooking.  It's a fantastic way to unwind after the day.

And so were the beautiful roses Thatboy brought me home last Thursday!

But it's nice to have someone else cook and do the dishes.  So we headed to our favorite neighborhood restaurant.  A place where the waitstaff dotes on Thatbaby.  And yet, with it's dim lighting and a view of the water, it still has elements of romance.

We exchanged cards and gifts -  how adorable is my new wallet?

And we sat and enjoyed each others' company and delicious food.  Thatbaby has been delightful at restaurants lately which makes things so much easier for us.

I may not have cooked for Valentine's Day, but that doesn't mean I don't have a new food love.  I read about this in last month's Bon Apetit and the idea was so ingenious, I don't know why I hadn't thought of it myself.  The recommendation was to make macaroni and cheese, saving a step by not boiling the noodles first.  I already do this with lasagna - the sauce cooks the noodles while it bakes.  So it makes perfect sense to do this with macaroni and cheese.

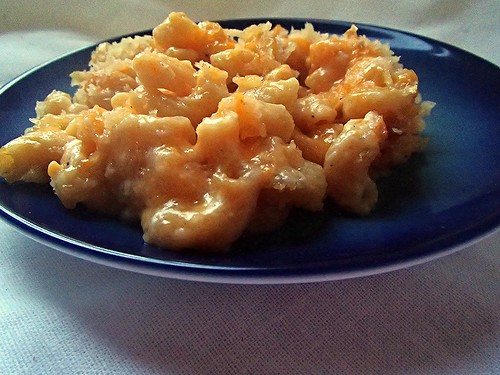
First of all, this is my new favorite way to make macaroni and cheese.  Second of all, this is my new favorite macaroni and cheese recipe.  It is so incredibly good.  I promise it's better than anything you've ever had.  It's better than anything I've ever had!  The noodles come out perfectly - tender with some bite.  There are loads of crunchy cheesy "edges" along the top, one of the best parts of mac and cheese.  And the sauce?  It's simple and basic - not a cheese sauce, but a sauce tossed with the noodles and cheese.  And something about that make it so much better.  Now THAT'S amore
.
No-Boil Macaroni and Cheese (From Bon Apetit)
1/2 cup butter, divided
1/4 cup flour
3 cups milk
1 Tbsp kosher salt
1/2 tsp black pepper
1 pound elbow macaroni
2 cups shredded cheddar, divided
2 garlic cloves, chopped
1 cup panko

1.     Preheat oven to 400. Melt 1/4 cup butter in a large saucepan over medium-high heat.
2.     Whisk in the flour, whisking constantly, for 1 minute, until a bubbly paste forms.
3.     Whisk in milk and 3 cups water. Bring to a boil, reduce heat to a simmer, and cook, whisking often, until a very thin, glossy sauce forms, about 10 minutes.
4.     Stir in salt and pepper. Remove sauce from heat.
5.    Toss pasta and 1 1/2 cups cheese in a large baking dish. Pour sauce over, submerging pasta.  Cover and bake about 20 minutes.
6.    Melt remaining 1/4 cup butter in a large skillet over medium heat. Add garlic and panko, toss to combine. Season with salt and pepper.
7.    Uncover the pasta and sprinkle with the remaining cheese and panko mixture.  Bake about 10 minutes longer, until top is golden brown. 

Monday, February 18, 2013

Mama Mondays: Extending a Good Thing

When I started breastfeeding, my initial goal was "until he grows teeth."  The thought of putting my nipple in a mouth with sharp pointies just wasn't appealing.
 
Thatbaby didn't get his first tooth until 10 months.  At that point, I seemed too close to the "finish line" of 12 months to stop.  And I was lucky to not have a biter. 

Part of it was my own stubborn pride.  I worked REALLY hard to breastfeed for those first 10 months.  Being a working mom and breastfeeding is much harder than being home and being able to feed on demand.  Pumping sucks.  Pumping at work sucks even more - taking up every "free moment" I had (no going out to lunch, no working out during the work day, and having to stop in the middle of a workflow because I needed to pump.)  And I was one of the "lucky" ones whose kid ate more than she pumped during the workday.  Which meant I got to add in pumping sessions at home, on the weekend, in the middle of the night, just to keep up with him.  With all that hard work, I just couldn't throw in the towel with 2 short months in front of me.

And then 12 months rolled around all too quickly.  October.  The start of flu season.  And I just wasn't ready to quit yet.  There were so many benefits to "extending" breastfeeding:

* The added immunity - so far (knock on wood), Thatbaby has managed to not catch the RSV that went around his daycare as well as the out-all-week sicknesses that have plagued many of his classmates.  And with the flu season rolling around, I feel good about giving him a little something extra to fight it off.

* The added healing - Thatbaby has been sick this year, but it's been very minor and seems to pass quickly.  When his coughing wakes him up in the middle of the night, I nurse him.  And his doctor has noted that probably helps the illness pass faster.

* The nutrition - I don't believe in "picky babies" at this age.  I think they all go through phases.  Phases where they eat a ton, phases where they hardly eat.  Phases where they don't eat vegetables, phases where they only eat fruit.  This is especially true during times of teething.  I don't have to worry how much (or little) Thatbaby eats, because I know he's getting the nutrients he needs in my breastmilk.

* The added sleep!  Thatbaby sleeps through the night now, usually waking between 5 and 6:00.  However, I nurse him at that time, and he knocks right back to sleep.  On the weekends, we usually get to sleep till almost 7:30!  Which is such a blessing.  Because my friends that don't nurse?  They're up long before 6am.

So at 12 months, I stopped pumping, but kept up with breastfeeding.  I dropped one pumping session a week until I wasn't pumping any more - which was perfect in terms of "weaning" since I never had any engorgement, clogged ducts, mastitis or other painful weaning symptoms.  At first, it seemed like Thatbaby nursed more than before. He was nursing almost every time we were together.  And still getting breastmilk at daycare - I had enough in my freezer to last him till he was 13 months.

At 13 months, I started sending cow's milk in to daycare for him.  But he was still nursing at home. 

And now, at 16 months, he nurses twice a day - first thing in the morning, and right before bed.  Of course, when he wakes up in pain - from teething or illness, I nurse him then too.  And this "night nursing" is strongly encouraged by Thatbaby's doctor.

Nursing for over a year isn't exactly common, but it has given me a wealth of knowledge - so please feel free to shoot any breastfeeding questions my way and I'll do the best to answer based on my experience.

At this point, I plan to start weaning in April, after flu season - stay tuned for those adventures!!!!!

Friday, February 15, 2013

Messy Play: Tri-Tip Enchiladas


On Sunday we headed back to the New Children's Museum for another afternoon of fun.  This time we tried more of the hands on activities.  There was drawing with chalk, stamping Valentines, coloring with colored pencils, and molding clay into...well, Thatbaby is obsessed with balls, so that's what we made.  Lots and lots of clay balls.

The only thing Thatbaby wasn't interested in, was painting.  Vehemently shaking his head no, backing away from the paint area, and clinging to me as though the paint might contain live venomous snakes.

I guess this isn't too surprising, considering that lately Thatbaby has been a little particular about messy hands.  He now requires a napkin with meals, so that he can wipe his hands and mouth.  And yet, at the same time, he apparently plays with slime at daycare and still mostly prefers eating with his hands to a fork.

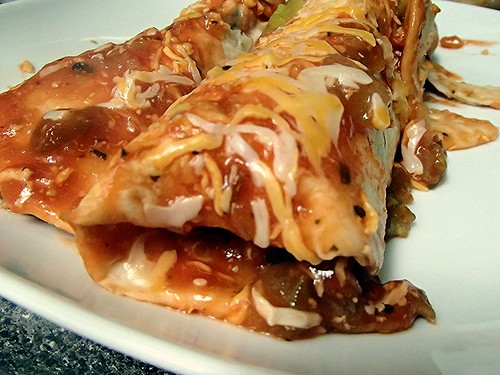
Especially with enchiladas.  Which might be due to the fact that he likes to pick out his favorite part - the black beans.  No matter what else I put in an enchilada, there must always be black beans.  But that doesn't mean we always eat vegetarian enchiladas.  I love Trader Joe's tri-tip, premarinated and ready to go.  All I have to do is cook it and we have meals for days.  It shreds so beautifully, it works well for any "steak" type dish.  This week alone we've had tri-tip quesadillas and tri-tip enchiladas.

 Tri-Tip Enchiladas
 1 lb tri-tip, cooked and shredded
8oz tomatillo salsa
1 can tomato sauce
1 cup shredded colby jack
1 can of black beans, drained and rinsed
1 can diced green chiles
1 pkg flour tortillas
  1. Preheat the oven to 350. Combine the salsa and tomato sauce in a saucepan over medium heat.  Cook until heated through. 
  2. Reserve 1 cup of the sauce, and stir the tri-tip into the remaining sauce.
  3. Stir in 1/4 cup of cheese.
  4. In a small pan, heat the black beans.
  5. Place just enough sauce in a baking pan to coat the bottom of the dish.
  6. Heat the tortillas in your favorite way.  In the center of each tortilla, place some of the tri-tip, black beans, cheese and chiles.  Roll the tortillas up and place seam side down in the baking dish.
  7. Pour the remaining sauce on top and any remaining cheese and chiles.  Cover with foil and bake for 15 minutes.

Thursday, February 14, 2013

Happy Valentine's Day!


It's that time of year again!  The time of year when I remind you not only love those around you, but let them know how important they are - you know, Valentine's Day!

When you think about it, we should all view holidays from a child's perspective - the magic of Christmas, the fun of Halloween, and the innocence of Valentine's Day.  As we get older, our views change, the holidays twist, but why should they?

When you're in elementary school, Valentine's Day meant a card from all your classmates.  No romantic intentions involved.  It was a way of saying "hey - we're friends and I'm thinking of you!"  At some point, we stop saying things like that to our friends.  Especially in this day and age of facebook and texting.  We barely speak to our friends, let alone tell them how important they are.  I'm a huge proponent of changing that, and Valentine's Day is a great reminder to squeeze it in.

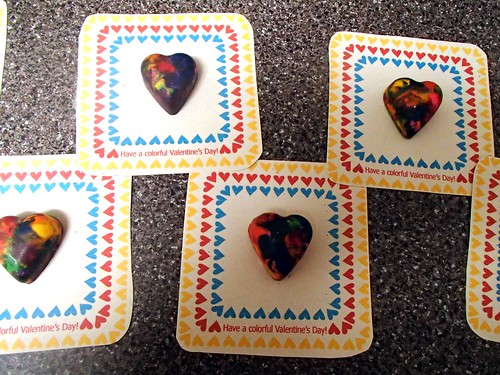
This is Thatbaby's first time to experience Valentine's Day in a school-setting, albeit daycare.  Which to me meant Valentine's for his little friends.  I didn't want to send in any chocolate, goldfish, or anything food related because with 16 month olds, I'm not really sure what their parents deem appropriate for them to eat.  I know Thatboy and I ate the Valentine's Day chocolate that was given to Thatbaby.  Instead, I sent in something that was age appropriate, colorful, and fun - crayons!  But not just any crayons - heart shaped crayons.  So holiday appropriate.  The magic of pinterest led me to a craft I could accomplish in a short time.

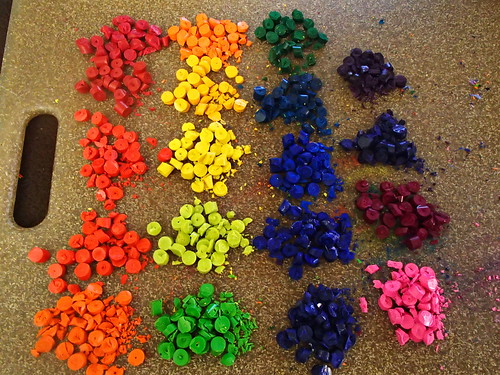
First, you chop up a box of crayons.  I used about 28 crayons for my project, which made 14 heart crayons.


Then, you place the chopped crayons in a silicone baking mold sprayed with cooking spray.  You can be as creative as you want here.  Use all colors in the same family, only two colors, every color you can.  I put all the chopped crayons in a bowl and just grabbed handfuls.


Bake the crayons at 275 until they're melted.  It took me about 10 minutes.  When I pulled them from the oven, I did a quick swirl with a toothpick in the melted crayons.  Wait until they're completely cool and pop them out of the mold.


I attached them to a little card, and voila - Thatbaby's first Valentine's ready to go!


Wednesday, February 13, 2013

Toddler Party: Salad with Beets and Blue Cheese


Saturday night we had dinner with the Pirates and the Horse Whispers.  Dinner was held at the Pirate's abode, and it was especially toddler friendly.  Thatbaby headed straight for Little Pirate's cars, and Little HW joined in as soon as she arrived.   It wasn't long before the three of them were running around the home and diving into piles of foam blocks.

Mrs. Pirate, being the genius that she is, set out a special "toddler appetizer" station, which became Thatbaby's home base, which allowed the men to hang out and drink beer, while that women hung out and drank wine.  She served the perfect dinner for children and adults alike - bbq chicken sandwiches, macaroni and cheese, sweet potato fries and tater tots - and a salad filled with leafy greens, clementines, and beets.

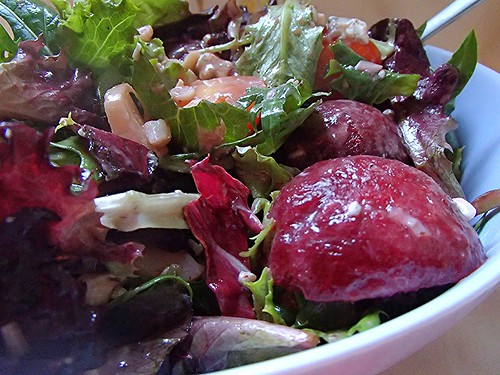
I love beets in salads, and Mrs. Pirate's salad reminded me that I haven't thrown beets in my salad in a very long time.  It was about time we rectified that.  I love beets and blue cheese together.  Something about the sharpness of the beets with the tanginess of the cheese.  As with any good salad, I also threw in whatever vegetables were in my fridge at the time.  

 Salad with Beets and Blue Cheese
2 cups mixed spring greens
1 can of hearts of palm, sliced
1 red bell pepper, sliced
1 pint of cherry tomatoes, halved
3 beets, roasted and quartered
4 oz blue cheese crumbles
1/4 cup balsalmic vinaigrette
  1. Toss together the greens, hearts of palm, bell pepper, tomatoes, beets, and blue cheese.
  2. Dress with the salad dressing and serve.

Tuesday, February 12, 2013

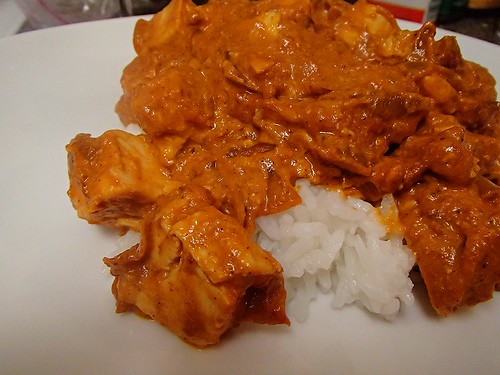
Indian in Pajamas: Chicken Tikka Masala

I love Indian food.  It's one of my favorite types of food.  Thatboy and I were talking about it, and the last time we went out for Indian was when I was heavily pregnant.   That was a very long time ago.  How did we go this long?

Probably because I placed an in-home boycott on our local Indian restaurant and our other favorites are all the way downtown - a place we rarely venture for dinner due to timing, traffic, and a 32 inch troublemaker.

And in general, Indian food you make at home just doesn't compare.  Unless you're my friend Tesseract.  The Indian food she makes at home is delicious, thanks to family recipes passed down from her mother over the phone as she prepares them.

This is especially true of chicken tikka masala, one of my favorite dishes.  It's complicated and even the storebought variety rarely holds a candle to the kind you get at restaurants. 

But I decided to give this version a shot.  I trust Joelen implicitly.  She really knows what she's talking about.  So if she gave this recipe a good review, it must be good.

And you know what?  It is good.  REALLY good.  Thatbaby, who can be a little lukewarm on chicken gobbled it up.  I gobbled it up.  Thatboy gobbled it up.  And the best part of the whole thing?  We didn't have to go out anywhere for it.  Restaurant quality in our pajamas.

Now, does anyone have a recipe they love for saag paneer?

Chicken Tikka Masala (From What's Cooking Chicago)
Chicken Tikka:
1 tsp ground cumin
1 tsp garlic powder
1/2 tsp cayenne pepper
2 tsps table salt
4 large boneless, skinless chicken breasts
1 cup plain whole-milk yogurt
1 Tbsp vegetable oil
3 garlic cloves , minced
1 Tbsp grated fresh ginger

Masala Sauce:
2 - 3 Tbsp canola oil
1 onion , diced fine
2 garlic cloves , minced
2 tsps grated fresh ginger
1 Tbsp tomato paste
1 Tbsp garam masala
1 can crushed tomatoes
4 tsps sugar
1/2 tsp table salt
2/3 cup heavy cream
  1. Combine cumin, garlic powder, cayenne, and salt in small bowl. 
  2. Sprinkle both sides of the chicken with spice mixture. Place chicken in a baking dish, cover, and refrigerate 1 hour.
  3. In large bowl, whisk together yogurt, oil, garlic, and ginger. 
  4. Remove the chicken from the fridge and pour the yogurt over, tossing to coat.  Cover and refrigerate overnight. 
  5. Heat oil in saucepan over medium heat until shimmering. Add onion and cook until golden. 
  6. Add garlic, ginger, tomato paste, and garam masala. Cook, stirring frequently, until fragrant. 
  7. Add crushed tomatoes, sugar, and salt; bring to boil. Reduce heat cover, and simmer for 15 minutes, stirring occasionally. Allow the sauce to cool, cover, and refrigerate overnight.
  8. Heat chilled sauce in a large dutch oven over medium heat. 
  9. Stir in cream and return to simmer. Remove from heat and cover to keep warm.
  10. While sauce is simmering, heat broiler.  Place chicken on a lined baking sheet and broil 10-18 minutes flipping halfway through.
  11.  Let chicken rest for 5 minutes, and then cut into bite sized pieces and stir into the sauce.