Pages

Tuesday, January 10, 2012

More lights!


Christmas lights weren't the only lights to entertain Thatbaby this holiday season. He got to take part in his first Channukah!
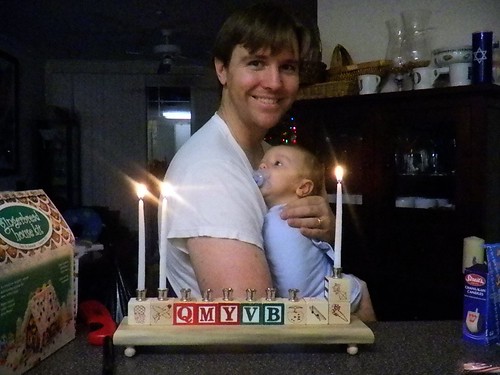

(You can see he was really into it.)

Having a new baby during a holiday that begins at sundown meant that everyone came to me this year for celebration. Usually we get together with the family up at Thatmom's house during one of the weekend days of Chanukkah. But Thatbrother and UDubb were heading up to her family the second day, which meant we had to do our celebrating the first night.

Since everyone was coming to me, it only made sense for me to whip up a fantastic dinner.


The brisket was the main attraction. I went with a traditional recipe by Joan Nathan. I've made brisket before, but this was my first time with this recipe and Thatboy's favorite. He claims to have never had a brisket like this before, but he has, he just doesn't remember. It's a recipe that couldn't be easier - combine minimal ingredients, marinate, and then throw in the oven.
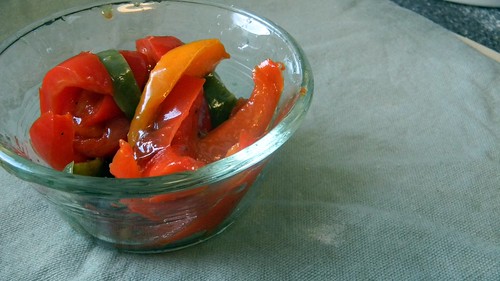


For sides there were sauteed bell peppers and a big green salad. The leftover peppers are a great addition to omelets, pizzas, or pastas. The sweetness really works well with the tangy brisket.


No Channukah would be complete without latkes! I've created my own little recipe which is a mix of my dad's recipe and a couple of others. It's a mix of potatoes and onions, an egg, and flour. Pretty basic, but I've found the ratios really do matter. My one egg is less than a lot of recipes and I add a little more flour to give it that nice crispiness. I also grate the potatoes and onions with a large grater, which seems to be another unique variable. I got a new food processor for Channukah that night and it would have made the grating of the potatoes and onions a lot easier.


A typical dessert for Channukah would be something fried - like sufganiyot. I went with cookies instead - almond horns to be exact. Thatmom LOVES almond horns. With a dusting of powdered Linksugar, they're the perfect winter treat.

Monday, January 09, 2012

Keeping Old Promises

Way back in 2011 I promised you another fabulous recipe involving fennel and I alluded to the fact that we were going to attempt another Santa photo op with Thatbaby. Since it's now 2012 I think it's about time I shared both with you!

San Diego loves to get all dressed up for the holidays. The San Diego Botanic Gardens hosts the "Garden of Lights" in December when the entire garden becomes a winter wonderland - complete with snow. Thatbaby was fascinated by the lights when we took him to his first Santa visit, so we thought this would be a hit.

We were right.


I'm pretty sure if Thatbaby could decorate heaven it would be covered in Christmas lights. He was in awe the entire time we were there. Sure maybe he was a little over stimulated and maybe we messed up his routine by an hour or two, but it was worth it to see him light up as he looked at the world covered in a sparkly glow. He didn't want to sleep for fear of missing a minute.


Watching him watching the lights was entertainment enough, but Thatboy and I also managed to find the corner where they were pouring mulled wine. It was a nice enough evening - as you can tell by Thatboy's "warm winter sweatshirt" but warmed wined in the cooler winter evenings is still appreciated.


Once we were all wined up we headed over to see Santa!


Once again Thatbaby did great - smiling and cooperative. Our family picture actually has all of us looking at the camera and smiling and is one of the best pictures of us so far. See - my baby's not afraid of Santa Clause, he just doesn't like sketchy men touching him. I don't either, so he must have inherited it from me.

We toured through the gardens which are beautiful at night and covered through lights. But they also looked like they would be wonderful during the day and we can't wait to go back.


As we headed over to the snow, we passed the miniature railroad which was elaborate and fascinating. We have a miniature railroad museum here in San Diego but I like the incorporation in the gardens.


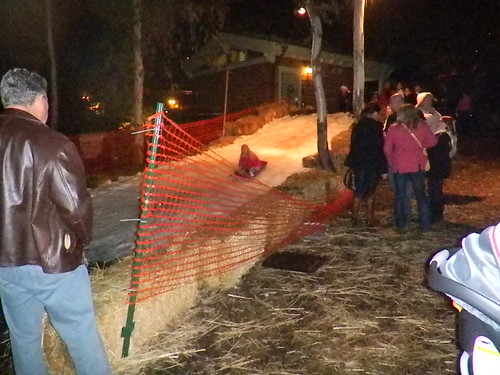
The snow areas were divided into two parts - one for free play and the other for sledding. Both were filled with smiling kids. By this time Thatbaby had fallen asleep so we held off on snowplay for another year and headed home.


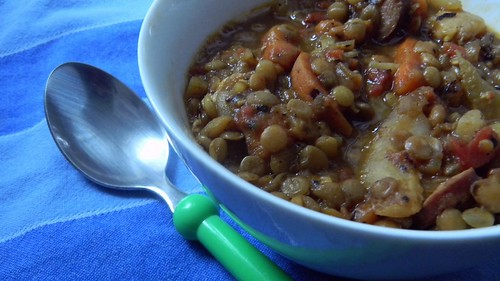
The other part of my promise was for a good fennel recipe and it seems something warm and filling should fit in right here after tales of snow and Christmas. I mentioned that I've been going through a fennel phase recently and happened to have a bulb on hand when Branny posted the recipe for Lentil, Kielbasa, and Fennel Stew.


Talk about good timing, right? Lucky for me we always have lentils on hand. I use it in so many soups it has become a pantry staple. I changed up the recipe just slightly because I don't love kielbasa. Instead I used garlic chicken sausages. The result was something so delicious we couldn't wait to have leftovers for lunch. It's hearty. It's filling. It's the perfect winter night meal with a nice crusty piece of bread.

Tuesday, January 03, 2012

Ch-ch-changes

2011 was a year of change. I think there were changes in almost every aspect of my life. The most obvious changes involved Thatbaby.


One thing that didn't change throughout the year was my hair. I think this is the longest it's ever been. I was terrified to cut it though -afraid that pregnancy hormones would have me irrationally in tears as it fell to the floor. I've never been afraid of cutting my hair before, because it will always grow back. And I really like it short. Thatboy usually isn't as much of a fan of my shorter hair, so I comprise and vacillate back and forth between short and long.

After Thatbaby was born it was time to go back to short. So in the beginning of December I lopped it all off.


Sure it may be a "mom do" but I was sporting long hair for years before I was a mom, so for me it's much more of a "Thatgirl do." And this may be one of my favorite haircuts ever. Even Thatboy, who loves neither short hair nor bangs admitted that he really likes my hair.

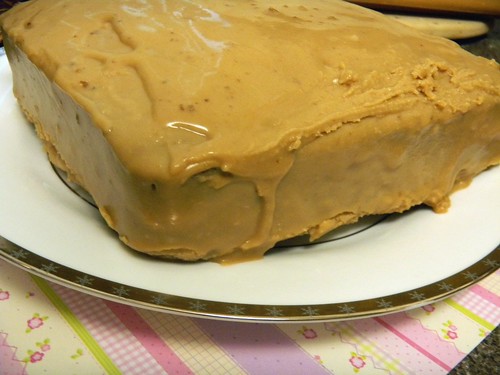
I pulled another switchup on Thatboy for Christmas Eve. Since it was our first Christmas not visiting his family, I let him dictate the menu for Christmas Eve. There was rack of lamb, roasted broccoli, and wild rice. But neither of us thought about dessert till the night before. I had him pick out a cake from a new cookbook (more on that another time) but ended up changing the dessert last minute to this mocha walnut cake. I'm SO glad I did. Like the hair change, this one went over so much better than expected. The cake itself was great, but I really think it's the frosting that sends this one over the top. Or licking plates. Thatboy described it as a caramel flavor, but after a couple more licks of the plate I decided that the flavor is much more akin to a praline. Since we both have a massive affinity for those southern sweets, it's no surprise that this frosting has become a quick favorite. See? Change is good!


Mocha Walnut Cake (From the Fannie Farmer Cookbook)
3/4 cup milk
3 Tbsp instant coffee
2 tsp vanilla
1/4 lb butter
1 1/2 cups sugar
3 eggs
2 1/4 cups cake flour
1/4 tsp salt
3 tsp baking powder
1 cup chopped walnuts

  1. Preheat oven to 350. Spray an 8x8 pan with baking spray. Heat the milk and stir in the instant coffee until it dissolves.
  2. Add the vanilla and let cool.
  3. Cream the butter and add the sugar, beating until light and fluffy.
  4. Add eggs, one at a time, beating until each egg is combined before adding the next.
  5. Stir in the coffee mixture.
  6. Combine cake flour, salt, and baking powder and add to the wet ingredients.
  7. Stir in the walnuts. Spread the batter into the pan. Bake 45 minutes. Let cool in pan for 5 minutes before turning out onto rack. Frost with Penuche frosting.

Penuche Frosting (From the Fannie Farmer Cookbook)

1 1/2 cups dark brown sugar
3/4 cup sugar
1/8 tsp salt
1/2 cup milk
3 Tbsp butter
1 1/2 Tbsp corn syrup
1 1/2 tsp vanilla
  1. Mix all the ingredients except vanilla in a heavy bottomed saucepan. Bring slowly to a boil and boil 1 minute.
  2. Cool till lukewarm, add the vanilla, and beat until think enough to spread.

Monday, January 02, 2012

Wow December sure flew by!

I know you've all been missing something as this new year begins. That little piece of Thatgirl that makes your life complete. But almost all my free time in December was dedicated to this little project:


More on that later, but suffice to say I was knitting on a schedule so blogging took a backseat. Which is a shame since we sure did a lot last month. (Which probably only compounded the timing issue.)

Like when Thatboy's best friends came down for the weekend. Our little home was filled to the brim with 5 adults, a toddler and a baby - which made the holidays even warmer. The last time we saw Ace he was 2 weeks old. Now he's a giant!


(picture taken seconds after Ace kissed Thatbaby's head and moments before Ace followed said kiss with a slap. Toddlerhood - it's a learning process.)

Their visit happened to coincide what has quickly become one of my favorite San Diego races - The Jingle Bell run. If you recall, I ran it last year and vowed to make it a regular part of my running schedule. It was just as much fun as I remembered, complete with jingling jingle bells on shoes, marimbas playing Christmas music, and an acapella choir who were singing "Steal my Kisses" for some reason - which I don't associate much with Christmas.

And of course there were the awesome costumes. I didn't get a picture of the guy in a green unitard on a unicycle, but I did capture Santa on Stilts:


The boys in the footie pajamas:


Santa and her sleigh of reindeer (these chicks won for best costume):


And other festive attire:


And we got into the spirit too.


Thatboy and the rest of the crew walked the race while I ran ahead. The nice thing about not being super speedy to begin with is I'm already back to my pre-pregnancy speed. In fact, at 2 months postpartum I actually finished this race 36 seconds faster than when I ran it in 2010!

After I crossed the finish line, I turned around and ran the course backwards to meet up with everyone. Which was fun because I got comments like "Hey - the finish line is the other way!" and I was able to give support to tired runners "The rest of the course is all downhill!" Around the halfway point I met up with these lollygaggers.


And we finished the rest of the race together.


Well, almost together. As we neared the finish line I ran ahead so I could capture Thatbaby finishing his first race. See that car behind us? That was the cleanup crew. We were the absolute last people to finish the race. But it was still a PR for Thatbaby!


Thatboy's favorite part of the race (and the reason he'll run it again next year) was the beer garden hosted by Stone Brewery.


Thatbaby was too young to come in, but we're such good parents, we kept an eye on him while we enjoyed.


While we were having houseguests I of course wanted to serve them up something home-cooked and delicious. Especially since we didn't want to go out the night before the race so we could all get to bed a little earlier.

I wanted to do something that would feed a large crowd but still be easy. I gave Thatboy some choices - roast chicken, lasagna, chili, or enchiladas. Not surprisingly he chose enchiladas. He always chooses enchiladas.


I used Nicole's adaptation for chicken enchiladas with red chile sauce. They were amazing. I really think making your own chile sauce is the key here. They were a big success and Magski even asked for the recipe to make at home once I assured her it was incredibly easy. Served with a nice salad and some Spanish rice it was the perfect way to spend an evening with friends.

Thursday, December 15, 2011

"Chicken Soup" for a rough day

Stick with me to the end on this one and you will be greatly rewarded. Trust me on this - it's worth it to scroll allllll the way down. You can do it now if you want - head down to the end and back up. We'll all wait here for you.

On December 2, Thatbaby turned 2 months old. And anyone with a young child knows what that means - the dreaded 2 month shots!


Thatbaby was a trooper. I mean, obviously he cried - even I cried when I have to get a shot, and I'm older than 2 months. But about 2.5 seconds after we got home, he was back to his normal self.

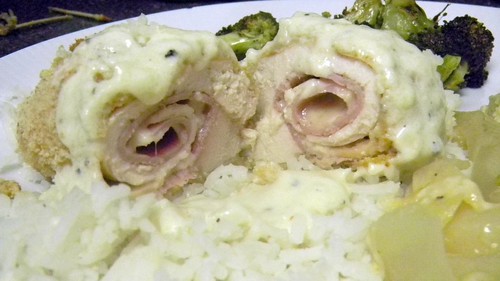
When I get a shot I wallow in the pain and misery. I don't get shots very often for this reason. And even though Thatbaby appears to have not inherited this delightful trait, I still felt like some comfort food should follow up this harrowing ordeal. Enter Chicken Cordon Bleu.


Can you think of anything more comforting than melted cheese? Cutting into a chicken breast and watching it just ooze out? And while most ooze verges on disgusting, oozing cheese is downright amazing. And topping it with an alfredo-like sauce sends it over the edge from ordinary to extraordinary.

The comfort-fest continues with our side dishes. Granted, I'm the weirdo that thinks pretty much any vegetable is comforting, but it's even more appealing when baked with cheese. I'm going through a fennel phase right now (you'll see more later this week). Raw fennel has a delightful black licorice scent, but when you cook it, it doesn't have that flavor. To me, it tastes like winter - warm and earthy. Like a sweater. And what could be more comforting than that?


Braised Fennel Au Gratin
1 head of fennel
2 Tbsp butter
chicken broth
salt and pepper
1/4 cup parmesean cheese
  1. Preheat the oven to 375. Wash and slice the fennel in 1/2 inch slices.
  2. Melt the butter in a skillet. Add the fennel slices and saute for 5 minutes.
  3. Add 1/2 inch of chicken broth, cover and simmer about 18 minutes.
  4. Remove fennel to a baking dish and boil down the liquid until only a few tablespoons remain.
  5. Pour the reduced liquid over the fennel, sprinkle the parmesean over and broil until the cheese has melted.


And for those of you that have stuck around - we got back our photos from the sketchy santa shoot. We went because I'm a sucker for free professional pictures, but really, are they much use when they turn out like this?


Tell me that santa doesn't give you the willies? And look how comfortable Thatbaby seems...right?

Let's review:

Good Santa


Bad Santa.


I think we've got one more Santa option this weekend. And I'm counting on this one to be the winner!

Tuesday, December 06, 2011

It's Beginning to Look A Lot Like Christmas


Now that Thanksgiving is over I can start getting into the winter holiday spirit. And we go full swing tilt once that happens.

H had told us that her photographer was doing pictures with Santa at a local car dealership, so Saturday we headed down for another photo opportunity. I don't have the photos back yet, but I'm not expecting much. Thatbaby's first pictures with Santa went really well. He was all smiles and coos. But this time, there was a lot more tears, crying, and general unhappiness. And of course, the Santa seemed a little sketchy. If I could figure out a way to upload the video without sound you would seem him almost drop Thatbaby ass over teakettle.

After the Santa experience we brought Thatbaby over to Balboa Park which is all dressed up for Christmas also. Lights and giant trees. Every year the Old Globe Theater puts on The Grinch that Stole Christmas and so the Whoville Tree is also present. With a host of Whos dancing around the base.


We then went to pick up our very own tree. For some reason, our usual tree lot wasn't there this year, so we went driving around to find a new lot. Which is when Thatbaby decided he didn't like his carseat anymore, and he wanted to go home, and he didn't like these stupid tree lots anyway. Which made the experience a lot less enjoyable.

Undeterred, we picked out the perfect tree and decorated it after Thatbaby went to bed for the night.


He was pretty excited about it when he woke up. He loves looking at it, even when it's not lit. I love going through our ornaments when we put them up - so many have special meaning. Like the ones that hung on Thatdad's tree, or the ones marking trips we've been on, or the ones marking special events in our lives. Like the birth of our son:


This year we also added a couple from our trips this year. Like when we went to Tahoe for Fourth of July.


Or our anniversary babymoon at Cannon Beach.


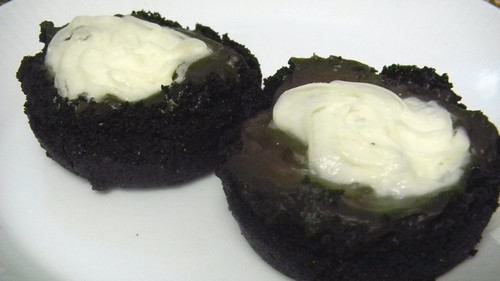
And since we're in the holiday spirit, I'll take a break from the entrees and veggies and share with you the recipe for the Mexican Chocolate mini-pies I sent in with Thatboy for his birthday.

I found the original recipe in Food Network Magazine, for a full sized pie, but full sized pies are difficult to eat at work. Besides, everyone loves treats they can hold in their hand and eat without a fork or spoon. So I adapted the recipe to make individualized pies. I also switched the crust to an oreo cookie crust which I like so much better than a chocolate wafer crust. With potlucks and holiday parties abounding, these are a sure fire crowd pleaser. They disappeared from Thatboy's office in a matter of minutes.


Mini-Mexican Chocolate Pies (Adapted from The Food Network Magazine)
30 oreo cookies
6 Tbsp butter, melted
2 cups milk
1/2 cup sugar
1 Tbsp cocoa powder
1/2 tsp roasted cinnamon
1/4 tsp almond extract
1 pinch cayenne
1/4 cup cornstarch
1/2 tsp salt
4 egg yolks
2 Tbsp cold coffee
1/2 tsp vanilla extract
4 oz semisweet chocolate chips
  1. Preheat the oven to 350. Crush the oreo cookies in a food processor.
  2. Add melted butter and pulse until moist. Divide between 12 muffin tins and press into the bottom and side of each cup. Bake for 20 minutes. Let cool while preparing the filling.
  3. Heat the milk in a large saucepan until hot but not boiling.
  4. In a separate bowl, whisk the sugar, cocoa powder, cinnamon, almond extract, cornstarch, and salt.
  5. Whisk the egg yolks, coffee, and vanilla into the sugar mixture.
  6. Temper the egg mixture by whisking in half of the hot milk into the eggs until smooth. Then whisk the egg mixture into the rest of the hot milk.
  7. Cook, whisking, 3-5 minutes until it boils and thickens. Remove from the heat, whisk in the chocolate until it is all melted. Let cool slightly. Stir during cooling so a skin doesn't form.
  8. Pour the filling into the muffin-tins and refrigerate until the pudding sets.

Sunday, December 04, 2011

Arroz by any other name


I'm not sure when I discovered Arroz con Pollo. I grew up in a pretty small town without a lot of ethnic diversity when it came to restaurants (or people for that matter).

I do know, however, that I discovered I could make Arroz con Pollo at home this summer. Which was a game changer here. I found a recipe which made the entire thing seem like child's play, because really, the thing that make arroz con pollo what it is, is this magic seasoning in a box - Sazon.


And of course, this little box contains more than one seasoning packet. Which I've been more than happy to make use of. I've started arroz con-ing on a near weekly basis. Almost anything I can get my little hands on because it's just that easy - make a sauce with tomato sauce and sazon, add rice, add protein of choice. It works just as well with chicken as it does with shrimp or pork.

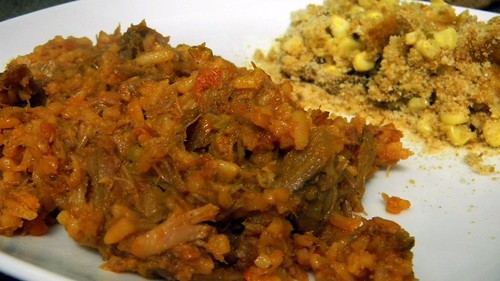
Now that I shared with you my secret of how easy this dish is, I'll tell you a way to make it even easier - use pre-cooked meat! Which makes this a fabulous way to use up leftovers (anyone still have turkey in their fridge? Arroz con pavo!). And if you want to go even easier than pre-cooked meat, use precooked meat someone else cooked! I love some of the prepared meats at Trader Joes - their potroast, pollo asada, and most especially carnitas. I picked up a package of their carnitas, used a fork to pull it apart (okay, I'm not going to lie - I pulled it apart with my fingers, but if I were serving this for company I would most certainly use a fork) and threw it in with my rice. Voila - arroz con carnitas!


Arroz Con Carnitas
3 Tbsp canola oil
1 cup tomato sauce
1 packet Sazon
2 bay leaves
1/ tsp cumin
2 cups of uncooked rice
4 cups water
salt and pepper
12 oz cooked carnitas, fork-pulled

  1. Heat oil in a dutch oven over medium heat.

  2. Add tomato sauce, Sazon, bay leaves and cumin. Cook for 5 minutes.
  3. Add the rice and cook for 1 minute.
  4. Stir in the water. Season with salt and pepper and bring to a boil.
  5. Boil for 10 minutes, then lower heat and simmer for 25 minutes.
  6. Stir in the carnitas and heat until the entire dish is warmed through.


Scalloped Corn (From the Fannie Farmer Cookbook)
3 Tbsp flour
1 tsp salt
1/4 tsp paprika
1/4 tsp dry mustard
pinch of cayenne pepper
3 Tbsp butter
1 small green pepper, chopped
1/2 onion, chopped
1 cup milk
2 cups corn kernels
1 egg yolk, slightly beaten
2/3 cup buttered bread crumbs
  1. Preheat oven to 400. Spray a baking dish with baking spray. Mix flour, salt, paprika, mustard, and cayenne pepper in a small bowl.
  2. Melt the butter in a skillet, add the green pepper and onion and cook until soft.
  3. Stir in the flour mixture and cook, stirring for 2-3 minutes.
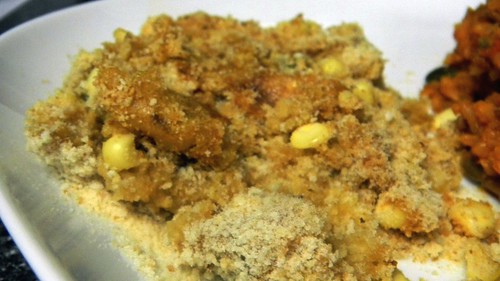
  4. Add the milk while stirring. Bring to a boil
  5. Stir in the corn and egg yolk.
  6. Spoon into the baking dish and sprinkle with the bread crumbs. Bake 25 minutes.

Saturday, December 03, 2011

Sufferin' Succotash


Before a couple of years ago, the only time I had ever heard of succotash was when it was uttered, alongside what could only be gallons of spittle, by Sylvester the Cat. I assumed it was one of those nonsense phrases like "Gee Wilikers."

Turns out succotash really is something. A vegetable medley that's a little different than your peas and carrots. My discovery began with Trader Joes - as all good discoveries do. In fact, if Christopher Columbus had a Trader Joes by him, he would have known he hadn't landed in India because - duh, no masala to be found anywhere. However, he would have seen succotash, which should have clued him in that this, my friends, was America. Land of the free and the brave - until the Pilgrims came and took the freedom of the braves.

Trader Joes has an edamame succotash that I pick up every now and again for variety. But traditional succotash, it turns out, is a lima bean dish. And we all know how much I love lima beans. Further research indicates that succotash was originally a Native American dish that was popular during the Great Depression because it was inexpensive to make. Which makes sense, since for many years corn was considered food for livestock, and not people.

Now I'll eat lima beans anyway I can get them, but Thatboy isn't as entirely easy to please in that department. So pairing them with corn and cream seemed like a good way to get him interested. And I was definitely right on the mark with that. This is probably his new favorite way to eat lima beans.


Succotash
1 Tbsp butter
1 cup cooked corn
1 cup cooked lima beans
2 Tbsp cream
salt and pepper
  1. Melt butter in a saucepan. Add the corn and lima beans and heat through.
  2. Add the cream and stir to combine. Heat until the entire dish is warmed.
  3. Season to taste with salt and pepper.

Friday, December 02, 2011

Mid-East Feast


In general, I work from a meal plan. I write out what we'll be having for the week and use that to make my shopping list. It usually cuts down on grocery costs and saves me from that awful "what are we having for dinner tonight" moment where you stare blankly into the fridge willing an answer to emerge from it's frosty depths.

But a couple of weeks ago when we were at the supermarket a couple of extra things made their way into my basket. Like the pound of ground lamb that was marked down to $1. I love playing with ground lamb. More than any other ground meat, this is the one I like to try new things with. Beef almost always gets made into meatloaf, burgers, or meatballs. Ground turkey tends to get thrown into chili. But ground lamb is never pigeonholed.

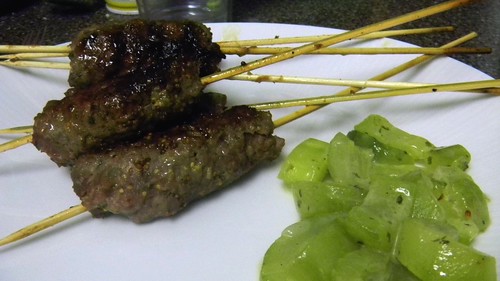
Instead I use it as an opportunity to scour the internet in search of a new idea, use, or flavor profile. Which is how I landed on Aarti Sequeira's Ground Lamb Kofto Kebabs.


Thatboy, Thatmom and I all watch The Next Food Network Star, so I was familiar with Aarti and the fact that she brings some really great flavor to the table in a very accessible manner. These kebabs certainly highlight that. The baking soda in the meat mixture gives them an almost sponge-like consistency, and the marinade is fantastic. So fantastic in fact, that I would recommend making them much thinner than I did so you get more of a marinade to meat surface area ratio.

Aarti serves her kebabs with potatoes and cucumbers. I served mine with just cucumbers. Because they bring such a nice contrast to the highly spiced meat. Traditionally, the cucumbers would be a cold, salad like dish. But there's nothing traditional about me. And with the colder weather coming in, I've been braising a lot of my vegetables - cooking them down to their essence in a sweet and salty sauce. This time cucumbers got the treatment.


Braised Cucumbers
1 cucumber
3 Tbsp of butter
1 sprig parsley, finely chopped
salt and pepper
  1. Peel the cucumber. Cut in half and use the tip of a spoon to remove the seeds.
  2. Slice each cucumber half and place in a pan with 2 Tbsp butter, 1/2 cup of water, and parsley. Simmer, covered, for about 9 minutes.
  3. Drain the cucumbers and toss with remaining butter and salt and pepper to taste.

Thursday, December 01, 2011

French History


When Thatmom met Thatdad she was an English major in college. Her career ambition was to go to the Sorbonne and translate French poetry. That obviously didn't work out.

Instead she went to nursing school and had a beautiful, smart, charming, and overall wonderful baby girl. And when that baby girl was a child, the family took a trip to Montreal where a sweet waitress, impressed with the girl-child's beginning French offered to take her and raise her and teach her French. That obviously didn't work out.

Instead the girl-child went home with her family, and began taking French classes as soon as she was able. She began reading novels in French, coaching teams for French competitions, and even winning a couple of blue ribbons herself. When she graduated high school, she applied to college in Montreal with the goal of teaching French. That obviously didn't work out.

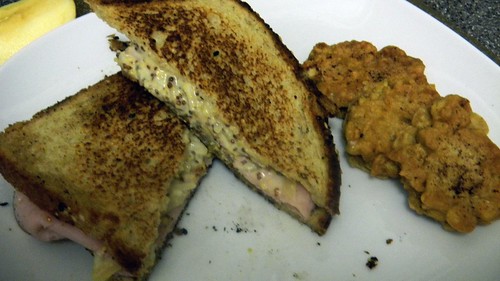
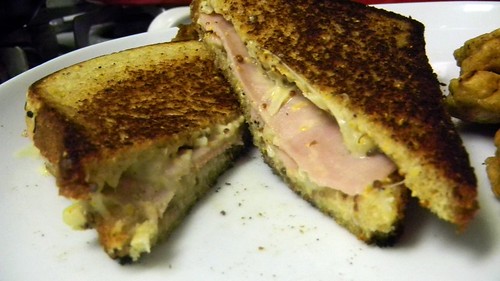
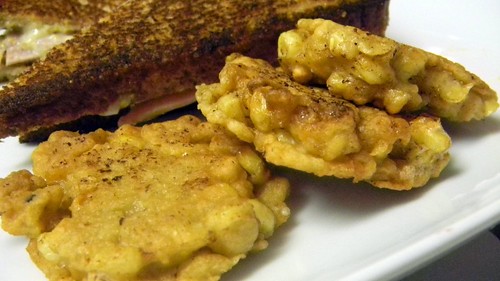
Instead she has had to make do with eating lots of French food. Like turning a simple ham and cheese sandwich into a gourmet French dinner. Especially since she has currently become obsessed with the pre-grated swiss/gruyere mix at Trader Joe's. The perfect flavor for just about everything and great for melting. Which makes it really nice for any sort of grilled cheese sandwich. C'est magnifique!


Croque Monsieur
1 Tbsp crème fraîche
1 Tbsp dijon mustard
1/4 cup Trader Joe's shredded swiss/gruyere mix
4 slices of bread
2 slices ham
2 Tbsp butter
  1. Stir together the crème fraîche, mustard, and cheese.
  2. Spread this mixture on each slice of bread.
  3. Add ham to half of the bread slices and cover with the other halves.
  4. Melt the butter in a skillet and cook the sandwich, about 2 minutes or until golden brown. Flip and cook the second side for another minute or two.
To keep this truly authentic you should probably serve it with pomme frites, but as I mentioned before, we're corn crazy in this house, so I instead of pomme frites, I made mais frites - or corn fritters.


Corn Fritters
1 cup corn kernels, chopped
1 egg, beaten
1/4 cup flour
salt and pepper
2 Tbsp butter
  1. Combine the corn, egg, flour, salt and pepper.
  2. Shape into small patties. Melt the butter in a skillet and fry the patties for about 4 minutes per side, or until golden.
  3. Flip and cook another couple of minutes on the other side.