Pages

Monday, October 24, 2011

I return to me

I waited 3 weeks before jumping back in the game. But really, it had to be done. Especially since training in earnest begins in 2 weeks.

Yesterday morning, after his "breakfast feeding" (which interprets to the time we decide that we've gotten enough sleep and can get up for the day) I passed off Thatbaby to Thatboy and headed out for a run. Things I noticed:
1) I didn't think I had any swelling during pregnancy, but my vibrams slip on so much easier now.
2) I started out slow, just the 2 miles I was doing before I had the baby, BUT now I don't need to walk up the especially big hills. Which means I can run the entire thing!
3) And as far as running the entire thing, I'm doing a 13 minute mile, which isn't very speedy but is SO much faster than I was running during the pregnancy. And I totally credit that with not carrying a baby anymore (and being below my prepregnancy weight at this point in time.)

The only downside to being faster is that the run was over far too early. But I don't want to push it too fast too soon, so I'll keep up with a couple more 2 milers this week before starting to increase my distance next week. And I know that speed comes with time, so I'm not going to worry about that at all. After all, I have until January before my next half.

Yesterday also marked my return to the kitchen. We are officially out of freezer meals! As I cooked up dinner Thatboy informed me that he was really excited for dinner because it smelled like "life before baby." Hot meals that take a little bit of love and time to prepare. And I'm sure he appreciated being off the hook for dinner since the last three weeks he's the one prepping all meals. Now he's got breakfast and lunch and I take care of dinner.

Thatboy and I have been walking to the grocery store on an "as needed" basis, so obviously with the advent of cooking dinners it was "needed." I saw these colorful carnival squash and decided to plan dinner around them.


Have you ever cooked with carnival squash? I hadn't. But I decided to do what I always do with a new ingredient -treat it like an old one! And I had seen a recipe in this month's Food Network Magazine for Gnocchi with Butternut Squash and Kale. Gnocchi is definitely my favorite pasta and the idea of gnocchi, squash, and a dark leafy green was almost irresistible. This cooks up in one pan making cleanup extra easy on people who are waiting for a baby to cry at any minute as they eat dinner. Thatboy adored this dish. He continued to rub his belly and tell me how much he enjoyed it all evening long. And jumped up to clean to show his appreciation. And was eager to have the leftovers for lunch today!
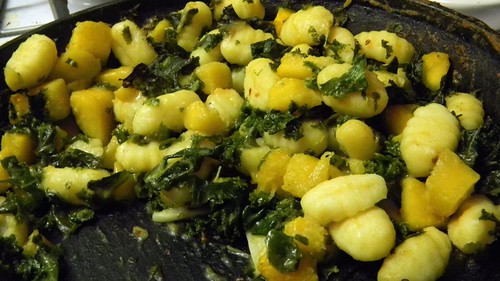


I have to say as good as dinner was, it was missing one key ingredient. I bet this dish would be perfect with some creamy goat cheese mixed in. Think about it, squash, kale, gnocchi and goat cheese? Next time.

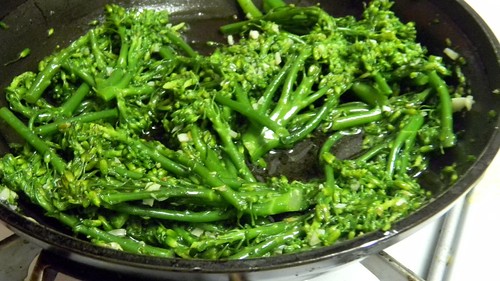
Never one to leave a good thing alone, I wanted to add a nice side to the pasta. I know a lot of people ask what kind of side to serve with pasta and I'm of the mind that you can't go wrong with a nice dark green vegetable sauteed with garlic. This works with zucchini, broccoli, green beans, spinach, etc. I would have loved to use broccoli rabe as a side, but my market didn't have, so instead I grabbed some baby broccoli. Totally different flavor, but I love the longer thinner pieces for aesthetic purposes and it sautes up a little quicker than broccoli.

If you're cooking a green veggie with a thicker stem - like broccoli or asparagus, the key is to give it a quick boil first. (Longer than a blanche, not long enough to fully cook). Because you don't want to leave it sauteing long enough to fully cook it or it'll become oil-logged. A short hot water bath fixes this problem and leaves you with a veggie that still has some crisp to it, a gorgeous green color, and tasting more of garlic than oil.

Broccolini
1 lb broccolini
2 cloves minced garlic
3 Tbsp canola oil
salt and pepper
  1. Bring a pot of water to a boil. Wash the broccolini and cut of stems. Boil them for 5 minutes and drain.
  2. Heat the oil in a pan over medium-low heat and add garlic. Saute for for a minute - but don't let the garlic brown.
  3. Add the broccolini and stir until tender. Season with salt and pepper.
Sunday, October 23, 2011

Corn-y but true


It must be the fall. I can't think of another excuse. Because we've been eating a ton of corn products lately. Corn bread, corn sticks, spoon bread, corn muffins, and grits for breakfast most mornings. And I blame the fall because corn mazes are just so autumnal. So even though corn is most certainly a summer product, I still associate it with October.
And Thanksgiving is very corn-centric too, is it not? I mean, I know the native peoples brought maize to the first Thanksgiving. Or at least they do in fables, because I'm not sure how true the actual first Thanksgiving stories are.

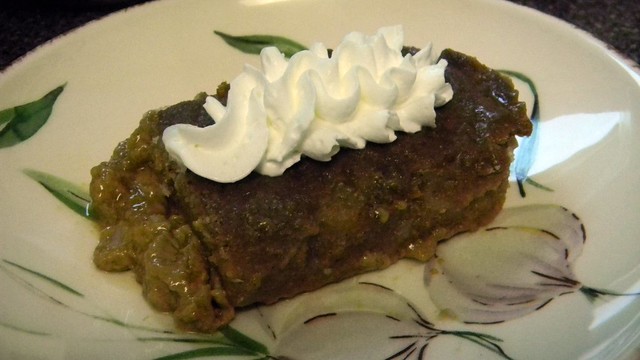
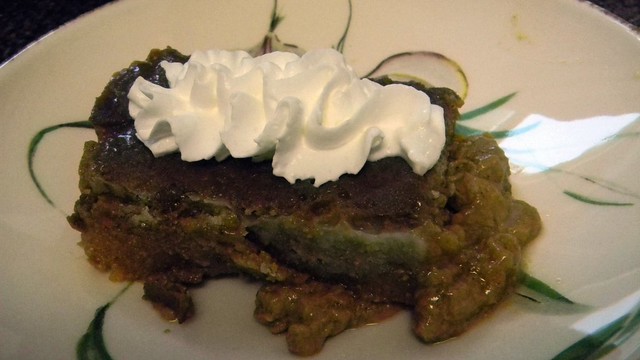
In fact, this dessert is attributed to the native people, or at least Fannie Farmer attributes it to the native peoples. A little further research and one is led to believe the name "Indian pudding" refers to the fact that it is made with corn meal or "Indian meal." (Guess I'm not the only one who attributes corn to the pre-colonial settlers.) No matter where the introduction comes from, this is a truly American dish, at one time considered quintessentially New England. In the early days of our fledgling nation this was quite common on the Thanksgiving table. Which would make it due for a resurgence.

Thatboy felt this dish was similar to pumpkin pie in taste, and really, anything with cinnamon and nutmeg leds itself to that comparison. But the rich molasses flavor gives it a little more depth and complexity - like pumpkin pie's dark older sister - the one who seems just a bit older, wiser, and more cynical.

Indian Pudding (From the Fannie Farmer Cookbook)
4 cups milk
1/2 cup yellow cornmeal
1/3 cup dark brown sugar
1/3 cup granulated sugar
1/3 cup molasses
1 tsp salt
4 Tbsp butter
1/2 tsp ginger
1/2 tsp cinnamon
  1. Preheat oven to 275. Pour 2 cups of hot milk over the cornmeal in a double boiler, stirring as you add the milk. Cook for 10-15 minutes.
  2. Add all the other ingredients and stir until combined.
  3. Spook into a 1 1/2 quart dish and pour the 2 remaining cups of milk on top. Bake 3 hours, until set. (It's still going to be super jiggly/wet when it comes out of the oven. It'll become firm as it cools)

Wednesday, October 19, 2011

Dessert Chard


Apparently I grew up with "fancy" vegetables. I use the term lightly because really, the main thing that separated the veggies I grew up with from the veggies Thatboy grew up with was water and seasoning.

In his family vegetables were always boiled (usually until they were limp and flavorless) and then slopped on a plate. In my house they were sauteed in olive oil, tossed with butter, roasted, grilled, steamed, salt, peppered, and spiced.

It doesn't take a lot of skill or imagination to create great vegetable side dishes. Heck, it doesn't even take a lot of time. The first time I made Thatboy zucchini it was sauteed and seasoned with garlic, basil, salt and pepper and he looked at me as though I was practicing magic. And he was hooked.

My basic arsenal changes based on my mood. The time of the magic zucchini I was using basil and garlic on everything. There was another period where red pepper flakes were my go to seasoning. Lately it's been lemon and butter. Lemon to me always makes the veggies taste "bright" and "fresh."
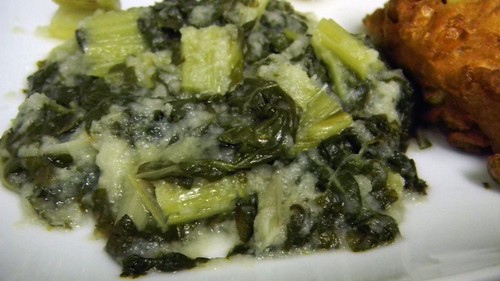
When I served this swiss chard with dinner the other night Thatboy asked me what it was. When I told him it was chard he told me it reminded him of dessert. Which I thought was weird, because he is a person who insists dessert be sweet, and usually chocolatey. But apparently for him the lemon adds sweetness to this dish. However you look at it, thinking that a dark green leafy vegetable is dessert-like has to be a good thing.


Swiss Chard
1 bunch of Swiss Chard

1 1/2 Tbsp flour
juice of half a lemon
1 Tbsp butter
salt
  1. Separate the leaves from the stalks, but wash both. Chop the stalks into bite sized pieces.
  2. Whisk the flour into 1 1/2 cups water and bring to a boil.
  3. Add the chopped stalks into the boiling flour-water with the lemon juice and a sprinkle of salt. Simmer for 25 minutes.
  4. Bring another pot of salted water to a boil and add the leaves. Boil for 12 minutes. Drain and chop the leaves, toss with butter.
  5. Combine the cooked stalks, their juices, and the greens and serve.

Monday, October 17, 2011

When Life Hands You Lemons...


On one of my last trips to the Farmer's Market there was a vendor selling giant, gorgeous lemons - 5 for $1.00. As I picked them up for inspection, the seller told me that I had better be careful with these lemons because they were ridiculously juicy. (As in full of juice, not as in related to the clothing line with something emblazoned upon their rears). With that, I was sold, and threw a bunch into my bag.

For some reason I continue to self-perpetuate the idea that Thatboy loves lemon desserts. I don't know where I latched onto this idea, but I am constantly making some lemon-flavored sweet in his honor. And every time he reminds me that he doesn't love lemon as much as I think he does. Which was exactly what he told me when I excitedly told him I had made a lemon dessert to stick in the freezer for when the baby came.

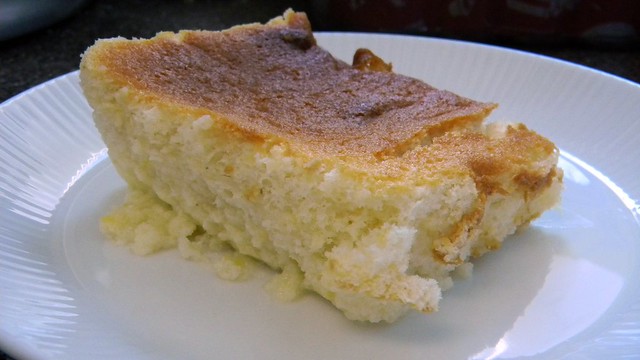
In trying to decide how to best use my juicy lemons in creating something sweet for Thatboy I turned to Fannie Farmer. The first lemon recipe I came across was for "Lemon Pudding." And I'm not incorrect in knowing Thatboy loves homemade pudding (though he tends to stick to chocolate or butterscotch as his faves). Upon closer inspection, this didn't seem to be a typical pudding - rather it was a lemony sponge cake over a creamy layer. I wasn't positive it would freeze well, but I figured I'd give it a shot. I divided the batter into two loaf pans so we could give it a try that night just in case freezing ruined it.

That night Thatboy begrudgingly tried a piece of this sweet cake combo. I mean, it's not like dessert options are plentiful here and cake always trumps dried fruit. He said something along the lines of "I didn't think this was going to be good, but this is REALLY good." Winner winner. And there's always a special glow I get in proving his initial "jump to conclusions" conclusions wrong.

We defrosted the lemon pudding for dessert and we tried it with baited breath. And you know what? Just as delicious as the fresh version! Which was surprising given the light and delicate nature of the cake. And you know what? I get a special glow in proving my initial "jump to conclusions" conclusions wrong too!


Lemon Pudding (From the Fannie Farmer Cookbook)
2 tablespoons butter
7/8 cup sugar
3 eggs, separated
1 cup milk
1½ tablespoons flour
1/3 cup lemon juice
Grated rind of 1 lemon

  1. Preheat the oven to 350ºF. Cream the butter in an electric mixer.
  2. Gradually add in the sugar and beat until the mixture is light and fluffy.
  3. Beat in the egg yolks one at a time, making sure each yolk is incorporated before adding the next.
  4. Add the milk, flour, lemon juice, and rind. Mix well (the mixture will look curdled because of the lemon juice mixing with the milk)
  5. In a separate bowl, beat the egg whites until stiff peaks form.
  6. Fold the egg whites into the batter. Divide mixture between two medium loaf pans.
  7. Set the loaf pans in a pan of hot water which comes halfway up the sides of the pans and bake for about an hour, or until top is golden.

Sunday, October 16, 2011

Flavors of the Season

I'm not a typical human being.
I don't love ice cream.
If chocolate were eliminated from the planet I'd be okay.
I rarely drink coffee, and when I do drink coffee, I tend to avoid Starbucks.

But there is an exception to that last one. Although it is a default option since Deidrich's no longer exists. Every fall I flit like a moth to a flame to Starbucks for the pumpkin lattes. And I stick around during the winter for the gingerbread lattes. To me, they are the harbingers of seasons.

This year it took me a while to get over to Starbucks for the pumpkin latte since work was busy and our free time was taken up trying to have "free time" before the baby arrived. I am sorely lacking in pumpkin-ness. In fact, I had brilliant plans to make pumpkin pancakes the weekend Thatbaby arrived and he kind of put the kibosh on that plan.

Which left me with a giant tub of pumpkin just waiting for me to use. And I thought it would be great to use in a pumpkin flavored drink - without coffee. A pumpkin pie milkshake!


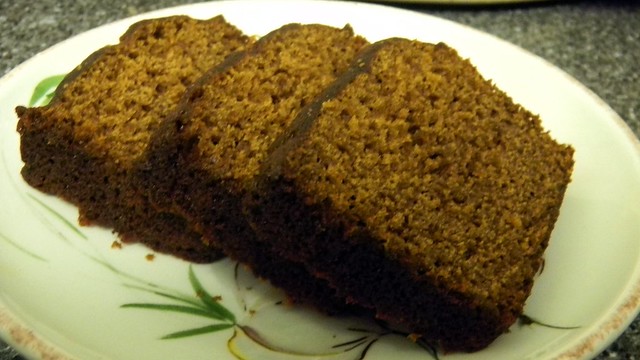
Well that takes care of fall, but what about my gingerbread latte? I know, I've still got time for it. But I'm impatient as all get out. And I'm a girl that grew up with zucchini bread in the freezer at all times. So I made some gingerbread and threw it in the freezer. I defrosted a loaf earlier this week.


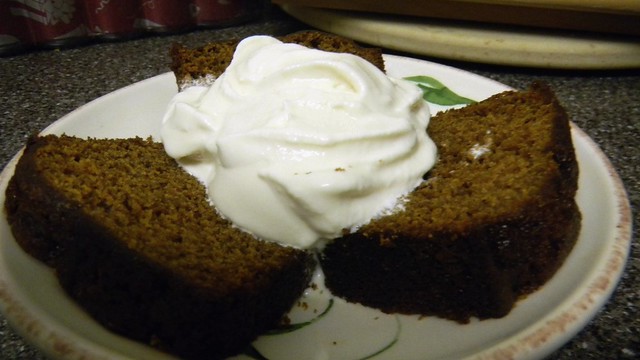
And can I just say - this is an amazing gingerbread. I love it. Perfect for snacking or topped with ice cream for dessert. I thought it would make good "company food" which is why we always had zucchini bread in the freezer growing up. I think this may become my new staple. Great for home and holiday gifts alike.


Pumpkin Pie Milkshake
1 cup milk
1 pint vanilla ice cream
1/2 cup canned pumpkin
1/4 tsp cinnamon
1/8 tsp ground ginger
1/8 tsp ground nutmeg
  1. Combine all ingredients in a blender and mix well.


Gingerbread (From the Fannie Farmer Cookbook)
1 stick butter
1 cup sugar
2 eggs
3/4 cup molasses
2 12 cups flour
2 tsp baking soda
1/2 tsp salt
2 tsp ginger
  1. Preheat the oven to 350. Spray 4 small loaf pans with baking spray. Cream the butter and sugar in an electric mixer until light and fluffy.
  2. Add the eggs, one at a time and beat well.
  3. Add 3/4 cup boiling water and molasses and blend.
  4. In a separate bowl combine flour, baking soda, salt, and ginger.
  5. Add the dry ingredients to the wet and combine thoroughly.
  6. Pour into the loaf pans and bake 40 minutes. Cool in the pan before turning onto a cooling rack.

Saturday, October 15, 2011

Mama's Taking Us To The Zoo Tomorrow

Thatboy and I are incredibly lucky in a lot of respects. When we first decided to expand our family we decided it would be ideal to have an October baby. And so that was what we tried to have. And we were obviously successful.

Even still, when I realized Thatbaby was due the first week of October there was a nagging thought in the back of my head - the zoo walk was usually the first weekend in October. We've been taking part in the zoo walk for years and it seemed pretty certain we'd be missing it this year. And even though I was excited about our upcoming addition, I was a little sad to be missing out on tradition. Besides, the zoo walk is my favorite way to see the zoo. It's not crowded, the animals are all up and active, and the weather is usually perfect.

As the months went on, I started getting notices about the walk and realized that for the first year it wasn't the first weekend in October - it was the third weekend! Meaning if I had Thatbaby the first week of October he'd be almost 2 weeks old by the time of the walk. I did a poll of my mommy friends who thought it wasn't unreasonable that I'd be able to do a 2.5 mile walk 2 weeks after giving birth. Even still, I waited to sign up until closer to the date.

I started out by saying how incredibly lucky I am. And that includes postpartum recovery. I've been up and at 'em since day 2 with little to no pain. Thatboy and I started going on 3 mile walks every afternoon by day 4. We took a roadtrip with Thatbaby up to the brit milah on day 8. So a 2.5 mile walk on day 13? Why not?

Earlier this week I signed us up and at 5:30 this morning I fed Thatbaby and we tucked him into the car for his first visit to the zoo.


As you can see, he got a lot out of it.


We decided to take pictures of him with various animals in the hopes we can turn it into a book for him later for bedtime readings.


He especially liked the giant bear.


Thatbaby spent almost the entire walk asleep, which we figured would happen. He spends most of our walks asleep. Actually, he spends most of the days asleep. But I hear that's a thing at this age.


The animals were their usual active morning self. The meerkats were amazed by the stilt walkers, the elephants were getting pedicures. We got up close and personal with a llama and the giraffes were racing each other. All in all it was the perfect outing and I'm so glad we were able to take part!

Of course being up and out at that time of day when you're still waking the baby every 3 hours means you're pretty much shot for the rest of the day. Luckily I had three things in my favor: 1)We had a great night with Thatbaby last night. Meaning he went to bed when he was supposed to, woke up easily when I woke him for feedings, and went right back to sleep. Meaning I was able to get in a full 2 hours of sleep after every feeding.
2) Afternoon nap!
3) Dinner in the freezer.

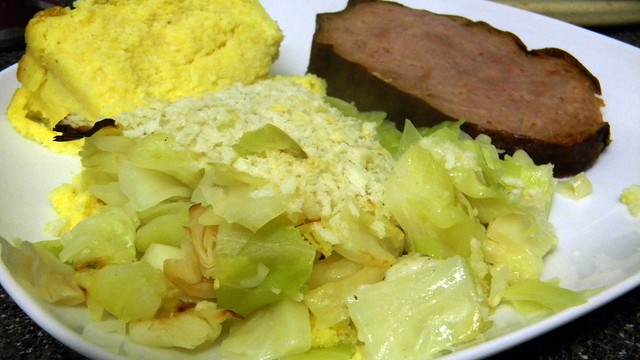
A little tip if you're looking to freeze meals - don't forget the veggies! Or sides in general. I found one of the easiest ways to include veggies in my freezer meals is have them in a baked dish. Like the rice and peas I've got ready to go. Or in this case, scalloped cabbage. That way you can get it all prepped, and when you're ready to eat you can pop it, frozen and all, into the oven. Baking it means you don't end up with soggy, water laden veggies - even when you're dealing with fresh greens. The scalloped cabbage was Thatboy's favorite part of the meal, but take that with a grain of salt because he's REALLY not a ham fan. That part of the meal was completely for me!


Scalloped Cabbage
1 small cabbage cut into quarters
2 Tbsp butter
2 Tbsp flour
1 cup milk, warmed
salt and pepper
1/2 cup bread crumbs

  1. Preheat oven to 400. Spray a casserole dish with cooking spray. Bring a pot of water to a boil. Add the cabbage and boil 7 minutes.
  2. Melt the butter in a saucepan and stir in the flour until a paste forms.
  3. Slowly stir in the hot milk and stir until a thick sauce forms. Bring to a boil.
  4. Salt and pepper the sauce to taste.
  5. Drain the cabbage and cut out core. Chop the cabbage and place in the casserole dish.
  6. Spoon the sauce over the cabbage and sprinkle the crumbs on top. Bake for 20 minutes.

Friday, October 14, 2011

The benefit of frozen meals


Yesterday we went and ran errands at the mall. When we got home, I fed the baby and passed him off for some daddy/son bonding time. And promptly fell asleep on the couch while catching up on the 900 hours of tv we have DVRed from when the inlaws were here.

I was awoken with a kiss on the forehead about an hour later. Dinner was on the table, the laundry had been done, and Thatbaby was as happy as a clam sitting in his swing. During one of our last "date nights, " Thatboy had confided in me that he was a little nervous how I was going to handle life once the baby came around. With my anxiety disorder he thought it would be easy for me to get worked up about all the things that I didn't get done in a day with the new baby to worry about. I tried to assure him that his fears were exactly the reason I had been doing so much prep work for the past month. I wouldn't need to worry about making breakfasts, lunches, and dinners because they were all ready to go in the freezer. And since we wouldn't be going out much, laundry and cleanup would probably be kept to a bare minimum.

What I wasn't expecting was how much Thatboy would rise to the occasion of getting things done. It's truly team work - since I did all the prep, it's very easy for him to make things available. With meals, all he has to do is defrost! Which means that while I was sleeping last night, he could pull the lasagna from the freezer, stick it in the oven and claim complete credit for making dinner.

He was pretty excited for this lasagna. I had made the same recipe a couple months back, when H had her son, and thought it would be a good idea to whip up a batch for us. It's an Emeril Lagasse recipe - which means it has a bit of kick to it, and also means it uses his fabulous "Essence." I made a ton of Essence earlier this year when I made his amazingly delicious gumbo (and seriously - if any of y'all are watching Hart of Dixie I can vouch that Emeril's gumbo is way better than gator food). You can easily find a recipe for the stuff and if you're like me, use it in pretty much everything.

Chicken, Mushroom, and Spinach Alfredo Lasagna (from Emeril Lagasse)
  • 1 stick butter
  • 1 lb mushrooms, sliced
  • 1 cup onion, chopped
  • 3 cloves garlic, minced
  • 1/2 cup flour
  • 7 cups milk
  • 2 tspns kosher salt
  • 1/2 tspn black pepper
  • 1/4 tspn nutmeg
  • 1 pound cooked spinach, chopped
  • 3 cups grated Parmesan
  • 2 TBSP olive oil
  • 2 pounds chicken breast
  • 1 TBSP Essence
  • 1 pound lasagna sheets
  • 1 TBSP butter, cut into 8 pieces
  1. Melt the butter in a saucepan over medium heat. Add the mushrooms and cook until the mushrooms are browned and most of the liquid has evaporated.
  2. Add the onions and garlic and saute until soft and translucent, 3 to 4 minutes.
  3. Add the flour and stir about 2 minutes.
  4. Whisking constantly, slowly add the milk and continue to cook, stirring occasionally until thickened, 5 minutes.
  5. Add 1 1/2 teaspoons of the salt, pepper, nutmeg, spinach and 1 1/2 cups of the Parmesan and cook, stirring, until thickened, about 2 minutes. Remove from the heat.
  6. Heat olive oil in saute pan over medium heat. Season the chicken with the Essence and remaining 1/2 teaspoon of kosher salt and place in the hot pan.
  7. Sear the chicken, stirring occasionally, until golden brown and cooked through, about 4 to 5 minutes. Transfer to a plate to cool and set aside. When cool, cut into bite size pieces.
  8. Preheat the oven to 375 degrees F. Spray a 9 by 13 by 3-inch casserole with cooking spray, and spread about 1/2 cup of the bechamel sauce on the bottom of the dish.
  9. Lay 3 sheets of pasta across the bottom of the dish and spread 3/4 cup of the bechamel sauce over the pasta.
  10. Sprinkle 1/4 of the chicken over the bechamel sauce, then sprinkle with 1/4 cup of the remaining Parmesan.
  11. Lay another 3 sheets of pasta over the chicken. Repeat 2 additional times with the remaining bechamel sauce, chicken, Parmesan, and pasta, ending with a layer of pasta covered with bechamel sauce.
  12. Sprinkle the remaining 1/2 cup of Parmesan over the bechamel sauce and scatter the butter pieces over the top. Place the casserole on a parchment paper-lined baking sheet and bake, uncovered, until bubbly and well browned, about 45 minutes. Remove from the oven and allow to cool for at least 20 minutes before serving.

Wednesday, October 12, 2011

First Steps toward Manhood


This is going to be a controversial post, so I promise there will be cake in the end. In fact, that was one of my incentives to get Thatbaby into the world. I promised him that if he came out, there would in fact be cake. Cake is an excellent motivator for just about anyone.

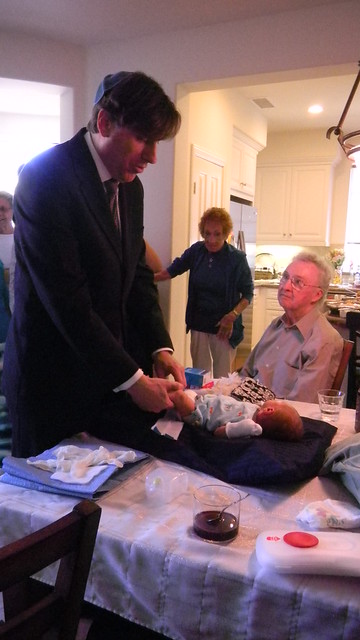
We knew from the very beginning that if Thatbaby was a boy, he was going to be circumcised. Many years ago, back when we were dating, I brought up the fact that it was very important to me to raise my children Jewish. It was a dealbreaker for me in a relationship. Thatboy, having his own issues with his Catholic upbringing, readily agreed. So it was a given that we begin Thatbaby's introduction to his heritage with the traditional brit milah.


On Sunday, 8 days after his birth, friends and family from across the country joined us in celebrating this new life. The bris has three main parts - the baby naming, the circumcision, and like any good Jewish ceremony - the food.


The Rabbi who married Thatboy and I performed the naming ceremony. He spoke of Thatdad, who shares a birth week with Thatbaby and a little bit more. We had decided to use Thatdad's Hebrew name as the Thatbaby's Hebrew name. Talking about Thatdad affected me as I expected it would - every moment of joy brings with it a feeling of loss. Of course that meant that the readings I performed were done through tears.


After the naming ceremony, the circumcision was performed by a Mohel. Our Rabbi recommended a couple in the area. We decided not to take chances with our little boy and went with the one who is also the Associate Director of Pediatric Urology at a prominent local hospital. (As an aside- we went in for a check up today and our pediatrician seems to think he did a good job. Thatboy is obviously concerned about loss of length, but I think that's probably a typical dad concern.)


After the circumcision 3 generations surrounded Thatbaby for a blessing. Which has always been my favorite part of Friday night services. I honestly can't wait to be able to participate in that with Thatbaby.

And then there was eating. Loads of eating. You would think for a breakfast occasion there wouldn't be massive amounts of food, but then again, if you thought that, you probably have never met my family.

I already had made the challah, not expecting to use it quite so soon. But I wanted to do more. Especially since I had been banned from the kitchen since the birth of Thatbaby. And it was driving me crazy for several reasons.

First, because TFIL did most of the cooking. This was a multifold problem. I've already complained about his use of every pot/pan/plate/dish in the house in making meals - exacerbated by the fact that he has a "I cook, you clean" policy. Which means my kitchen was a disaster area every night. Add to that the fact he takes 3 hours to cook green beans and you can imagine how long they were here every night. And if that wasn't enough, he spent whatever time he wasn't cooking complaining about all the work he was having to do by cooking.

TMIL wasn't much better as she spent her time complaining about how bored they were during the day when they weren't over at our place making a mess. She was on cleaning duty and again I wasn't allowed to help. BUT she also refused to respect any of our wishes about where things belonged. This ranged from "Please don't put our good fragile wine glasses in the dishwasher" all the way to "Ummm I can't find where the plates are since they don't seem to be in the plate cupboard." Which meant every night after they left we had to unload the dishwasher and wash by hand everything we asked her not to put in, and then go searching through all our drawers and cupboards to find things and put them back where they belonged.

I decided to put my foot down toward the end of their stay and take back my kitchen. It started slowly - picking up first just an entree (the night of the three hour green beans), but by their last night they showed up just in time to have dinner placed on plates for them, with no cleanup to be done (because that's how it works in Thathouse.)

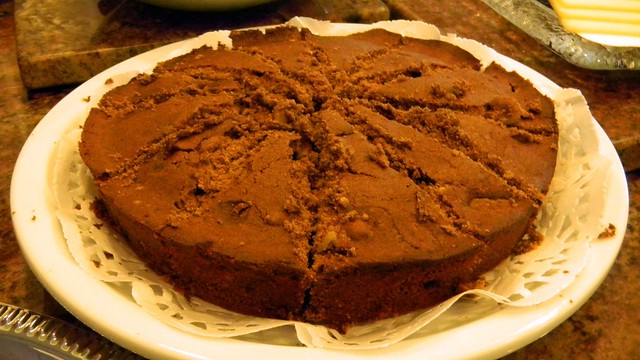
I also used some of my precious - noninlaw time to bake a cake for the bris. Since it was a morning affair I didn't want a layer cake, dripping with frosting. Nothing overly sweet. I figured a coffee-cake type cake would be the best way to go. Filled with dried fruit and nuts it's almost like a quick bread. Except for the use of cake flour which makes it light and fluffy.

The soaking of the raisins is a trick I picked up from my great grandmother who used to leave that step out whenever she gave anyone a recipe involving raisins. It was her own trick so that people would say "I made Zelda's raisin bread and it just didn't taste as good as when Zelda made it." She soaked her raisins in water, I used kirsch. Because I had it leftover from fondue night and chocolate and cherry combine together oh so well. I made this in a round, but it could easily be baked in loaf pans for the upcoming holidays.

Chocolate Fruit and Nut Cake
1/3 cup golden raisins
2 Tbsp kirsch
2 oz unsweetened chocolate
1 stick butter
1 1/4 cup sugar
2 eggs
1 tsp vanilla
1 cup milk
2 cups cake flour
2 tsp baking powder
1/2 tsp salt
2 tsp cinnamon
1/3 cup dried cherries
1/2 cup chopped walnuts

1. Soak raisins in kirsch overnight.
2. Preheat oven to 350. Spray two round cake pans with baking spray. Melt the chocolate in a double boiler and let cool.
3. Cream the butter in an electric mixer and then slowly add in the sugar. Beat until light and fluffy.
4. Add eggs, one at a time, mixing completely before each addition.
5. Add in the chocolate, vanilla, and beat until thoroughly combined.
6. In a separate bowl, combine flour, baking powder, salt, and cinnamon. Alternate adding in these dry ingredients with the milk, starting and ending with the dry ingredients.
7. Stir in the raisins, along with the kirsch they've been soaking in, the cherries, and the walnuts.
8. Spread the batter into the pans and bake for 35 minutes. Cool in pans before turning out onto a cooling rack.

Tuesday, October 11, 2011

What a week

The last time I posted was Monday, September 26. So much has happened since then that I just have to catch you up. As usual, let's pick up where we left off.

Tuesday, September 27:

- In April I texted my friend Michelle with a conversation that went something like this:
Me: I have some really bad news for you.
Michelle: Are you okay? Is your mom okay? Is Thatboy okay?
Me: Everyone's fine, I'm just not going to be able to make it to your big book signing event when your book comes out this fall. The doctors probably aren't going to let me travel that weekend.
Michelle: Are you sick?
Me: Nope
Michelle: Are you pregnant?
Me: Ding Ding Ding!

Michelle and I live parallel lives in a lot of respects and we both kind of got a kick about having our big arrivals arriving in the same week. The stresses, the excitement - our "first born" jitters were shared even though it was for vastly different things.

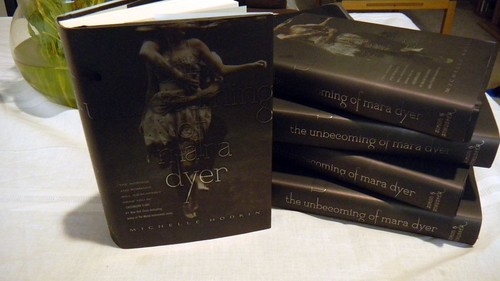
On Tuesday Michelle's first born hit the shelves:


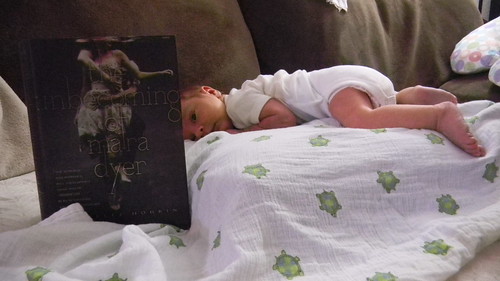
Yeah, I bought a lot of them. They're going to make fantastic gifts for almost everyone I know. Plus I get a kick out of being in the acknowledgements of a book my dad didn't write! Thatboy has already devoured his copy, although he had more time than usual to do so. More on that later.

Thursday, September 29 - Rosh Hashana

- Normally we spend the Jewish Holidays up with my mom, attending services. This year I really didn't want to be so far from home (which in retrospect wouldn't have mattered in the slightest). Instead the whole family came down to celebrate with us Wednesday night. We had a nice holiday dinner together before they headed back home.

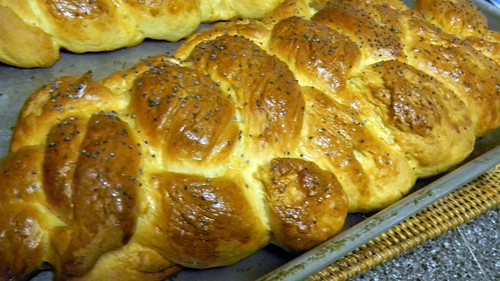
On Thursday we spent the day celebrating the New Year in our own way. First I made challah:


I made one for the holiday, and another to stick in the freezer for the brit milah/baby naming after the baby was born. Because I figured I wouldn't be doing much baking with a new baby. I'm all about prep.

Then Thatboy and I headed to the beach with Thatdog for our own little Tashlich service.


Tashlich is the casting away of sins, so you start the New Year off on a good foot. Traditionally the sins are thrown into a body of water which can carry them away.

We came home and took our weekly "bump" shot. This one marked the 39th week of my pregnancy.


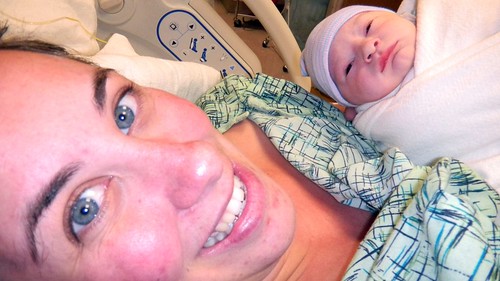
Although now it marks the last picture we took of me during our pregnancy, because on Sunday, October 2 I no longer looked like that, I looked like this:


And Thatboy looked like this:


I won't bore you with the long involved birth story but the short version is that I went in for my 39 week appointment on Friday, September 30 and ended up getting sent to the hospital for an induction. An induction that lasted 2 days because this little person was not ready to come out.

Which means I spent most of Saturday, October 1 sleeping and watching movies waiting for something to happen and Thatboy spent his time reading and waiting for something to happen.

When things finally started happening, they happened really really fast. And on Sunday, October 2, 2011 at 2:42AM Thatbaby made his way into the world. That's right - Thatbaby's a BOY!

We've spent the past week fending off the inlaws who have been far more trouble than help. In fact, I joke that this mommy-ing thing comes pretty easily, it's dealing with the inlaws that is driving me nuts. They finally left yesterday and things already are far more peaceful and easy here.

Thatbaby is generally a good baby - as good as babies can be. He has his good nights and his bad nights. Last night he decided that 3am was an excellent time to wake up for the day and nothing we said or did could convince him otherwise. But really, I have very little complaints about him. He's only a week old, it may take him a little bit of time to figure out how the world works.


Monday, September 26, 2011

Treasures Matey


When I was younger, my mom used to do a old "camp song" on my brother and I which involved tracing up and down our back:

We're going on a treasure hunt
X- marks the spot
With a Dash-Dash-Dash
and a Dot-Dot-Dot
Up the river
Down the river
All around the river

And this is really a very long introduction to a treasure I found in the supermarket. They were these little premade shortbread tarts. Mini guys, just begging to be filled with custard or fruit. Although after I made the banana cupcakes last week my coworker informed me that he really liked pumpkin pie and cheesecake. Which meant these puppies were going to be filled with cheesecake.

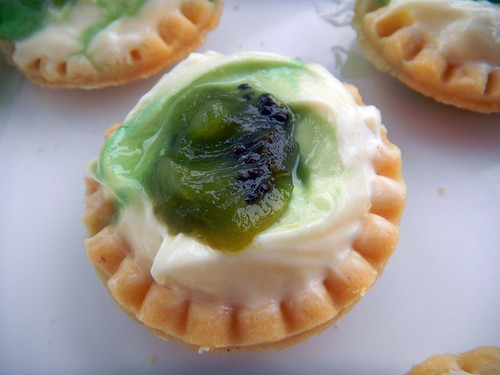
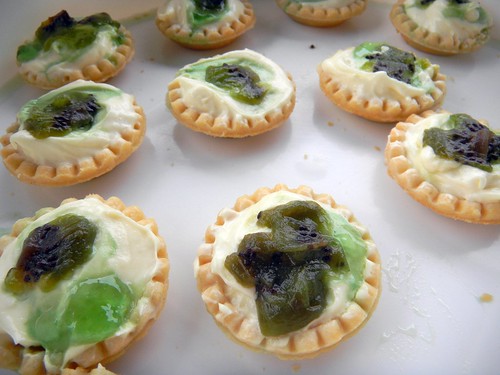
Since the "crust" was already prepared, I didn't want to cook them so I went for a no-bake recipe. Which is basically just cream cheese and sugar blended together. Except I had some other treasure to use up too. And this treasure was a golden treasure (like real pirates have) - Trader Joe's Lemon Curd. I love this stuff. And I decided to use it instead of sugar - all the sweetness but without having to worry about making sure the sugar was fully beaten into the whip cream. For some added fluffyness since these were going straight into the fridge, I took a trick from icebox pies/cakes and used cool whip to aerate. You can top these with whatever you like, I ended up with kiwi jam and kiwi, which kind of gave them a key lime pie feel once combined with the lemon curd. This is probably about as Sandra Lee as I get!


Cheater Mini-Cheesecakes
8 oz cream cheese
1/4 cup lemon curd
1 cup cool whip
mini-shortbread tarts

  1. Place cream cheese in electric mixer and mix until smooth.
  2. Add lemon curd and mix thoroughly.
  3. Fold in cool whip.
  4. Divide this mixture between the mini-shortbread tarts.
  5. Garnish with whatever fruit you like!

Sunday, September 25, 2011

Winter Cookies for Fall


Last night after dinner I was in an especially mood. I lay on the sofa bed and confided in Thatboy I couldn't be any happier. The temperature was perfect, I was decidedly full but not stuffed, and was incredibly comfortable lazing in bed. So comfortable that I even let Thatboy do all the dishes - unlike our normal routine where I pop up to help. "The only thing that would make this night perfect, would be hot chocolate chip cookies straight from the oven." I told him, while he stood with his hands elbow-deep in suds. "But I'm too comfortable and lazy to get up and make cookies."

"Can I make them?" He asked. I gave him a look of shock. Knowing that of course he couldn't make cookies. This is a man who needs help cooking "meal in a bags." "Don't we have one of those refrigerator packs where you can just cut them up and put them on a sheet?"

Another look of shock on my behalf. "In the time we've known each other, have you ever known us to have refrigerator cookie dough lying about?" He admitted he did not and therefore wasn't surprised there was no dough ready for him to pop in the oven.

But today was all about food. For the most part. I got up and headed to the supermarket to "stock up" on essential supplies just in case it's my last chance. (Which doesn't seem likely for anyone who's concerned. I'm sure I'll be making another trip next weekend.) Then it was home for lunch - chicken with fava beans.

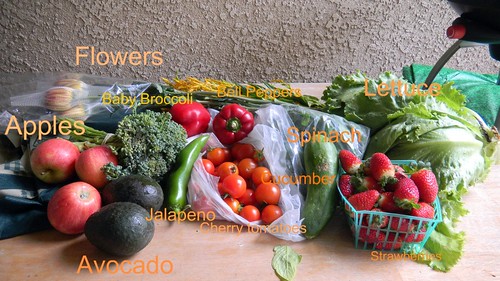
Then I headed out to the farmer's market so I could load up on produce for the week. And pick up some fresh flowers. I love having flowers when we have company coming and with the New Year this week it's an excellent excuse to pick up something bright and colorful. This week my egg guy wasn't around and I skipped the bread so our haul this week ended up as $20 instead of $30.


Those little strawberries are delicious. They've already been chopped up and placed in our lunch for tomorrow. And those apples have "crisp" written all over them. But I ran out of time to make the crisp today.

Instead, I came home and made Mexican Meatloaf (which incidentally has completely won this non-meatloaf girl over. I highly suggest you try it. It's my new go-to recipe.)

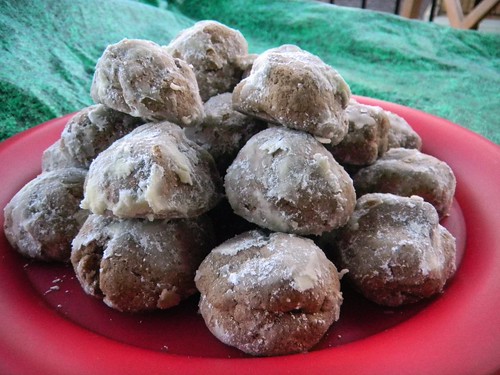
And since I was already in the kitchen, cookies seemed like a natural next step. To go along with the Mexican Meatloaf, Mexican wedding cookies seemed to make sense. Growing up in rural Pennsylvania we called them snowballs. But then again, I doubt anyone in my town had any cultural ties to Mexico. Instead they popped up as Christmas cookies all over town. Vanilla cookies, rolled in powdered sugar conjure up wintery feelings everywhere. It's still a ways from Christmas, but chocolate and cinnamon are definitely autumnal, right? Cinnamon is so very close to cider. And chocolate? Well they're no chocolate chip cookies, but they will definitely do.


Chocolate Cinnamon Snowballs
1 cup butter
1 cup powdered sugar (plus more for rolling)
2 Tbsp cocoa powder
1 Tbsp cinnamon
2 cups flour
  1. Preheat oven to 400. Cream butter in an electric mixer.
  2. Add sugar, cocoa, and cinnamon and beat until the mixture is fluffy.
  3. Add the flour in 2-3 batches. Mix just until blended.
  4. Roll the dough into 1 inch balls and place on a baking sheet. Bake for about 10 minutes.
  5. Cool on wire racks just until you can handle them. Roll in powdered sugar and then let cool completely.
  6. Roll them in powdered sugar again (and if you like, do it even one more time because that's the best part).

Saturday, September 24, 2011

Pasta-mania


This has been a very unusual Saturday. I can't remember the last time I had one like it. We have nothing - absolutely nothing to do today. No errands to run, no cooking to get done, no work to do, no anywhere to be or anyone to meet up with, even all the laundry has been folded and put away!

Which means although we're showered and dressed, Thatboy and I have spent the entire morning on the couch, catching up on all the series premieres we missed this week. Currently we're exploring surgery and trauma via Grey's Anatomy. (Although, I just looked over and realized my husband isn't quite fully dressed given that he decided to put on pajamas after showering.) (And on a related unrelated note - anyone else think that to start a season off built around the benefits of lying might be the wrong message to send?)

I honestly don't remember the last lazy day we had. I mean sure, it's hard for me to sit around doing nothing, and in a few minutes I'll be up and cleaning the place a bit before our Rosh Hashanna guests arrive since it's always easier to clean on the weekends than during the week. But for the most part, I'm really enjoying the idea of not having to leave the house at all!

A lazy day calls for a lazy meal. And I honestly can't think of anything lazier than pasta. I know - there was a pasta recipe yesterday. All I can do is promise there will not be another pasta dish tomorrow. I make no promises about today. Especially when this is a dish that cannot be described with a better adjective than lazy. What else to do you call a pasta that cooks in its own sauce, so you don't even need to dirty a pot?

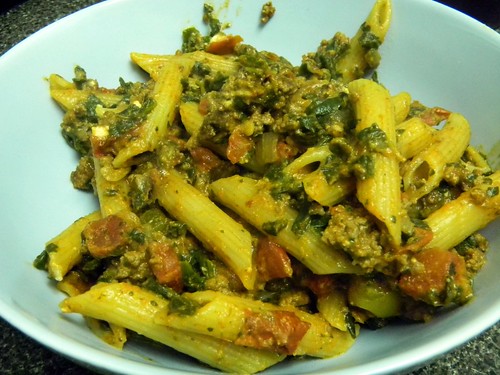
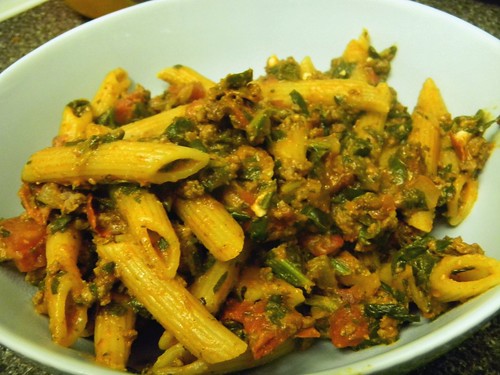
In Italy, a Ragu is meat sauce served atop pasta. In France, a Ragout is a thick meat stew. The common denominator in both is the meat. A thick meat sauce, no matter where you're from. The idea is universal and can be translated many different ways. This is my take on a Greek ragu - a spiced meat sauce served atop pasta, but using typical Greek flavors. (Or at least American Greek since I can't claim any authenticity into anything Greek.)


Greek Ragu
1/2 Tbsp olive oil
1/4 onion, chopped
1/2 lb ground beef
2 sprigs oregano
1 tsp cinnamon
1 clove garlic, minced
1 cup beef broth
2 tomatoes, diced
1 Tbsp tomato paste
1 cup penne pasta (uncooked)
1 cup spinach, blanched, drained, and chopped
1/2 cup feta cheese

  1. Heat oil in large skillet. Add onions and cook until they are translucent.
  2. Add ground beef and cook until beef is browned.
  3. Stir in the oregano, cinnamon and garlic.
  4. Add the broth, tomatoes and tomato paste and bring to a boil.
  5. Stir in the pasta, reduce heat to a simmer and cover. Cook 10 minutes.
  6. Stir in spinach and half of the feta. Cover and cook 5 minutes more.
  7. Remove from heat, sprinkle with remaining feta, cover and let sit for 5 minutes before serving.

Friday, September 23, 2011

Raising Spirits


It's been a rough week at work - full of ups and downs and confusing messages. Yesterday we got some news that took us all by surprise. I thought morale would be low today so I decided to bring in a treat for everyone - banana cupcakes.

They were a hit. Morale wasn't as low as I was expecting, but the cupcakes were welcomed anyway. And it ended up being a long day/night as we all ended up working late. Which means having the cupcakes around became very appreciated as we got hungry as the hours ticked by.

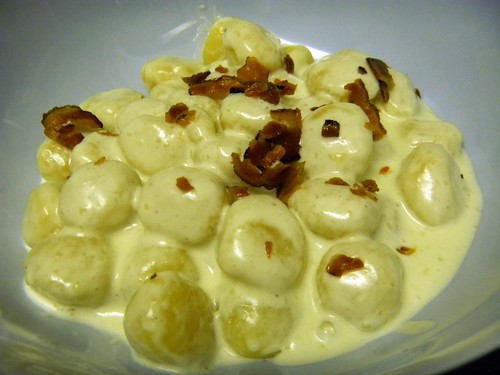
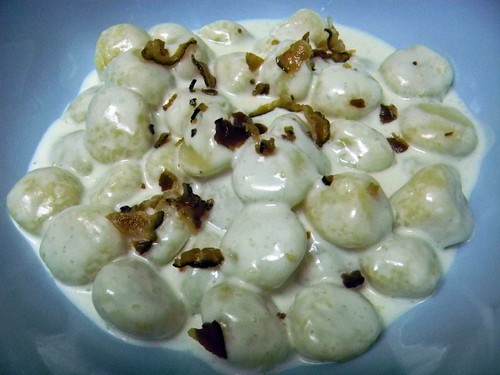
But for me, sweets aren't usually my morale booster. I'd much prefer something warm and cheesy. So when I came home, I turned to my favorite pasta - gnocchi. Really, you can't go wrong with any type of sauce on gnocchi. I love them all. Browned butter, marinara, vodka sauce. But I do love a good cheese sauce. Typically you see gnocchi with a nice gorgonzola cream but we had blue cheese at home. Thatboy doesn't like blue cheeses in general - although he does prefer gorgonzola. But this recipe wasn't for Thatboy. It was for me. And sinking into the couch with a nice bowl of hot, creamy, blue-cheesy pasta was enough to cheer up any bad mood.


Gnocchi in Blue Cheese Sauce
2 strips of bacon
1 1/2 cups heavy cream
1/3 cup blue cheese, crumbled
1 pkg of gnocchi
  1. Cook bacon in a skillet until crispy. Remove bacon, but leave the remaining drippings.
  2. Add the heavy cream and blue cheese to the bacon drippings. Cook, stirring until the blue cheese melts into the cream and the sauce starts to thicken.
  3. While sauce is thickening, cook gnocchi.
  4. Drain gnocchi and add to the cream sauce, tossing to coat gnocchi.
  5. Divide into serving dishes and crumble bacon over.

Thursday, September 22, 2011

Unwrapped


So the highlight of my day this week has been coming home and finding packages.

I make Thatboy play "Channukah" every night when we can open our "presents."


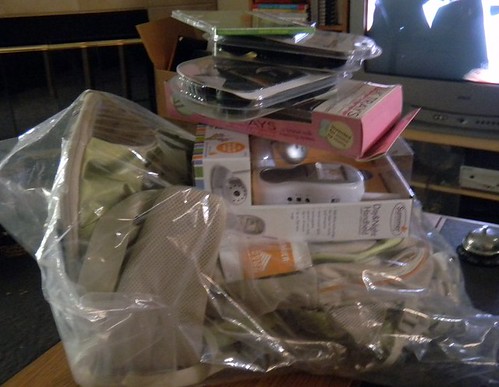
Normally, they're not really presents. I signed up for Amazon Mom which means I have free two-day shipping that I am definitely taking advantage of. In fact, I'm placing another order tonight.


But this week also brought an actual present in the mail too! Amber and I met on a wedding planning board, after we had both already planned our weddings. From the start I always joked we lived parallel lives in different places. It didn't hurt that she and her husband went to the same college as Thatboy and I. So it wasn't terribly surprising to find out that we were both expecting our first child within the same week of each other.

Amber took up sewing a couple years ago, and has made everything from formal dresses to blankets. This week, I got a package from Amber which was loaded to the gills with stuff for Thatbaby.


Blankets, covers, burp cloths, clothes - oh my! We're so excited to use everything.

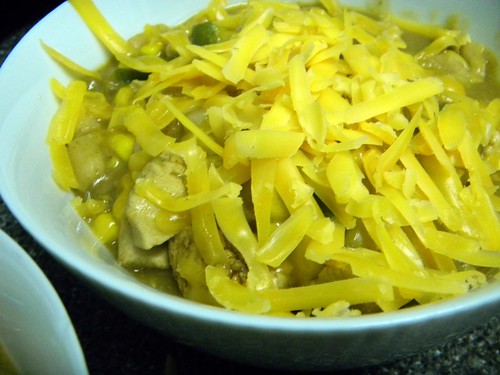
Know what else we're excited about? (I may be using the "we're" a little liberally. I'm very excited for this, obviously) It's officially fall! Which means it's officially chili season! And there is no better way to break in the fall than with a new chili recipe. It's pretty well known that I love all forms of chili, but I tend to stick to the traditional kind when making it - ground beef or turkey in a thick red sauce. This is the first white chicken chili I've attempted. It's easy to go from red to white by switching the bean and adding chicken as the protein of choice. As with any chili, it's always best when loaded up with onions and cheese!


White Chicken Chili
2 Tbsp butter
2 Tbsp flour
1 cup milk, warmed
1 Tbsp canola oil
1 lb chicken, cut into cubes
4 tsp chili powder
2 tsp cumin
1 onion, chopped
1 green pepper, chopped
1 1/2 cups corn kernels
2 cans white kidney beans

  1. Make the white sauce: Melt the butter in a saucepan and stir in the flour until a paste forms.
  2. Slowly stir in the hot milk and stir until a thick sauce forms. Bring to a boil.
  3. Lower the heat and simmer for 2 more minutes.
  4. In a separate pot, heat the canola oil. Add in the chicken, chili, cumin, onion and pepper and cook until chicken is cooked through.
  5. Stir in the white sauce, 3/4 cup water, corn, and kidney beans. Bring to a boil.
  6. Reduce the heat and cook 5 minutes.

Wednesday, September 21, 2011

Almost Italy

In the spirit of "let's get as much us time as possible before baby comes," Thatboy and I headed out last night.

It wasn't really a "night on the town" as we purposely avoided nightlife. Instead we headed to a not-so-secret little hideaway in our own backyard, the Grand Del Mar.


While we haven't stayed here, we thought it would be nice to try one of their two outstanding restaurants, Addison and Amaya. Last night we dined at Amaya.


The Grand Del Mar is modeled after an Italian Villa and Amaya follows suit with red and white striped awnings and curving staircases. We sat outside, watching the sunset over the manicured lawns.


After dinner we walked along the grounds. We stood and looked out over the hills, which looked as though they were painted in every shade of blue. We walked through the fountains and gazebo, and then through the hotel itself, stopping to sit in the library and journey through corridors.


And there was of course a bathroom trip - one of the nicest bathrooms I've ever been in. How fancy was this bathroom? Instead of paper towels, there were handtowels to dry your hands with.


It was such a lovely peaceful evening where we got to enjoy each other's company. We came home very relaxed, which is a perfect mid-week break.

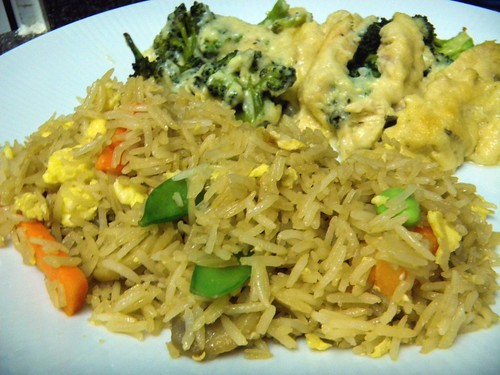
Last post I promised you the fried rice recipe, which works out well since I obviously didn't make dinner while we were dining out.


Fried Rice
1/2 Tbsp canola oil
1 cup cooked rice
1 egg, beaten
1/2 cup chicken broth
1/2 cup of your favorite veggies
1 1/2 Tbsp soy sauce

  1. Heat oil in a pan over medium heat and add the rice. Cook for 3 minutes and then push to the side of the pan.
  2. Add the egg and scramble in the open space and stir into the rice.
  3. Add the broth, vegetables, and soy sauce. Bring to a boil.
  4. Remove from heat and let stand 5 minutes before serving.