
Pages

Wednesday, April 29, 2020

Hogwarts at Home: Butterbeer Ice Cream


When we first planned out our "Universal at Home" day, Thatkid requested that we do an entire separate day for the Wizarding World of Harry Potter.  In fact, he requested we basically just do a Harry Potter themed day.  He's just finished the series, and would have been in San Francisco seeing Cursed Child if not for the pandemic.  These seemed like a very easy compromise.  Especially since we have so much leftover from his birthday party last year.

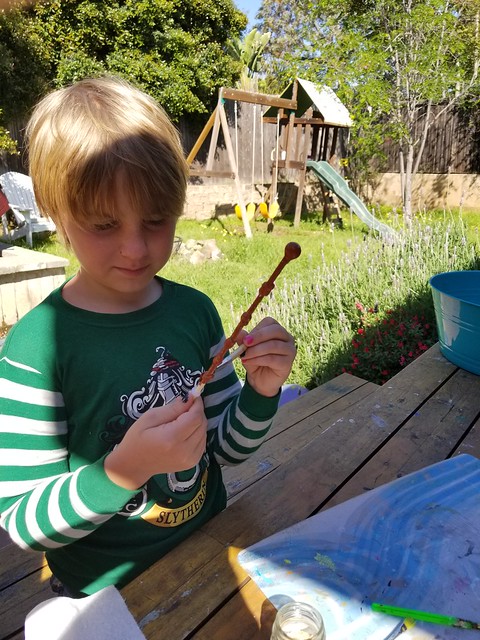
So Saturday morning we headed to Hogwarts.  First we made a quick stop at Diagon Alley to pick up some wands.  The fact that they already have 11 wands between the two of them notwithstanding.  Thatkid really wanted to make another wand, and I still have a whole mess of the extra long chopsticks.

So they got to design their own wands, which I created with some mom-magic (and hot glue) and then they got to paint them.


We did make use of the Wizarding World at Universal Studios to help explore.  Like taking the Hogwarts express from Diagon Alley to Hogsmede, and visiting Gringotts, Hagrid, and taking a Forbidden Journey with Harry Potter.


I also set up some classes for them.  Like potions.  We did a lot of "magical" chemistry and the "Exploding Elixer" was a HUGE success.


I ordered some Harry Potter training wands for Charms class.  The wands come with a spell book and electronically test you on spells - letting you know with lights and sounds if you get the spell right.  Both boys spent some time learning their spells.
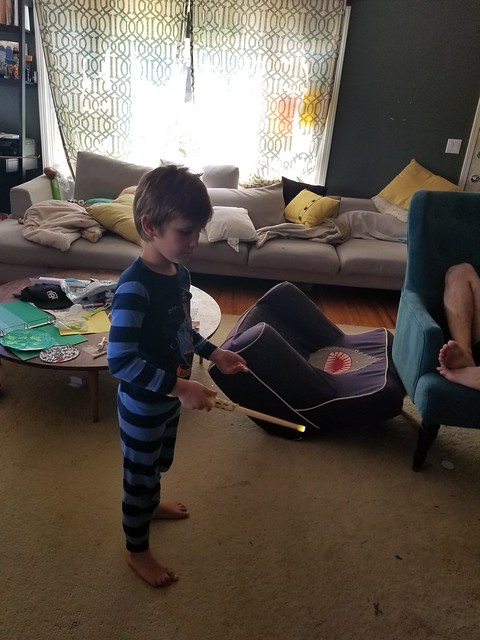

There is also a setting for playing "wizard tag" which works a little like laser tag, with the wands interacting with each other.  We're hoping that this cuts down on the boys actually hitting each other with wands on their frequent wizard duels. 


I set up a much smaller Quidditch field than I did for the party.  Which was much easier to deal with, and a lot of fun.

For lunch I made Mrs. Weasley's famous corned beef sandwiches, with a little something off the trolley to go with it - chocolate frogs, jelly slugs, Bertie Bott's every flavor beans, and butterbeer.


After lunch and nap, we took in some shows from the Wizarding World of Harry Potter.


And had a dance party to the music of Celestina Warbeck and the Banshees.


I made some simple pub fare a la the 3 Broomsticks for dinner - some vegetable barley soup and some pumpkin juice.


Followed with some amazingly delicious butterbeer ice cream.


We ended the evening with watching the Nighttime Lights at Hogwarts show.


The butterbeer ice cream isn't exactly canon, but it's something we were going to try for the first time on our trip to Universal Studios, so I thought it would be a good time to try a copy-cat recipe.  But there really isn't one.  Instead there are a lot of no churn recipes.  But I have an ice cream maker, so I wanted a churn one.  I found this recipe from Feast of Starlight which used the ice cream maker, a cream soda reduction in the base, and layered the butterscotch to make a swirl.  Which sounded like a great jumping off point.  But I'm lucky enough to have butterbeer soda easily available at several local stores/markets so I wanted to use that instead.  If you don't, or prefer a milder flavor, head over to her blog.  This recipe also calls for homemade butterscotch, which is my favorite ice cream topping, so I was happy to make it.  However, if you want to cut corners or save time, commercially made/purchased butterscotch syrup would work just fine.  I played with the recipe a little, adding more butterbeer/butterscotch flavor than she had initially done to give it a REALLY rich, butterscotch taste.  It was a fantastic way to end our day.  

Butterbeer Ice Cream
1 bottle butterbeer soda (or any butterscotch soda)
3.5 cups heavy cream (divided)
1 cup milk
1/2 cup sugar
1/2 tsp salt (divided)
5 egg yolks
2 tsp vanilla extract (divided)
2 Tbsp butter
1/2 cup brown sugar
  1. Bring soda to a boil over medium-high heat in a small saucepan.  Lower heat to medium-low and continue to cook until the soda is reduced to 1/2 a cup. Let cool.
  2. In a larger saucepan over medium heat combine 3 cups of the cream, milk, and cooled soda reduction.  Bring to a simmer.
  3. Whisk the yolks in an electric mixer until pale yellow.  
  4. Slowly add the sugar.  
  5. Add 1/4 tsp salt and 1 tsp vanilla and continue mixing until just combined.
  6. Temper the eggs by stirring in 1/4 cup of the simmering cream mixture.
  7. Add the tempered eggs to the saucepan and continue to stir until the mixture is thick enough to coat a spoon.
  8. Strain the mixture into a bowl and let cool overnight in the fridge.
  9. When you're ready to process the ice cream, make the butterscotch.  Melt the butter in a small saucepan over medium heat.  
  10. Slowly sprinkle about 1 Tbsp of the brown sugar over the melted butter and let cook without stirring until it melts.
  11. Begin stirring as you sprinkle in the remaining brown sugar until all the sugar is melted.  
  12. Slowly add the remaining cream and continue stirring for 5-6 minutes until it thickens.  Remove from heat.
  13. Stir in the remaining vanilla and salt, then let cool until it's room temperature.
  14. Stir 3 Tbsp of the butterscotch into your ice cream base and process according to your ice cream maker's instructions.
  15. When transferring ice cream into the container, layer the butterscotch between layers of ice cream and swirl with a knife.  Freeze until it's your desired consistency. 

Wednesday, April 22, 2020

Universal Studios, Home Edition: Krusty Burgers and Lard Lad Doughnuts


This weekend we were supposed to be heading up to Universal Studios for their Running Universal Trolls race.  Thatkid and I were signed up for the 5k, while Thatbaby was going to do the kids' race.  Of course, like usual, we were going to make a whole weekend out of it.

But since the race was cancelled, and Universal Studios is closed for the foreseeable future, I decided that we'd do our Universal Studios weekend at home.  This worked especially well given that Universal just released their Trolls World Tour Movie for streaming instead of a theatrical release.

When the boys woke up, I had Trolls shirts and hats ready for them, since they wouldn't get them from the race.  I also had printed out park maps for the two of them to decide what ride or show they wanted to go on/see.


We set up the loveseat facing the television and the kids' chairs in front of it and pulled up some virtual ride-thrus on youtube.


The kids took turns being the "line manager" and asking how many were in our party and directing us to our seats.

And then we rode a bunch of rides.


We took a quick break at lunch to head over to "Springfield USA" which is where we usually eat lunch at the park, since there's something for everyone.  This day, however, everyone was stuck with one option - Krusty Burgers.  However, they were served with fries and Squishees.


I even managed to grab some Duffs for the adults.  (Although in this case it was an energy drink instead of a beer)


And after lunch, there was doughnut.  Just one.  But as big as the kids' heads.  Because that's how they serve them at Universal Studios and because that is Thatbaby's FAVORITE thing to eat there.  Just like at the park, we divided the doughnut into four pieces and split it.


After lunch and nap, there were more rides.


And even a show or two!


And of course, we rounded out the evening with a showing of  Trolls World Tour.


It actually ended up being a really fun way to spend the day.  Of course, riding rides virtually doesn't really compare with riding them in real life, but as Thatboy pointed out, there were also no wait times.

And we did a pretty good job of creating theme-park worthy food.  Our doughnuts might have even been better than the ones you get in the park!


Krusty Burgers
1 lb ground beef
2 Tbsp butter
1 Tbsp flour
1/2 cup milk
1/4 cup shredded cheddar
lettuce, tomato,  red onion
Thousand Island dressing
4 burger buns
4 cornichon

  1. Heat a skillet over medium-high heat.  Divide the meat into 4 portions and shape into patties.  Season with salt and pepper and cook 4-5 minutes per side until desired doneness.
  2. In a small saucepan, melt butter. 
  3. Stir the flour into the butter and cook until a paste forms.
  4. Stir in the milk and continue cooking and stirring until thick enough to coat the back of the spoon.  Remove from heat.
  5. Stir the cheddar into the white sauce.
  6. Place each burger patty on a bun and top with some of the cheese sauce.
  7. Add lettuce, tomato, onion, and a squirt of thousand island before topping with the other half of the bun.
  8. Garnish each with a cornichon and serve.


Lard Lad Doughnut
1 1/4 cup milk
1/4 cup + 1 tsp sugar, divided
1 packet active dry yeast
4 1/2 cups flour
1/2 tsp salt
6 Tbsp butter, melted
2 eggs
1 tsp vanilla extract, divided
canola oil
2 cups powdered sugar
pink food coloring
sprinkles
  1.  Microwave 1 cup of milk for 40 seconds.
  2. Add a teaspoon of sugar and stir to dissolve.
  3. Sprinkle over yeast and let sit for 8-10 minutes, until frothy and bubbly.
  4.  In a medium bowl, whisk together flour and salt.
  5. In a large bowl, whisk together remaining sugar, melted butter, eggs, and 1/2 tsp vanilla.
  6. Pour in the yeast mixture and mix to combine.
  7. Add in the dry ingredients, stirring until a shaggy dough forms.
  8. Transfer to a lightly floured surface and knead until elastic, about 5 minutes (add more flour if necessary during this process)
  9.  Form the dough into a tight ball and place in an oiled bowl, covered with a clean dish towel.  Let rise in a warm spot until doubled in size (about 1 hour).
  10.  Line 2 baking sheets with silpat or parchment.  Punch down the dough and divided in half.
  11. Roll out one half on a lightly floured work surface until it is about a 1/2 inch thick round.  Use a doughnut cutter or biscuit cutter to cut the center out of your "doughnut."  Repeat with second half of dough.  You can use the leftover scraps to craft more regular sized doughnuts or even doughnut holes.
  12. Place doughnuts on baking sheets and cover with a dish towel.  Let rise again, about another hour.
  13. Make the glaze.  In a shallow pie pan, whisk together remaining milk, powdered sugar, and vanilla until smooth.  
  14. Whisk in as much pink food coloring to the glaze to get your desired color.  
  15.  Heat 2 inches of Canola oil in a large, shallow, saucepan - large enough for your doughnut to fit inside - to 350 degrees.  Cook doughnuts, one at a time, until deeply golden on both sides, about 2 minutes per side.
  16. While doughnuts are cooking, line the baking sheets they were on with paper towels.  Remove doughnuts from oil and transfer to these baking sheets to drain and cool slightly.
  17. Spoon glaze over top of doughnut and place on cooling rack.  Add sprinkles to your heart's content.

Wednesday, April 15, 2020

Pajama Party!: Hot Cocoa Popcorn


Things are certainly not easy in Thathouse right now.  Due to the nature of my profession, work hasn't slowed down at all - it's increased as we are daily faced with new rules/regulations/health crises that need to be dealt with immediately, on top of my regular workload which hasn't slowed or adapted to the additional work, with the warning that when it does slow we'll be moved into hospitals and other clinical settings.

On top of that, like most every other kid in the country, mine are home.  But mine have no guidance or direction from the schools on what to do with them.  Which means on top of working 8+ hours a day, I also am in charge of keeping them occupied in a way that allows me to address the needs of millions of people, state regulatory boards, health care providers and agencies without the flexibility of doing it after the kids are asleep or before they wake up.

I admit to being resentful when friends have viral posts about taking this time to spend with your children who need you more than ever now, or who complain about having to work 4 hours a day and then post pictures of hikes and bike rides with their children, or write that they deserve an award for answering emails while helping their child with schoolwork.  My kids get no hikes, no bikes, no help with work, no parent time at all during the day.  Time off has been canceled, we had no spring break.  My entire week is me telling my kids "no" or "I can't."  Which is really hard for them to understand when I'm right there.  I was commiserating with a friend when we realized we spend less time with our kids now than before they were home 24/7. 

I'm trying to make it up to them on the weekend.  Going device free during their waking hours so I can actually spend time with them and give them the attention they crave so much.  When I heard Disney was releasing Onward on Disney+ I decided we would make a whole event of it - turning the living room into a giant pillow pit and having a slumber party while we watched it.


We went with a slumber party theme, which is their favorite.  They love wearing their pajamas all day.  And the movie was incredible.  Maybe moreso as I watched my two boys watching it together, since it's all about brothers.  If Frozen was about the love between two sisters, this is definitely the brothers' response.


As much as I'd have loved to turn the day into a movie marathon, my kids aren't great with sitting in front of a television, and having cushions all over the floor is basically just an invitation for them to wrestle until someone gets hurt.  So instead of movies all day, we threw in some other pajama party classics.  Like playing card games.


And eating pizza RIGHT ON THE FLOOR!


And most importantly, popcorn.  It doesn't hurt that popcorn is my all time favorite food, but it fits in well with a movie too, right?  I did a choose your own adventure with the popcorn, throwing together a couple different flavors so they could pick what they wanted.


The winner?  This Hot Cocoa popcorn.  I can't even remember why I bought the container of mallow-bits, but I always find a use for them.  And while regular marshmallows would add a gooey-ness to the popcorn, these little bits have the marshmallow flavor and a crunch that goes great with the snack.


Hot Cocoa Popcorn
1/4 cup popcorn kernels (if you use microwave popcorn, skip the first and second step)
1 Tbsp butter (melted)
1 Tbsp cocoa powder
1 Tbsp powdered sugar
1/4 cup Jet Puffed Mallow Bits
  1.  Pop popcorn kernels in airpopper, or paper bag, or however you like to pop your popcorn.
  2. Pour the melted butter over and toss.
  3. Sift cocoa powder and powdered sugar over the popcorn.
  4. Add Mallow Bits and toss.

Wednesday, April 08, 2020

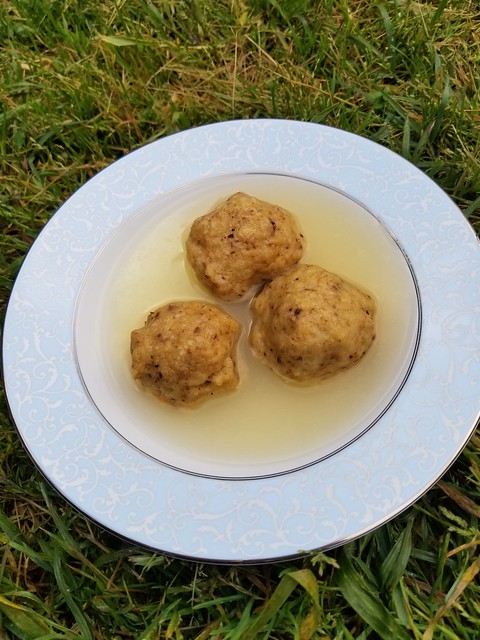
Passover Prep: Stuffed Matzah Balls


Most of us have had to make changes to our upcoming holiday plans and we're no different.  So instead of heading up to our big family seder tonight, we're doing it virtually.  So a lot less travel, but also - that means I need to make dinner!  You win some, you lose some.

In addition to those kind of changes, I think a lot of us are rethinking and simplifying our menus.  Because I'm still working full time, with no reprieve from momm-ing since there's no school, so the idea of making the typical multi-course seder just doesn't seem doable.

Instead I've decided to focus on the seder food my family loves - matzah ball soup.  It's my kids' favorite, and usually they don't eat much else.  So why not just make it the star of the show?  I found a recipe for "South African- Lithuanian Stuffed Kneydlakh" in my Joan Nathan Holiday cookbook and it seemed like the most perfect idea - matzah balls stuffed with meat.  It takes the dish from an appetizer to a main course.

And then I tried to make them.

I knew they didn't look right as soon as I added the matzah meal.  It was supposed to look like "a soft mass" but there was absolutely no massing.  Just a lot of water with some matzah meal floating around.  I forged ahead.  Maybe it REALLY firms up in the refrigerator.

They didn't.

"No problem," I thought, pressing on, maybe the magic is in the boiling.  And I gamely tried to shape the mush around the filling.

Friends, the magic was not in the boiling.  I ended up with little meatballs floating in water with matzah meal just...everywhere.

But I had the basic idea, so I decided to toss the recipe and just do it myself.  And THAT is where the magic happened.  With one hand in the mixture, I added the ingredients in my own order - with the water last, adding just enough to create a dough that was slightly wet, but still held together.

With a dough already holding its shape, I didn't need to refrigerate it as long - just until my water boiled.  And then it was so easy to shape the balls around the filling.  They held their shape while they boiled, and turned a beautiful brown when roasted in the oven.

And how did they taste you ask?  Well let me just say my family is not going to be missing a main course brisket this year!

Stuffed Matzah Balls
1/4 lb ground meat (beef/chicken/turkey)
1 Tbsp canola oil
2 eggs yolks
4 1/2 Tbsp margarine
1 1/2 cups + 2 Tbsp matzah meal
1/4 tsp cinnamon
2 eggs
  1. Heat the oil in a pan over medium high heat.  Add ground meat and cook until browned.  Drain and cool.
  2. Add egg yolks, 2 Tbsp margarine, 2 Tbsp matzah meal, a pinch of salt, and cinnamon.  Refrigerate an hour.
  3. Combine eggs, 1 1/2 Tbsp margarine, matzah meal, and a tsp of salt in a large bowl.
  4. Slowly add water until the mix turns into a dough that's wet, but still sticks together  (this was just scant of a cup for me).  Place in refrigerator.
  5. Bring 3 quarts salted water to a boil.  When water is boiling, divide the matzah meal into 8-10 balls.
  6. Place 1 tsp of filling in the middle of each ball, and enclose in the ball by pinching the edges over the filling. 
  7. Place the filled matzah balls in the boiling water.  Cover and simmer for 20 minutes. Preheat the oven to 400 while the matzah balls cook.
  8. Drain the matzah balls and place on a pan.  Divide the remaining margarine between the tops of the balls and bake for about 15 minutes. 

Wednesday, April 01, 2020

Passover Friendly Easter Brunch: Tira-matz-su


This is it.  This is the going to be the centerpiece of your Easter Brunch.  Or Passover Seder.  Or just your Passover in general. 

Tiramisu is my all time favorite dessert.  And I make it the classic way so it's very labor intensive and rarely gets made at all.  So when I read about a matzah tiramisu last year, I was ALL IN.

The idea is simple enough - I mean, I make matzah lasagna, and what is tiramisu but a dessert lasagna?


I did need to make a slight alternation to make it work though, a simple cocoa dusting on top wasn't going to work with matzah.  It needed something a little more wet.  A ganache works pretty well for that though.

My favorite taste tester thought it was amazing and wanted me to make enough for before, during, and after Passover.  I'm sure the rum didn't hurt.


Tira-matz-su
1 1/2 cups strong coffee, cooled
1 Tbsp + 1/2 tsp dark rum
1/3 cup + 1 Tbsp sugar
1 1/2 cups heavy cream
1/2 cup mascarpone
3 large egg yolks
4 sheets of matzah
cocoa powder
2 oz bittersweet chocolate
  1. Whisk coffee, 1 Tbsp rum, a pinch of salt and 1 Tbsp sugar in a shallow dish large enough to hold a sheet of matzah.  Chill in fridge until ready to use.
  2. Whisk 1 cup cream and mascarpone in a medium bowl until smooth.
  3. Combine egg yolks, 1/3 cup sugar, and 2 Tbsp water in the top of a double boiler or a heat proof bowl placed over a saucepan of simmering water.  Beat mixture on medium high with an electric mixer until eggs triple in volume and pale yellow (about 6-7 minutes).  Remove bowl from heat.
  4. Wash beaters and then beat the mascarpone mixture until medium peaks form.
  5. Fold the egg yolk mixture into the mascarpone until no streaks remain.
  6. Dip the first matzah into the chilled coffee mixture and let soak about 1 minute per side, until it's almost falling apart.  Place an an 8x8 baking dish.
  7. Spread 1/3 of the filling over.
  8. Sprinkle cocoa powder over the filling.
  9. Soak another sheet of matzah and layer on top.
  10. Spread half of remaining filling over and sprinkle with cocoa powder.
  11. Repeat layers one more time.
  12. Make ganache - place bittersweet chocolate in a bowl.
  13. Heat remaining cream until boiling, then pour over chocolate.  Let sit for a minute and then stir until chocolate has melted.
  14. Stir in remaining rum.  Let cool slightly before spreading on top of to.p sheet of matzah.  Chill until form at least 6 but up to 12 hours (the longer the better!)

Wednesday, March 25, 2020

Passover Friendly Easter Brunch: Broccoli and Leek Frittata


This may be a problems that only we face, but my inlaws find it absolutely impossible to find any Passover friendly foods for Easter.  On the off chance that there are others out there facing the same conundrum, I thought I would share some amazing Easter brunch foods, that also work for Passover.

In truth, it seems like the easiest thing - I mean, Easter is all about the eggs, right?  And eggs for breakfast is a very Passover thing. 

Let's be honest, eggs for everything is a very Passover thing.  We make good use of those hardboiled eggs we dye for Easter!


The best part about this frittata?  It doesn't really matter if you celebrate Easter or Passover.  Filled with green veggies that seem to just bridge the gap between winter and spring, this is really the perfect breakfast for any group gathering.  Or - since we're not supposed to be gathering in groups right now....this works really well to give you breakfasts (or lunches) for a couple days.  The vegetables inside are hearty and withstand a day or two in the fridge.


Broccoli and Leek Frittata
3 Tbsp olive oil
2 leeks, sliced thinly (white and light green parts only)
2 cloves garlic, crushed
1 head broccoli, chopped
2 Tbsp water
10 eggs
1/2 cup milk
1/2 cup cheddar cheese, grated
  1. Preheat oven to 350.  Heat 2 Tbsp oil in a large pan over medium-low heat.  
  2. Add the leeks and garlic and cook for 5 minutes.
  3. Add the broccoli and cook for an additional 5 minutes.
  4. Add the water, cover the pan, and cook for another 5 minutes.
  5. Add remaining Tbsp of oil.
  6. Whisk the eggs, milk, and salt and pepper to taste in a large bowl.
  7. Add the egg mixture to the cooked veggies and cook for 5 minutes.
  8. Sprinkle the cheese on top and place the pan in the oven for about 17 minutes, or until set.  Serve warm.


Wednesday, March 18, 2020

Passover Prep: Egyptian Haroset


This past Sunday was supposed to be Mitzvah Day at synagogue.  We gather together and do volunteer projects and community service.  Thatkid and I signed up to bake and package cookies for Holocaust survivors.  So my brilliant plan was to make the cookies with Thatkid and then blog about how amazing they were, sharing the recipe with you.


But with the Covid-19 Pandemic closing schools, businesses, and religious services, we also cancelled Mitzvah Day.  So instead of sharing cookie recipes, I'm going to use these next few weeks to share Passover/Easter recipes.  Especially since we won't be traveling for either this year!

We'll start with the Passover seder, which is especially timely as I just figured out I may be in charge of making my own - for the first time in years!!!!  I really need to get on that menu prep and start buying things as the supermarkets make them available.

One thing I know I'll have is haroset.  Haroset, one of the most traditional Passover foods beside matzoh is a dish made by combining fruit and nuts.  The color and texture is supposed to resemble the mortar used by the Israelites in construction during their time of enslavement in Egypt.   This is one of the big differences between the Sephardic (Mediterranean/Middle Eastern/African) Jews and Ashkenazi (Eastern European) Jews.  I grew up in the Ashkenazi tradition with haroset that never resembled mortar.  Instead, the Ashkenazi haroset is made of grated apples, nuts, red wine, cinnamon, and honey.  It is sweet and light and exceptionally fresh tasting.  It also does not keep all that well.

This Sephardic haroset will definitely last until Passover next month!  Made with dates, raisins, and sugar, it is easy to see the resemblance to mortar.  It is also exceedingly sweet!  I'm excited to try it with horseradish - a necessary combination at a seder.  So sticky and sweet, I also think it would make an excellent filling for a cinnamon roll.  Or a Passover version of a cinnamon roll.


Egyptian Haroset (From Joan Nathan's Jewish Holiday Cookbook)
1 lb raisins
8oz pitted dates
1/4 cup sugar
1/4 cup chopped walnuts or pecans
  1. Place the raisins and dates in a bowl with enough water to cover.  Let stand for 1 hour
  2. Add the sugar and whirl the mixture in a blender.
  3. Transfer to a heavy saucepan and let simmer over low heat until the fruits are cooked and the liquid is absorbed.
  4. Remove from the heat and place in a jar.  When cool, sprinkle with chopped nuts.


Wednesday, March 11, 2020

Green for St. Patrick's Day: Chilled Avocado Soup


St. Patrick's Day is pretty set when it comes to food in my house.  Thatboy isn't happy unless he has his corned beef for dinner.  And I made the mistake of giving the kids Lucky Charms for breakfast ONE YEAR and now it's become a whole thing. 

But that leaves lunch wide open.  Well for the grownups anyway.  Thatbaby has lunch made for him at preschool, and Thatkid is in charge of making his own lunch.  The good news about that is I can make things to eat that the kids wouldn't necessarily enjoy.

I learned my lesson the hard way that the kids don't like chilled soups.  I made a chilled pea soup and while they liked the flavor (since they love peas) they were highly unimpressed by the lack of warmth in the soup.  Which is fine, because as the weather warms up, a chilled soup makes a better lunch than dinner anyway.  Something very light and springy - and the green color is appropriate for both the upcoming season as well as St. Patrick's Day.

I don't think of avocado as having an especially strong flavor, so it's especially lovely with a little citrus and cream.


Chilled Avocado Soup
1 cup avocado
1 cup chicken broth
1 Tbsp fresh tarragon, chopped
1/4 tsp hot sauce (I used Green Dragon - to keep it as green as possible)
Juice of 1/2 a lemon
1/4 cup heavy cream
1/4 cup sour cream
  1. Puree avocado in the food processor.
  2. Heat the chicken broth in a small saucepan.  Press the pureed avocado through a mess strainer to remove any larger lumps and combine with the warmed chicken broth.  
  3. Add the tarragon, hot sauce, and lemon juice and stir until combined.  Chill until cold.
  4. Add the heavy cream and sour cream and chill until ready to serve.

Wednesday, March 04, 2020

Prepping for Pi Day: Fresh Lemon Pie


In the Jewish tradition, trees are planted to commemorate the birth of a child.   When a boy is born, the foreskin is buried beneath the tree following the circumcision.  The tree is supposed to grow along with the child, and when the child marries, the branches are used to create the chuppah, or wedding canopy.

We chose to use a lemon tree which has (4 years later) finally started fruiting!  Which is pretty exciting.  I mean, we got 2 weird looking lemons that never turned yellow last year, but this year we've got multiple lemons, and more on the way by the way this thing is flowering. 

So I really wanted to use the lemons to make a pie for this year's Pi Day pie.  Only problem?  I've never made a lemon pie before.  TMIL makes lemon meringue pie, and while in general my takes on her "classics" come out better than the original, this is one I just wasn't willing to mess with.  Not with Thatboy's obvious affection for it.  I didn't want to risk the comparison.

But, I can follow a recipe, and so I pulled out my James Beard Cookbook and gave it a shot.  And you guys?  The recipe was just no good.  No really.  I ended up with lemon soup instead of lemon curd and when I tried to figure out why I stumbled upon the fact that EVERY other lemon meringue pie recipe calls for boiling the filling, while my recipe tells you to take the filling off heat just before it boils.  Which (I learned) makes the cornstarch never activate and the filling never thicken.   I will say though, that Thatboy happily ate the pie with a spoon from a bowl and declared it the best lemon curd he's ever eaten.

Meanwhile I decided to move on to the next lemon pie recipe and see if I stood a better shot at that.  This one creates a lemon marmalade instead of a curd - using the entire lemon, peels and all.  Learning from my last mistake, I cooked this one for much longer than the recipe called for, making sure it got very thick before removing it from the heat.  In various forums I read, I noticed they mentioned you should be able to cut through the filling with a knife before putting it in the crust. 

And this time the filling set up!  A nice, tart filling that's perfect for the upcoming spring, holidays, and even Pi Day next week!


Fresh Lemon Pie  (From James Beard's American Cookery)
1 cup thin slices of unpeeled lemon
1 1/2 cups water
2 cups + 6 Tbsp sugar, divded
3 eggs, divided into whites and yolks
7 Tbsp flour
1/2 tsp salt, divided
2 Tbsp butter
1 tsp cream of tartar
1 pie dough, pressed into a pie pan and baked
  1. Place the lemon slices and water in a saucepan and simmer for 10-20 minutes (until the lemon rinds are very tender).
  2. Add 1 cup sugar and simmer until sugar has dissolved.
  3. Combine remaining sugar with the egg yolks, flour, and 1/4 tsp salt.
  4. Temper the egg mixture by stirring in some of the hot lemon water.
  5. When well combined, stir all the yolk mixture into the hot lemon water.  Continue to stir and cook over low heat until the mixture is thick (this took me almost 20 minutes.)
  6. Add the butter and cool to room temperature.
  7. Pour the filling into the crust and let cool completely.
  8. Make the meringue topping. Preheat oven to 350. Beat the egg whites on high speed until soft peaks form.
  9. Add the tartar and remaining salt.  Continue beating until stiff peaks form.
  10. Slowly add the sugar and beat until combined.
  11. Spoon the filling onto the pie and bake for 18 minutes.
  12. Let cool completely before cutting!