Pages

Tuesday, November 22, 2011

Defying Expectations


Like many places, San Diego has different areas where certain ethnicities are more prevalent than other areas. Last week on our Farmer's Market exploration Thatbaby and I headed to a part of the town that I usually consider to be very Mexican.

So you can imagine my surprise when we pulled into the parking lot of a large Asian market. It started to make a little more sense to me when I thought about it, after all, my favorite Thai restaurant was almost literally across the street.


This farmer's market was different than the typical markets I've been too. Of course they had the usual suspects - oranges, apples, eggs, etc. But there were also stands and stands of atypical farmer's market finds like bitter melon, daikon radishes, and lots of Asian greens. Not that you would know that by looking at my haul.


My $16 haul included:
  • 1 ginormous bag of oranges (which is still in the trunk of my car. Hey - you try lugging around a baby and bags of groceries!)
  • strawberries
  • figs - totally wasn't expecting these! It's been a couple of weeks since I've seen them in the markets, but they're impossible to resist.
  • eggplants
  • onions
  • corn
  • cucumber
  • string beans
Given the amount of produce I brought home, you would expect to see some of it featured in the recipe I'm posting. But there you'd be wrong. Because aside from the strawberries and fruit, most of the produce is actually sitting around waiting for Thanksgiving to be over. For when I've eaten my fill of mashed potatoes and heavy starchy sides. Instead I'll give you one of those impossibly quick and easy meals that is perfect for when your kitchen has become overrun with all the Thanksgiving prep. It's equally fabulous for when you too are sick and tired of turkey and stuffing.

Thatboy and I made a meal of these little taco bites - ground beef cooked with my own personal "taco seasoning". The kick of the ground chipotle powder and the extra kick from the salsa over go over well in Thathouse. But these little finger-friendly treats work well as appetizers for guests or snacks for kids. And, between you and I, they're the perfect way to use up leftover wonton wrappers you may have hanging around your home.
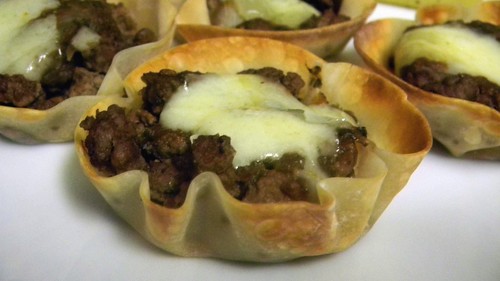

Taco Bites
20 won ton wrappers
1/2 lb ground beef
1/2 tsp cumin
1/2 tsp onion powder
1/4 tsp chipotle chili powder
1/2 tsp garlic powder
1 cup salsa
1/2 cup monterey jack cheese, shredded
  1. Preheat oven to 350. Press won ton wrappers into a muffin tin so that they form little cups.
  2. Brown ground beef in pan over medium heat.
  3. Add cumin, onion powder, chipotle chili powder, and garlic powder to ground beef and continue to cook until cooked through.
  4. Divide ground beef between muffin tins.
  5. Top each with scant Tbsp of salsa. Bake for 10 minutes.
  6. Sprinkle each taco bite with cheese and bake for 5 more minutes until cheese is melted and bubbly.

Monday, November 21, 2011

Goes Together Like Peas and Carrots


Pairings are a funny thing. We were discussing this yesterday when The Actress and Armani came down to visit Thatbaby. As we were walking home from lunch, we reflected upon how different our lifestyles were when we all first met each other.

When I met Thatboy I was looking for a fun college fling. The fact that he'd be graduating in a little over a year meant, for me, that I wouldn't have to worry about anything long term. Unbeknownst to me, he had already had his fill of flings. He was looking for something more serious. And while he certainly wasn't looking for me, he quickly discovered I fit the bill perfectly.

The Actress and I were roommates and while I was trying to suck the life out of every last minute of college, she was incredibly homesick for the first 3 months - flying home almost every weekend. I was out to have a good time, and she was having near hysterical breakdowns over the amount of glitter that ended up on our floor. We laugh about the differences now and I point out that even our worst moments couldn't have been so bad, given how close we remain.

And as for Armani, I never would have put the two of them together - and trust me, I set him up with just about every one of my friends other than The Actress. I mean, she was as far from a party girl as you could get (her self-described "rebellious" period was when she started trying to become more independent from her family by calling them less.) And he was one of the main leaders of his fraternity, out almost every night. So, although I adored both of them, I never would have imagined them dating, let alone married for 3 years now.


It's been over 10 years since we've known each other, and it's amazing to see how we've grown, matured, and yet still remain the same. How this unlikely grouping continues to thrive despite, or perhaps because of our differences.

The pairing of peas and carrots is not nearly as unusual, or uncommon. We're very used to it. Except when you stop to think about it, the two vegetables couldn't be more different. Carrots, a root vegetable. grow underground. They're tough, hearty, and strong. Peas on the other hand grow barely suspended from a tendril. They are small and delicate. Even their vibrant hues are on opposite ends of the color spectrum. And yet, they just work together so well that the combination has become commonplace in households.

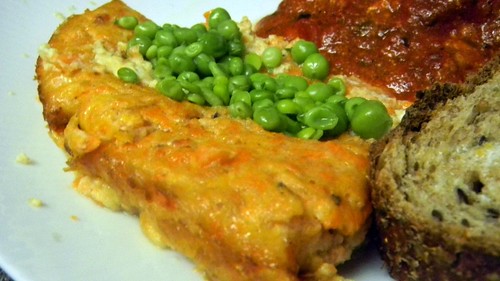
The easiest, and most common way to find this pairing is a simple chop and toss of the cooked vegetables. This carrot and pea custard is a little more unusual and a little more elegant. Served in slices like a pie it's both visually appealing and delicious - although that's not surprising given the ingredients. The beautiful colors make it a fine choice for both autumn and spring and it's perfect for a holiday meal.


Carrot and Pea Custard
2 1/2 cups cooked carrots
3 sprigs thyme, chopped
3 Tbsp melted butter
2 eggs, beaten
1 TBSP flour
1 cup milk
1/2 tsp salt
1/4 tsp ground pepper
1/2 cup cooked peas
  1. Preheat oven to 350. Spray a casserole dish with baking spray. Mash the carrots until mostly smooth. Some chunks are okay.
  2. Mix all the ingredients but the peas in a bowl and stir until thoroughly combined.
  3. Spoon into the casserole. Place the casserole dish in a shallow pan of hot water and bake for 45 minutes.
  4. Press down the center of the carrots with the back of the spoon to create a depression. Fill the depression with the peas.

Sunday, November 20, 2011

A Few of His Favorite Things


We usually celebrate Thatboy's birthday with his friends the weekend before Thanksgiving since the weekend after people are inevitably either out of town or hosting out of towners. So last week I told Thatboy not to make any plans for Saturday, because it was going to be birthday extravaganza time.

Since I had waited too long to throw him a real birthday party, I decided to devote the day to doing things he loves. Thatmom came over to babysit since most of Thatboy's favorite things are not baby friendly.

I began the day by addressing his love of cars and driving fast by taking him to K1 Speedway for some go-cart racing.


Thatboy had done this once before, but it was my first time and something outside of my comfort zone. But I hadn't chosen this place for me.


It was very different than Mario Kart, which I excel at.


Thatboy, who does not excel at Mario Kart, came in second during our 14 lap race. He was happy, but that happiness grew even more when he discovered that the person who came in first place had the best lap time of the entire week. As for me? Well I was expecting to come in dead last, so I was just pleased as punch when I didn't.

Our second stop on the tour of Thatboy's favorite things was supposed to be at a place that serves the best burgers in San Diego. But we were running a little late, so instead we grabbed In N Out on our way to the main event of the day, Thatboy's mini-surprise party!


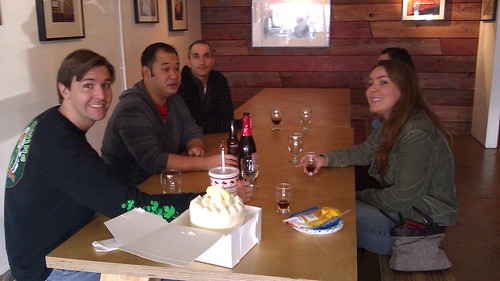
When trying to figure out what to do for Thatboy's birthday I stumbled across a new beer shop in town, Bottlecraft. Like a wine bar for beer (although how weird does a "beer bar" sound?), Bottlecraft is a beer shop with a "drink me here" philosophy. In addition they also offer flights of beer for tastings. Thatboy loves beer, especially craft beers which the shop specializes in, and so I thought it would be the perfect venue for celebration.

I emailed a couple of his friends asking them to join us, but warned them not to say anything to Thatboy. When we arrived at Bottlecraft, Thatboy was excited just to be there, but he lit up as he saw some of his friends start arriving. He does love drinking buddies.

He was like a kid in a candy store as he wandered through the store picking up beers for the table to sample. Bottlecraft has a healthy collection of our favorite local brews, as well as many craft beers completely new to us. And there were many small batch/limited edition beers they carried that of course we just had to try. We came home with a ridiculous amount in addition to the bottles we sampled while there.

And of course, it wouldn't be a party without cake. When I asked Thatboy what kind of cake he wanted for his birthday, he said he would like either Thatmom's 20lb cake, her ice cream cake, or a storebought red velvet cake. Thatmom had promised to take care of the first two for his birthday and Thanksgiving, so I thought I would take care of the third for his party.


Thatboy's favorite red velvet cupcake comes from Elizabethan Desserts, so I naturally turned to them for his cake. It came out perfectly!

And thought this would be a good time to share my go-to cole slaw recipe I had promised to share weeks ago. Mostly because this is one of Thatboy's favorite meals I've made in a long time, so it's a great place to share it!


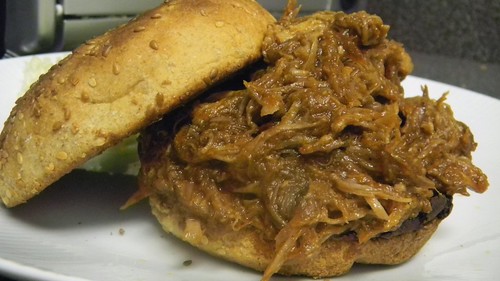
I started making pulled pork a couple years ago. It's great for dinner for two with loads of leftovers that freeze well, but it's also an easy dinner for a crown. But it's one of those things I didn't grow up with, and so, of course I didn't know where to begin.

So when I stumbled across the Cooks Illustrated as seen on Bridget's Blog I decided to give it a shot. Especially since it was a crockpot version that meant very little effort on my part. It quickly became my pulled pork staple and the one I made at home and brought to friends. I usually alter it very little, my main change being to add extra BBQ sauce at the end and mixing it in before serving because we like our pulled pork saucey round here. This time I made an additional, accidental alteration.

One of the first rules of cooking is not to measure your ingredients over the workbowl. I never follow that rule. Which is one of the reasons I enjoy cooking more than baking. Cooking is pretty forgiving when it comes to that extra bit of sugar or cumin that falls into the pot. But this time as I was mixing the spice rub, the cayenne came out much faster than I was expecting, leaving me with far more than the recipe called for. And I knew we would have some spicy pork on our hands. I tried to counteract the anticipated burn with extra brown sugar and something must have worked out with the proportions because it was the best pulled pork I've made yet. The extra cayenne gave it a delicious kick that had Thatboy asking for leftovers for days.


And with my pulled pork I usually serve coleslaw. In fact, I tend to put my coleslaw on my sandwich with the pulled pork. Thatboy likes his beside his sandwich - you can do whichever you prefer. I use an old school boiled dressing with my coleslaw which I prefer to mayonnaise (although it contains some of the same elements). Something about that vinegar kick just does it for me and the dressing makes for a less creamy side dish.


Coleslaw
1 small head cabbage, shredded
2 egg yolks, lightly beaten
1/4 cup cold water
1 TBSP butter
1/4 cup apple cider vinegar

  1. Mix the egg yolks with water, butter, and vinegar in a saucepan over low heat.
  2. Continue heating, stirring until thick and creamy.
  3. Toss the coleslaw with the dressing and serve.

Saturday, November 19, 2011

The beginning for birthday boy


A couple of weeks ago, when we were both still home with the new baby, Thatboy went surfing with one of his friends. When they came back, the two were talking about Thatboy's upcoming birthday. The friend noted that Thatboy had already declared that this year his birthday "was going to suck."

His birthday has always been a little on the sucky side. It's hard having a birthday the week of Thanksgiving. It is always overshadowed. And his parents never really did anything to celebrate his birthday separately from Thanksgiving. Instead they just added an ice cream cake onto Thanksgiving dinner. Even when we used to go up at the beginning of November to celebrate his brother's birthday, Thatboy's birthday was never acknowledged.

And then, of course, he met me. While dating, we still did separate family Thanksgivings, but once we were married he started attending the one my family hosted. And I started making a big deal of his birthday. The first year I decorated our entire apartment with balloons and streamers while he was out surfing. And when we reached my parent's home for Thanksgiving dinner, it was similarly outfitted. Since then, I've always made a big point of making his birthday extra special - whether that meant a surprise trip to Vegas to see one of his best friends, or driving around Thatboy and 14 of his favorite friends on a beer extravaganza.

This year, however, I really dropped the ball planning-wise. I blame the whirlwind that was our life in October, but at the same time, feel like I certainly had enough time to do something. And so last weekend the call went out. I emailed a couple of his friends to see if we could get together as a mini-surprise for his birthday and planned a day of fun for him. I'll fill you in on that tomorrow.

One of the people I reached out to was Workwife, who then decided to take it upon herself to make sure there was also a work celebration for Thatboy. (See - that's why she's his Workwife.) She initially emailed me to see if Thatbaby and I could make it to a lunch next Tuesday, but when I pointed out that Thatboy would be out of town for work that day she moved the lunch to Friday.

And so Thatbaby and I headed downtown yesterday to join in the frivolities with Thatboy and his coworkers at Extraordinary Desserts. Thatboy was very excited to try their dulce de leche cake which he had seen on Food Network's "Best Thing I Ever Ate." What? Your husband doesn't watch the Food Network when left to his own devices? There must have been nothing on Fuel TV. So after our lunches he ordered a slice and it was passed along the table. The consensus was that although the cake was delicious and decadent, it was a bit of a misnomer to call it a dulce de leche cake. More like a "chocolate cake with a smear of dulce de leche on top."

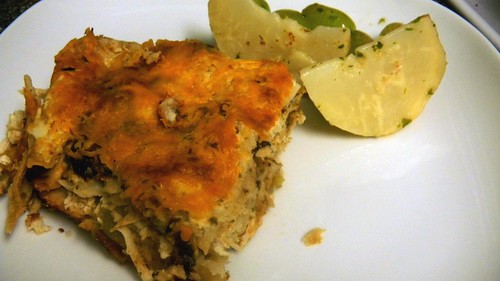
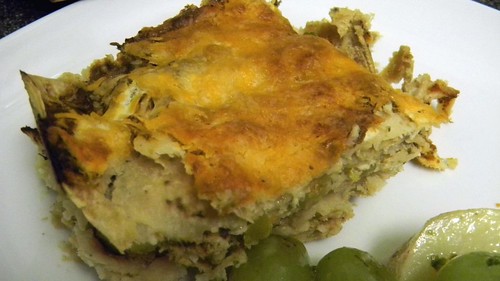
When Thatbaby and I got home, I set about making a quick and easy dinner. I know, you're all anticipating pasta, but I thought I would change it up a bit. It'd been a while since we'd had chicken, so I decided now was as good a time as any to start working it back into our meal plan. The original Tuesday lunch plan was at a Mexican restaurant, so when we switched over to Extraordinary Desserts I still had a hankering for something with a bit of Mexican flavor. Good thing I keep tortillas in the freezer! A casserole style dish is one of the easiest ways to make an easy dinner - since I can get all the flavors without having to stand over the stove playing with spices and heat. Just layer it all up and let the oven do the work.

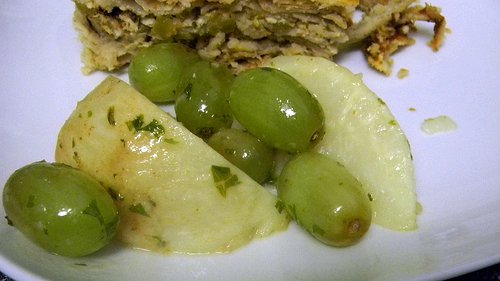
And, like I said before, I'm going through a mild obsession with celery root. This one does require some standing over the stove time, but it cooks so quickly that I could wait until Thatboy came home and took over the baby to make it. And it combines some fantastic fall flavors - celery root, apple, and grape. With the cider and grape it's also good for those of you with a sweet tooth. Maybe not an extraordinary dessert, but definitely an above average side.


Taco Lasagna
1 chicken breast, cooked and shredded
1 can diced green chiles
16 0z of salsa
1 cup sour cream
12 corn tortillas
1 cup shredded "Mexican style" cheese
  1. Preheat oven to 375 degrees. Combine chicken, chiles, salsa, and sour cream in a bowl.
  2. Heat the corn tortillas. I place them over a burner on my gas stovetop till they get fire roasted. Use 4 of the tortillas to cover the bottom of an 8x8 square baking dish.
  3. Place half of the chicken mixture over the tortillas and sprinkle with 1/3 cup of cheese.
  4. Repeat with 4 more tortillas, the rest of the chicken mixture, and another 1/3 cup of cheese.
  5. Place the final four tortillas on top and sprinkle with remaining cheese. Bake 30 minutes


Celery Root with Grapes
1 celery root
1 cup apple cider
juice of 1 lemon
3 Tbsp of butter
1 Tbsp of parsley, minced
1 cup of green grapes
salt and pepper
  1. Peel and slice the celery root. Place the celery root, cider, lemon juice and butter in a saucepan, cover and cook over low heat for 10 minutes, or until the celery root is tender.
  2. Add the butter, parsley, grapes, and salt and pepper to taste. Heat through.

Friday, November 18, 2011

The smell of success


We're not really a cinnamon bun kind of family. Thatboy grew up with pancakes for special occasion breakfasts and I grew up with blueberry muffins. I know that for many people, cinnamon buns are one of those Christmas morning breakfasts, but the inlaws never do anything quite as fun. I've actually offered to make Christmas morning cinnamon buns and been shot down - because they'd rather stick with the usual fare. Know what the inlaws do for breakfast Christmas morning? Cold cereal. Merry Christmas one and all!

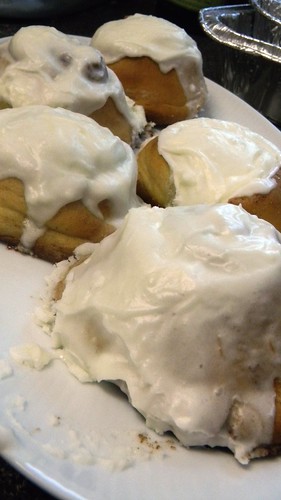
And yet, here I am recommending a cinnamon bun recipe to all of y'all. So something must be up, right? Well these rolls have a very easy explanation. They smell good.

I think it's a fairly common housewarming trip. one that certainly has been co-opted by realtors over the year, that baking cinnamon imparts a warm, welcoming, and lasting scent throughout any home. And so, when we were preparing for Thatbaby's open house, when Thatboy turned to me and said "I wish it smelled like something was baking in here," I knew exactly what had to be done.


Sure, I could have taken the easy way out and just stuck some cinnamon sticks in the oven. That would impart the warm fragrance with minimal work on my part. But roasting cinnamon sticks doesn't give you something to eat for breakfast for a full week. I had seen a copy-cat recipe for Cinnabon's Cinnamon Rolls a couple months ago in Food Network Magazine, and thought they would make a much better alternative.

See - I have this thing about Cinnabon. It's one of my secret guilty pleasures. Problem is, I very rarely get to indulge. Mostly because - have you seen the size of those things? I could never finish one in a sitting and I can't stand throwing a good portion away. So I've only ever gotten them if I can rope Thatboy into sharing one with me. When we were first dating, I could usually convince him anytime we were in an airport. But the San Diego Airport doesn't have a Cinnabon, so really it's been years. And if I was going to make cinnamon rolls - there is no other recipe I'd rather call upon, and making them myself I could make them smaller.

The recipe below originally said it made 6 cinnamon buns. But when I saw the uncut cylinder I knew that would make them far too big, so I decided to cut the roll into 8 pieces. Frankly, those were still a little large for my taste - but you make the decision for yourself.

As for the results? As the guests arrived they all commented on how good it smelled. Which was the purpose after all. And then of course, there was the secondary benefit. Thatboy had one of these babies every day for breakfast before his first week of work. Usually as he ate, he commented to either Thatbaby or Thatdog about how "mom sure makes a delicious cinnamon roll." And when they were gone, he was sad. He mused about it a couple of days later as we sat watching television one night. Seemingly out of nowhere he turned to me and stated that those cinnamon rolls I made were really good. This year we're spending Christmas just us, no inlaws. I think I know what's going to be on the table Christmas Morning, and though it probably will be served with milk, it's a far cry from cereal.


Almost Famous Cinnamon Buns (From Foodnetwork.com)
1 cup milk
1 packet yeast
3/4 cup plus 1/4 tspn granulated sugar
8 Tbsp melted butter
1 egg yolk
1 1/2 tspn vanilla extract
2 3/4 cup flour
3/4 tsp salt
1/2 teaspoon ground nutmeg
12 tablespoons butter at room temperature
3 tablespoons ground cinnamon
2 cups confectioners' sugar
1/3 cup heavy cream
  1. Make the dough: Warm the milk in a medium saucepan over low heat until it reaches about 100. Remove from the heat and sprinkle in the yeast and 1/4 teaspoon sugar (don't stir). Set aside until foamy, 5 minutes.
  2. Whisk in 4 Tbsp melted butter, egg yolk, and vanilla.
  3. Whisk the flour, 1/4 cup sugar, the salt and nutmeg in the bowl of a stand mixer.
  4. Make a well in the center and pour in the yeast mixture. Mix on low speed with the dough hook until thick and slightly sticky.
  5. Knead on medium speed until the dough gathers around the hook, 6 minutes.
  6. Remove the dough and shape into a ball. Grease the bowl and return the dough to the bowl. Cover and let rise in a warm, draft free location until doubled, 1 hour 15 minutes.
  7. Roll out the dough into a 12-by-14-inch rectangle with the longer side facing you.
  8. Spread the room temperature butter over the rectangle, leaving a 1/2-inch border around the edge.
  9. Mix the remaining 1/2 cup of sugar and cinnamon; sprinkle over the butter.
  10. Brush the far edge with water. Roll the dough away from you into a tight cylinder and press on the long edge to seal.
  11. Cut the cylinder into 8 pieces. Spray a large baking pan with baking spray and place the buns cut-side down in the pan, leaving space between each. Cover and place back in that warm, draft free space and let rise until doubled, 40 minutes.
  12. Preheat the oven to 325. Bake the buns until golden brown, about 35 minutes. Cool in the pan 15 minutes.
  13. While buns are cooling, sift the confectioners' sugar into a bowl, then whisk in the cream and remaining 4 Tbsp melted butter.
  14. Transfer the buns to a rack and spoon the glaze on top while still warm.

Thursday, November 17, 2011

A new tradition?


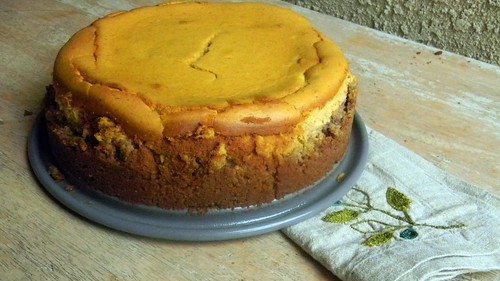
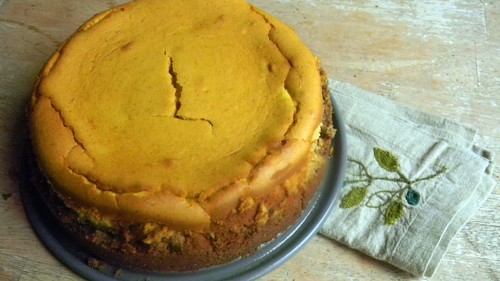
Every year during the fall season I end up making a pumpkin cheesecake. I think it goes back to when I was in college. Every fall The Cheesecake Factory would have pumpkin cheesecake as their seasonal menu choice and 2 of my girlfriends and I would mark the date it came out on our calendar. We'd find a way to get to the nearest outpost and indulge.

For some reason, I remember it marking the celebration of some annual event - but given the time of year it could hardly be finals. It might have been midterms. Then again, it might have just been an event to celebrate the annual arrival of pumpkin cheesecake.

I don't think I've been back to The Cheesecake Factory to sample their pumpkin cheesecake in years - definitely not since college and that was many many moons ago. But once I started living on my own and cooking and baking pumpkin cheesecake seemed to make an appearance despite the fact.

It started out with Peabody's Pumpkin Swirl Cheesecake. Which evolved into a version that was less swirl, and more pumpkin. And then a couple of years later I discovered my go-to cheesecake recipe, Ruth Reichl's New York Cheesecake. Over the years I've worked to make a pumpkin cheesecake that was more similar to that than the original.

I don't usually bring a pumpkin cheesecake to Thanksgiving, mostly because it's been made and eaten by that time. But this year has been a little different and I haven't had time to get my pumpkin cheesecake fix in. So I'll be sharing this with family at our Thanksgiving table. For those of you who want something a little different than Pumpkin Pie, this is a great alternative. Although in my mind you can never have too much pumpkin anything, so might as well serve both! After all, pumpkin is certainly cause for celebration.


Pumpkin Cheesecake
1 1/2 cups graham cracker crumbs (about 6 ounces)
1/4 cup sugar
1/2 cup melted unsalted butter
1 1/2 pounds cream cheese
4 eggs
1 cup light brown sugar
1/2 cup heavy cream
1/2 cup flour
1/2 teaspoon cinnamon
1 teaspoon vanilla
2 cups pumpkin puree
  1. Preheat oven to 350 degrees.
  2. Mix the graham crackers with 1/4 cup sugar and the melted butter and press into bottom and sides of a 9-inch ungreased springform pan. Chill while preparing filling.
  3. Beat the cream cheese, brown sugar, and eggs until smooth. Add the heavy cream, flour, cinnamon and vanilla and blend until smooth. Add the mashed pumpkin and blend until smooth. Pour into chilled crust and bake for an hour, or until the cheesecake is set. It should be a little jiggly in the middle.

Wednesday, November 16, 2011

Pie Prepping


Next week is a big week in Thathouse. The most obvious is Thatboy's birthday. I've been prepping for it all week. In fact, today Thatmom came over today to babysit so I could run around picking up presents for Thatboy.

But most of you won't be celebrating Thatboy's birthday (although all presents can certainly be directed here if you're interested in this very important event). For the rest of the nation, the big event for next week is Thanksgiving.

Don't worry - I'm prepping for that too. As usual, I assign myself dessert for our family Thanksgiving. Partly because I've taken over Thatdad's role of making ice cream. Partly because I make the best pumpkin pie.

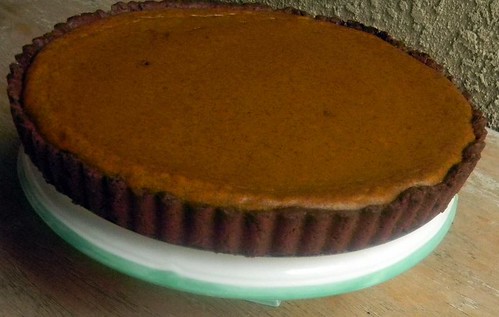
Every year I try to do a little something different with the pumpkin pie. Last year the request was to make the crust with graham crackers instead of a traditional pie crust. I've done a pumpkin caramel pie and a pumpkin pecan pie. This year I decided to again play with the pie crust. Instead of the traditional pie crust, or even the graham cracker crust, this year I went with a chocolate crust.

Since I don't do a lot of chocolate crusts, I went over my options:
1 - chocolate wafer crust, which is usually what I do for pies. But it's a little dry and not too flavorful.
2 - oreo cookie crust, which seemed like it would be weird with pumpkin pie
3- chocolate shortbread crust, something I've never tried before, but comes from Dorie Greenspan's book and she knows her desserts.

So as you all know, the best time to try something new is when you're making it for a large group of people. This is why you'll see most people decide to host Thanksgiving and make a giant turkey for 50 people and start preparing the night before. Luckily, even though it wasn't a good idea I seem to take this risk every Thanksgiving, so why stop now? New untested crust it is!


Pumpkin Pie with Chocolate Shortbread Crust (adapted from Baking: From My Home to Yours by Dorrie Greenspan)
  • 1 1/4 cups flour
  • 1/4 cup unsweetened cocoa powder
  • 1/4 cup confectioners’ sugar
  • 3/4 tsp salt
  • 9 Tbsp unsalted butter, cut into pieces
  • 1 large egg yolk
  • 2 1/2 tsp ground cinnamon
  • 3/8 teaspoon ground cloves
  • 4 oz semisweet chocolate chips
  • 3 eggs
  • 1 can of pumpkin puree
  • 1/2 cup heavy cream
  • 1/2 cup light brown sugar
  • 1 tsp ground ginger
  1. Make the crust. Combine flour, cocoa, 1/2 tsp cinnamon, 1/4 tsp ground cloves, confectioners’ sugar and 1/4 tsp salt in a food processor and pulse a couple of times to combine.
  2. Disperse the butter into the mix and pulse until the dough turns into pea-sized lumps.
  3. Add the egg and pulse until the gets clumpy. Turn the dough out onto a work surface and knead just until all the ingredients are incorporated.
  4. Press the dough into a buttered tart pan. Freeze for at least 30 minutes.
  5. Preheat the oven to 375. Cover the crust with aluminum foil and bake 20 minutes.
  6. Sprinkle the chocolate chips over the bottom of the crust. As the chocolate melts, smooth it with a spatula. Let cool while you prepare the filling.
  7. Whisk the eggs, pumpkin, cream, brown sugar, ginger and remaining cinnamon, ground cloves and salt.
  8. Pour into the cooled pie shell and bake for 45 minutes until the filling is set.

Tuesday, November 15, 2011

Living for the weekend


Weekends are a totally different beasts round these parts. With both of us around I can do my runs outside. And we can get out ourselves!

Thatboy had a 3-day weekend because of Veteran's Day. We spent Friday running some errands. Saturday the rain came down and we were housebound. So by Sunday we were ready to get out.

We headed to one of my favorite San Diego locations - Cabrillo National Monument.


I especially love coming here after a rain. The sky is bluer, the grass is greener, and the air just feels crisper.


But it was very very cold. Not at first. In fact, when I went on my run Sunday morning it was warm and gorgeous out. So much so that I accidentally added an extra mile onto my run. We picked up lunch on our way to Cabrillo and somehow in the middle of our picnic, the sun got scared and went away.

We had plenty of warm options for Thatbaby, but Thatboy and I got pretty freaking cold. So we called it a day early and headed home to fill up with something warm.


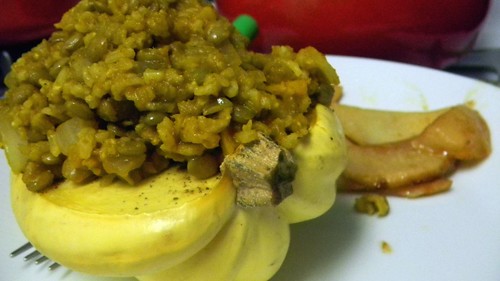
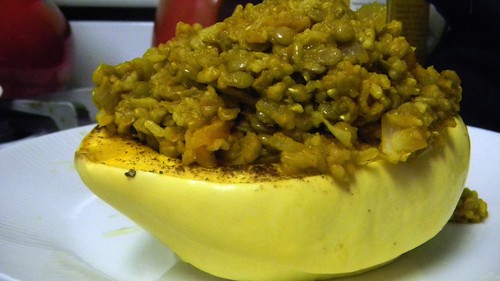
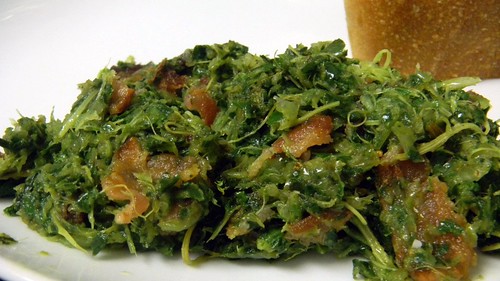
I made us Tyler Florence's Moroccan Stew. Basically it's a lentil and rice dish served in an acorn squash. The acorn squash added nothing to the meal. If you're going to make it I would leave it out entirely. In fact, today for lunch I took some of the leftover rice and lentils and mixed it in with some collard greens and bacon and that was a far superior dish.

Other than squash (and pumpkin) my current fall obsession is celery root. I love root veggies in general, but celery root has that great earthy taste with a little sweetness and a little green-ness that you don't find in turnips, rutabagas, or potatoes. You'll probably be seeing it popping up a lot since we've been eating it a lot. Here's a real easy recipe to try it for yourself.


Celery Root
1 celery root
2 Tbsp butter
2 cups beef broth
  1. Peel the celery root and cut into slices. Place in a pan with the butter and beef broth.
  2. Cook, partially covered 10 minutes. Remove the celery root from the pan.
  3. Reduce the remaining beef broth and pour over the celery root.

Monday, November 14, 2011

The New Normal


As I mentioned yesterday, Thatboy went back to work last week. Leaving me to play parent all by myself during the day. While he was home we worked out a pretty good routine which involved us taking turns taking care of the baby while the other one got things like laundry, dishes, and meal prep done around the house. In the afternoon, we'd take a nice, long 3 mile walk.

Things are a lot different now. Now Thatboy gets up and heads to work and I have time to do nothing but take care of the baby. Pretty much nothing gets done around here until he gets home from work and we trade off. So dinners are not labor intensive. Especially because I like to head to the gym when he gets home so I can get some running in. I mean the half marathon I'm running in January is not going to take "I just had a baby" as an excuse for poor training.

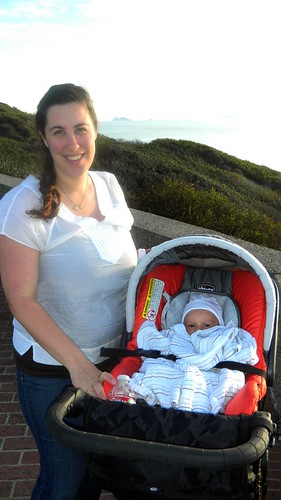
And I don't get my afternoon walks anymore either - although we do go for walks to the supermarket to pick up things I realize we need. So I've decided to use this time I'm home with Thatbaby to do some exploring. We're going to try to visit a different farmer's market every week. San Diego has 51 Farmer's markets that take place 7 days a week. Obviously we won't hit every one, but it'll be fun to explore and get us both out of the house.

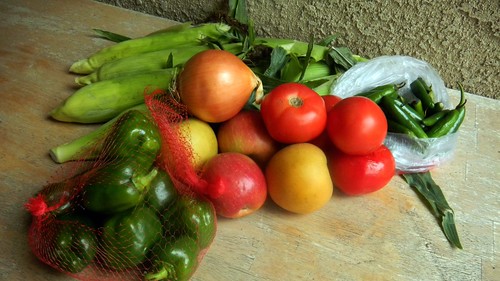
Last week we went to the Carlsbad Village Farmer's Market. It was a little disappointing. The highlight was my favorite apple vendor and loads and loads of summer corn. I picked up A LOT of corn. We'll be eating corn for days!


For $14 I got 7 ears of corn, 2 onions, 2 apples, 2 asian pears, 5 tomatoes a bag of thai chiles, and a bag of bell peppers.

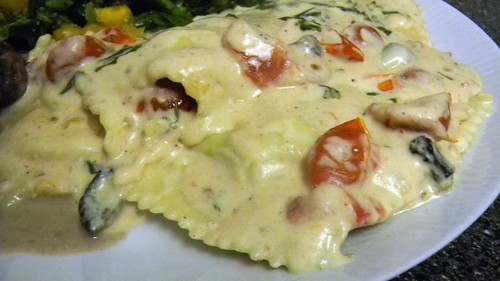
My new weeknight meals are thrown together during bathtime. When Thatboy comes home he gives Thatbaby a bath, a bottle, a story, and a cuddle while I run to the gym and throw things together in a pot. However, just because it's quick, doesn't mean you can't dress up dinner. Like taking storebought ravioli and creating a rich, enticing cream sauce, loaded with herbs, tomatoes, and mushrooms.

And to further take advantage of the fall bounty I served it with some roasted squash tossed with spinach and some chestnuts. With this colder weather coming in, a warm dinner full of fall flavors doesn't take long to make or enjoy.


Tomato, Mushroom, Basil Ravioli
1 pkg ravioli
1/4 cup butter
4 oz cream cheese
1 clove garlic, minced
1 cup milk
2 Tbsp Parmesan cheese
1/4 cup mushrooms, chopped
2 tomatoes, chopped
2 Tbsp dry white wine
1/4 cup basil, chiffonade

  1. Prepare ravioli according to the package instructions.
  2. While it's cooking, melt the butter in a large saucepan. Add the cream cheese and garlic and stir until the cream cheese is melted.
  3. Add milk and whisk until smooth.
  4. Add parmesean, mushrooms, tomatoes, wine, and basil. Heat through and remove from heat. The sauce will thicken quickly.
  5. Stir the ravioli into the sauce and serve.


Creamed Chestnuts
1/2 lb of shelled chestnuts
1/2 cup of beef broth
salt and pepper
1 Tbsp butter
2 Tbsp heavy cream
  1. Combine chestnuts, beef broth, salt and pepper in a pan. Cover and simmer for 15 minutes.
  2. Add butter and cream and stir to coat the chestnuts. Heat through.

Sunday, November 13, 2011

Meet Our Muppet


One of the things I love about Thatboy is that we are on the same page about things more often than not. Like finding out the sex of our unborn child. Both of us wanted to wait until birth to discover whether we'd be having a son or daughter.

And not knowing made the whole pregnancy a little more fun. We got to envision what life would be like with a little boy or girl. We got to come up with two different name options. Many people expressed disturbance that we weren't finding out. Among other things, they told us we wouldn't be able to bond with the baby if we didn't address the child by name from the first moments of conception.

I blame my BA in theater, but I'm superstitious. Frankly, even if we knew the sex, we wouldn't have used a name until birth for fear of putting a kenahora on the health of my unborn child. Instead we lovingly used a pet name for Thatbaby all through the pregnancy and beyond. He was our Muppet - or Mupps for short.

The Muppets have always held a special tie between Thatdad and I. It goes alllll the way back to when I was a baby myself. There's a joke that for the first week I was home, I kept my mouth shut. Around week 2 it opened and I haven't stopped making noise since. I was queen of the colicky babies and the only way my parents could get me to sleep is if Thatdad kept me at a 45 degree angle against his chest. And so every night he would rock me to sleep while watching The Muppet Show. Our little nickname became a way of including Thatdad in the birth of his grandchild.


After Thatbaby was born we asked our friends to give us a couple of weeks to get settled before we'd start entertaining visitors. Last weekend we hosted an open house so that our friends could finally get a chance to meet the little guy they'd been hearing so much about.

It only made sense to theme our little get-together as a chance to Meet the Muppet. We chose to the host the party in the middle of the day so we could load our guests up with sugar instead of real food.


Don't worry - there were vegetables available too. Which is good, because Harvard informed me that he had a dentist appointment the next day.

And I once again enlisted the very talented services of Wan in creating the perfect Muppet-themed treat for our guests.


Since this was an open house, we weren't sure when the guests would leave, or when they would stop arriving - so I went with something easy for Thatboy and I for dinner. And you all know what that means, right? Pasta!


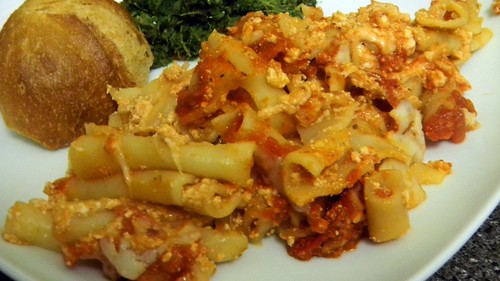
In this case a baked ziti is exactly what the doctor ordered. Since it only tastes better the next day and is quick to reheat. It also left lots of leftovers, which is important since Thatboy started back up at work last week. And having an easy lunch was such a nice thing to have when I was home alone with the baby for the first time.


Baked Ziti
1 box of ziti
3 cups of your favorite marinara sauce
1 lb of fresh ricotta cheese
2 cups fresh mozzarella cheese, shredded
1 egg
1 tsp dried oregano leaves
1 clove garlic, minced
1/2 tsp ground black pepper
Parmesan cheese, thinly sliced
  1. Preheat oven to 375°F. Cook ziti.
  2. When ziti is cooked, mix it with half of the marinara, the ricotta, mozzarella, egg, oregano, garlic, and pepper.
  3. Spread ziti mixture in a large baking dish and top with the remaining sauce. Spread the parmesan across the top and cover. Bake for 30 minutes.

Saturday, November 05, 2011

Addition of Apples


I think I've groused for months about missing out on apple picking this year. Obviously I'm upset. Mostly because I'm used to utilizing apples in many of my favorite fall dishes.

And I'm not just referring to baked goods (although I did manage to sneak an apple crisp into the freezer before Thatbaby's arrival) - apples are a welcome addition to many savory dishes. As you'll see this week, I especially love them with pork. The sweetness of the pork, the sweetness of the apples, they go together like peanut butter and chocolate.

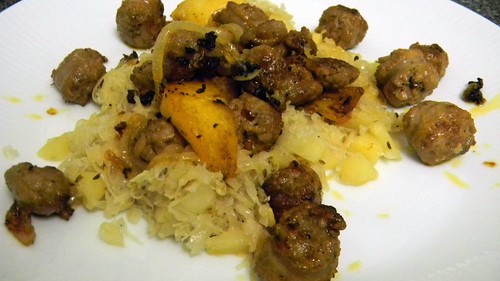
I've been playing around a lot with conflicting flavors as of late - and this recipe is an prime example of that. I took my pork and apple philosophy and decided to apply it to sausage. Sausage and peppers is a fairly typical dish, but substituting the apples for the peppers is a more seasonal approach. I went with a really spicy sausage too, instead of the typical Polish sausage to give it a bit more kick. Spicy and sweet is usually a winning combination. So with the sweet and spicy taken care of, there was another flavor profile I wanted to include - something with a little bite. So I went with another stereotypical sausage pairing - sauerkraut.

To further emphasize my insanity, or my love for apples, I cooked the sauerkraut with apples too. Adding an ingredient to every step of the dish both makes you look like a looney and intensifies the taste of that ingredient. And I didn't want the apples to get lost in the spice and brine.

They didn't. What they did do was help to contrast the spiciness of the sausage - and boy did these things have some heat to them! They also helped to sweeten the sauerkraut and help to meld together the disparate flavors.

I thought long and hard for a creative name for this dish and came up empty. But maybe you'll have better luck. Or perhaps you'll be so busy eating that the age old adage "What's in a name?" will take on a more profound meaning for you.


Sausage and Apples with Sauerkraut
1/2 lb sauerkraut
1 apple, peeled and sliced
1/2 cup beef broth
1/2 tsp caraway seeds
salt and pepper
12 oz Italian sausage, sliced
1/2 onion, sliced
  1. In a large skillet, combine sauerkraut, half of the apple, beef broth, and caraway seeds. Cook over low heat for 30 minutes, stirring occasionally.
  2. While the sauerkraut is cooking, cook the sausage in a separate to the skillet.
  3. Add the onions and remaining apple to the sausage. Cook until the onions are lightly browned and the apple is tender.
  4. Add the sausage mixture to the sauerkraut and continue cooking for whatever time is remaining on the sauerkraut.

Thursday, November 03, 2011

Dinner Dictation


My friend Elly once told a story about her husband cooking something. The story entails her having to give him step by step instructions which led to more questions than he had originally and her doing far more work than she would have expected since he was doing the cooking. It was hilarious in that many of us could relate to the situation where a helping husband is more trouble than help.

Thatboy is always offering to help in the kitchen, but in truth, I rarely let him. I've tried on a couple of occasions which resulted in sriracha and spaghetti, and me having to walk him through dumping a frozen bag into a skillet. Usually I give him a simple job to do like shucking peas.

But throw a kid into the mix and you start turning to help in unlikely places. It was easy when we had frozen meals. Thatboy has become very adept at heating up frozen entrees in the oven. (Especially when his wife writes instructions on how to reheat on the foil covering it.) It's a little more difficult once those freezer meals are gone.

This is a dinner that was a complete joint effort, due in part to a fussy child. So while I took care of the baby, Thatboy asked if he could help get dinner started as it was getting late. I told him he could do the pork tenderloin if he was so inclined. Which really entails him running back and forth between the kitchen and the baby's room between each step as I dictated. Because of that, try to picture a 2-3 minute pause between each of these interactions.

Me: Turn the oven up to 375 and rub the pork with olive oil and seasonings
He: What seasoning should I use?
Me: You can use any seasoning you like. We have an entire shelf full of them.
He: I don't know what seasoning goes with pork.
Me: Well, I usually like rosemary. Why don't you use some rosemary, salt, and pepper.
He: We don't have any rosemary.
Me: I find that hard to believe. Did you check the spice shelf?
He: yes
Me: And the spice rack beside the oven?
He: Yes
Me: Uggh. I can't find it for you, I'm kind of stuck with the baby here. Why don't you use Cajun seasoning? We have two different bottles. The front one is unlabeled and that's the Emeril seasoning. The other is a giant bottle that says "Cajun seasoning" you can't miss it.
He: Which one should I use?
Me: Whichever you can find - I'm trying to make it easy for you. We've already been at this for about 15 minutes and the pork isn't even in the oven yet.

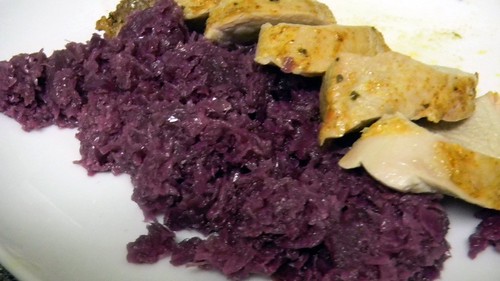
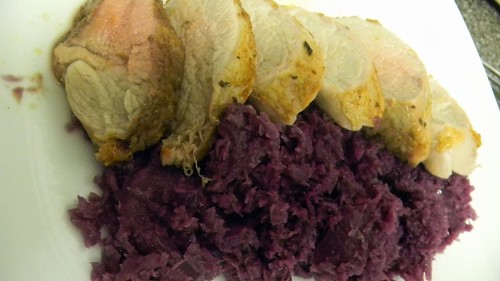
After that it got quiet for a bit, so I figured we were all good. Until of course the pork actually went in the oven and Thatboy needed advice on how long to set the timer for. And around this time I was ready to rejoin him in the kitchen and get to work on the side dish. So while the pork cooked, I tossed together some cabbage and bacon. But this time, I also added some apples. Sweet apples, bitter cabbage, salty bacon, along with some vinegar - all work together to create a sweet and savory dish. Better than coleslaw and a perfect fall dish. Especially served alongside some pork. And as for that pork? It came out delicious. I'm sure you're as surprised as I am. Although I think that I might be off the hook for cooking pork tenderloins. I might make them Thatboy's specialty for nights I want off!


ABC - Apple Bacon Cabbage

4 slices bacon
2 Tbsp sugar
1 onion, chopped
1 head red cabbage, shredded
2 apples, peeled, cored and sliced
2 Tbsp cider vinegar
1/2 tsp caraway seed
1/4 tsp nutmeg
1/8 tsp cayenne pepper
1/2 cup red wine
  1. Cook the bacon in a skillet. Remove the cooked bacon, but leave the drippings in the skillet.
  2. Add the sugar to the bacon drippings and cook, stirring, for two minutes.
  3. Add the onion and cook slowly until lightly browned.
  4. Crumble the bacon and stir it in with the cabbage, apples, vinegar, caraway seeds, nutmeg, cayenne and red wine. Cover and cook for 10 minutes.
  5. Partially uncover the skillet and add 1/2 cup water. Cook for about 35 minutes.

Wednesday, November 02, 2011

Bringing back an old favorite


When I first got back in the kitchen I wanted to make use of the items I already had on hand. Because the induction was unexpected, when I went into the hospital we already had a fully stocked fridge. A fully stocked fridge which the inlaws refused to make use of and continued to bring over new ingredients every night.

One of the "uncooked" items in my freezer was ground pork. I used about half of it to make the meatloaf Thatboy enjoyed for many lunches in the first couple weeks. The other half sat waiting to be turned into.....well, see, now I can't remember. So when I went to use it I turned to my old standby with leftovers - ma po tofu.

I always have all the ingredients on hand for this dish and it is one of my all time favorite uses for leftover ground meat.

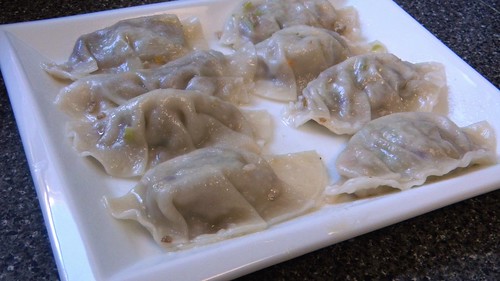
To make it "special" I decided to turn this classic standby into a dumpling. Thatboy looked at me with fear in his eyes - "I think you're taking too much on, that's going to be really hard." Which I didn't understand at the time. And as I was stuffing the potstickers, he came over and peered over my shoulder. "Wow - those look really good! My mom and I tried to make potstickers one time when I was little and it was a disaster. It took forever and we made a mess everywhere. Yours look professional." Which explained his earlier comment. But I'll share with you my secret. The hardest part of making potstickers is the stuffing. Sealing them so they don't pop open and creating a beautiful little pocket. Elizabeth has the best most fabulous video to show how to fold and seal these suckers and it makes anyone look like a professional.


Ma Po Potstickers
1 (1-pound) package reduced-fat firm tofu, cut into 6 slices
1/2 cup fat-free, less-sodium chicken broth
1 tablespoon cornstarch
2 tablespoons low-sodium soy sauce
1 tablespoon oyster sauce
1 to 2 teaspoons chili garlic sauce (such as Lee Kum Kee)
4 ounces lean ground pork
1 tablespoon grated peeled fresh ginger
3 garlic cloves, minced
won ton wrappers
1 Tbsp peanut oil
1 cup water

  1. Place tofu slices on several layers of paper towels; cover with additional paper towels. Place a dinner plate on top of covered tofu; let stand 30 minutes. Remove plate; discard paper towels. Cut tofu slices into 1/2-inch cubes.
  2. Combine broth, cornstarch, soy sauce, oyster sauce, and chili garlic sauce, stirring with a whisk.

  3. Heat a large nonstick skillet over medium-high heat. Add pork; cook 4 minutes or until done, stirring to crumble.

  4. Add ginger and garlic; cook 1 minute, stirring constantly.

  5. Add tofu; cook 4 minutes or until golden, stirring frequently.

  6. Add broth mixture to pan. Bring to a boil; cook 1 minute or until mixture thickens. Remove from heat and cool to room temperature.

  7. Place mixture in a food processor and pulse a couple times to break down the mixture.
  8. Spoon a scant tablespoon of the mixture into center of each won ton wrapper. Moisten edges of skin with water. Fold in half, pinching edges together to seal.
  9. Heat peanut oil in a large nonstick skillet over medium heat. Arrange potstickers in pan in a single layer; cook 1 minute or until browned on bottom.
  10. Add 1 cup water to pan; cover and steam 3 minutes.
  11. Uncover and cook another 2 minutes or until the water evaporates.

Tuesday, November 01, 2011

Better with bacon

In Thathouse cabbage usually comes in one of two forms - once a year on the 17th of March you will find it boiled alongside potatoes and carrots and served with corned beef. The rest of the year it is shredded and tossed with vinegar in a decidedly slaw-like manner. (And sometime later this week I'll be sure to share my go-to slaw recipe with you.)

But honestly, there's a limit to how much coleslaw one person can eat. And a whole head of cabbage would make a ridiculous amount of coleslaw. So I usually chop it in half. And then have half a head of cabbage that sits around growing disgusting until I end up trashing it and feeling incredibly wasteful.

This time I vowed not to let that happen. Knowing that bacon is what initially won over Thatboy and brussels sprouts, it seemed like a natural addition to cabbage. Or if not natural, at least something that would impart a delicious flavor.

Thatboy was instantly won over. "Bacon makes cabbage taste really good!" And you know what? He's totally right. So with that in mind, here are two variations on a theme - bacon and cabbage.


Bacon and Cabbage (1)
1/2 head of cabbage, core removed
2 slices of bacon
2 Tbsp melted butter
salt and pepper
  1. Bring a pot of water to a boil Tear cabbage into bite sized pieces.
  2. While waiting for the water to boil, cook the bacon.
  3. Place cabbage in boiling water for a quick minute and drain.
  4. Toss together the cabbage, butter, salt, pepper, and crumbled bacon.


Bacon and Cabbage (2)
4 strips of bacon
1/2 head of cabbage, shredded (I did it here with bok choy, just because you can do it with any cabbage you love)
salt and pepper
  1. Cook the bacon in a skillet and remove the bacon (leave the drippings!)
  2. Add the cabbage to the bacon dripping, cover and cook for 3 minutes.
  3. Crumble the bacon into the cabbage, season with salt and pepper.