Pages

Showing posts with label candy. Show all posts

Wednesday, August 12, 2020

Charlie and the At-Home Chocolate Factory: Chocolate Tomato Soup


When I  broke out the cotton candy machine for our Backyard Fair, I thought about other fun toys we've accumulated over the years of birthday parties.  Which is how I decided to plan a day centered around our chocolate fondue fountain.  Because I don't think we've used that thing since Thatbaby's second birthday.  

But what could I plan that centered around a chocolate fountain?  Why a Willy Wonka Day of course.  It may not be a chocolate waterfall, but it's pretty close.  It definitely helped that I had bookmarked Economy Candy's "Candy Care Package" as a fun idea way back in April and this would be the perfect excuse to order one.   As an aside, Thatboy has declared this the absolute best mail to ever receive and it has become our go-to "happy mail" to send.  

We made gummy legos during "Lego Mom Camp"    (maybe one of these days I'll get around to writing up all those camp lessons.  You know, in case anyone wants them for the next pandemic) which also inspired the idea of making our own candy.  Especially since Thatbaby has been so into science kits and growing his own rock candy.  So I picked up a Candy-Science kit and we made sour blue raspberry gummies (which were completely sour - not sweet - to the point where they were probably just vitamin c gummies), watermelon sucking candies, and grape marshmallows.

Did I mention that Thatkid wanted to dress up like Willy Wonka for the day?


Another one of our pandemic purchases with a bubble machine which filled our entire yard with bubbles.  The kids love it so much.  And I thought it would be even cooler if we could fill it with edible bubbles, like in the Fizzy Lifting Drink room.  So when I found "Lick-A-Bubbles" which are literally edible bubbles you can flavor with any non-dairy drink, I knew we were set for the day.  I poured them into our bubble machine and the kids went crazy running around trying to catch the bubbles in their mouth.


And while I was on the site purchasing the bubbles one of those "you may also be interested in" things popped up and I was interested!


Edible stickers!  So we could make our own lickable wallpaper.


One thing we already owned, that needed no modification was the Candy Land board game.  


Now, it was definitely a dangerous idea to throw in this game.  It never goes well.  We have retired it from weekly game nights because inevitably one of the kids ends up near the finish and having to go back to the start and there are tears and anger and flipping of tables.

So we moved quickly from game to lunch.  In trying to find ideas for a "chocolate factory lunch" I came across white chocolate macaroni and cheese.  Which doesn't sound super-appetizing, but had rave reviews from other skeptical persons.  So I thought, maybe the white chocolate just adds some thickness and creaminess.  Especially since the rest of the white cheeses mixed in sounded so delicious.
Y'all, this was not delicious.  Too sweet.  It was like eating a dessert.  Even my chocolate loving, macaroni and cheese loving kids did not enjoy it.


After nap I set up some chocolate we did enjoy - our very own chocolate waterfall (fountain).  


And then we relaxed for the rest of the evening by watching the original film.  With a special drink I found in the grocery store.


Thatkid had requested a dinner inspired by Willy Wonka's amazing gum - the one containing a three course meal that had poor Violet Beauregard blow up like a giant blueberry.

We began with a tomato soup.


Followed by roast beef and a buttery baked potato.


And of course, the famous blueberry pie with cream.


I wanted to dress up the tomato soup a bit, but I was a little wary after the macaroni and cheese incident.  But I've put chocolate in chili, and what is tomato soup except chili without the rice and beans?  Plus this recipe uses bittersweet chocolate, which REALLY doesn't add sweetness, just a depth of flavor.  The result?  Well Thatbaby hates tomato soup, but he loved this one so much he asked for it for lunch the next day too.  

Chocolate Tomato Soup
2 Tbsp olive oil
2 Tbsp butter
1 onion, chopped
3 cloves garlic
2 carrots, diced
2 celery stalks, diced
1 cup sundried tomatoes
2 tsp paprika
2 tsp cumin
1 tsp ground coriander
1/2 cup white wine
28-oz can of diced tomatoes
4 cups chicken broth
4oz bittersweet chocolate, chopped
2 Tbsp honey
  1. Melt butter and oil in a pot over medium-high heat.  Add onion and saute 5 minutes, until translucent.
  2. Add garlic, carrots, celery, tomatoes, paprika, cumin, coriander, and salt and pepper to taste.  Cook for an additional 3 minutes.  
  3. Add wine and continue cooking until all the liquid has evaporated.
  4. Add the chicken broth and tomatoes and bring to a boil.  Cover and reduce heat.  Simmer for 45 minutes.
  5. Let cool slightly and then puree in a blender.  Return to pot and heat until warmed through.
  6. Add chocolate and honey.  Stir until chocolate is melted and serve.

Wednesday, November 07, 2018

A Haunting We Will Build: Candy Corn


It will come as no surprise to you that we filled our month of October with lots of Halloween activities, so get ready for a November filled with Halloween tricks and treats.

When I asked my kids what their favorite Halloween activity was, they both responded that it was making haunted gingerbread houses, so I thought I would start with that!

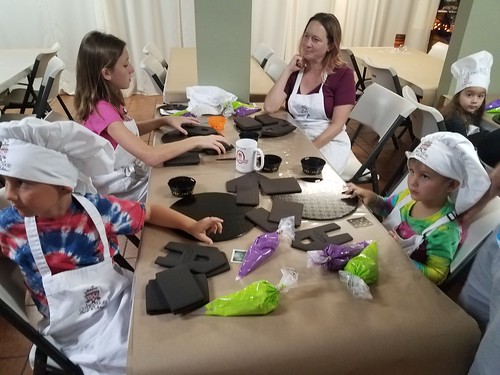
I was flipping through Facebook one day when I saw that Cute Cakes Bakery was running a special on their Spooky Gingerbread workshop - it was half off for the next week.  A quick check with the kids and a look at our schedule and I signed them up.

Neither of my kids has ever done a decorating workshop, but it seemed like something that would be right up their alley.  They both love to help me in the kitchen, Thatkid makes dinner every week, and as a family, we have made our fair share of gingerbread houses.

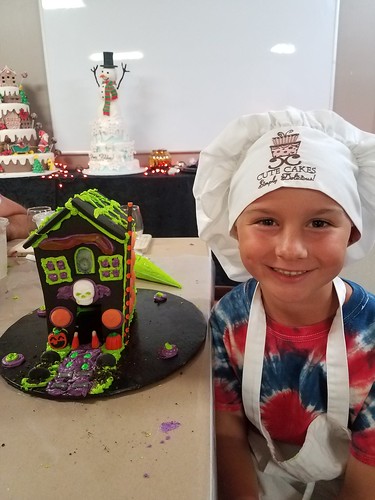
When we arrived, the bakery was closing up for the day, but they stayed open long enough for the adults to grab a mimosa or beer.  Each station was set up with a hat, apron, frosting bags, and the gingerbread walls.  Black gingerbread walls. Because it's a haunted house!


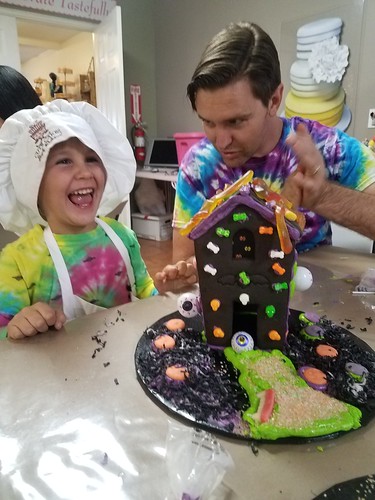
Our kids were actually did really well at listening to instructions and taking it step by step.  Thatboy and I did the divide and conquer routine, each helping one of the kids with the frosting bag and putting the pieces together.


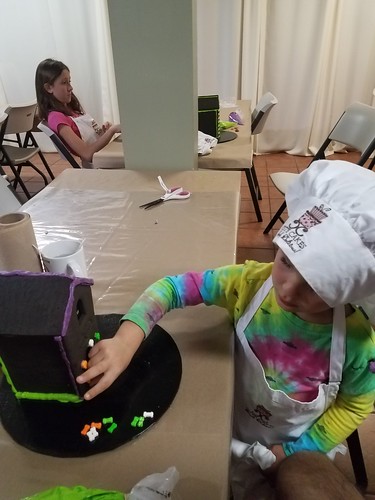
The highlight for the kids, and what really made it all worth it, was the extensive candy bar.  If you've ever made a packaged gingerbread house before, you know they're a little stingy with the decorations.  Here the kids got free reign to take and use as much candy as they'd like.  And my boys definitely took advantage of that.


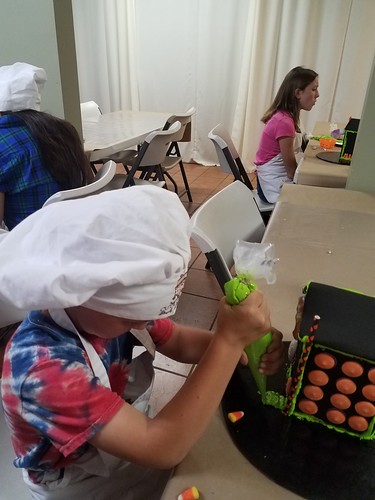
While Thatboy and I helped a lot with the construction of the house, the decorating was all them.


Thtboy went with a vision - to make it look like an actual haunted house, complete with a graveyard in the front yard, and candy corn gateposts for the front door.


Thatbaby's goal was to get as much candy on that house as humanly possible.


The boys had so much fun, and bonus, we had fun table decorations for the rest of the month!  They're already asking to go back for the Christmas Gingerbread House Workshop.

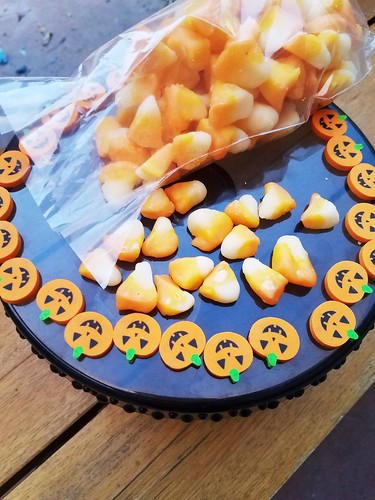
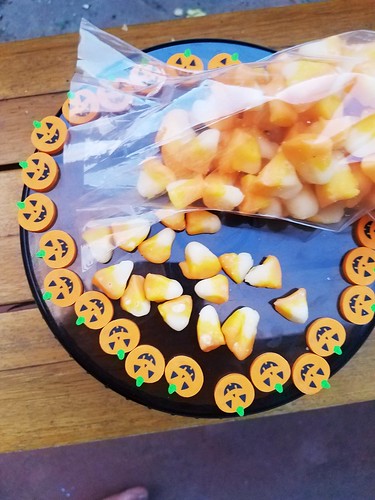
In addition to this new Halloween activity, we tried a new Halloween treat this year - making our own candy corn.  I should warn, this is not for the faint of heart.  The warm dough doesn't love to hold its shape when rolling into strands, and it took me forever to figure out how to form them into a wedge for cutting.  There were some really ugly ones in the bunch.

I should also warn that these don't taste like store bought candy corn.  They have a flavor all their own, aided by that vanilla extract.  They're SUPER sugary, so a bigger hit with the kids than me, but I find them way more appealing than store bought candy corn!  

Candy Corn (From Alton Brown)
1 1/4 cups confectioners sugar
6 1/2 tsp powdered nonfat milk
1/4 tsp salt
1/2 cup sugar
1/3 cup light corn syrup
2 1/2 Tbsp water
2 Tbsp butter
1/2 tsp vanilla
yellow and orange gel paste food coloring
  1. Combine the confectioners sugar, dry milk, and salt in a food processor.  Pulse until combined.
  2. Combine the granulated sugar, corn syrup, and water in a 2 quart pot.  Place over medium heat, cover, and cook for 4 minutes.
  3. Add butter and bring the syrup to 230 degrees.  Remove from the heat.
  4. Add the vanilla and the confectioners sugar mixture and stir until combined.  Pour on a sheet pan lined with a baking mat and cool until it is cool enough to handle. Divide the dough into 3 pieces.  
  5. Add 2 drops of yellow food coloring to one piece and knead the color in.  
  6. Add 2 drops of orange food coloring to a second piece and knead the color in.  Leave the third piece white. Roll each piece of dough into an 18 inch long strand.  Cut each strand in half and roll into a strand that is 22 inches long and 1/2 inch thick.
  7. Lay the strands side by side - orange, yellow, then white, and press them together.  Cut into 4 inch pieces.  Then press each piece into a wedge, with the orange on bottom and the white part on top coming to a tip.
  8. Cut each wedge into individual candies.  Let dry for at least 1 hour on parchment paper.

Friday, July 03, 2015

A Homemade Life: Espresso Walnut Toffee


Thatboy and I are members of a wine club.  It was one of the smartest things we ever did, because 1) it keeps us well stocked in wine, and 2) it provides a really cheap date when we head to the winery to pick up our selections.

The way the wine club works is that every other month we get 2 wines from the winery.  Unlike most wine clubs, which send you a selection, at our winery we can pick any two wines we want.  And you pick them up at the winery.  But you don't have to pick them up every other month, they just keep tabs of how many "months" they "owe you."  A couple times a year we'll head to the winery for a day of wine tasting and then pick as many wines as we're "owed."  The last time we went was in August, before I got pregnant.  So we came home with quite a few wines this time.


The vines were filled with not-quite ready grapes, green, waiting to darken as the summer progressed. 


We always make a day of it when we head to the winery.  We grab a table under the trellis and set up shop, complete with all our favorite wine-pairing snacks.

There's always fruit and berries, cheese and bread.  This time around, Thatboy requested olives.  And of course, chocolate to pair with the richer reds and sweet dessert wines.  The chocolate came in the form of this espresso walnut toffee.  A blend of dark and white chocolate, swirled over toffee.  As I've said before, coffee is a great pairing with chocolate, and this toffee proved no exception.  I think Thatboy might have preferred it without the walnuts, but I liked the crunch they gave the treat.  And I think they served to counter balance the sweetness, providing a saltiness that I appreciated given that I can only do a bite or two of most candies.


Espresso Walnut Toffee (From A Homemade Life)
2 cups walnut
1 cup sugar
1/3 cup light brown sugar
2 tsp instant espresso
1/2 tsp cinnamon
1/4 tsp salt
1/3 cup water
1 Tbsp unsulfured molsasses
4 1/2 oz bittersweet chocolate, very finely chopped
2 1/2 sticks unsalted butter
  1. Preheat oven to 325. Place the walnuts on a baking sheet and bake 5-10 minutes, until fragrant.  Set aside to cool for 10 minutes.  Coarsely chop and transfer 1 1/2 cups to a bowl. Finely chop remaining 1/2 cup and place in a different bowl.
  2. In a medium bowl whisk together the sugars, espresso, cinnamon, and salt.
  3. In a small bowl, whisk together water and molasses.
  4. Place the chocolates in separate bowls.
  5. Grease a baking sheet with cooking spray.
  6. In a heavy saucepan, melt the butter over low heat.
  7. Add the sugars, cinnamon, slat, water, and molasses and stir until the sugars have dissolved. 
  8. Attach a candy thermometer to the side of the pan. Raise the heat to medium and cook until the mixture reaches 290, stirring frequently at first and then slowly and constantly scraping the bottom of the pan with the spatula or wooden spoon, about 20 minutes.
  9. When the mixture reaches the temperature, remove the pan from the heat.  Stir in the 1 1/2 cups coarsely chopped walnuts.  
  10. Quickly pour the mixture onto the prepared baking sheet so the toffee spreads to a 1/4 inch thickness.
  11. Sprinkle the chocolates by generous tablespoons onto the hot toffee, alternating rows of bittersweet and white.  Allow them to melt for 1 minute.  Using the back of a spoon, spread the melted chocolates, taking care not to mix them.  Drag the tip of a small kife or the tines of a fork across the chcolates, swirling them to create a marbeled look.
  12. Sprinkle with 1/2 cup finely chopped walnuts and refrigerate 1 hour.  Break into pieces.