Pages

Showing posts with label pies. Show all posts

Wednesday, March 04, 2020

Prepping for Pi Day: Fresh Lemon Pie


In the Jewish tradition, trees are planted to commemorate the birth of a child.   When a boy is born, the foreskin is buried beneath the tree following the circumcision.  The tree is supposed to grow along with the child, and when the child marries, the branches are used to create the chuppah, or wedding canopy.

We chose to use a lemon tree which has (4 years later) finally started fruiting!  Which is pretty exciting.  I mean, we got 2 weird looking lemons that never turned yellow last year, but this year we've got multiple lemons, and more on the way by the way this thing is flowering. 

So I really wanted to use the lemons to make a pie for this year's Pi Day pie.  Only problem?  I've never made a lemon pie before.  TMIL makes lemon meringue pie, and while in general my takes on her "classics" come out better than the original, this is one I just wasn't willing to mess with.  Not with Thatboy's obvious affection for it.  I didn't want to risk the comparison.

But, I can follow a recipe, and so I pulled out my James Beard Cookbook and gave it a shot.  And you guys?  The recipe was just no good.  No really.  I ended up with lemon soup instead of lemon curd and when I tried to figure out why I stumbled upon the fact that EVERY other lemon meringue pie recipe calls for boiling the filling, while my recipe tells you to take the filling off heat just before it boils.  Which (I learned) makes the cornstarch never activate and the filling never thicken.   I will say though, that Thatboy happily ate the pie with a spoon from a bowl and declared it the best lemon curd he's ever eaten.

Meanwhile I decided to move on to the next lemon pie recipe and see if I stood a better shot at that.  This one creates a lemon marmalade instead of a curd - using the entire lemon, peels and all.  Learning from my last mistake, I cooked this one for much longer than the recipe called for, making sure it got very thick before removing it from the heat.  In various forums I read, I noticed they mentioned you should be able to cut through the filling with a knife before putting it in the crust. 

And this time the filling set up!  A nice, tart filling that's perfect for the upcoming spring, holidays, and even Pi Day next week!


Fresh Lemon Pie  (From James Beard's American Cookery)
1 cup thin slices of unpeeled lemon
1 1/2 cups water
2 cups + 6 Tbsp sugar, divded
3 eggs, divided into whites and yolks
7 Tbsp flour
1/2 tsp salt, divided
2 Tbsp butter
1 tsp cream of tartar
1 pie dough, pressed into a pie pan and baked
  1. Place the lemon slices and water in a saucepan and simmer for 10-20 minutes (until the lemon rinds are very tender).
  2. Add 1 cup sugar and simmer until sugar has dissolved.
  3. Combine remaining sugar with the egg yolks, flour, and 1/4 tsp salt.
  4. Temper the egg mixture by stirring in some of the hot lemon water.
  5. When well combined, stir all the yolk mixture into the hot lemon water.  Continue to stir and cook over low heat until the mixture is thick (this took me almost 20 minutes.)
  6. Add the butter and cool to room temperature.
  7. Pour the filling into the crust and let cool completely.
  8. Make the meringue topping. Preheat oven to 350. Beat the egg whites on high speed until soft peaks form.
  9. Add the tartar and remaining salt.  Continue beating until stiff peaks form.
  10. Slowly add the sugar and beat until combined.
  11. Spoon the filling onto the pie and bake for 18 minutes.
  12. Let cool completely before cutting!

Wednesday, February 12, 2020

Buffalo Everything: Buffalo Chicken Pot Pie


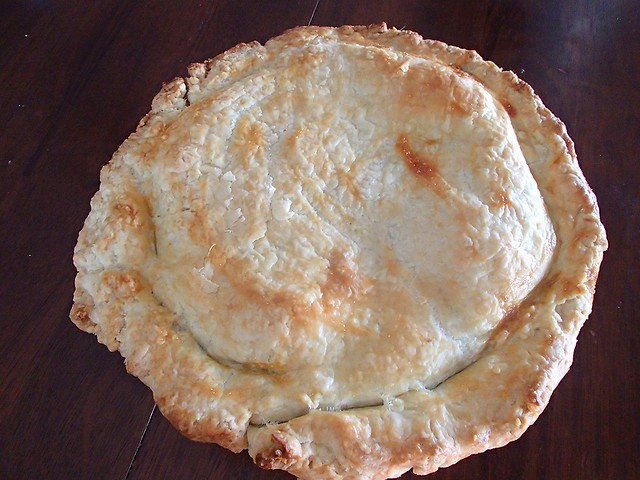
I know I know, I JUST posted a recipe for buffalo wings.  And here's another buffalo chicken recipe!  I can't help it you guys, the weather gets cold and I start putting buffalo chicken in just about everything.  It's such a spicy comfort food for me and the flavor works with just about all your other favorite comfort foods - chili, macaroni and cheese, and yes, even pot pie.

In fact, pot pie might just be the best use for buffalo chicken.  Think about it, buffalo wings always come with carrots and celery anyway, two ingredients of any self respecting pot pie.  So your brain already connects those flavors.  And if you've had buffalo chicken dip, then you're already familiar with a creamy version of buffalo wings.  Pot pie is a less creamy version of that dip - but the warm buttery crust is a nice substitute.

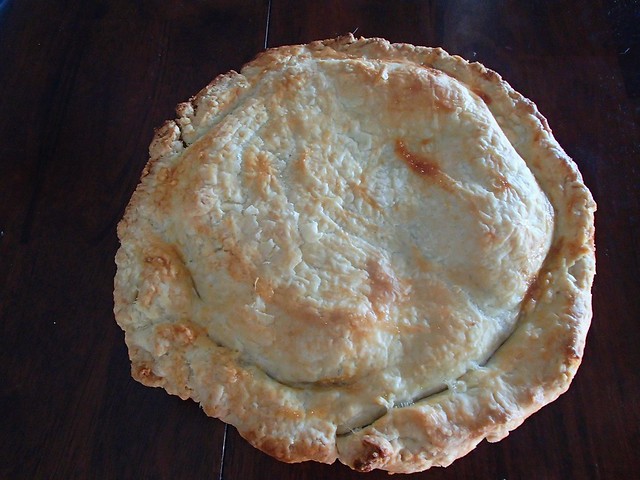
I made 2 individual pot pies with this recipe, because I like the crust to filling ratio better that way, but you could certainly make it into one large pot pie if you're serving a crowd. I ended up with extra filling (I always end up with extra filling) which I used in hand pies that I froze.  You could use the entire recipe to make handpies, they make for fabulous lunches. 


Buffalo Chicken Pot Pie
1 Tbsp butter
1/2 onion, diced
1/2 cup celery, diced
1/2 cup carrots, diced
2 cups cooked chicken, shredded
3/4 cup buffalo wing sauce
1 cup blue cheese
  1. Preheat the oven to 400.  Melt the butter in a large saucepan over medium heat.  Add the onion and cook until translucent.
  2. Add the carrots and celery and continue to cook another 5 minutes, or until they are soft.
  3. In a large bowl combine the cooked veggies, chicken, wing sauce, and blue cheese.
  4. Divide the pie dough into 4 balls.  Roll out 2 of the bowls into small circles and press them into small bowls or ramekins (if you're making one large pot pie then divide the dough in half and roll one half into a larger circle and fit into pie pan).
  5. Divide filling between the two ramekin/bowls.
  6. Roll out the other 2 balls of dough (or remaining half), and place on top of each filled ramekin.  Flute the edges and cut several slits in the middle of the dough.
  7. Bake for 30 minutes, or until crusts are golden brown.

Wednesday, July 17, 2019

Blueberry Picking: Blueberry Pie


If you're a long time reader of the blog you know that we love fruit picking around here.  If you're a new reader of the blog,  Hi!  We love to pick fruit!

Blueberry season started a little later here than usual, but the payoff was incredible.  It lasted for a long long time.  Which gave us enough time to head to the blueberry farm, a month later than we usually do.


The thing that I really like about blueberry picking is that it's the easiest one for the kids to do.  There aren't any thorns like blackberries, and there's no twisting and pulling like strawberries.  


The berries literally just roll right off into your hands.


It's also really easy for the kids to figure out which berries are ripe - dark blue berries only!  Don't pick them if they're purple, red, or green.  


It wasn't long before we had buckets of berries.


The other thing I like about blueberries, is that they last a very short time in our house.  The kids devoured a pint before we even left the farm.  And then the remaining pints were gone so quickly I almost didn't have time to make anything with them.  I had to commandeer enough to make this pie.  Because berry pie is a necessity in the summer.  Don't you think?  And it really doesn't get any easier than blueberry pie.  No cooking the berries, no parbaking the crust.  Really it's a dump and bake kind of dish, which is what you want on those hot days.  We brought this over to a friend's house for dinner and there were no leftovers.  Out of berries.  Out of pie.  That's a successful berry picking adventure.

Blueberry Pie
4 cups blueberries
3/4 cup sugar
5 Tbsp flour
1/4 tsp salt
1 Tbsp butter
  1. Preheat oven to 450.  Roll out half of the pie dough and line the pie pan with it.
  2. Combine blueberries, sugar, flour, and salt.  
  3. Place berries in the pie pan.
  4. Dot the berries with butter.
  5. Roll out the remaining half of the dough and place over the berries, crimping the bottom and top edges together.  Cut slits in the top dough for steam.  
  6. Sprinkle the top pastry with sugar and bake for 15 minutes.
  7. Lower the heat to 350 and bake for an additional 15-30 minutes, until golden brown.  Cool on a rack before serving.


Wednesday, March 13, 2019

Pi Day: Smores Pudding Pie


Tomorrow is March 14.  3/14.  3.14.  Otherwise known as "Pi Day."  A day in which we celebrate the ratio of the circumference of a circle to its diameter by eating a homophone.  And that my friends is probably the nerdiest sentence you will ever read in this blog. 

But back to Pi/Pie day.  Every year it sneaks up on me.  I wake up, realize through social media that it is indeed the 14th of March, and scramble to find a pie at a market or bakery.  And they told you to beware the IDES of March.  Ha!

But this year I was ahead of the game.  Ahead enough that I have got a pie in the refrigerator right now, just chilling and getting ready for tomorrow.   Although, I realized that I might forget the date because this is SUCH a busy week in this household.  I'm also simultaneously prepping for St. Patrick's Day, Thatmom's birthday, and Purim.  And a trip.  And a couple of work deadlines.


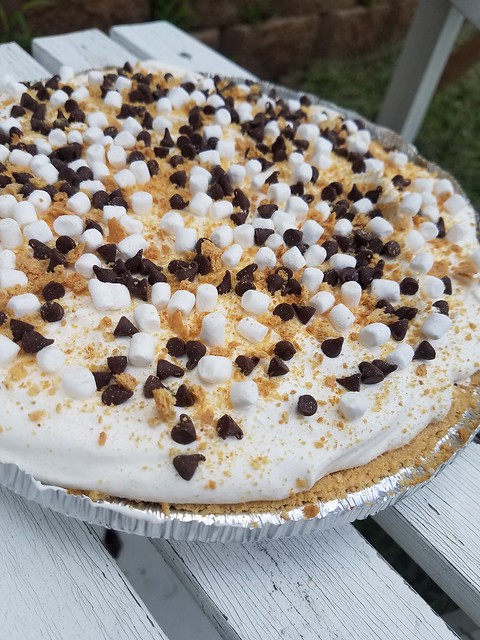
So I may have cheated a little.  I went for the easiest pie I could think of.  A no bake pudding pie.  With a graham cracker crust, so I didn't even have to mess with dough.   But as I was making it, I kept thinking about chocolate and graham cracker and realized I had a bunch of mini marshmallow bites in the pantry leftover from groundhog's day that would turn this simple pudding pie into a smores pie!  Throw on some chocolate chips and graham cracker crumbs for good measure and it still is the easiest pie ever, but dressed up in it's Pi Day best.


Smores Pudding Pie
1 1/2 cups graham cracker crumbs (about 6 ounces) (plus extra for sprinkling on top)
1/4 cup sugar
1/2 cup melted unsalted butter
1 pkg instant chocolate pudding
1 1/2 cups milk
1 container cool whip
1/4 cup mini chocolate chips
1/4 cup marshmallow bits
  1. Mix the graham crackers with sugar and melted butter and press into bottom and sides of 9 inch pie pan. Chill while preparing filling.
  2.  Whisk the milk into the chocolate pudding for 2 minutes.
  3. Place half of the chocolate pudding into the chilled pie crust.
  4. Whisk half of the cool whip into the remaining chocolate pudding and spread this mixture over the top of the chocolate pudding in the pie crust.
  5.  Spread the remaining cool whip over the pie.
  6. Sprinkle with chocolate chip, marshmallow bits, and graham cracker crumbs.  Refrigerate overnight.

Friday, May 29, 2015

A Homemade Life: Rum Cream Pie with Graham Cracker Crust


Our second party of the weekend was a Memorial Day potluck at the home of the HorseWhisperers.  Our entrance had never been so well received.  The rest of the guests were HW's classmates she recently graduated with.  Mr. HW was thrilled to see Thatboy and Little HW had been eagerly awaiting a peer of her own.


The two of them ran off to create all sorts of trouble.  While the Mr. HW and Thatboy retired outside to drink beer and play guitar.   I sat around with the college kids feeling instantly old.  But in reality it was the perfect audience for a rum pie.  Because there's nothing a recent college graduate likes better than alcohol.  In fact, we had come just late enough to miss the shots of Hypnotiq.

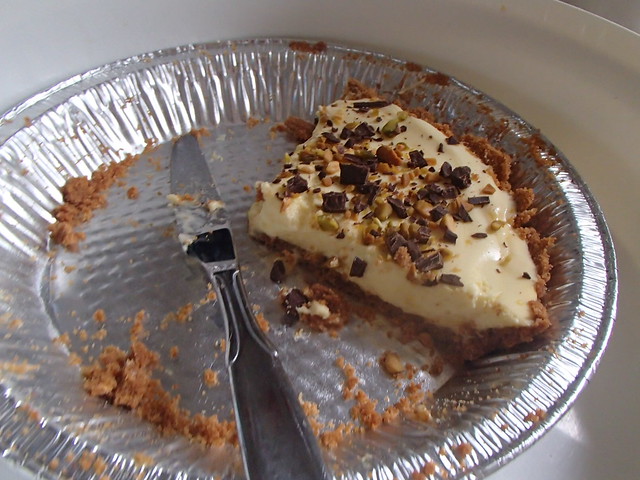
They were uber appreciative of this pie with it's creamy consistency and strong rum flavor.    Within moments of slicing it, it was completely gone.

Rum Cream Pie with Graham Cracker Crust (From A Homemade Life)
9 graham crackers broken coarsely into pieces
2 Tbsp sugar
5 Tbsp melted butter
1/4 cup cold water
1 1/4 tsp gelatin
1 cup heavy cream
3 egg yolks
1/2 cup granulated sugar
2 Tbsp dark rum
  1. Preheat oven to 325.  Process the graham crackers in a food processor until they are very fine.
  2. Add the 2 Tbsp sugar and pulse to combine.
  3. With the motor running, slowly add the melted butter and process until the mixture resembles wet sand.  Scrape the mixture into a 9 or 9 1/2 inch pie plate and press along the bottom and up the sides.  Bake for 15 minutes.  Let cool completely.
  4. Pour the cold water into a small microwaveable bowl.
  5. Sprinkle the gelatin over the water.  Set aside to soften for a few minutes.
  6. Pour the cream into the bowl of an electric mixer.
  7. In a separate bowl beat the egg yolks until they are pale yellow.
  8. Add the 1/2 cup of sugar to the eggs and whisk until thick.
  9. Microwave the gelatin for 20 seconds and then pour into the egg mixture.
  10. Whip the cream to soft peaks with the whisk attachment to the mixer. 
  11. Gently stir the whip cream into the egg mixture.
  12. Add the rum.  Chill until it starts to set. Scrape into the prepared crust.  Chill 4-6 hours.
  13. Top with chopped pistachios and bittersweet chocolate.

Thursday, May 28, 2015

A Homemade Life: Dried Fruit Pie

So far my biggest complaint about A Homemade Life is that it is very dessert heavy.  Don't get me wrong, I adore dessert, but making one every night means my house is full of more sweets than we can handle.  So when I noticed that a chapter had not one, but two pie recipes in it, I felt like last weekend, when we had two parties to go to, was the perfect excuse to make them.  That way I could bring them to parties and everyone could enjoy them, instead of Thatboy and I trying to finish two pies by ourselves.

The first party of the weekend was a barbeque held in our honor.


It was so unbelievably beyond perfect.  You see, we didn't really want a shower - and we have everything we need for Oppo-baby.  But this wasn't a shower, it was a family party!  You see, the hosts of the party were Lexus's parents.  And the guests were the families of Thatkid's old daycare friends.  Our little group.  It was a like a playdate for the kids and parents!

The youngest members of the group, the round 2s are still babes in arms.  Thatkid and his friends tore around the house, playing pirates, monsters, and dig-in-the-mud.


Meanwhile the grownups, got a chance to catch up and chat with each other.  And we got loads of good advice about adding a second into our brood.  I really am so very thankful for Thatkid's experience in daycare/preschool and the wonderful people we've met through there.  Both the sweet kids and their wonderful parents.

It only seemed right to share this pie with them.  Dried fruit may not be a common filling, but right now I feel like I'm making loads of things with dried fruit.  I have dried fruit dishes in my freezer, fridge, and on my counter right now.  As I was commenting to Thatboy earlier, there's something about it that makes you feel like you're eating something healthy, even when there is the addition of chocolate, sugar, or other unhealthy ingredients.


Dried Fruit Pie (From A Homemade Life)
1/2 cup ice water
1 1/2 tsp apple cider vinegar
3 cups flour
2 Tbsp sugar
1 1/2 tsp salt
2 1/2 sticks cold butter, cut into cubes
2 cups pitted prunes, coarsley chopped
2 cups dried apricots, coarsely chopped
1 cup golden raisins
1/2 cup dried apples, coarsely chopped
3/4 cup sugar
1 stick unsalted butter, melted
1/2 cup walnuts, chopped
1 egg
  1. In a measuring cup combine the ice water and the cider vinegar.
  2. Combine the flour, sugar, and salt in a food processor and pulse to blend.
  3. Add the 2 1/2 sticks of cold butter and pulse until the mixture resembles coarse meal.
  4. With the motor running, slowly add the water-vinegar mixture and process just until moist clumps form.
  5. Turn the dough out onto a wooden board or clean countertop and gather it until it just holds together.  Shape into a ball, cut in half, and press each half into a disk.  Wrap each disk in plastic wrap and refrigerate at least 2 hours.
  6. Combine the dried fruits in a large saucepan, and add cold water to cover.  Bring to a boil over medium high heat, then simmer for 10 minutes, stirring occasionally.  Drain the fruit well in a colander and return to the saucepan.
  7. Add sugar and melted butter.  Stir well.  Set aside to cool, stirring occasionally. 
  8. Preheat oven to 425.  Roll 1 disk of the dough into a circle wide enough for a 9-9 1/2 inch pie plate.  Transfer gently into the pie plate.
  9. Roll out the second disk of dough into a circle about the same size.
  10.  Stir the chopped walnuts into the cooled filling.  
  11. Scrape the filling into the prepared pie plate, distributing it evenly.  
  12. Place the second circle of dough atop the filled pie, and fold and pinch the edges over the bottom crust to seal completely and form a high fluted rim.
  13. In a small bowl, beat the egg with a fork and brush lightly over the top and rim of the pie.  Bake for 30 minutes.  Reduce heat to 375 and bake for an additional 10 minutes.

Friday, April 25, 2014

Lemon Tarts

Have you guys been missing my pie posts?  They were all over the place for a while, and then...poof!  Nothing.

Now that Passover's over, I can share some more pie-love with you.  Like lemon tarts.

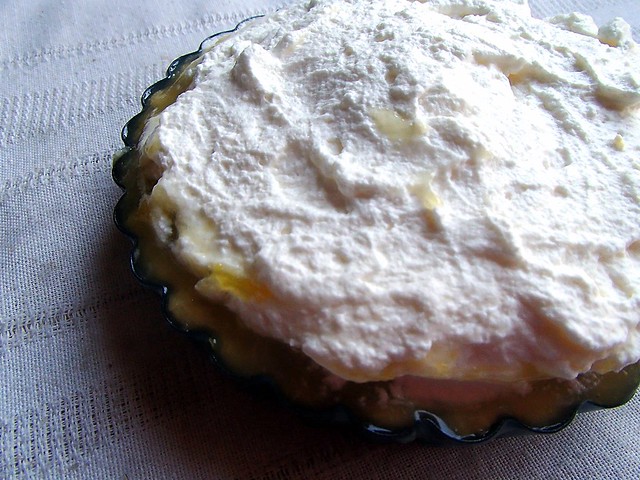
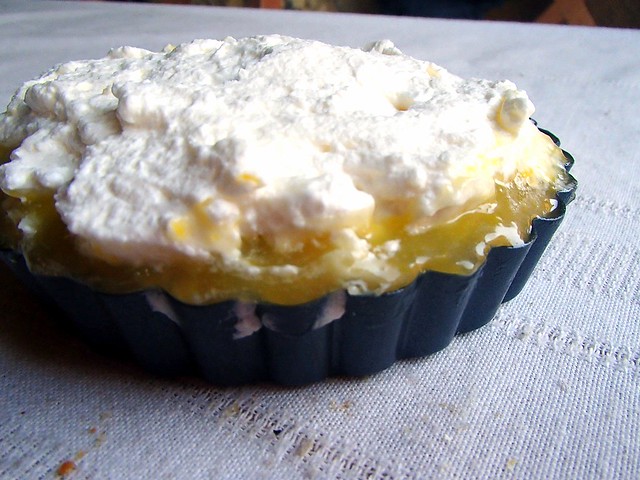
There's really something about lemon in the spring, isn't there?  The bright color yellow, the sour zing, it's like spring personified.  Or fruitified?  And lemon desserts are a great way to ring in the season.  Fabulous for springtime tea parties or brunches.


Lemon Tarts
1 cup flour
1/2 tsp salt
  1 stick + 6 Tbsp butter
1 egg yolk
1 1/2 cups sugar
grated rind of 2 lemons
juice of 3 lemons
6 eggs
  1. Mix the flour and 1/4 tsp salt in a bowl.
  2. Cut 6 Tbsp butter with your fingers until it forms pea-sized balls.
  3. Whisk the egg yolk and 2 Tbsp water and add to the flour mixture, mixing until it forms a smooth ball.  Wrap in foil and refrigerate 20 minutes.
  4. Preheat the oven to 375.  Press the dough into 6 small tart pans and prick with a fork.  Bake for 10 minutes.  Cool and remove from tins.
  5. Mix the remaining butter, sugar, lemon rind, lemon juice, and eggs in a pan and cook over moderate heat, stirring constantly, until thick.
  6. Cool in the refrigerator.  Fill the tart shells with the lemon filling and top with fresh whipped cream.


Thursday, March 27, 2014

Berry Tart


This is what the boys do when I go out on the weekend.  It's a "bad habit" I started when Thatbaby and I were both sick.  I asked if he wanted to nap on the couch with me.  I wasn't expecting it to actually work.  But he took it seriously, covering his little eyes with his little hand and taking a nice nap snuggled up against me.

When I told Thatboy how well it worked, he decided to give it a shot himself.  And now the two of them take "couch naps" together.  Of course, when Thatbaby naps with Thatboy the naps are incredibly long, lasting over 2 hours.  Not so much with me, or by himself.  This picture was taken when I got home from a picnic with my running group.  I had been gone for hours!

As for that picnic, I wanted to bring something sweet and easy - something I could toss together quickly, since I've been so busy as of late.  And since there is so much running around on the weekends, I didn't want to have to slave over something I was bringing to a park.  With the arrival of spring, a fruit tart was calling my name. 


Berry Tart
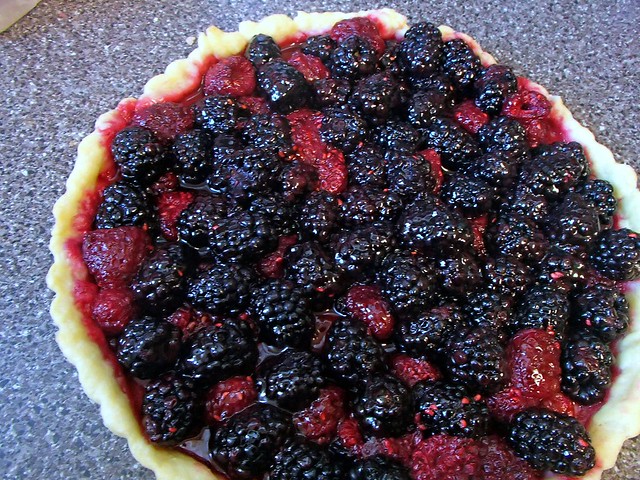
The easiest pie you can make.  Perfect for unexpected company, or a last minute invitation.  And really, with sweet, plump berries, you don't need much else to make it a treat.


Crust:
1 1/2 cups flour
1/4 tsp salt
1/2 cup shortening
3-4 Tbsp cold water


  1. Preheat oven to 375.  Mix the flour and salt in a bowl.
  2. Cut the shortening in with 2 knives until mixture resembles coarse meal.
  3. Sprinkle water over the flour mixture, mixing with a fork, adding just enough for the dough to hold together. 
  4. Roll out the dough and place in a tart pan.  Prick the bottom with a fork and bake for 10 minutes. Let cool.


  1. Toss 3 cups of berries with sugar and add to cooled shell.
  2. Melt 1 1/2 cups currant jelly in a pan over low heat.
  3. Pour the currant glaze over the berries.


And when the boys woke up, the shared a slice that I brought home for them.  After all, when you're two, you need all the strength and energy you can get.

Wednesday, March 19, 2014

Pies in Review

I've mentioned before I've been going through a "pie phase" as of late. Experimenting with crusts and fillings.  We've been eating a lot of pie round these parts.  To temper the intake, I've been making mini-pies, using my tartlet pans.  It's ingenious really, because we get to try a bunch of different varieties, with no leftovers!


So you'll be seeing pies making a frequent appearance here, but I thought I would start out with a roundup of some of my favorites.  Or ones I am especially proud of.

Stay tuned for more information on my pie adventure!


Blueberry Pie - Thatboy's favorite.  So simple, just fresh blueberries tossed with a simple syrup sauce.


Cherry Pie - my very first lattice pie!

Pecan Pie - not quite as good as Thatmom's, but pretty sweet!

Cottage Cheese Pie - The love child of cheesecake and pie: the best of both worlds.

Lemon Meringue Pie - My first meringue pie!  This is TMIL's specialty, so I've never made it.  Thatboy thought this was "pretty damn good."

Lemon Crumb Pie - I never really liked lemon desserts as a child, but now I can't get enough of them.
 
Coconut Custard Pie - Playing into Thatbaby's love of all things coconut right now.


Coconut Cream Pie - Another classic and my first successful cream pie.  It just worked!

Friday, March 14, 2014

Peach Pie


Happy Pi Day!  I never ever ever remember to participate in Pi Day.  Well this year, that's going to change.  I actually remembered AND made a pie in advance that I could share with you.  This is NOT the season for peach pie.  Peach pie should ideally be made in the summer, with sweet, juicy peaches.  Preferably from Georgia.  But I am far from Georgia.  And it is far from summer.  But I am not one to be deterred when there is a holiday based upon a mathmatical constant that sounds like a delicious dessert.  I mean, how often does that happen?  So I went with the next best thing to fresh, juicy, Georgia peaches - frozen peaches.  Not as good, but a great substitute in a pi-nch. 

Peach Pie
2 1/2 cups flour + 4 Tbsp
1/2 tsp salt
3/4 cup shortening
cold water
1 cup sugar
4 cups frozen peach slices
juice of 1 lemon
 

  1. Preheat oven to 425.  Mix 2 1/2 cups flour and salt in a large bowl.
  2. Cut in the shortening with 2 knives until the mixture resembles little peas.
  3. Sprinkle water by the tablespoon over the mixture, mixing with a fork, adding just enough water so the pastry holds together.  Divide the dough into 2 balls.  Roll one of the balls out and place in a 9 inch pie pan.
  4. Combine the sugar and remaining flour in a large bowl. 
  5. Add the peaches and lemon juice, tossing to combine.
  6. Pile the fruit into the pie plate.  
  7. Roll out the remaining ball of dough and drape over the fruit.  Crimp the edges and cut several vents in the top.  
  8. Bake for 10 minutes. Lower the heat to 350 and bake for another 35 minutes.

Friday, January 24, 2014

Apricot Pie

I rarely post recipes without pictures, but sometimes, you just have to.

See, I didn't take any pictures of this apricot pie, because I didn't think it was going to be blogworthy.  I know that sounds silly, but I've been playing around with pie recipes lately, so a lot have been coming out of my oven.  I've been messing around with fresh, frozen, and canned fruit.  Different ways of thickening.  Different cooking methods.  They're not all going to be winners.

And I had very low expectations of this apricot pie.  Apricots are not my favorite fruit.  In fact, I only made this apricot pie because Thatbaby and Thatboy both really like apricots.  Strike number 2 was the fact that you can't get apricots in January.  Except the canned variety.  As much as I don't care for fresh apricots, I really really really don't like canned apricots.  For me, they're too slimey. 

So this pie had a lot working against it.  But unlike 2 wrongs making a right, apparently 2 strikes can still make something delicious.  Something really, really good.  Right now this is Thatboy's favorite pie I've made.  Because of the canned apricots, the filling is sweet and simple.  Serve it warm with a scoop of vanilla ice cream on top. We didn't, but you should!

Apricot Pie
2 cans of apricots in juice, drained
1 cup sugar
2 Tbsp tapioca
juice of 1 lemon
2 Tbsp butter
  1.  Preheat oven to 425.  Line a pie pan with half of the pie dough.
  2. Spread 1 can of the drained apricots in the pan.
  3. Sprinkle with half of the sugar.
  4. Spread the remaining can of drained apricots over the rest.
  5. Sprinkle the remaining sugar, tapioca, and lemon juice on top.
  6. Cut the butter into small pieces and dot over the filling.
  7. Roll out the remaining half of the dough and drape overtop, crimping the edges.  Cut a couple of vents in the top of the pie and bake for 10 minutes.
  8. Lower heat to 350 and bake for an additional 35 minutes.

Thursday, January 16, 2014

Strawberry Tart

This year we spent New Years Eve with Thatmom.  Instead of going away like we have for the past few years, we spent this holiday at her home.  She wanted something very low key.  And that's how it started out.

We talked about having a simple dinner, but she wasn't sure what we should make.  Thatboy and I discussed some options and came upon the idea of duck.  Thatmom had never made duck before, but I assured her it was as easy as roasting a chicken, and after she spent some time searching for recipes she got really excited about making duck for dinner.

The idea of duck for dinner elevated our "simple" meal.  And it expanded to include wild rice, brussels sprouts, and pureed rutabegas.  Our little party of 3.5 grew to include my cousin and her boyfriend visiting from Boston, and one of my mom's friends.  We drank wine, and then port.  We laughed and ate, heaping our plates full of the delicious meal.

And before my cousin and her boyfriend headed to the airport to catch a New Year's flight home, I brought out dessert.  A strawberry tart which, like the duck, is simple to make, but seems somehow elegant.  I was a little wary of the not so sweet December strawberries.  I'm sure this would be even better in the summer.  The orange glaze helps to add any sweetness your strawberries are missing, so if you are using summer berries, you can go a little lighter with the syrup to really let the berries shine through.


Strawberry Tart
1 cup flour
1/2 tsp salt
6 Tbsp butter
1 egg yolk
1 cup sugar
3 Tbsp cornstarch
3/4 cup orange juice
juice of 1 lemon
1 quart of strawberries, hulled and sliced
  1. Mix the flour and 1/4 tsp salt in a bowl.
  2. Cut in the butter with your fingers until it forms pea-sized balls.
  3. Whisk the egg yolk and 2 Tbsp water and add to the flour mixture, mixing until it forms a smooth ball.  Wrap in foil and refrigerate 20 minutes.
  4. Preheat the oven to 425.  Press the dough into a tart pan and prick with a fork.  Bake for 12 minutes.
  5. Combine the sugar, cornstarch, remaining salt, orange juice, and lemon juice in a saucepan.  Cook over low heat, stirring, until thickened, about 5 minutes.  Cook for an additional 10 minutes and then let cool.
  6. Fill the tart crust with the sliced strawberries and cover them with the syrup.

Tuesday, December 24, 2013

Twas the Night Before: Savory Green Tomato Pie With Beef and Onions


'Twas the night before Christmas,
and all through their homes,
the readers were thinking,
"Oh No!  Not a poem!"

But Thatgirl was tired,
and weary from travel.
Her nerves had been frayed,
and slightly unraveled.

A week with the inlaws!
How would she cope?
There better be liquor.
One only can hope.

So while she settles in 
as best she is able,
here's a meat pie recipe for 
your holiday table.


Savory Green Tomato Pie with Beef and Onions (from A Canadian Foodie)
2 Tbsp olive oil 
3 onion, sliced
4 Tbsp cornstarch
3 stalks celery, diced
1 carrot, diced
1 lb ground beef
1/2 tsp sage
2 cloves garlic, minced
1 Tbsp Worcestershire sauce
2 Tbsp soy sauce
1/4 cup butter
pie dough
3 green tomatoes, sliced
  1. Heat 1 Tbsp oil over medium high heat in a skillet.  Add onions and saute about 20 minutes, until onions are caramelized.  
  2. Season with salt and pepper and remove from heat.
  3. Add 1 Tbsp olive oil to the skillet,  Add the celery and carrots and saute for 3-4 minutes. 
  4. Add ground beef and continue to cook until meat is browned.
  5. Add sage and garlic and saute until garlic is fragrant, about 30 seconds.
  6. Add Worcestershire sauce, soy sauce, and butter, and cook until butter mlets.
  7. Stir in 2 Tbsp cornstarch and let cool.
  8. Preheat oven to 350.  Roll out half of the pie dough and use it to line a baking dish.
  9. Place the meat filling in the dough-lined baking dish.  
  10. Mix 1 Tbsp corn starch with the onions, and layer the onions over the meat.
  11. Lay the tomato slices over the onion and season with salt and pepper.
  12. Fold sides of pie dough over the meat and tomatoes.
  13. Roll out remaining pastry dough and place on top of the folded dough to cover the top of the "pie."  Press down on edges to seal, and crimp with a fork.  Pierce the cover several times with a sharp knife.  Bake for 1 hour.

Wednesday, September 11, 2013

Getting to the Meat of It: Mincemeat Pie and Cookies


While we were visiting Thatmom, we decided to take advantage of Irvine Regional Park, a giant park with all sorts of fun things.  Including a train!


Per usual, Thatbaby fell asleep on the way there.  Really, the only time he stays awake in the car is when you're dying for him to fall asleep.  But as soon as he woke up, he shouted "Choo Choo!"  Guess he remembered where we were going.


He sat with Thatmom on the train, whom he gleefully refers to as "A-ma."  And they pointed out all the fun things to each other like the horsies, fishies, peacocks, and lakes.  And every few minutes Thatbaby called out "Alll Aboard!"


And he was ever so brave in the tunnel.


Afterwards, even though it was 1000000 degrees outside, Thatbaby wanted to explore the park, the playgrounds, the ducks, and the ponies.  He found a way to communicate with them.  He would neigh, and the pony would paw his at the ground with his hoof.  And then Thatbaby would paw at the ground with his foot.


Even with the heat, it's definitely feeling like fall.  I even saw some leaves changing color when I went on my run on Saturday.  I wanted to make a harvest type meal, and flipping through the Fannie Farmer cookbook had me land smack dab on Mincemeat.  I know it's typically a Christmas type thing, but with all the dried fruits and apples, it seems autumnal to me.

Mincemeat was originally a way of preserving meat.  Like keeping fruit fresh year round, mincemeat allowed meat to be stored for long periods of time (Thatmom's friend described it as "indefinitely").  Thatboy had a really hard time with the concept of eating meat for dessert.  And I'm not going to lie, the thought of it weirds me out a little too.  But then I started cooking it.  And the aroma of candied fruit, molasses, sugar, cinnamon, nutmeg filled the house.  And you kind of forget about the meat, which is such a small part of the recipe.  And it doesn't taste like meat either, just sweet and spicy (but the cinnamon kind of spice, not the sriracha kind!)  Of course, this recipe makes a boatload of mincemeat (in fact, this is what I made, which cuts the recipe in third.)  And I still have a ton left.  So I'm taking suggestions for great uses for mincemeat!


Mincemeat  (From the Fannie Farmer Cookbook)
1 1/3 chopped lean beef
2/3 chopped beef suet
1 lb dark brown sugar
2/3 cup molasses
2/3 quart cider
1 lb dried currants
1 1/3 lbs raisins
1/6 lbs citron
1 lb apples, peeled, cored, and sliced
1/3 quart brandy
1/3 Tbsp cinnamon
1/3 Tbsp mace
1/3 Tbsp ground cloves
1/3 tsp nutmeg
1/3 tsp allspice
2/3 tsp salt
  1. Put the beef, suet, brown sugar, molasses, cider, currants, raisins, and citron in a large pot.  Cook slowly, stirring occasionally, until the sugar and citron melt.
  2. Add the apples and cook until tender
  3. Add the remaining ingredients and cook 15 more minutes, stirring frequently.  


Mincemeat Cookies (From the Fannie Farmer Cookbook)
1 cup shortening
1/2 tsp vanilla
1 1/2 cups sugar
3 eggs
3 1/4 cups flour
1 tsp salt
1 tsp baking soda
1 cup chopped nuts
1 1/2 cups mincemeat
  1.  Preheat oven to 350.  Cream the shortening.
  2. Add the vanilla, sugar, and eggs and mix well.
  3. Mix the flour, salt, and baking soda together and add to the first mixture, blending well.
  4. Stir in the nuts and the mincemeat.  Arrange by teaspoonfuls on the cookie sheets.  Bake for 8-10 minutes, until lightly browned.


Mince Pie (From the Fannie Farmer Cookbook)
2 balls of pie dough
1 pint of mincemeat
  1. Preheat oven to 425. Line a 9 inch pie pan with 1 ball of the pie dough.
  2. Fill the pan with the mincemeat.
  3. Roll out the other ball of pie dough and make a top crust.  Crimp the edges and cut vents.  Bake for 10 minutes.
  4. Lower the heat to 350 and bake 40 minutes more, until browned.