
It will come as no surprise to you that we filled our month of October with lots of Halloween activities, so get ready for a November filled with Halloween tricks and treats.
When I asked my kids what their favorite Halloween activity was, they both responded that it was making haunted gingerbread houses, so I thought I would start with that!
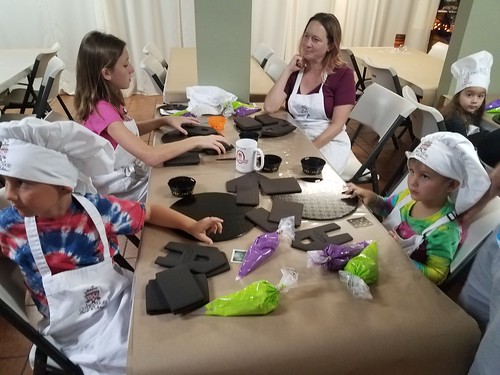
I was flipping through Facebook one day when I saw that Cute Cakes Bakery was running a special on their Spooky Gingerbread workshop - it was half off for the next week. A quick check with the kids and a look at our schedule and I signed them up.
Neither of my kids has ever done a decorating workshop, but it seemed like something that would be right up their alley. They both love to help me in the kitchen, Thatkid makes dinner every week, and as a family, we have made our fair share of gingerbread houses.
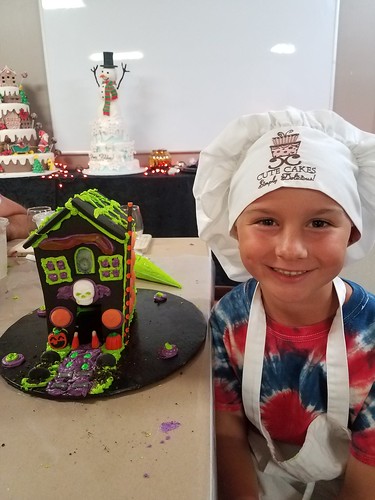
When we arrived, the bakery was closing up for the day, but they stayed open long enough for the adults to grab a mimosa or beer. Each station was set up with a hat, apron, frosting bags, and the gingerbread walls. Black gingerbread walls. Because it's a haunted house!


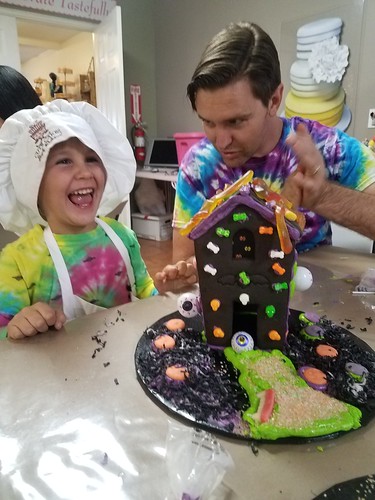
Our kids were actually did really well at listening to instructions and taking it step by step. Thatboy and I did the divide and conquer routine, each helping one of the kids with the frosting bag and putting the pieces together.
The highlight for the kids, and what really made it all worth it, was the extensive candy bar. If you've ever made a packaged gingerbread house before, you know they're a little stingy with the decorations. Here the kids got free reign to take and use as much candy as they'd like. And my boys definitely took advantage of that.


While Thatboy and I helped a lot with the construction of the house, the decorating was all them.
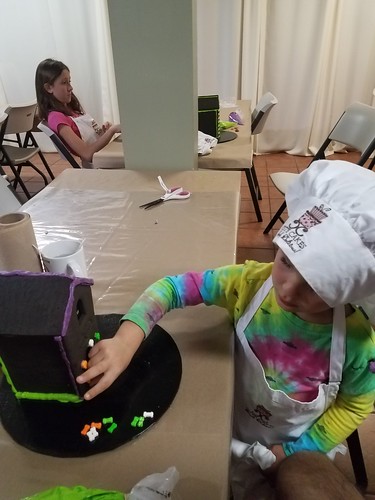
Thtboy went with a vision - to make it look like an actual haunted house, complete with a graveyard in the front yard, and candy corn gateposts for the front door.
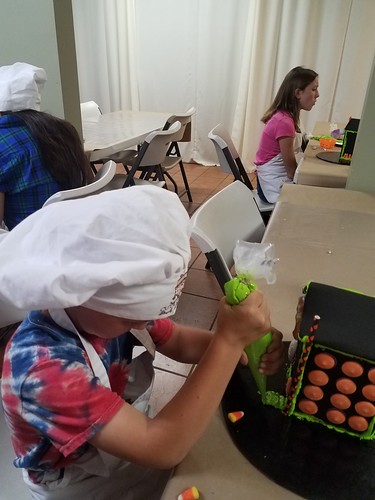
Thatbaby's goal was to get as much candy on that house as humanly possible.
The boys had so much fun, and bonus, we had fun table decorations for the rest of the month! They're already asking to go back for the Christmas Gingerbread House Workshop.
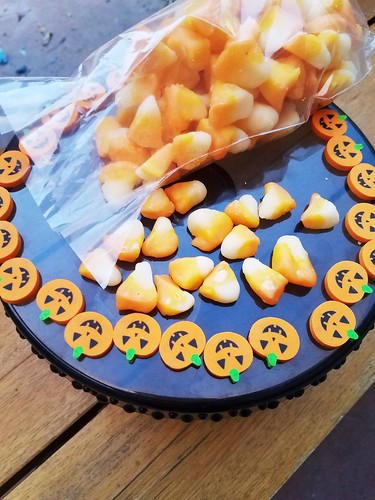
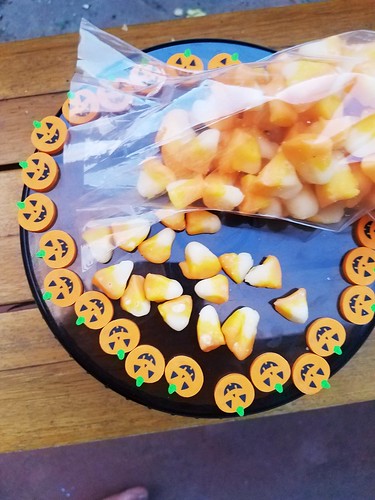
In addition to this new Halloween activity, we tried a new Halloween treat this year - making our own candy corn. I should warn, this is not for the faint of heart. The warm dough doesn't love to hold its shape when rolling into strands, and it took me forever to figure out how to form them into a wedge for cutting. There were some really ugly ones in the bunch.
I should also warn that these don't taste like store bought candy corn. They have a flavor all their own, aided by that vanilla extract. They're SUPER sugary, so a bigger hit with the kids than me, but I find them way more appealing than store bought candy corn!
Candy Corn (From Alton Brown)
1 1/4 cups confectioners sugar
6 1/2 tsp powdered nonfat milk
1/4 tsp salt
1/2 cup sugar
1/3 cup light corn syrup
2 1/2 Tbsp water
2 Tbsp butter
1/2 tsp vanilla
yellow and orange gel paste food coloring
- Combine the confectioners sugar, dry milk, and salt in a food processor. Pulse until combined.
- Combine the granulated sugar, corn syrup, and water in a 2 quart pot. Place over medium heat, cover, and cook for 4 minutes.
- Add butter and bring the syrup to 230 degrees. Remove from the heat.
- Add the vanilla and the confectioners sugar mixture and stir until combined. Pour on a sheet pan lined with a baking mat and cool until it is cool enough to handle. Divide the dough into 3 pieces.
- Add 2 drops of yellow food coloring to one piece and knead the color in.
- Add 2 drops of orange food coloring to a second piece and knead the color in. Leave the third piece white. Roll each piece of dough into an 18 inch long strand. Cut each strand in half and roll into a strand that is 22 inches long and 1/2 inch thick.
- Lay the strands side by side - orange, yellow, then white, and press them together. Cut into 4 inch pieces. Then press each piece into a wedge, with the orange on bottom and the white part on top coming to a tip.
- Cut each wedge into individual candies. Let dry for at least 1 hour on parchment paper.


Okay, I'm DEFINITELY going to see if there are classes like this around here. Remy would LOVE this! She's always telling me "You stay here, I'm going to make dinner." Terrifying and adorable.
ReplyDelete