Pages

Thursday, June 25, 2015

A Homemade Life: Vanilla Bean Buttermilk Cake with Glazed Oranges and Creme Fraiche


So I never really got a chance to celebrate my birthday this year.

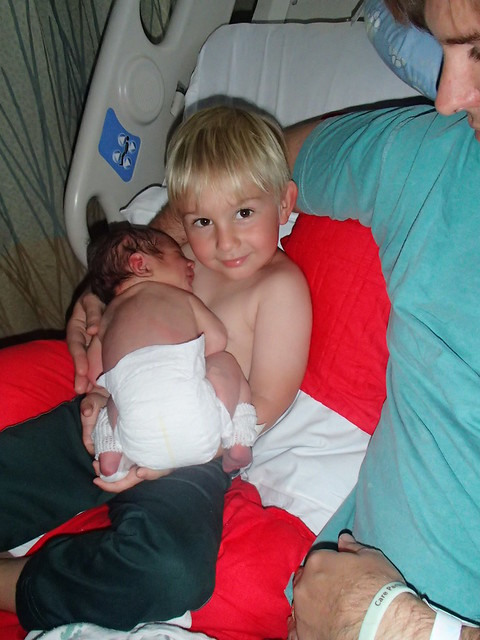
I guess that's not entirely true.  This was pretty much the extent of my birthday celebration:
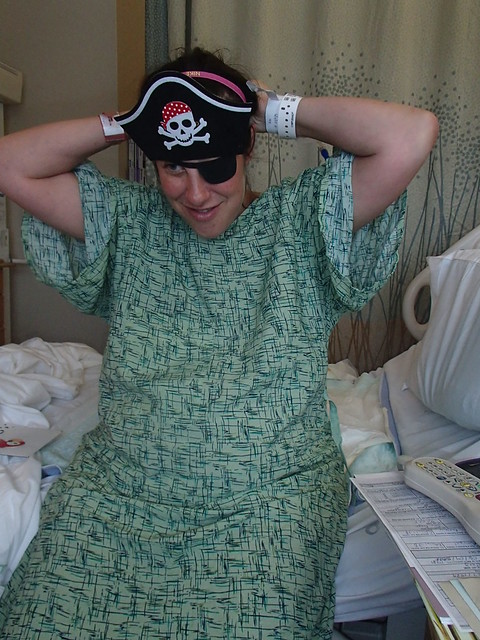

There was no cake, no singing, and my birthday meals consisted of a lifeless quesadilla for lunch and sorry hospital stirfry for dinner.  Let's not even get into my beautiful birthday attire.  Let's just say hospital bracelets were not really what I had in mind when requesting jewelery.

During one of my poor "woe is me" bitching sessions to L&O about how I am officially done with celebrating my birthday because we will now be celebrating Thatbaby's birthday instead, she mentioned that my amazing group of friends would never let me celebrate alone.

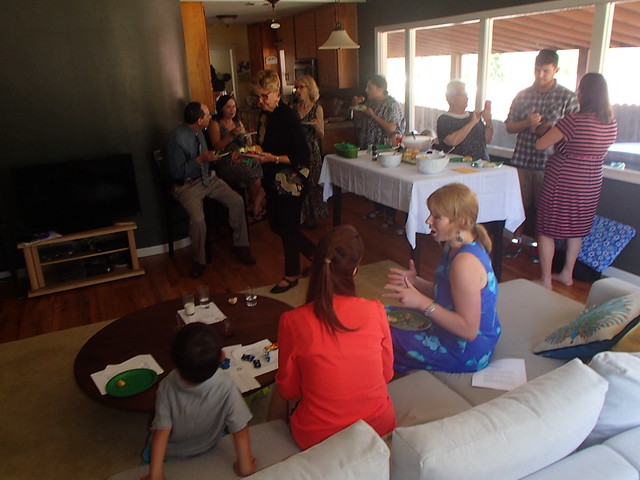
Which gave me a great idea.  The girls had been planning for the past month to come over after the baby was born and make up for the fact that I missed my spa day.  They promised to bring food and good company.  And I decided we would also use the opportunity to celebrate my birthday.  Yeah, I kind of threw my own party.  And L&O was right, my friends didn't hesitate to happily agree.

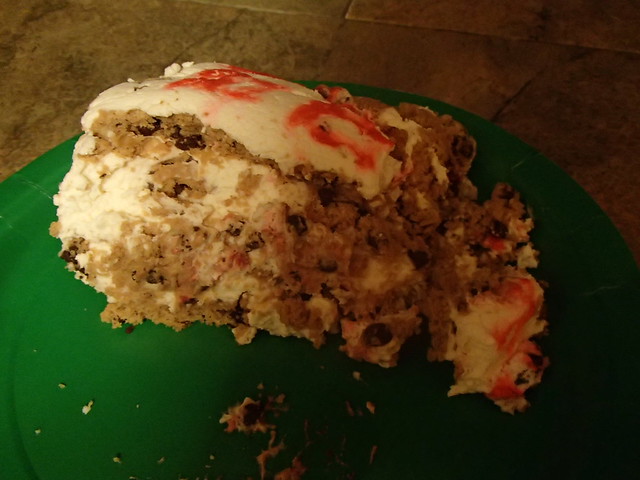
Mrs. Pirate asked what my favorite foods were, and was quick to organize a meal that included all of them.  The girls brought drinks, gnocchi, salads, and even cake.  (This was all that was left after our evening).

And M brought Thatbaby's newest best friend.  K was born just 4 days before Thatbaby (but look how much tinier she looks!)
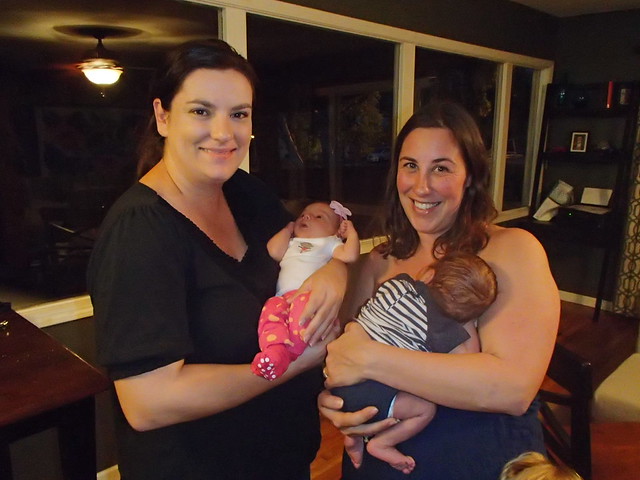


It was one of my favorite birthday celebrations - just having some of my closest friends over to eat, drink, and chat.  It was also nice to not have to do much other than be present.

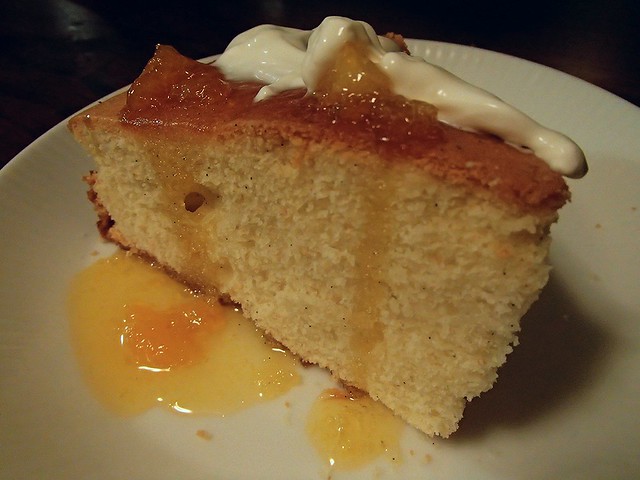
I'm especially happy that I got some cake - because really it's not a birthday without.  Horsewhisper asked me what my favorite kind of cake was.  And I answered her truthfully - anything with frosting.  This cake is lacking in the frosting department, which makes it a complete failure as a birthday cake.  But perfect for a weekend tea, or a non-birthday gathering of friends.  This is Thatboy's favorite cake from A Homemade Life.  Which he admits was unexpected.  Even without the oranges and creme fraiche, he liked the sweetness and denseness.  Almost pound-cake like.
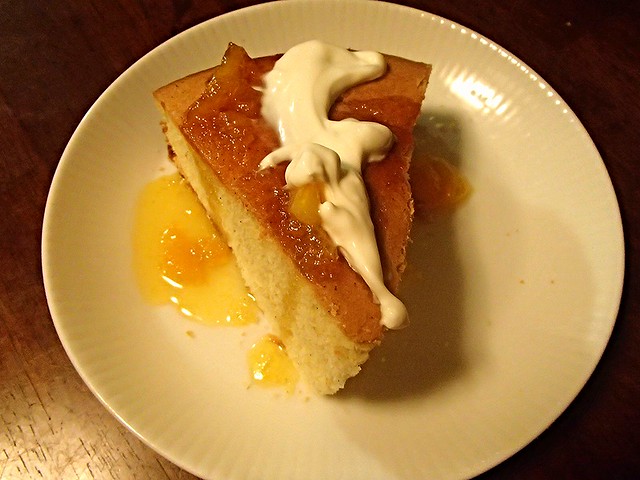
Vanilla Bean Buttermilk Cake with Glazed Oranges and Creme Fraiche (From A Homemade Life)
4 large egg yolks
2/3 cup buttermilk
1 1/2 cup sugar
1 vanilla bean
2 cups cake flour
1 Tbsp baking powder
1/2 tsp salt
1 stick unsalted butter, room temperature
4 oranges
creme fraiche

  1. Preheat oven to 350.  Grease a 9 inch springform pan with baking spray.  Line the bottom of the pan with a  round of parchment paper and spray it too.  Whisk the egg yolks with 1/4 cup of buttermilk.
  2. Put 1 cup sugar in a stand mixer.
  3. Use a sharp knife to split the vanilla bean in half from tip to tip.  Run the back of the knife down each half of the pod, scraping out the seeds and dump them into the bowl with sugar, rubbing the seeds into the sugar.
  4. Add the flour, baking powder, and salt to the vanilla sugar.  Beat on low speed for a few seconds.
  5. Cut the butter into pieces and add it to the dry ingredients, along with the remaining buttermilk.  Beat on low speed until the ingredients are moist.  Increase the speed to mediuma dn beat until well combined, about 1 minute.
  6. Scrape down the sides of the bowl with a  rubber spatula, then add the egg mixture in three doses, beating well after each addition.  Scrape down the sides of the bowl, and beat for 30 seconds on medium speed. 
  7.  Scrape the batter into prepared pan and bake for 40 minutes.  Cool the cake in the pan on a rack for 15 minutes, then remove the sides and invert the cake onto a plate.  Remove the bottom parchment and turn upright onto the rack to cool completely.
  8. Supreme 3 of the oranges.
  9. Juice the fourth orange.  Add juice from the supremed oranges so that you have 1/2 a cup of orange juice.  Pour the juice into a 2-quart saucepan.
  10. Add the remaining 1/2 cup sugar and cook over medium heat until the sugar dissolves and the mixture reduces to a deep orange gold syrup, about 10 minutes.
  11. Add the supremes, stirring them gently in the syrup and cook until warmed through.
  12. Serve oranges with wedges of the cake and spoonfuls of creme fraiche.

Wednesday, June 24, 2015

Crave Wednesdays: Roasted Garlic Pizza


For me, garlic is a kitchen staple.  The one ingredient that is truly transformative.  If you have no other herbs or spices, garlic alone can bring complexity to a dish, turn the flavors from bland to vibrant.
Garlic also has the unique quality of being transformed itself by a little heat.  Raw garlic is sharp and biting.  It's use needs to be controlled so that it doesn't become overpowering.  Throw some garlic in a pan with warmed olive oil and that little bit of heat helps to create a richer, deeper flavor.  But roasting?  Roasting completely changes the quality of garlic.  It becomes mellow, sweet, and while raw garlic must be tempered, roast garlic can (and should) be consumed in excess.

A roast head of garlic really needs little else.  It becomes soft and pliable enough to be spread over bread - as creamy as butter.  On Father's Day my dinner came with fingerling potatoes and roasted garlic cloves - the cloves `requiring as much fork space as the potatoes.

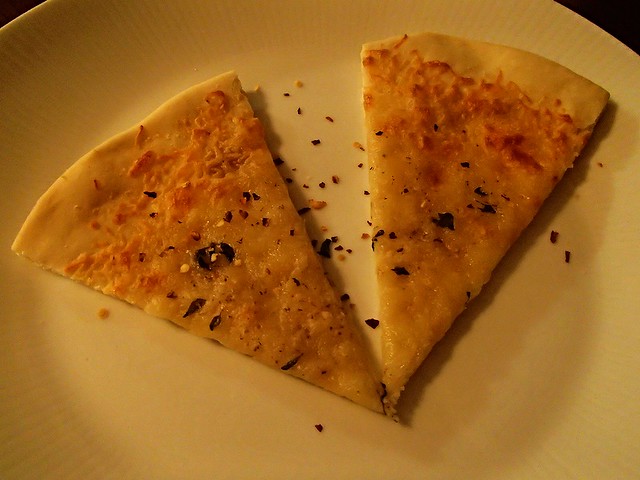
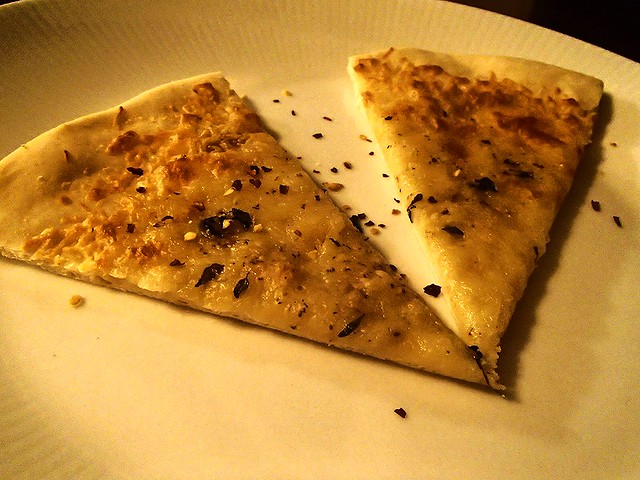
This pizza makes exceptional use of roasted garlic.  There is little else to distract from the warm garlic flavor spread atop the crust. And this garlic is double roasted - once as a whole head, and again when placed atop the pizza.  Cheese, garlic, and a good crust - you won't even miss the tomato sauce.

Roasted Garlic Pizza (From Cooking Light)
1 garlic head
1/2 tsp dry yeast
1/3 cup warm water
2 1/4 oz flour
2 3/8 oz bread flour
1/2 tsp salt
1 tsp olive oil
1 Tbsp cornmeal
1 cup shredded mozzarella
1/4 cup grated Parmigiano-Reggiano
2 tsp chopped oregano
1/4 tsp crushed red pepper

  1. Preheat oven to 375.  Remove white papery skin from garlic head and wrap in foil.  Bake for 45 minutes.  Cool 10 minutes.  Separate cloves and squeeze to extract garlic pulp. Discard skins.
  2. Dissolve yeast in 1/3 cup warm water in a small bowl and let stand 5 minutes.
  3. Place flours and salt in a food processor and pulse 2 times.
  4. Add oil to yeast mixture. and add to the flours in the food processor, with the processor on.  Process until dough forms a ball and then process another minute.
  5. Turn dough out onto a floured surface and knead lightly 4 to 5 times.  Place in a large bowl coated with cooking spray.  Cover and let rise 1 hour.
  6. Increase oven temp to 400.  Punch dough down, cover and let rest 5 minutes.  Roll into a 10 inch circle and place on pizza pan sprinkled with cornmeal.
  7. Spread roasted garlic evenly over pizza, leaving 1/2 inch border.
  8. Top with cheeses, oregano, and pepper.  Bake for 12 minutes.  Cut into 8 wedges.

Monday, June 22, 2015

Mommy Mondays: How To Throw A....

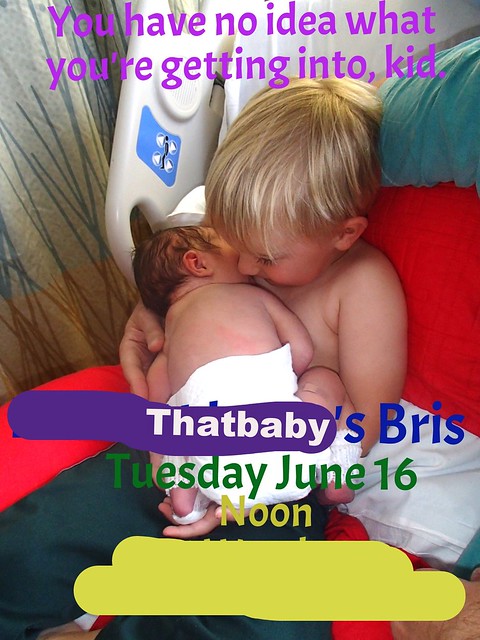
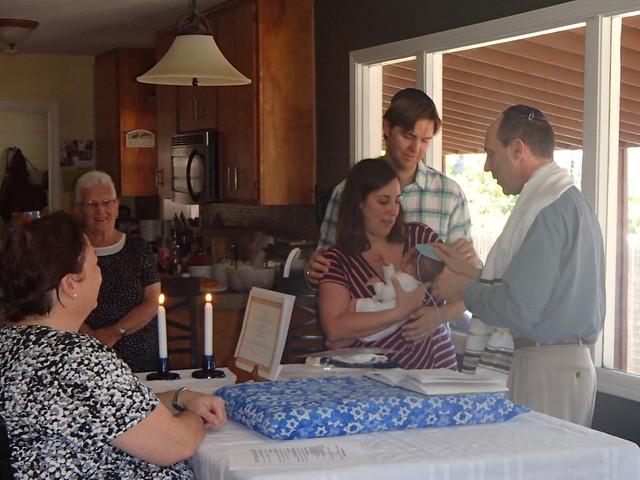
Being the mom of two Jewish boys I am now an expert at planning and throwing a Brit Milah - the Jewish ceremony during which a boy is circumcised.  This is a very specialized expertise.  For most, this is not the sort of thing they ever have to worry about.  However, the basics in planning are equally helpful in planning for Sip&Sees or Meet the Baby Parties - really any sort of get together that happens relatively soon after the birth of the child.  So here are my tips for planning a baby celebration following the birth of your child.

1) Prepwork:  The first few weeks of parenthood are a bit of a blur - and I say that as one who is deep in the throes of those first few weeks.  So if you're planning on having people come over to coo at your little one, you should get as much done as you can, before the baby comes.  For me, this means that around 38 weeks I started making and freezing challahs, cookies, and strudel - to serve at the bris (boy) or baby naming (girl).  Because we knew there'd be a Jewish ceremony involved, we also contacted a mohel (the doctor performing the circumcision) and our Rabbi ahead of time.

2) Keep invites simple: I absolutely love paper invites.  Mostly because they look so much nicer in memory books than evites  But when you're short on time, paper invites just won't cut it.  A bris occurs 8 days after the boy is born, which means I need to get the word out as soon as possible.  For both boys, we were out of the hospital the day after they were born, and I sent out an email the night we got home.  Which doesn't mean you can't get creative. 


3) Outsource!  As much as I usually overdo it when it comes to entertaining, with a newborn in the house, you just can't.  Which means there is no shame in having prepared food brought in.  (Truthfully there is never any shame in having prepared food brought in - whatever makes the host happy makes the guests happy) For Thatbaby's bris we had Terriyaki sliders, coleslaw, potato salad, fruit salad, along with the challah, cookies, and strudel.


And Thatbaby's brit milah went off with only slight hitches.  Our original mohel was unavailable on the day, which meant despite my prep, I was left calling a different mohel the day I gave birth to introduce myself and ask about his availability the following week.

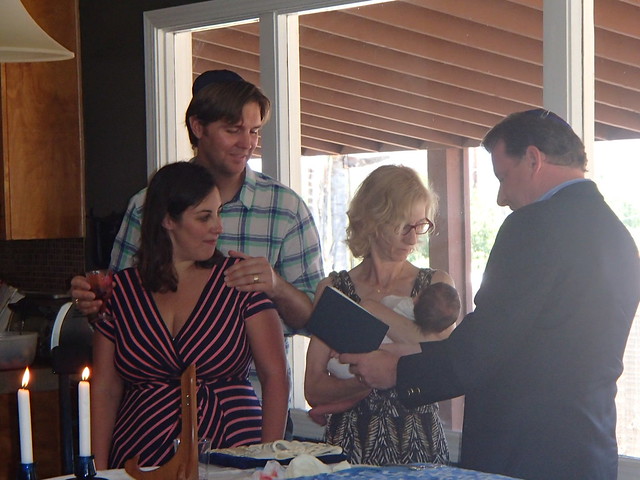
But the doctor we ended up with was wonderful and he did a great job at explaining all the parts of the ceremony to our guests who were unfamiliar - the reason for the circumcision, why it is done at 8 days, and the various roles of honor.  The circumcision itself went as well as these things go, meaning there were tears and blood, but both ceased after mere moments.


After the circumcision came the baby naming portion of the ceremony, where we bestowed a Hebrew name on Thatbaby.  This is where the Rabbi stepped in and gave his blessing, as we shared how the name we chose was a way to honor my cousin China.

And of course, after that, as with all Jewish ceremonies, the food comes out.  And the baby gets passed, and we all get a chance to chat and catch up - which is the part that translates to all get togethers following a birth.

Sunday, June 21, 2015

Sunday Runday: San Diego Sundays

As I mentioned a couple of weeks ago, Sunday Rundays are taking a bit of a hiatus.   At least until I get the all clear to run again.  As it is, Friday was the first day I even attempted any fitness, going for a 2 mile coastal walk with Thatboy and Thatbaby.

So when SDMom mentioned that she wanted to start up a "San Diego Sundays" link up, I felt the timing couldn't be better.  Especially since I'm home for the next few weeks and get to take part in all the great things San Diego has to offer this summer.

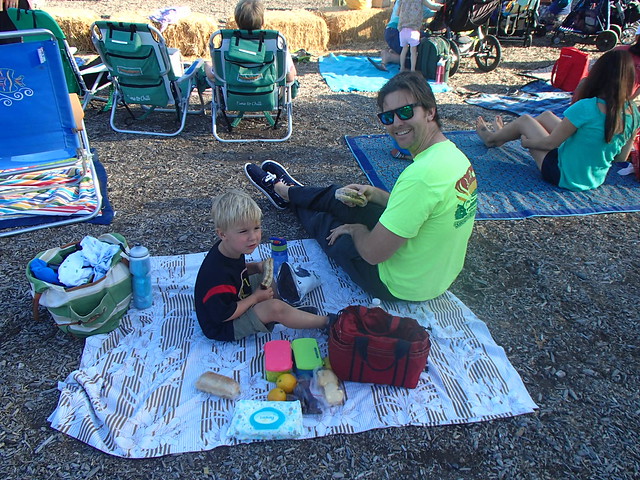
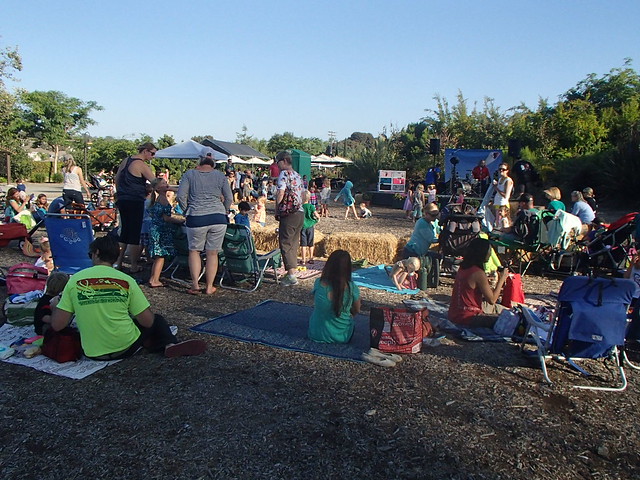
One of our favorite summer-time activities is Thursday Family Fun Night at the San Diego Botanical Garden.  In general, we're big fans of the Botanical Garden, but we tend to find ourselves there in the winter for Garden of Lights, and in the summer for the Family Fun Nights - which is their summer concert series.

As the name implies, Family Fun Nights take place every Thursday night all summer long.  Hamilton Children's Garden is open from 4:30 to 8:00, with live music from 6-7pm. The concerts are included with the price of admission - $14 for adults, $8 for kids.


All the music is "kid friendly."  Last week we were treated to the musical stylings of the Boo Hoo Crew.

With a new baby at home, Thatkid relished in being out, active, and able to shake his pirate booty.


The concert provides a grass area for the "grownups" which also serves as a great place for picnics - and my love of picnics is no secret. 


The front is marked off by bales of hay, which creates a perfect space for the toddler mosh pit that ensues. 


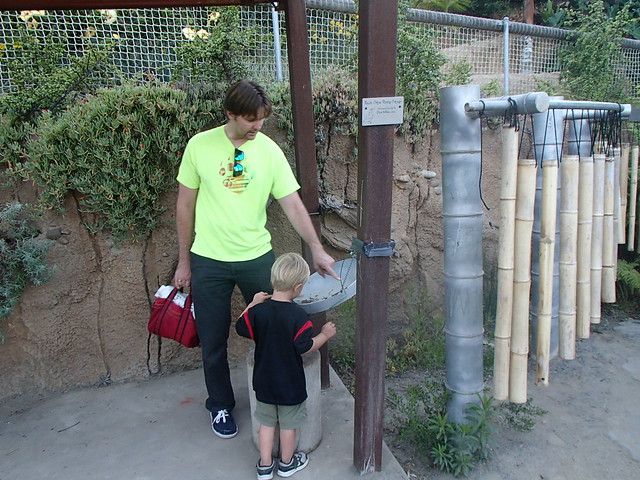
Following the concert, the Children's Garden stays open for another hour, which gives the kids more time to run off that energy.  There are tree houses to explore,


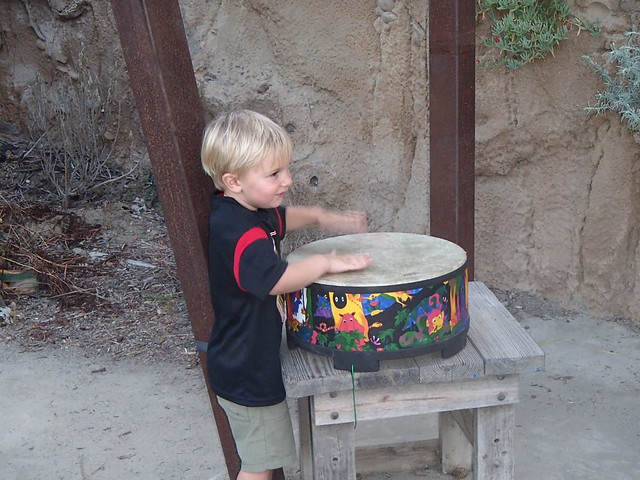
and loads of organic musical instruments - made from natural objects.


Thursday Family Fun Nights only goes on till August, so pack a bag and your favorite music lover and head over to the Botanical Gardens.

Friday, June 19, 2015

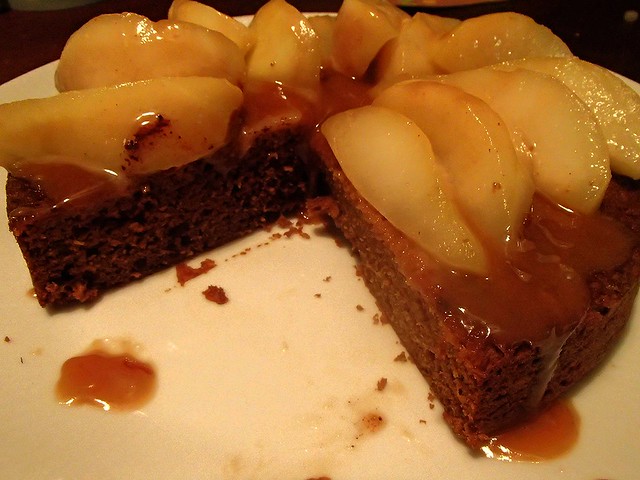
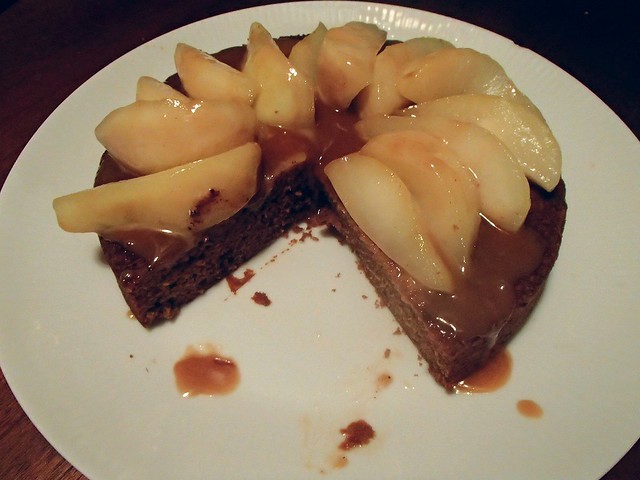
A Homemade Life: Fresh Ginger Cake with Caramelized Pears


This is another post where I tell you how Thatkid and I are different than Thatboy.  Today we're going to talk about ginger.  Thatboy is not a fan of ginger.  Sure he'll put away a gingerbread cookie ro two, but the minute I add ginger to a dish, especially a baked dish, Thatboy turns up his nose and tells me there's too much ginger".  It doesn't really matter how much I use - it's always too much.

Thatkid on the other hand, is a huge fan of baked goods with ginger.  Which is really surprising given his declaration that almost everything is "too spicy."  Black pepper is too spicy.  Garlic is too spicy.  But ginger? Apparently it passes whatever tastebud test he has. 

So this is a cake for Thatkid and I.  I had to rescue the pears from both Thatboy and Thatkid who are apparently pear-fiends, with the promise they would be used in a cake.  Which was rather cruel given that I knew Thatboy would not be eating the cake.  But that's really his loss.

The cake is a simple gingerbread, which I love in the winter.  What takes this past the simple gingerbread is the caramelized pear topping.  Caramelized anything makes something seem pretty fancy, and this caramel recipe is one of the easiest I've done.  Since I have a tendency to ruin caramel.

Fresh Ginger Cake with Caramelized Pears (From A Homemade Life)
1 cup flour
1/2 tsp baking soda
1/4 tsp salt
1/4 cup unsulfured molasses
1/4 cup sour cream
4 Tbsp butter, melted
1/4 cup light brown sugar
1 egg
2 tsp finely grated, peeled, fresh ginger
1/2 tsp grated lemon zest
2 pears
1 Tbsp lemon juice
2 Tbsp unsalted butter
1/4 cup sugar
3 Tbsp water
3 Tbsp heavy cream
1 1/2 tsp brandy
  1. Preheat oven to 350.  Grease an 8 inch round baking pan with baking spray. In a medium bowl, whisk together the flour, baking soda, and salt.
  2. In another medium bowl, combine the molasses, sour cream, melted butter, brown sugar, egg, ginger, and lemon zes tnad wisk until smooth.
  3. Add the flour mixture and stir until just combined.  Pour the mixture into the prepared pan and bake 15-20 minutes.  Cool the cake in its pan for 5 minutes then turn onto a wire rack and cool to room temperature.
  4. Peel the pears and cut each lengthwise into 8 wedges, discarding the cores.
  5. Place them in a medium bowl and toss with lemon juice.
  6. In a heavy skillet, melt the butter over medium heat.
  7. Add the pears and cook, shaking the skillet occasionally for 3 minutes.
  8. Sprinkle them with sugar and continue to cook, shaking the skillet and gently turning the pears, until the sugar is melted and the pears are tender.  Using a slotted spoon, transfer the pears back to their bowl.
  9. Boil the sugar butter mixture over medium heat until it turns a deep shade of caramel.
  10. Combine the water and and cream in a small bowl or cup.
  11. When the caramel is the right color, remove the skillet from the heat and carefully add the cream mixture.
  12. Add the brandy and a pinch of slat and return the skillet to the heat.  Simmer, stirring until thickened slightly.
  13. Return the pears to the skillet and cook until heated through.
  14. Serve the cake in wedges, with a few pieces of pear alongside and caramel drizzled over top.

Thursday, June 18, 2015

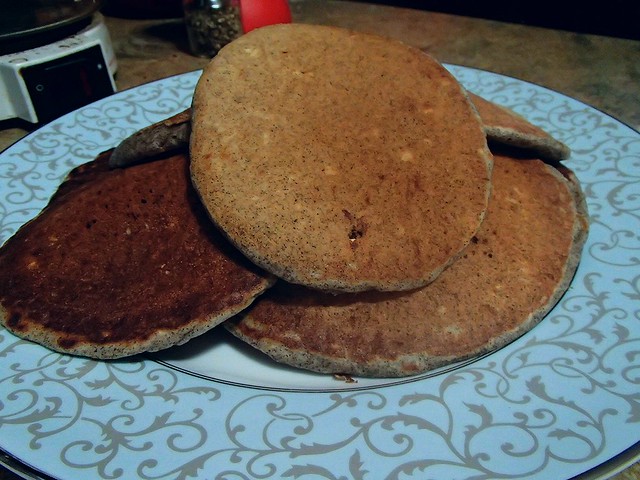
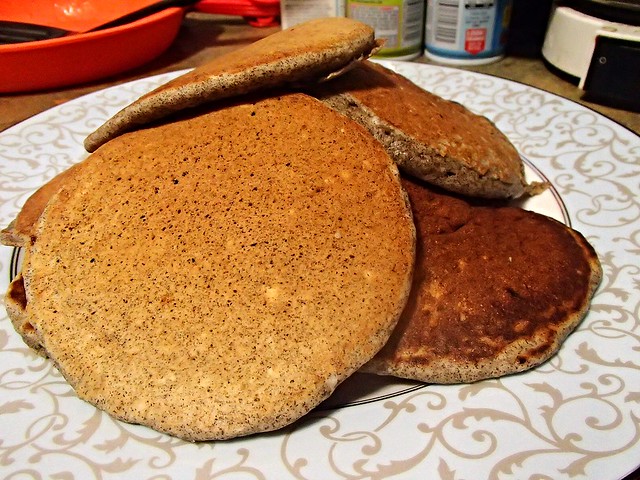
A Homemade Life: Buckwheat Pancakes


Father's Day is quickly approaching.  And with the new baby, Thatboy has decided that all he really wants for Father's Day is a trip to the Original Pancake House for breakfast.  The man is nothing if not predictable.  In fact, I had told Thatkid weeks ago we'd be taking Thatdad for breakfast there on Father's Day.  Of course, now Thatkid asks every morning if we're going out for pancakes yet.

It's funny that Thatkid will grow up associating pancakes with his father, because I have a similar relationship with buckwheat pancakes.  In truth, as I've mentioned before we weren't really a pancake family growing up.  And going out to breakfast was no guarantee that pancakes would make their way off the menu and on to the table.  With one exception.  Thatdad was a huge fan of buckwheat pancakes.  Because of this, buckwheat pancakes always seemed so grown up to me.  They weren't sweet like your typical pancakes, but had more of an earthy flavor, something you had to grow into.

I remember not liking them much as a small child, but appreciating their complexity as I got older.   When I made these buckwheat pancakes from A Homemade Life, I was a little worried in promising Thatkid there would be pancakes in the morning.  What 3 year old likes buckwheat pancakes?  My 3 year old apparently!  Thatkid either has a very advanced palate or just doesn't discriminate when it comes to pancakes because he loved these.  For me, it was nice to bring a bit of Thatdad to the breakfast table.  The only one who wasn't a fan was Thatboy, who doesn't have much of  a taste for buckwheat pancakes whatever their form.  Not all of us are grownups apparently.

Buckwheat Pancakes (From A Homemade Life)
2/3 cup flour
1/3 cup buckwheat flour
2 tsp sugar
1/2 tsp salt
1/2 tsp baking powder
1/4 tsp baking soda
3/4 cup buttermilk
1/4 cup plus 2 Tbsp milk
1 egg
2 Tbsp butter, melted
  1. In a large bowl, whisk together the flours, sugar, salt, baking powder and baking soda.
  2. Pour the buttermilk and milk into a medium bowl.
  3. Whisk the gg whitesinto the milk mixture.
  4. In a small bowl, use a fork to beat the yolk with the melted butter.
  5. Whisk the yolk mixture into the milk mixture.
  6. Pour the wet ingredients into the dry ingredients and whisk until just combined.
  7. Heat a large nonstick skillet over medium-high heat.  Brush the skillet with canola oil.  Ladle the batter in 1/4 cupfuls into the skillet.  Cook for 2-3 minutes, then flip and cook 1-2 minutes on the other side.
  8. Re-oil the skillet and repeat with more batter.  Serve warm with maple syrup.

Wednesday, June 17, 2015

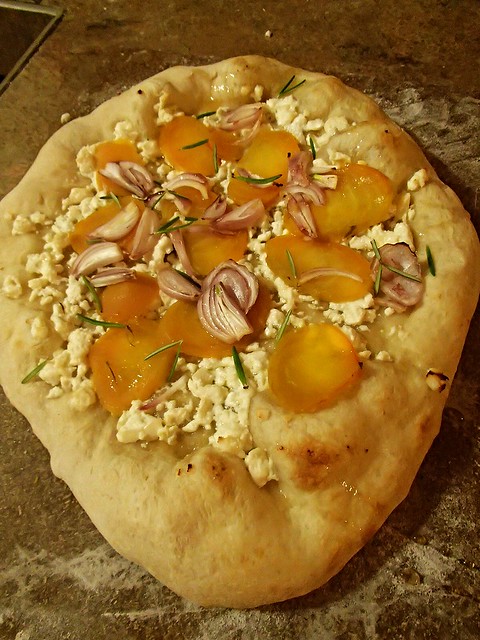
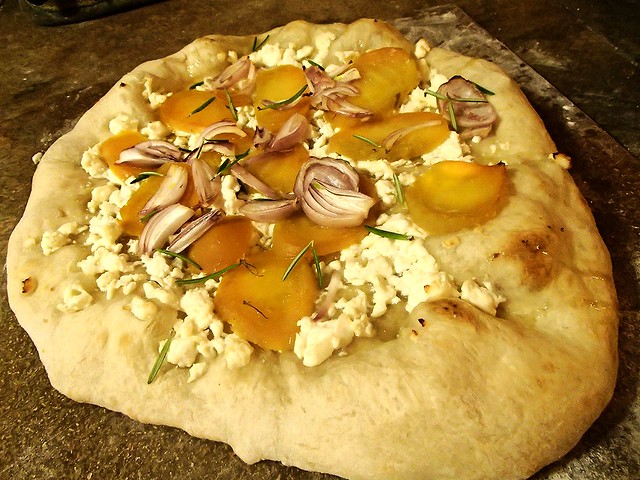
Crave Wednesday: Roasted Beet Pizza


Most normal people don't associate root veggies with summer.  Turnips and carrots usually grace fall tables.  Luckily I never claimed to be "normal people.:  For me, beets are a summer vegetable.  This is true even though preparation for them in this house always involves roasting.  Turning up the oven to an insanely high heat, which is something normal people avoid as the temperatures climb. 

But I brave through.  Because once roasted, the beets provide a sweetness that just seems fitting for summer.  Roasted beets, finely grated and tossed with vinegar serve as an excellent salad for picnics and barbecue.  Roast beets with goat cheese and arugula is the perfect salad to enjoy on a warm evening.   And roasting yellow beets, in thin circles resembling the summer sun, serve as a perfect foil to this light pizza.

No need for heavy sauces, a simple brush of olive oil helps to create a golden crust that needs no tomato to bring out the flavor.  Instead the sweet beets pair with salty feta, which, if cheeses were seasonal, would also belong in summer as it is often paired with mint, or watermelon, or bright tomatoes. A sprinkle of fresh herbs - a summer staple rounds out this pizza.

Roasted Beet Pizza (From Cooking Light)
1 golden beet
1 Tbsp cornmeal
pizza dough
1 tsp olive oil
1/2 cup crumbled feta cheese
1/4 cup vertically sliced shallots
1/4 tsp salt
1 tsp honey
1 tsp rosemary leaves
  1. Preheat oven to 450.  Leave root and 1 inch of stem on beet.  Scrub with a brush and wrap in foil.  Bake for 40 minutes.  Remove from oven and cool.  Trim off root and rub off skin.  Cut in half crosswise and thinly slice halves.
  2. Place a pizza stone in the oven and increase temperature to 500.  Sprinkle cornmeal on a baking sheet with raised edges.  
  3. Roll dough into 10 inch circle on baking sheet.  Brush oil over dough.
  4. Arrange cheese, beet slices, and shallots evenly over dough, leaving a 1/2 inch border.  Slide dough onto preheated pizza stone.  Bake for 8 minutes.
  5. Remove from stone and sprinkle with salt and drizzle with honey. 
  6. Sprinkle with rosemary.  Cut into 8 wedges.

Monday, June 15, 2015

Mommy Mondays: Introducing Thatbaby!

Click to play this Smilebox slideshow
Create your own slideshow - Powered by Smilebox
Create your own free slideshow design

If I had known writing about my prodromal labor last week would bring on the real thing I would have written about it weeks ago!

On Monday morning I woke up around 4am with more annoying contractions.  The same ones I'd been having for weeks that never seemed to progress.  So I figured I was in for a long, uncomfortable day.  

I went in to work, where they were no long surprised to see me.  At this point, we all figured I'd make it allllllll the way to my induction later in the week.  Besides, my birthday was on Tuesday and there was NO WAY I was having a baby on my birthday. 

That night Thatboy and I were watching a movie when the contractions started again.  What's funny about them is that they were farther apart than the ones I usually have.  I started timing them and they were 7 minutes apart - the farthest they'd ever been.  It was 10pm at night and I figured I should go to bed.  That usually got my contractions to disappear and I definitely didn't want labor starting.

By 11:30pm, the contractions were pretty strong and now every 4 minutes apart, but I could still talk through them.  I called Thatmom, crying that I was about to have a birthday baby.  She headed down to come watch Thatkid so Thatboy and I could head to the hospital. 
Thatmom arrived at 1:00am on Tuesday morning.  My birthday.  By that time, I was in agony.  I could no longer talk through the contractions, it took everything I could to get through them.  I tried various positions to get relief - sitting, standing, moving around, on the ball, on all fours, nothing worked.  The contractions were being sporadic, usually 4 minutes apart, sometimes 2 minutes apart depending on if I was moving around or not. I was vomiting, which was causing more contractions. 

We headed to the hospital.  It was the longest 20 minute drive I have ever taken.  Sitting in the car was probably the worst position out of all I tried!  And I was still vomiting.  We arrived at the hospital at 1:30am and the front desk took one look at me and sent me up to triage.  It was very "Hollywood" with Thatboy double parking the car at the entrance and rushing me in where I could barely tell them my name because of the contractions.  When they checked me I was 6cm dilated and 100% effaced.  They immediately got me admitted.  I could barely get up and into the wheelchair to get to the labor and delivery floor, having them wait through another vomiting and contraction episode before I could stand. 

By 2:30am I was in L&D with the anesthesiologist on his way.  It took at least half an hour for him to place the epidural, but after that, things got back to normal.  From 3-4am I was able to actually answer questions about my medical history, give them my name and birthdate, talk about my pregnancy and thoughts on the upcoming process.

Before she left the room at 4am, the nurse did another check. I was still 6cm, pushing 7cm and my water bag was "bulgy." We talked about whether it would break on its own or need to be broken. The nurse said the doctor would come in after shift change around 7am and based on progress we'd talk about it at that point. She tucked me in and told me to get some sleep and left the room.

I was anxious to get some sleep.  Other than the pain relief, I really wanted the epidural so I could get some sleep.  I'd been up for 24 hours at this point and I knew I wanted to rest before any babies showed up.  I closed my eyes and - my water broke. I called the nurse back in and got cleaned up, then she headed out again and I tried again to get some sleep.  After my water broke, I could feel the contractions, despite the epidural. They were still so much better than before, but still pretty
uncomfortable. I wasn't able to get any sleep.

At 4:40am the nurse came back in. The baby was experiencing Tachycardia (increased heart rate) and she was a bit concerned. She tried having me change positions, which didn't seem to help, so she called another nurse to bring an oxygen mask and internal monitor. The other nurse suggested they check me out and see where I was in terms of cervical progress. I was complete and the baby's head was almost hanging out. "If she pushes right now, this baby is coming out."

All of a sudden it was all hands on deck. I think every nurse on the floor was in my room, but no doctor. They were paging the doctor, but couldn't find her. I don't think they even broke down the bed. They had me start pushing anyway. Thatboy says after the first push, the head emerged, but it took about 4 more pushes for the rest of the baby to come out.

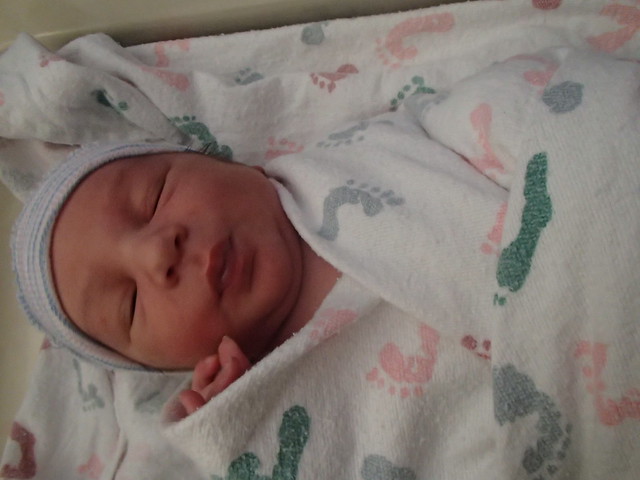
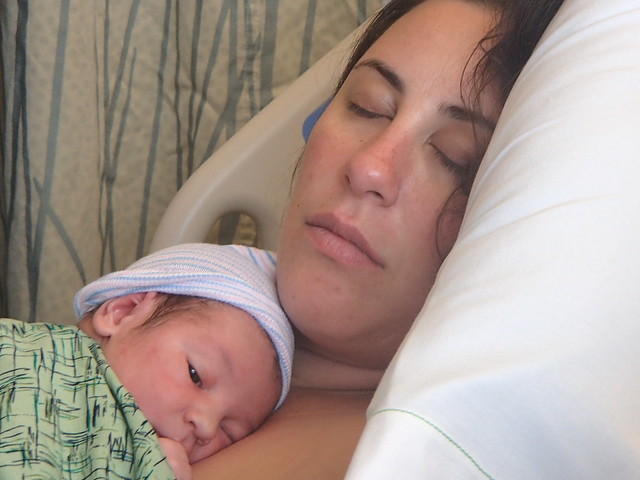
At 4:52am, less than 7 hours after my contractions started, less than an hour after my water broke, we met Thatbaby.  He was as blue as a smurf, but cried immediately and was placed on my chest for skin to skin as he was stimulated to help get the color into him. Apgars were 6/9 because of his blueness.


Thatbaby continues to be my Oppo-baby.  So very different from his big brother.  Breastfeeding has been so much easier this time around as Thatbaby has a voracious appetite.  Despite his rough start, he hasn't had the same issues as Thatkid, who suffered from jaundice for almost the first month of his life. 


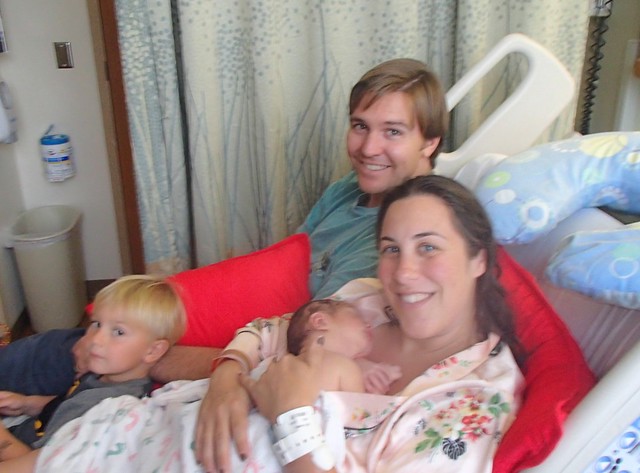
We're finding the adjustment to being a family of four much easier than anticipated.  There's so much less anxiety the second time around, because we already know what to expect, and how to handle situations.  Thatboy remarked that this time at the hospital it was almost vacation-like, just sitting around and relaxing.

Although I do think the benefit to having a weekday baby (and a second kid) is that there were far less visitors at the hospital.  Which gave us a lot more downtime.  Our only guests were Thatmom and Thatkid - who is madly in love with his little brother.

We've been told about jealousy, that it takes several days for a sibling to understand the baby isn't going anywhere, that we could expect all sorts of behavioral issues.  We were expecting the worst, which could be why things are going so well.  Thatkid is ridiculously protective of his brother, he doesn't want to give him away.  He wants to be whereever the little guy is, traipsing behind to watch diaper changes, peering into the crib, asking to "carry him" (hold him) multiple times an hour.  He is often fond of saying "He's MY baby.  No one else's."  I'm already taking such delight in my boys!

Friday, June 12, 2015

A Homemade Life: Stewed Prunes

I'm about to get really personal with you, maybe too personal.  We're going to talk about constipation.  It's a pregnancy and post pregnancy woe. 

I was lucky enough to not worry about it at all this pregnancy, except towards the end, when it was less about the actual constipation, and more about rectal pressure from the positioning of the baby.  You hear complaints from pregnant women about the bladder pressure - that feeling of having to pee all the time.  No one talks about "the other end."  But when the baby descends, you constantly feel like you have to go, even though usually you don't.  It's been the bane of my existence for weeks.

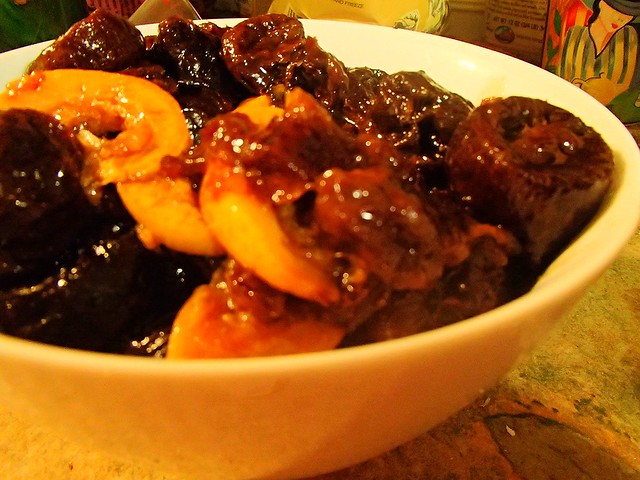
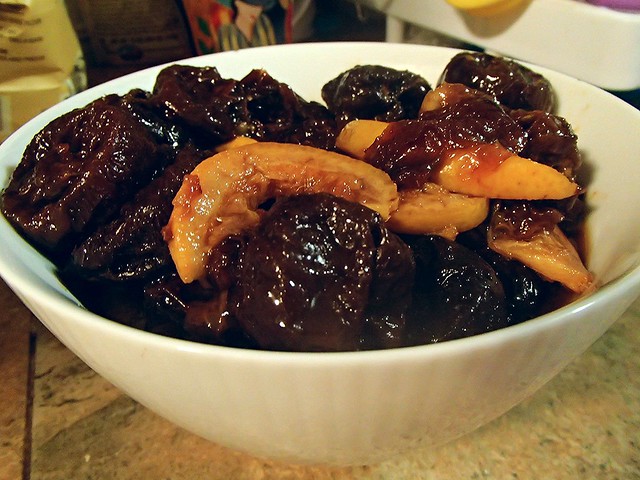
Here's another dirty little secret - I really dislike prunes.  I think it stems from my childhood when Thatmom made us drink prune juice regularly to "keep us regular."  But after having Thatkid, I gained a newfound appreciation for them.  So while I normally wouldn't get excited about stewed prunes recipe, given the timing of this one, I was more than happy to make and try it.

Wizenberg recommends serving it warm, and it is delicious that way, but lately I've made it a regular part of my breakfast, serving it cold from the fridge and I don't think it loses much served that way either.

Stewed Prunes with Citrus and Cinnamon (From a Homemade Life)
1 orange
1 lb pitted prunes
1 cinnamon stick
  1. Cut the orange in half from stem to tip, then slice it very thinly, peel and all.
  2.  Put the orange slices in a medium saucepan with prunes and the cinnamon stick.
  3. Add water just to cover.  Bring to a simmer over medium heat and cook for 30-45 minutes.
  4. Remove the cinnamon stick, cool slightly and serve.

Thursday, June 11, 2015

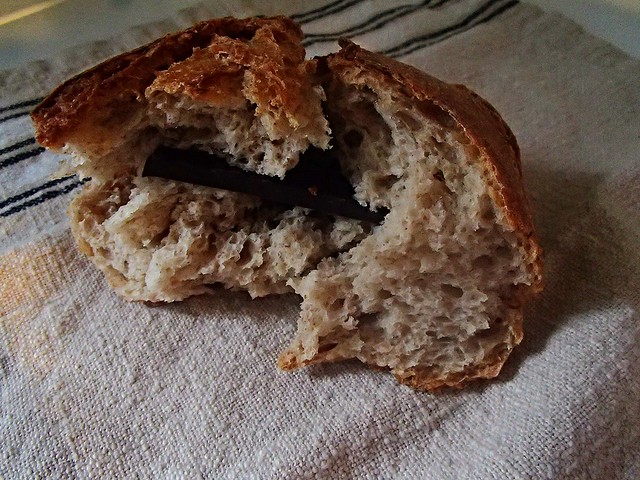
A Homemade Life: Bread and Chocolate

I think every blogger has a recipe that isn't really a recipe.  More like "you should mix these things together and eat them if you have common sense."  I have this thought every time I post a smoothie recipe, which really is nothing more than a list of ingredients.  Everyone knows how to make a smoothie in general terms - put things in a blender and press mix.

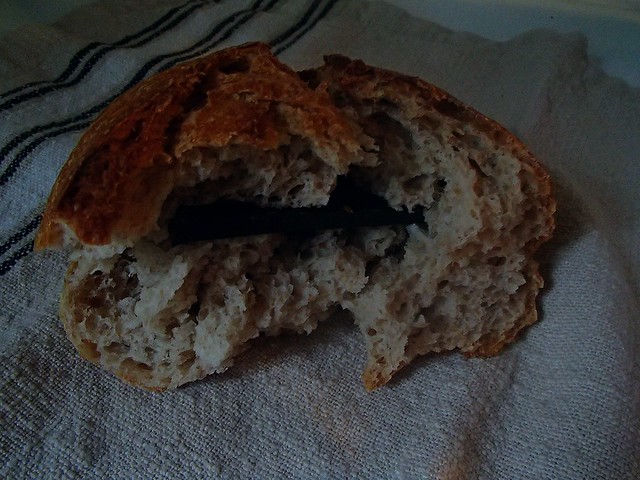
This is Wizenberg's non-recipe recipe.  Because really, it's just chocolate placed in a piece of bread.  I have a similar recipe that involves peanut butter and a piece of toast. 

The idea only sounds novel, until you stop and think about it.  Because really, chocolate goes with just about anything.  And the French do know how to do bread and chocolate.  While I never had this variation while in Paris, dunking a baguette in some hot chocolate was something I did on a regular basis. 

Bread and Chocolate (From A Homemade Life)
French style bread
dark chocolate
  1. Tear off a hunk of bread.  Slice or tear it across the middle, as though using it for a sandwich.
  2. Break off a piece of chocolate roughly the same length as the bread and insert the chocolate into the bread.

Wednesday, June 10, 2015

Crave Wednesday: Pizza Margherita


If you tell Thatkid that we're having pizza for dinner, his first words are usually something along the lines of "I just want cheese pizza."  I don't think it's very different from most kids.  Or a lot of adults.  There's something to be said for the simplicity of a cheese pizza. 

But if you're going for simple, it's also important to keep the ingredients fresh.  None of that pre-shredded cheese stuff.  I know that sounds snobby, and in truth, pre-shredded cheese certainly has it's place.  Especially when you need it to melt into something like macaroni and cheese.  But for a pizza with 3 main ingredients, each one should stand out on it's own.  Which means fresh mozzarella - that soft ball that crumbles in your hands and melts in your mouth.  This recipe calls for pizza sauce, but I usually make my margherita pizza instead with tomatoes - super ripe tomatoes that produce their own sauce when roasted first, or simply as they are warmed atop the dough in a very hot oven.  And of course, the final ingredient, bright green basil.  Which works with the flavors but also adds vibrant color to the pizza, mimicking those of the Italian flag.

Pizza Margherita (From Cooking Light)
1 cup warm water
10 oz bread flour
1 pk dry yeast
4 tsp olive oil
3/4 tsp salt
1 Tbsp cornmeal
3/4 cup pizza sauce
5 oz thinly sliced fresh mozzarella
1/3 cup basil leaves

  1. Pour 3/4 cup warm water in the bowl of a stand mixer with a dough hook attached.  
  2. Add flour to warm water and mix until combined.  Cover and let stand 20 minutes.
  3. Combine remaining 1/4 cup warm water and yeast in a small bowl and let stand 5 minutes.
  4. Add yeast, oil, and 1/2 tsp salt to flour.  Mix 5 minutes.  Place dough in a large bowl coated with cooking spray; cover surface with plastic wrap coated in cooking spray and refrigerate overnight.
  5. Remove dough from fridge and let come to room temperature for 1 hour.  Punch dough down.  Sprinkle cornmeal on a baking sheet.
  6. Press dough into a 12 inch circle on pan.  Crimp edges to form a 1/2 inch border.  Cover with plastic wrap.
  7. Put pizza stone in oven and preheat to 550.    Remove plastic wrap from dough and sprinkle with 1/4 tsp salt.
  8. Spread pizza sauce over dough, leaving a 1/2 inch border.
  9. Arrange cheese slices over pizza.  Place pizza onto pizza stone and bake for 11 minutes.
  10. Cut pizza into 10 wedges and sprinkle with basil.

Monday, June 08, 2015

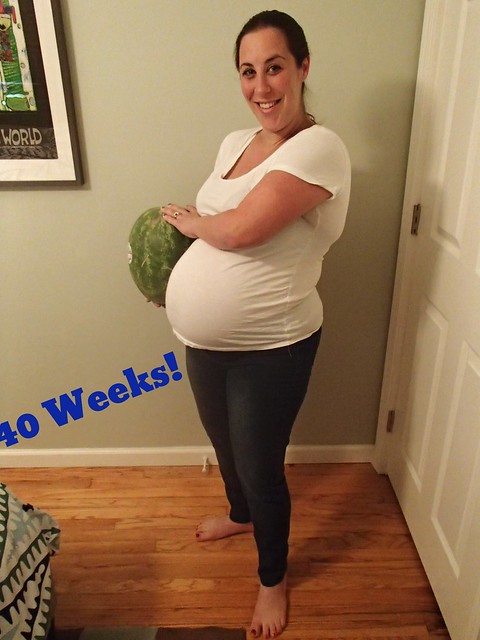
Mommy Mondays: 40 Weeks

I definitely didn't think I'd be writing this post - I was not expecting to make it to 40 weeks.  No one expected me to make it to 40 weeks.  Let alone PAST 40 weeks. 

And let me tell you, past 40 weeks is a terrible place to be.  Let me tell you a little about prodromal labor.

About 2 weeks ago, it started.  Contractions. Regular contractions, about 2 1/2 minutes apart.  But not painful, just uncomfortable.  "This is it" I thought, "labor is starting.  It's going to pick up and there will be a baby tonight!"  But the contractions never picked up.  They stayed 2 1/2 minutes apart, never getting stronger in intensity, until I fell asleep that night. The next morning?  Nothing.  No contractions.

They started again that night.  Again, 2 1/2 minutes apart, uncomfortable but not painful.  Continuing until bedtime and then stopping.  This continued for the entire week.  Contractions that led nowhere.  Sometimes at night, sometimes waking me up at night. 

Everyday I'd go into work, and every day they'd be surprised to see me there.  I was getting frequent texts from family asking how I was and if the baby was here yet.  All of this only further exacerbating the problem.

On Friday on  the way home from work, the contractions started getting stronger.  Still 2 1/2 minutes apart, but this time they were more than just uncomfortable.  Not crippling pain, but strong enough where I actually had to breathe through them.  "This is it!"  I thought.  I called Thatmom and had her come down to watch Thatkid.  Except, by the time she got to our house, the contractions had completely died out.  "Tonight" my friends told me.  "It'll happen tonight."  So Thatmom spent the night.  But, nothing happened.

More of the same this past week - the mild contractions that led nowhere.  The texts, the messages, the surprise every morning at work - my secretary had actually started storing things in my office.  My boss predicted on Wednesday "tonight's the night!"  Thursday my secretary was sure I wouldn't be in on Friday.  I grew sick of being asked if I'd had the baby yet, or comments about how unbelievable it was. 

Friday morning at 2am I was awoken by more strong contractions.  I timed them, about 4-5 minutes apart.  I got up and after an hour woke up Thatboy, asking if I should call Thatmom (fool me once....).  We decided to wait until 4am, and he waited up with me, watching trashy television. The contractions didn't get any stronger or closer together, and we figured maybe we should try to hold out a couple more hours before calling, so we could drop Thatkid off at preschool.  We both tried to get some sleep - and were successful.  Woke up at 6 and the contractions were the same, so we decided just to go to my doctor's appointment and have her evaluate the situation.  We called Thatmom and told her that today was probably the day, and she should plan on picking Thatkid up from school.  At the appointment my doctor determined I was probably in labor, but not active labor since I could still talk through the contractions.  "Go for a walk,"  she told me.  "That should help pick it up."  So I headed to work, and continued having these contractions all day.  But they weren't picking up.  They were still about 4-5 minutes apart, and I could still talk through them, although they were more uncomfortable than anything I had been through so far.  I found myself humming through them.  I went for a walk, and they never picked up.  And they continued all day and all night until I finally went to bed.  And the next morning, they were gone.

I was describing prodromal labor for my mom and told her it's like trying to start a car.  The engine keeps revving, but it never turns over.  But it still kills the motor.  The constant contractions are exhausting.  My body is tired, I'm beyond frustrated.  Every day feels like "the day" and every day I remain pregnant. And I feel as though I may be pregnant for years.  None of my maternity shirts fit anymore because they weren't designed for a belly this big. 

Speaking of big, the baby is currently the size of a watermelon.  No joke, imagine carrying around a watermelon with you all day, every day.  My entire pelvic area is tender, sore, and in pain all hours of the day.  So.Much.Pressure.


Total weight gain/loss: +22

Next Appointment: N/A
Maternity clothes? Well, as best as I can.
Stretch marks: Yup
Sleep: Off and on.
Best moment this week:  This has been a really tough week for me.  I'm not sure what the "best" moment was.
Movement: Yup.
Food cravings: Nothing
Food aversions: Nothing
Gender: Not finding out
Belly Button in or out: In.  But basically it's flat.
What I miss: A nice poop.  I know, too much information.  But the bladder pressure has resolution.  I can pee every few minutes.  The rectal pressure?  No such similar relief.
What I am looking forward to: The BABY!
Contractions: Yes.
Milestones: 
- Officially overdue.

Sunday, June 07, 2015

Sunday Runday: The End of the Road

On Saturday, May 23 I went for a 5.5 mile run/walk with some friends.  Later that day I started having contractions - more discomfort than anything else, but it was a start.  By the end of the week I was showing definite progress in terms of dilation and effacement, and when I mentioned Saturday to my doctor she told me to keep it up and maybe things would progress even more.

So I did.  I was great about getting in a couple miles a day while at work, sticking with the run/walking because it worked that Saturday.

On Tuesday of last week I upped it to 3 miles, because I had the time to kill.  Plus I was having contractions at the time and hoped maybe a little run would amp them into something.  But they didn't.

I tried again on Wednesday, which would turn out to be my last run of the pregnancy.  About .10 of a mile in, I got a sharp pain in my groin muscle.  In all honesty, I think I pulled that sucker.  It wasn't enough to send me to the floor, but it was sore for days after.  I decided to leave well enough alone and hang up my running shoes for the next few weeks.

In retrospect I'm happy I was able to make it through all 40 weeks of pregnancy and continue running, but I'm a little bummed it had to end on such a painful note.

So Sunday Runday fans - stay tuned.  It'll be a little quiet here for a bit since there's not much to write about when I'm not running, but I'll be back soon with updates about my eventual return.

Friday, June 05, 2015

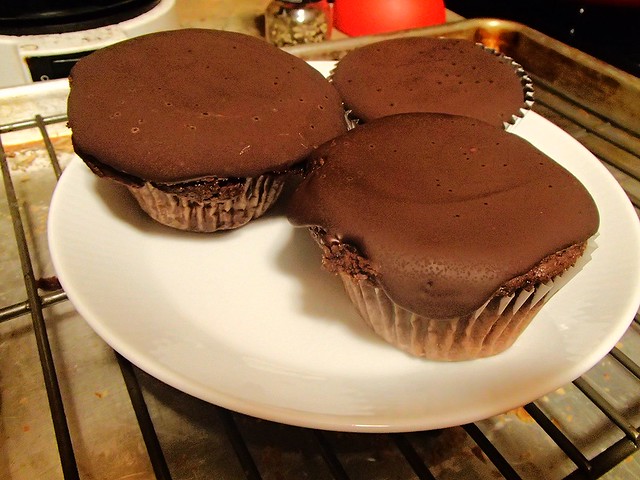
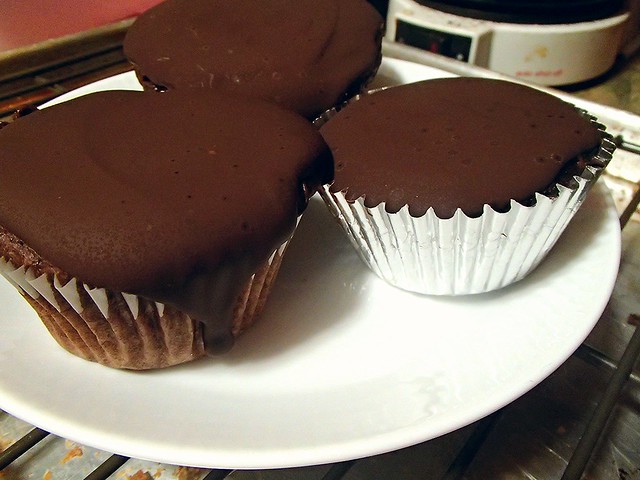
A Homemade Life: Chocolate Cupcakes with Bittersweet Glaze

 Tuesday is my birthday.  At this point, it's not quite clear how we'll be celebrating - so much depends on how things progress with the pregnancy.  At this point, we are more than ready for the baby, I've prepared so much in advance.  Our freezer is stocked with meals and snacks.  The fridge is loaded with soups.  Kind of a weird choice, but the freezer was already full.  And in the hopes that I will have my hands full next week, I leave you with my birthday cake in advance.

This isn't actually my birthday cake.  It's not even actually a cake.  Which you probably have figured out by now.  But my birthday celebration is the perfect time to share Wizenberg's cupcake recipe.  Because everyone needs a little celebrating in their life.  I actually made these for "Teacher Appreciation Day" at Thatkid's preschool.  Because those women definitely deserve appreciation.  And chocolate.

As someone who thinks frosting is the best part of the cupcake, I wasn't prepared to enjoy these as much as I did.  Thatboy said the glaze reminded him of the top of a Hostess Cupcake (which is not a selling point for me, but to each their own).  I appreciated the simplicity of these cupcakes.  Nothing fancy, nothing over the top.  The "frosting" is simply melted chocolate.  And the cake itself is a very basic chocolate cake recipe.  Sure it has hot coffee in it, but coffee isn't such a strange addition to chocolate cake.  It always helps to bring out the depth of the chocolate.  And I also feel it tempers the cake from being cloyingly sweet.


Chocolate Cupcakes with Bittersweet Glaze (From A Homemade Life)
1 oz semisweet chocolate, finely chopped
1/2 cup hot brewed coffee
1 cup sugar
3/4 cup plus 1 Tbsp flour
1/2 cup cocoa powder
1/2 tsp baking soda
1/4 tsp baking powder
1/4 tsp salt
1 egg
1/4 cup canola oil
1/2 cup plain yogurt
1/4 tsp vanilla extract
8 oz bittersweet chocolate, finely chopped

  1.  Preheat oven to 300.  Line a muffin tin with paper liners.  Put the semisweet chocolate in a medium bowl with the hot coffee.  Let stand, stirring occasionally, until the chocolate is melted and the mixture is smooth and opaque.
  2. In a separate bowl whisk together the sugar, flour, cocoa powder, baking soda, baking powder, and salt.
  3. Beat the egg on medium speed in a stand mixture about 1 minute. 
  4. Add the oil, yogurt, and vanilla, beating well.
  5. Pour in the melted chocolate mixture and beat to thoroughly combine.
  6. Add the dry ingredients and beat on low until the batter is just combined.  Spoon the batter into the muffin tin.  Bake for 25 minutes.  Transfer to a wire rack adn cook for 20 minutes before removing the cupcakes.
  7. Once the cupcakes are cool, melt the bittersweet chocolate in a metal or glass bowl over a pan of gently simmering water until chocolate is completely smooth.  
  8. Spoon a heaping teaspoonful of chocolate on top of each cupcake, tilting and rotating the cupcake to get the chocolate all the way to the edges.

Thursday, June 04, 2015

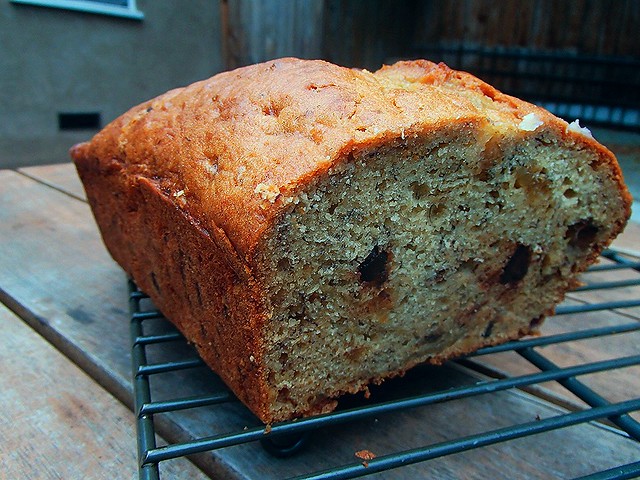
A Homemade Life: Banana Bread with Chocolate and Crystallized Ginger

I've mentioned before that Thatmom was the baker in our family growing up.  And while we didn't do a ton of pancakes or waffles, quick breads and muffins were a staple on our breakfast table.  And there were always quickbreads in the freezer.  Usually either zucchini or banana bread.  Not quite banana bread, chocolate chip banana bread.  I'm not sure I even knew banana bread came without chocolate chips until I was quite old.  It was a necessary part of the bread.  Like you wouldn't have chocolate chip cookies without chocolate chips, so how could banana bread exist without one of its core ingredients.

I will admit, banana is one of my least favorite flavors.  It's too overpowering.  Put banana in something and that's pretty much the only thing you will taste.  I make an exception for Thatmom's banana bread though. I have no concrete theories, but perhaps it's the addition of the equally powerful chocolate chip flavor?

I was a little nervous about Wizenberg's banana bread recipe.  Sure it had the classic chocolate chip requirement, but it also had ginger, a flavor Thatboy isn't entirely keen on and can be a little "spicy" for 3 year olds.  My worries were only slightly misplaced.  Thatboy certainly wasn't a fan of the ginger, but Thatkid sure was!  He loved this bread and it became a favorite after-dinner treat for him.  And a gateway into the world of quick breads.  I got him hooked on zucchini bread shortly after.


Banana Bread with Chocolate and Crystallized Ginger (From A Homemade Life)
6 Tbsp butter, melted
2 cups flour
3/4 cup sugar
3/4 tsp baking soda
1/2 tsp salt
3/4 cup semisweet chocolate chips 
1/3 cup finely chopped crystallized ginger
2 large eggs
1 1/2 cups mashed bananas
1/4 cup plain yogurt
1 tsp vanilla extract

  1. Preheat oven to 350.  Spray a 9x5 loaf pan with baking spray.  Whisk together the flour, sugar, baking soda, and salt in a large bowl.  
  2. Add the chocolate chips and ginger and whisk to combine.
  3. In a medium bowl, beat the eggs with a fork.
  4. Add the mashed banana, yogurt, butter, and vanilla and stir to mix.
  5. Pour the banana mixture into the dry ingredients and stir with a rubber spatula until just combined.  Scrape the batter into the prepared pan and smooth the top.  Bake for about an hour.  Cool on a wire rack for 5 minutes before turning the bread onto the rack.  Cool completely before slicing.

Wednesday, June 03, 2015

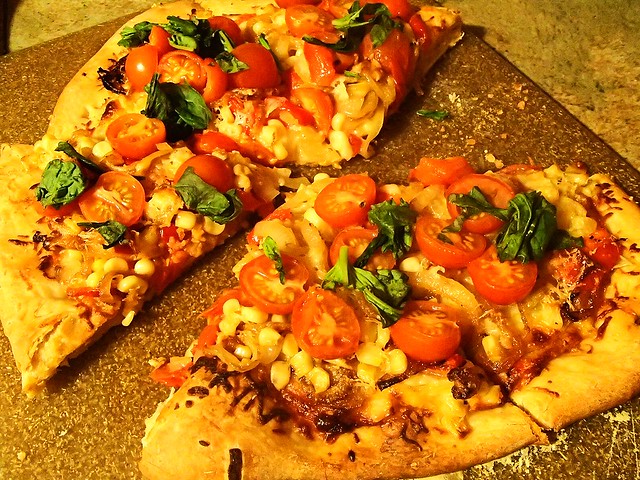
Crave Wednesday: Local Farmers' Market Pizza


When you think of Austrian food, what do you think of?  For me, it's schnitzel, strudel, and sausage (wurst).  So you can imagine my surprise that when I lived in Vienna the predominant food, found on every corner, or more aptly every subway stop, was pizza.

Maybe it's not so surprising, given that here in the USA we have lots of non-native foods that can be found just about everywhere, but I was still taken aback.  What differentiated the Viennese pizza from its American counterpart was the addition of corn.  On almost every slice.  Corn on pizza?  It seemed like such a strange concept to me.  But when in Rome...(or Vienna).  So one day after class, waiting for the train to take me home, I sampled a piece of Viennese pizza.  Complete with corn. 

Corn adds a really interesting texture and flavor to pizza.  When eaten at the height of summer, their sweetness bursts in your mouth.  Without getting too into the double entendre territory, I love things bursting in my mouth.  It's my favorite part of cherry tomatoes.  This Farmers' Market pizza combines both.  And as the weather is warming up, it's getting to be just the right season for sweet tomatoes and sweet corn.  So good, no sauce is even necessary - although, to be fair, I often find fresh tomatoes to be one of the best sauces out there, leaking their juices with each bite.


Local Farmers' Market Pizza (From Cooking Light)
refrigerated pizza dough
cooking spray
1 Tbsp olive oil
2 cups thinly sliced onion
1 tsp chopped thyme
2 cups thinly sliced red bell pepper
5 garlic cloves, thinly sliced
1 cup fresh corn kernels
1/4 tsp salt
1/4 tsp black pepper
5 oz thinly sliced fresh mozzarella cheese
1/2 cup grated parmigano reggiano cheese
1 cup cherry tomatoes, halved
1/2 cup basil leaves
  1. Preheat oven to 425.  Place a pizza pan in the oven to preheat.
  2. Place dough in a large bowl coated with cooking spray and let stand, covered, 30 minutes or until dough comes to room temperature.
  3. Heat a large nonstick skillet over medium high heat.  Add olive oil to pan, swirl to coat.  Add onion and thyme to pan and cook 3 minutes until onion is tender.
  4. Add bell pepper and garlic to pan, cook 2 minutes, stirring occasionally.
  5. Add corn, slat, and black pepper and cook 1 minute.
  6. Roll dough into a 16 inch circle on a lightly floured surface.  Remove pan from oven and coat with cooking spray.  Place dough on pan.
  7. Arrange mozzarella slices evenly over dough.  
  8. Spread corn mixture evenly over mozzarella.
  9. Top with Parmigiano-Reggiano cheese.  Bake for 23 minutes.
  10. Arrange tomatoes evenly over pizza and bake an additional 5 minutes. 
  11. Sprinkle with basil and cut into 6 wedges.

Monday, June 01, 2015

Mommy Mondays: 39 weeks

I am currently the most pregnant I have ever been!  Personal Pregnancy Record!   See, last time, it was at my 39 week appointment where I got sent to the hospital for an induction.  So you can imagine my anxiety when I went in on Friday. 

The good news is.....my blood pressure was absolutely perfect - no induction for me!  Which means that although last time at this time I was already holding a baby, this time I get to sit and let nature take its course.

Which is frustrating in its own way.  Don't get me wrong, I am ever so happy about not sitting in a hospital bed for days waiting for labor to start, but because I've never had the chance to do it on its own I'm very much a "first time mom" overinterpreting every little twinge and pain.

With Thatkid, I never dropped, never dilated, never got effaced.  I never had any contractions or discomfort.  I never lost my mucous plug, my water never broke until it was broken for me.  All of this can make one feel, well, like your body isn't working the way it's supposed to.  I feared that maybe my body didn't know how to go into labor on its own.

So I'm really encouraged by my progress this time around.  Oppo-baby has dropped.  I've been having contractions for the past week - and real contractions!  Contractions that DO THINGS!  So I'm already dilated. So now it's just the waiting game.  There's an end date in sight, but I'm hoping baby comes before we get there!


Total weight gain/loss: +25

Next Appointment: Friday
Maternity clothes? Yup.
Stretch marks: Yup
Sleep:Off and on.  I'm either sleeping ridiculously well, or not at all.
Best moment this week:  Finding out I'm dilating and effacing.  Stupid, but like I said, it makes me feel like I might be able to go into labor.
Movement: Yup.
Food cravings: Nothing
Food aversions: Nothing
Gender: Not finding out
Belly Button in or out: In.  But basically it's flat.
What I miss: Being comfortable, not having backpain, going to the bathroom when I feel like I have to.
What I am looking forward to: The BABY!
Contractions: Yes for sure. I think its prodromal labor though, because they're not practice contractions.  Friday night they were bad enough that I thought the baby was actually coming.  They're timeable and really uncomfortable and go on for several hours, then they lighten up until they disappear.
Milestones: 
- Contractions
- Loss of mucous plug

Friday, May 29, 2015

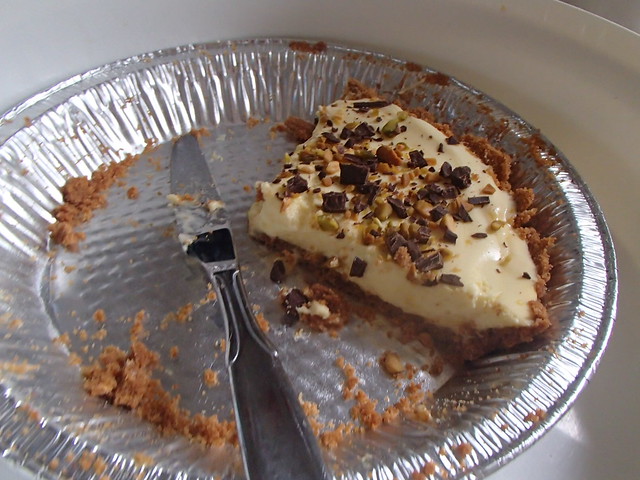
A Homemade Life: Rum Cream Pie with Graham Cracker Crust


Our second party of the weekend was a Memorial Day potluck at the home of the HorseWhisperers.  Our entrance had never been so well received.  The rest of the guests were HW's classmates she recently graduated with.  Mr. HW was thrilled to see Thatboy and Little HW had been eagerly awaiting a peer of her own.


The two of them ran off to create all sorts of trouble.  While the Mr. HW and Thatboy retired outside to drink beer and play guitar.   I sat around with the college kids feeling instantly old.  But in reality it was the perfect audience for a rum pie.  Because there's nothing a recent college graduate likes better than alcohol.  In fact, we had come just late enough to miss the shots of Hypnotiq.

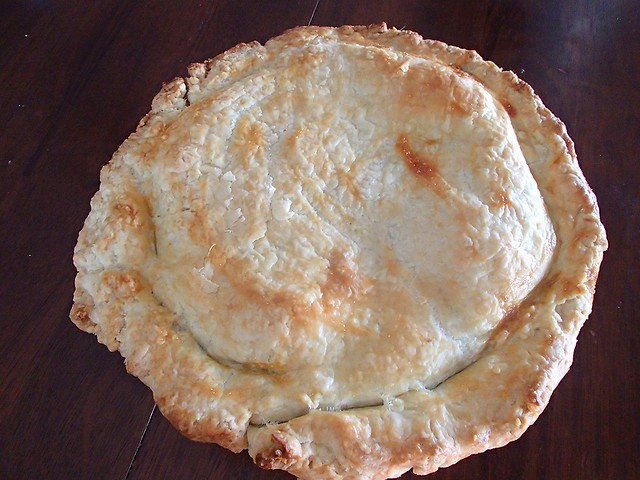
They were uber appreciative of this pie with it's creamy consistency and strong rum flavor.    Within moments of slicing it, it was completely gone.

Rum Cream Pie with Graham Cracker Crust (From A Homemade Life)
9 graham crackers broken coarsely into pieces
2 Tbsp sugar
5 Tbsp melted butter
1/4 cup cold water
1 1/4 tsp gelatin
1 cup heavy cream
3 egg yolks
1/2 cup granulated sugar
2 Tbsp dark rum
  1. Preheat oven to 325.  Process the graham crackers in a food processor until they are very fine.
  2. Add the 2 Tbsp sugar and pulse to combine.
  3. With the motor running, slowly add the melted butter and process until the mixture resembles wet sand.  Scrape the mixture into a 9 or 9 1/2 inch pie plate and press along the bottom and up the sides.  Bake for 15 minutes.  Let cool completely.
  4. Pour the cold water into a small microwaveable bowl.
  5. Sprinkle the gelatin over the water.  Set aside to soften for a few minutes.
  6. Pour the cream into the bowl of an electric mixer.
  7. In a separate bowl beat the egg yolks until they are pale yellow.
  8. Add the 1/2 cup of sugar to the eggs and whisk until thick.
  9. Microwave the gelatin for 20 seconds and then pour into the egg mixture.
  10. Whip the cream to soft peaks with the whisk attachment to the mixer. 
  11. Gently stir the whip cream into the egg mixture.
  12. Add the rum.  Chill until it starts to set. Scrape into the prepared crust.  Chill 4-6 hours.
  13. Top with chopped pistachios and bittersweet chocolate.

Thursday, May 28, 2015

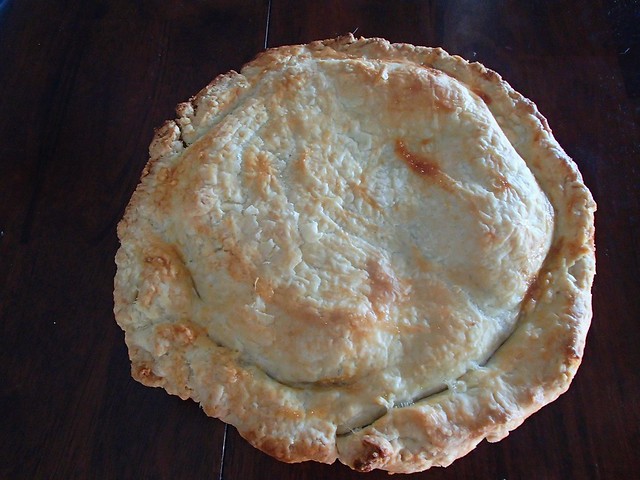
A Homemade Life: Dried Fruit Pie

So far my biggest complaint about A Homemade Life is that it is very dessert heavy.  Don't get me wrong, I adore dessert, but making one every night means my house is full of more sweets than we can handle.  So when I noticed that a chapter had not one, but two pie recipes in it, I felt like last weekend, when we had two parties to go to, was the perfect excuse to make them.  That way I could bring them to parties and everyone could enjoy them, instead of Thatboy and I trying to finish two pies by ourselves.

The first party of the weekend was a barbeque held in our honor.


It was so unbelievably beyond perfect.  You see, we didn't really want a shower - and we have everything we need for Oppo-baby.  But this wasn't a shower, it was a family party!  You see, the hosts of the party were Lexus's parents.  And the guests were the families of Thatkid's old daycare friends.  Our little group.  It was a like a playdate for the kids and parents!

The youngest members of the group, the round 2s are still babes in arms.  Thatkid and his friends tore around the house, playing pirates, monsters, and dig-in-the-mud.


Meanwhile the grownups, got a chance to catch up and chat with each other.  And we got loads of good advice about adding a second into our brood.  I really am so very thankful for Thatkid's experience in daycare/preschool and the wonderful people we've met through there.  Both the sweet kids and their wonderful parents.

It only seemed right to share this pie with them.  Dried fruit may not be a common filling, but right now I feel like I'm making loads of things with dried fruit.  I have dried fruit dishes in my freezer, fridge, and on my counter right now.  As I was commenting to Thatboy earlier, there's something about it that makes you feel like you're eating something healthy, even when there is the addition of chocolate, sugar, or other unhealthy ingredients.


Dried Fruit Pie (From A Homemade Life)
1/2 cup ice water
1 1/2 tsp apple cider vinegar
3 cups flour
2 Tbsp sugar
1 1/2 tsp salt
2 1/2 sticks cold butter, cut into cubes
2 cups pitted prunes, coarsley chopped
2 cups dried apricots, coarsely chopped
1 cup golden raisins
1/2 cup dried apples, coarsely chopped
3/4 cup sugar
1 stick unsalted butter, melted
1/2 cup walnuts, chopped
1 egg
  1. In a measuring cup combine the ice water and the cider vinegar.
  2. Combine the flour, sugar, and salt in a food processor and pulse to blend.
  3. Add the 2 1/2 sticks of cold butter and pulse until the mixture resembles coarse meal.
  4. With the motor running, slowly add the water-vinegar mixture and process just until moist clumps form.
  5. Turn the dough out onto a wooden board or clean countertop and gather it until it just holds together.  Shape into a ball, cut in half, and press each half into a disk.  Wrap each disk in plastic wrap and refrigerate at least 2 hours.
  6. Combine the dried fruits in a large saucepan, and add cold water to cover.  Bring to a boil over medium high heat, then simmer for 10 minutes, stirring occasionally.  Drain the fruit well in a colander and return to the saucepan.
  7. Add sugar and melted butter.  Stir well.  Set aside to cool, stirring occasionally. 
  8. Preheat oven to 425.  Roll 1 disk of the dough into a circle wide enough for a 9-9 1/2 inch pie plate.  Transfer gently into the pie plate.
  9. Roll out the second disk of dough into a circle about the same size.
  10.  Stir the chopped walnuts into the cooled filling.  
  11. Scrape the filling into the prepared pie plate, distributing it evenly.  
  12. Place the second circle of dough atop the filled pie, and fold and pinch the edges over the bottom crust to seal completely and form a high fluted rim.
  13. In a small bowl, beat the egg with a fork and brush lightly over the top and rim of the pie.  Bake for 30 minutes.  Reduce heat to 375 and bake for an additional 10 minutes.