Pages

Friday, August 31, 2012

Skulls for breakfast


When I was a small child, I was adorable.  I know, you're shocked.

Among my many adorable qualities were my mispronunciation of words.  I'm not talking about "psghetti," my mispronunciations were far more advanced.

Like how I insisted "mild" was pronounced "milled."  Because hooked on phonics did NOT work for me.

But one of my favorite mispronunciations was related to the realm of breakfast foods.

Thatmom has been involved in Weight Watchers since we was a teenager.  And when I was little, sometimes I would accompany to her to the weigh-ins.  Which happened to be right next to a bakery? coffee shop?  a place that sold scones.  But I didn't call them scones.  (Of course not, that wouldn't make much sense for this post, would it?)  I honestly believed they were called "skulls."  Which made sense to my child-brain, since they were hard, like a skull.  And bumpy, like a skull.  And dotted with raisins, like a skull?  (or like eyeballs on a skull.  A bit of a stretch, but again, we're talking about a small child.)

I don't remember when I realized the actual name of scones, but it was before I embarrassed myself in front of anyone.  I outgrew my mispronunciation, but not my love of the flaky breakfast treat.  And until recently, it was never something I attempted to make on my own.  But they're so easy!  And come out just as well as something from the bakery counter.  These are simple and plain, but can easily be dressed up with a simple glaze or inclusion of fruit.  Because sometimes, you need to cover your skull.

Cream Scones (From the Fannie Farmer Cookbook)
  • 2 cups flour
  • 2 tsps baking powder
  • 1 Tbspn sugar
  • 1/2 tsp salt
  • 4 Tbspns butter
  • 2 eggs
  • 1/2 cup cream 
  1. Preheat oven to 425 degrees F. Mix the flour, baking powder, sugar, and salt in a large bowl.
  2. Work in the butter with your fingers until the mixture resembles coarse meal.
  3. Add the eggs and cream and stir until blended. Turn out on a lightly floured board and knead for about a minute.
  4. Roll dough into a disc about 3/4 inch thick and cut into 12 wedges.
  5. Place wedges on a greased cookie sheet and bake for 15 minutes.

Thursday, August 30, 2012

It's only Thursday?


Friends, I'm tired.  Exhausted really.

It's been a long week and I'm ready for it to be over.

I've already spent 2 mornings in court, with another morning tomorrow.  And mornings in court mean I have to leave the house an hour earlier than usual.

Tonight I feel like I could quite literally fall asleep on my feet.  I ended up skipping my evening run, and while I may regret it in the long-run, tonight all I can think about is my beautiful, fluffy, mounds of pillows.

So much so, that I think I emulated that fluffy mound with tonight's dinner.  A big, fluffy, mound of chicken.  Don't you just want to curl right up and rest your head upon it?  Or how about the fluffy mound of avocado?  Are you yawning yet?

Sandwiches are one of Thatbaby's favorite foods.  And I like that they're easy when I'm feeling worn out from the week.  But easy doesn't have to mean boring.  This twist on a classic chicken salad sandwich is packed with a flavor punch from chipotles in adobo.  Smothered in cheese, and topped with creamy avocado,  it's a warm respite after a long hard day.


 Southwestern Chicken Melt
1 chicken breast, cooked
1 Tbsp chipotles in adobo
1/4 cup Greek yogurt
salt and pepper
1 slice of colby jack cheese
2 slices of bread, toasted
1/4 avocado
  1. Shred chicken breast with 2 forks.
  2. Combine chipotles in adobo, Greek yogurt, and salt and pepper to taste.
  3. Stir chicken into yogurt mixture and mound on 1 slice of bread.
  4. Place slice of cheese on top.  Place under broiler and broil just until cheese starts to melt.
  5. Top cheese with the avocado and place remaining sliced of bread on top.

Wednesday, August 29, 2012

These folks are animals!


It's not just Thatbaby getting older, but my little cousins are growing up too!  When we moved to California, Mustang was just a little thing.  Bigger than Thatbaby, but not by that much.  This weekend he moved in to his new digs down here in San Diego to start college.  COLLEGE!

Thatbaby is so excited to have more family nearby.  He's already anxiously anticipating his first football game.

Saturday night we went out for a big family dinner with everyone.  Thatboy and I showed up a little rough and tumble since we had spent the day at the Wild Animal Park.

Workwife and her husband left on Monday to celebrate their first anniversary in Europe.  But before they left, they needed to test out their new camera  The animals at the park make the perfect test subjects.

Thatbaby is loving animals lately, so we were more than happy to tag along.  He especially loved the elephants.  I especially loved the bats.  There was a mama bat snuggling with her baby.  It reminded me of us.


Thatbaby loves Workwife too. 

With September around the corner, and Mustang starting school, it's clear that fall is right around the corner.  Which means it's just about time for chili season!  In preparation, here's a sweet and soft corn cake - perfect for the most wonderful time of the year.

Corn Cake
4 Tbsp butter
1/2 cup sugar
1 1/4 cup cornmeal
1 1/4 cup flour
4 tsp baking powder
1 tsp salt
1 1/3 cups milk
3 egg whites
  1. Preheat oven to 425.  Beat egg whites until stiff, but not dry.
  2. Cream the butter in an electric mixture, then add sugar and beat until light and fluffy.
  3. In a separate bowl, combine the cornmeal, flour, baking powder, and salt.
  4. Alternate adding this dry mixture and the milk to the butter, starting and ending with dry ingredients.
  5. Stir in a third of the beaten egg whites, then fold in the remaining whites. 
  6. Spoon the batter into a greased 8x8 dish.  Bake for 30 minutes.

Tuesday, August 28, 2012

Transitioning


Saturday was Thatbaby's last swim class of the summer.  He did a fantastic job, Thatboy thought it was the best class yet since Thatbaby got to do his favorite things like splashing in the pool, swimming after toys, doing his "good scoopers" and "good kicks."


I know he's going to miss swim lessons, because when we went to the beach on Sunday with the Pirates he headed straight down toward the water.  "Look at Thatbaby in the water!  He's so brave" said Pirate Mama, who is the one who told us about the swim lessons in the first place.  Pirate Baby is still a little shy around the water, choosing to stand on the sand and throw things in.  Thatbaby on the other hand, kept crawling down to the water and as I held him, he'd lift his feet and splash his arms.

The end of one thing comes with the beginning of another.  We had Thatbaby's first "parent-teacher conference" last week.  We discussed him moving up to the next room, where the 12-18 month old toddlers hang out.  At the time, it was anticipated he'd be making the move the last week of September or the first week of October.  I received an email from the director of his daycare saying he's moving to the blue room NEXT WEEK!  It's the first time I've had that "my little boy is growing up" feeling!  As of Tuesday he's going to be in a room with walkers!  And cot naps!  And no more bottles!  Thank goodness some of his little buddies are moving with him.  But his girlfriend is not, and I think he's going to miss her.  I know she's going to miss her circle of admirers.

These popovers are another "transition" food.  You start them in a cold oven, and as oven heats, they cook and grow. It's another recipe I almost didn't get a picture of because Thatboy and Thatbaby were eating them by the handful.  With a limited number of ingredients, they're quick and easy to throw together.  Perfect for breakfast, snacks, or a side with dinner.

Popovers (From the Fannie Farmer Cookbook)
2 eggs
1 cup milk
1 tablespoon melted butter
1 cup flour
1/4 teaspoon salt


  1. Spray a muffin pan with baking spray.  Combine all the ingredients in a bowl, just until blended.2. Fill the muffin cups half-full and place them in the oven.
    3. Turn the oven to 450 and bake for 15 minutes.
    4. Reduce the heat to 350 and bake 15 minutes more. 

Monday, August 27, 2012

Mommy Mondays: Babies, the latest accessory

Based upon the responses to last week's Mommy Mondays, I thought this would be a good time to talk a little bit about baby carriers.

I knew I wanted to use a carrier when Thatbaby was born, but I never knew how dependent we'd be on one!  For the first 6 months of his life, Thatbaby HATED the carseat.  Would scream his head off every time he was in it.  If, by some miracle, he managed to fall asleep in the carseat, he'd wake up the second the car stopped moving.  So we were never able to bring him anywhere in the carseat.
This was equally true with his stroller, which he only started being okay with around 7.5 months.  Before that, the only way to take him anywhere was if he was strapped on to one or both of us.  This was also how we got things done around the house.  And how we went out to eat.  Our carriers are worth their weight in gold.
I registered for a ton of different carriers.  I think I registered for 9 or 10.  Because I had no idea what was the best out there, and figured that if someone wanted to get us a carrier, they would probably be someone who used or knew which was good.
We got 3 carriers as gifts.  And then I saw a great deal for a moby and ending up getting a "his" and "hers" version.  So when Thatbaby arrived, we were already "carrier people."  And we've picked up a couple more along the way, so we now have a total of 6.  Here's a review of the ones we have, with a pro and con list attached.

The Moby
The moby was the first carrier we ever used.  In fact, we used it the very night we came home from the hospital.  Here's Thatboy getting ready to eat dinner our first night at home.  He looks amazing doesn't he?  That's because he slept all of 2-3 hours during the 60 hours we were at the hospital.

Pros:
  • Can be used from birth.
  • Really, really, comfortable.  Like wearing a t-shirt.
  • Inexpensive.
  • You can put it on before leaving the house, so you don't have to worry about tying it on in a parking lot.
  • One size fits all.
Cons:
  • Can get really warm.  I've retired it for the season as of last week.
  • Rumor has it that it's only good for small guys.  Thatbaby is around 20lbs and I haven't had a problem with him being too heavy for it, but maybe I'm just super strong.
  • Not a lot of variety to the carries.
One thing I didn't list is the oft-heard complaint: "It's too difficult to figure out."  And really, when the Moby arrives at your doorstep, the giant piece of fabric can be a little intimidating.  But once you get it, it's really easy to put on, and very convenient since you can pop the baby in and out.  I felt much better about how to put it on after I saw it done in person.  This isn't exactly "in person" but here's a quick little video of me putting on the moby so you can see how it's done.


Catbird-Baby Pikkolo

The Pikkolo was the first carrier we received as a gift.  And it quickly became Thatboy's favorite.  So much so, that we referred to it as "his carrier."


Pros:
  • Can be used from birth.
  • Ergonomic and comfortable as the weight bearing is spread between the shoulders, back, and hips.
  • Can be used for front carries - facing in and facing out, hip carries, and back carries.
  • Has loops for attaching pacifier
  • Sleeping hood!  Which is great if your little one would rather check out the world than sleep.
Cons:
  • If you're sharing this with your partner and he's almost a foot taller than you, it takes a little time to adjust back and forth.
  • Gets warm.  This carrier has been retired for a couple months because it was getting a little sweaty for all parties involved.


    Babyhawk Mei-Tai
    This was another thoughtful gift.  It's the cutest of all our carriers and I honestly squealed when I opened it.  The cuteness factor is why Thatboy refuses to wear it though, he thinks it's too girly.


Pros:
  • Can be used from birth.
  • Super cute (because we all know how important that is)
  • Very easy to put on - Thatboy is jealous of how quickly I can throw this on since it's just a quick tie.
  • Comfortable
  • Lightweight - this one doesn't have to be retired no matter how hot out it is.
  • Can do a high-back carry.  I haven't done this yet (I need to practice), but in theory, this is supposed to help Thatbaby see over my shoulders when doing a back carry.
  • Great for nursing!
 Cons:
  • No sleeping hood.  So sometimes I have to drape a blanket over Thatbaby if he's too distracted.
  • Long straps are no fun when it's wet outside since they seem to be a magnet for water on the ground. 

 
Babybelle

This was the last carrier we received as a gift.  Due to the weight requirement, we couldn't use it for a couple of months, but it was perfect for our first trip to Palm Springs in January.  It was a little too warm for the Pikkolo, and this is open enough to stay cool.  At 3 months, it was perfect for Thatbaby.  Now, at 10.5 months, Thatboy discovered last week that it's no longer comfortable for either of them to wear, so it will probably be retired.

Pros:
  • Lightweight - perfect for summer/warm weather. 
Cons:
  • Can't be used from birth.
  • Short lifespan - since at less than a year we're already done with it.
  • It's a "crotch dangler" - see the way Thatbaby is positioned in the carrier?  All his weight is pretty much being held up by his groin area.  Despite the fact that doesn't even sound comfortable, it's also been linked to hip dysplasia and other not-so-fun developmental issues when worn for long periods of time.  This carrier really only got worn for short trips from the car to the restaurant, or around the house while Thatboy vacuumed, so it's not a major concern for us, but since this is a post about carriers, I do think it's really important to mention.  It's much better for the baby to be in a carrier that supports their entire bottom/hip area.
  • Not a lot of variety to the carries. 


Kelty

As much as we love our other carriers, we decided to invest in one especially for hiking since Thatboy and I do love our hiking and camping trips.  After seeing good reviews for the Kelty (and because H had one), we used our registry completion discount to get this.  But it requires the baby to be 7 months old, so we didn't use it for quite some time.


We also got the sun hood, to help protect little head from the sun.

Pros:
  •  Built in backpack - with this, you don't need to carry a diaper bag!  
  • Cool - the baby is kept a little bit away from your body, which keeps him cooler.
  • Sun hood - perfect for protection, while still letting him have a good view.
Cons:
  • Can't be used for the first 7 months.
  • Not as comfortable as some of the other carriers.
  • Not a great place for napping.  (Here's a picture of our sleeping baby, hanging out since there's nothing to keep him in and secure)

Ergo:

The Ergo was an impulse buy.  We were getting ready for a trip to Palm Springs, when the Ergo Performance just happened to show up on BabySteals for 60% off list price.  It was in my cart before I even knew what I was doing.  And I got a little lecture from Thatboy along the lines of "how many carriers does one person need?  But it didn't take him long to change his tune.  This was perfect for our Palm Springs trip - and beyond.  It has all the benefits of the Pikkolo, but in a more lightweight material, with vents, so it doesn't get as hot.  Unfortunately, it does require a special insert to use with a newborn, which the Pikkolo does not, but we got this when Thatbaby was already 6 months old, so we didn't need to worry about that.
Pros:
  • Good for nursing
  •  Lightweight - with vents and cooler material, this is Thatboy's summer carrier.
  • Ergonomic and comfortable as the weight bearing is spread between the shoulders, backs, and hips.
  • Can be used for front carries, hip carries, and back carries.
  • Sleeping hood!  Which is great if your little one would rather check out the world than sleep.

Cons:
  • Can't be used from birth without an "infant insert."
  • If you're sharing this with your partner and he's almost a foot taller than you, it takes a little time to adjust back and forth.

Friday, August 24, 2012

The Pig's The Thing


I don't remember when it was, but I have a very vivid memory of Thatboy turning to me and saying "I'm so glad you're not kosher."  Thatboy was willing to give up a lot by marrying into the Jewish faith, but apparently cheeseburgers were not part of the package.

Thatbaby is similarly inclined to the non-kosher menu.  Most notable is his love of pork.  It's a meal he never tires of. 

Other things he never tires of?
Scream-laughing
Crawling with balls in his hands
Being held
Bathtime
Being thrown in the air


We went to the park this weekend and Thatbaby got lots of time in the sky, and on the grass.  Afterwards we went to check out a new burger place.


Thatbaby likes to really relax at restaurants.

We came home sunkissed and grateful for the summer.  And there was still some fresh corn in the fridge.  I decided it was time for Thatbaby to have his first taste of risotto.  I paired it with his favorite "other white meat."  The following recipe was enjoyed by the adults in the family - since honey isn't recommended for babies and chipotle isn't appreciated by our little guy.  (His slices get cooked separately).  But we all enjoyed the risotto!


 Chipotle Honey Lime Pork Tenderloin from A Taste of Home Cooking

1 pound pork tenderloin
1/2 cup lime juice
Zest from 1 lime
1/4 cup honey
1/2 tablespoon kosher salt
1/2 teaspoon garlic powder
1 chipotle chile in adobo sauce, chopped
1/2 tablespoon adobo sauce
Canola oil
Chopped cilantro

  1. Combine lime juice, zest, honey, salt, and garlic powder in a bowl
  2. Place pork in large ziplock bag and pour half of this mixture over.
  3. Add chipotle and adobo sauce to bag, close and marinate in the refrigerator overnight.
  4. About 30 minutes before you are ready to cook, remove pork from refrigerator and allow to come to room temperature. 
  5. Preheat oven to 425°F. In a heavy, oven-proof skillet, heat enough oil to coat over medium high. Remove tenderloin from marinade and sear in hot skillet on all sides, 3 minutes per side. 
  6. Place the skillet in the oven and roast tenderloin for 15 minutes, turning once halfway through the cooking time.
  7. Remove pork to cutting board and tent with foil.
  8. Pour reserved lime juice mixture and leftover marinade into skillet with meat juices and heat on medium-high. Allow sauce to reduce and thicken slightly, then pour over sliced pork.
Sweet Corn Risotto
5 cups chicken broth
1/2 onion, chopped
1 Tbsp olive oil
1 tsp red pepper flakes
2 cloves garlic, minced
1 cup arborio rice 
1/2 cup white wine
4 cups fresh corn
4 Tbsp butter
2 Tbsp milk
1/4 cup Parmesan cheese
  1. Heat chicken broth on stove and keep warm.
  2. Heat olive oil in a saute pan over medium heat.  Saute onion until translucent.
  3. Add in red pepper flakes and garlic and saute for about 30 seconds.
  4. Add rice and toss until coated in oil.  Cook until rice is translucent.
  5. Add the wine and corn, stirring until the wine is almost completely absorbed.
  6. Add the chicken broth to the rice, about 1/4 cup at a time, waiting to add each addition until the previous addition is absorbed. Stir frequently.
  7. After all the stock is absorbed, and the rice is tender, stir in butter, milk, and Parmesan.

Thursday, August 23, 2012

I put this stuff on everything!


I've got an incredible recipe to share with you today, but I can't let another week go by without sharing a picture from Thatbaby's swim lesson.  This week during Humpty Dumpty time, while the other kids stood on the side, waiting for mommies and daddies to help them jump in the pool, my kid stood shoving toys in his mouth.


And some fun video of a little underwater swim and his new ability to get out of the pool!


Thatboy is already trying to figure out how to keep up these skills once swimming lessons end next month.

Okay, now on to one of our favorite summer recipes. It started innocently enough.  Thatbaby loves Mexican food, chicken tostadas sounded like a good idea.  I made the dressing first and stuck a finger in it to taste.  (Don't gasp - I know you do this too.)  It was gooooood.  REALLY good.  SO GOOD!

The tostadas were awesome - Thatbaby tends to ignore the tostada portion, but he ate every little piece of what sat on top.  Thatboy and I didn't leave any of it.  And then we dipped some broken toastada pieces in the cilantro ranch dressing.  And there was enough left over that I put it on a salad later, dipped some chips in it, and served it with some carnitas quesadillas another time.  It's great for tacos and veggies too.  Or rice and beans.  Frankly the only thing it might not be good on is chocolate cake.

Sweet and Spicy Chicken Tostadas (from What's Cookin, Chicago as seen on Cassie Craves)
2 tablespoons sweet paprika
1 tablespoon chili powder
1 tablespoon ground cumin
1 tablespoon dark brown sugar
1 1/2 teaspoons dried oregano
1 tablespoon kosher salt
1 1/2 teaspoons sugar
1 1/2 teaspoons black pepper
1/2 teaspoon cayenne pepper
1 pound boneless skinless chicken breasts
Tostadas 
Cilantro Ranch Dressing (recipe to follow)
Shredded cheddar cheese
Salsa

1. Preheat the oven to 350 degrees. Combine all the spices in a ziplock bag.
2. Place chicken in bag with spices and shake to coat.
3. Bake chicken for 30 minutes.  When cool, shred chicken.
4. Top each tostadas with shredded cheese, salsa, and a drizzle of cilantro ranch dressing.

Cilantro Ranch Dressing (Adapted from Cassie Craves)
1 1-ounce envelope Hidden Valley Ranch Dressing Mix
1 cup greek yogurt
1/2 cup milk
Juice of 1 lime
2 cloves garlic, roughly chopped
1/2 cup roughly chopped cilantro
1/4 cup green salsa
Put all ingredients in a blender or food processor and combine. Make several hours ahead of time to allow for thickening.

Wednesday, August 22, 2012

Sweet Summer Fun

It's August.  And not just August, but almost the end of August.  For most parts of the country, that means summer is almost at an end.  For us in San Diego, it means the weather has finally become summery.  And now we're doing our darndest to try and make the most of those last minutes of summer.

All of a sudden we're planning more beach trips and pool time.  Hanging out with friends, planning parties.   We even snuck in a summer concert last weekend! 

Summer in San Diego is also race season, and every weekend the Del Mar races host concerts following the last race.  On Friday we ditched the kids, met up with our friends at the races.


We got there in time to watch the last race and place a $1 bet, which we promptly lost.  Then we grabbed dinner and drinks while we waited for the show to start.

We heard the music before heading to the stage to watch Michael Franti and Spearhead perform.

Mrs. Pirate had picked the concert.  She'd been to a couple of his concerts and said they were always a good time. 

And it was a good time!  At one point Franti put himself out in the crowd, bouncing around, singing, and introducing us to his high school volleyball coach.

Thatboy wasn't excited about the evening before we left.  It was Friday night, we'd just gotten back in town, really he just wanted to curl up on the couch for the evening. 

But by the end of the night, I think he had changed his mind.


In addition to taking advantage of summer activities, I'm also feeling the pressure to make use of summer produce while I still can.  Gorgeous basil, corn, peppers, tomatoes.  We're going through oodles of gorgeous yellow grape tomatoes in our house.  And corn is getting thrown in just about everything from salads, polenta, risotto - even pasta!  I can't claim the original idea of using corn in a pasta dish, but after seeing it on all sorts of blogs this summer I thought it was an idea that I had to make my own.  And it was delicious!  Make it soon - because I can guarantee it won't be as tasty with the frozen substitute.

Summer Penne

1/2 package of penne pasta
4 slices bacon
3 cups of fresh corn kernels
1/4 cup chopped red onion
1/2 red bell pepper, sliced
1/4 cup sliced mushrooms
1/2 cup milk
1/4 cup white wine
1/4 cup chicken broth
1 sprig fresh thyme
1/4 cup basil, chiffonade
shaved parmsean cheese

  1. Cook penne according to package instructions.
  2. Cook bacon in large skillet until crisp.  Remove bacon from skillet and set aside.
  3. Place 2 cups of corn, onion, pepper, and mushrooms into the pan with the bacon fat and cook until veggies are tender crisp.
  4. Add the wine and chicken broth to the veggies and simmer until reduced.
  5. Place the remaining cup of corn, milk, and thyme in food processor and puree.  Add this mixture to the veggies and simmer about 5 minutes, until thick.
  6. Add pasta to the vegetables and heat until the pasta is warmed through.  Top with crumbled bacon, basil, and parmsean.

Tuesday, August 21, 2012

Chicago: The Fun Stuff


If you read my post yesterday you know that we packed far too much into our short trip to Chicago.  The upside to this is you get to benefit from our adventures.

Day 1

Our first adventure, as I mentioned in the food post was to Lincoln Park.  We started with lunch at the Green Market.
I just read an article in a very old Bon Apetit (I think I am about 4 months behind in my magazines) about cooking tourism - renting a place in a food-centric city so you can make the most of local foods.  Great farmer's markets always make me wish I could scoop up a little of everything and make delicious meals.

Our next stop was supposed to be the Lincoln Park Zoo, but Thatbaby fell asleep moments after we got in, so we detoured it over to the Lincoln Park Conservatory which we felt he would have less interest in.


Doesn't this look like something straight out of Alice in Wonderland?

While Thatboy and I were frolicking in the ferns, Thatbaby woke up.  So we headed out of the flora to check out the fauna in the zoo.

The last time Thatbaby went to the zoo he was 6 months old and not as interested in the animals.  This time, he loved seeing all of them.  He tried to pet the rhino and laughed at just about every animal he saw.


Day 2

Thatbaby was similarly enthralled with the Shedd Aquarium.  He liked that he could get very close to the fishes and they were moving around.


He loved watching the jellyfish.  Thatboy and I were really looking forward to this "special exhibit" but to be perfectly honest, it was the worst jellyfish exhibit we've seen.  We loved the jellyfish in the Georgia Aquarium, and even the ones we have here in the Birch Aquarium.  This was disappointing.


When I was pregnant with Thatbaby, we visited the Vancouver Aquarium and saw the belugas.  He went crazy in my stomach kicking when he heard the whales.  This year he got to see them himself!  A tip for those of you with small children, if you bring your kid in a stroller, you get to use the "accessible" entrance which has a much shorter line.


Following our time at the aquarium, we went to  check out the Chicago Art Institute.


We saw the Lichtenstein exhibit, and a fantastic Asian art exhibit, as well as some classics.  Thatbaby got a big kick out of the museum.  He was chattering away the entire time we were there.  I'm sure people LOVED us.  But he wasn't trying to be disruptive, he was just sharing his love of art.


Day 3

As I mentioned yesterday, we did the Architectural Boat Tour, which is supposed to be a "must do" in Chicago.  I think we would have enjoyed this much more if it had just been Thatboy and I.  Thatboy spent the entire time below deck with a fussy Thatbaby,  And according to my cousin who accompanied us, we did not luck out in the docent department.  I learned more from the tidbits he was feeding from the side.

After the boat tour my cousin took us on a tour of Millennium Park. 

We got to pose by "The Bean,"  listen to opera at the Pritzker Pavilion (designed by Gehry), and splash around in the Crown Fountain.  We then spent the rest of the afternoon letting Thatbaby crawl around and eat grass.

Monday, August 20, 2012

Mommy Mondays: Hit the Road Jack

In one of Thatdad's books, he began a chapter describing the different approaches Thatbrother and I take to planning trips.  Thatbrother flies by the seat of his pants, barely reserving a plane ticket before heading out.  I plan everything down almost to the minute - tickets, reservations for hotels and dinners, maps between activities. 

Traveling with an infant is a whole 'nother ball game.  As prepared as I normally am, I still felt wholly unprepared.  So you can learn from my mistakes.  Here's how NOT to travel with a baby.

1)  Don't slack off on research.  Maybe this just pertains to me.  As I mentioned, I usually have a mini-binder for each trip with all our reservations printed out, maps of the area, etc.  But normally I also have time to do this.  Now that Thatbaby is with us, I have far less time for planning.  So I let this slip.  And paid for it.  Like when I thought our dinner reservations were in one area of town, and they were miles away in another part of town and I had to figure out how to get there, in the rain, and we were horribly late after getting lost.

2) Don't overplan.  When Thatboy and I travel we usually fill our days.  We leave the hotel early and don't return till late at night.  This does not work so well when traveling with a little guy.  Next trip I'm definitely keeping it simple and only planning one activity a day, with time to come back to the room and just relax instead of rushing from one thing to another.  No horror stories about this one, it worked out all right (Thatbaby will sleep anywhere and just took his naps in the carrier or stroller), but we were exhausted every night.  Not a very restful trip.

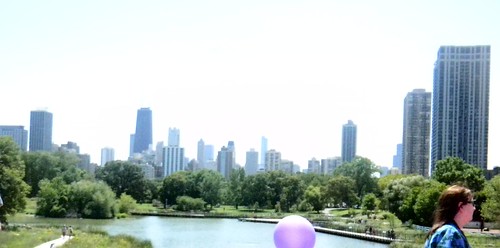
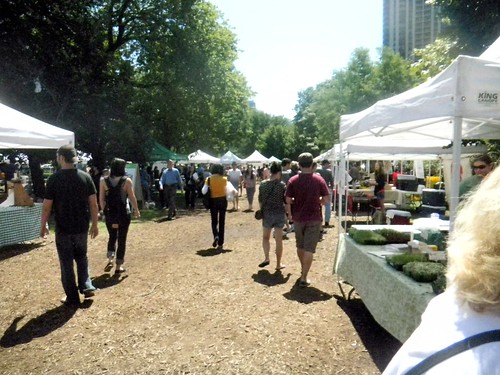
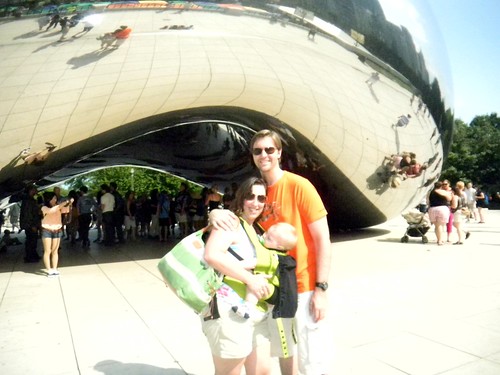
3) Don't assume the weather will cooperate.  Our trip was to Chicago.  In August.  Knowing this, I removed Thatbaby's sweatshirt from my diaper bag before we left.  Thatboy and I decided we didn't need to pack any long pants or shirts for him or us.  So of course, one day it rained from dawn till dusk.  And this happened to be the day we planned on walking around town.  And the day we got stuck in outdoor lines for every activity we had planned.  It was pretty miserable for everyone involved.

4) Don't bother bringing any reading material for yourself.  There won't be time.

5) Save some activities for when they're older.  Thatbaby did not enjoy the architectural boat tour and therefore we did not enjoy the architectural boat tour.  He wanted to crawl around and be crazy, not listen to the docent and enjoy the boat ride.  In retrospect I wish we had waited on this one.

And things we did right:

1) Get bags for your stroller and carseat.  We just got some cheap ones, but they made things so much easier.  We could shove extra things in the bags because they were so big.  The carseat bag had backpack straps so Thatboy could wear it through the airport, leaving his hands free to carry our carry-on.

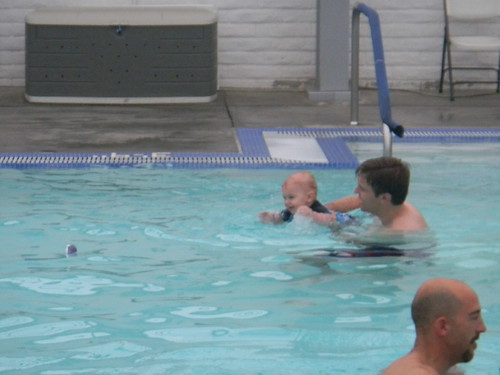
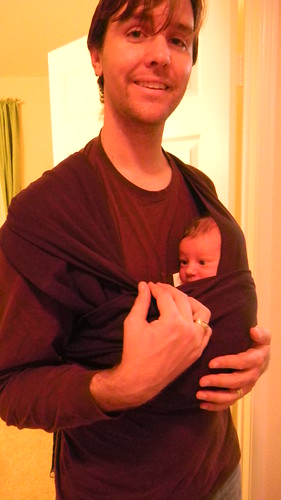
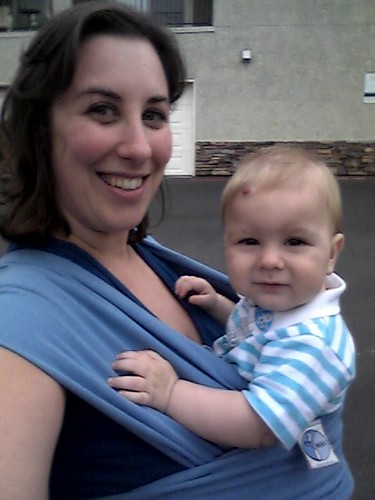
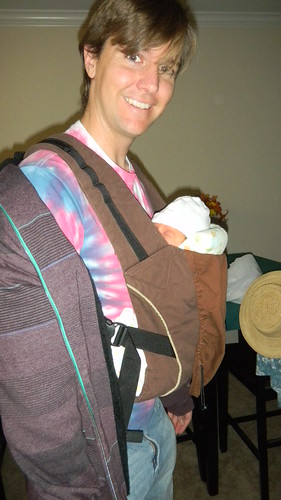
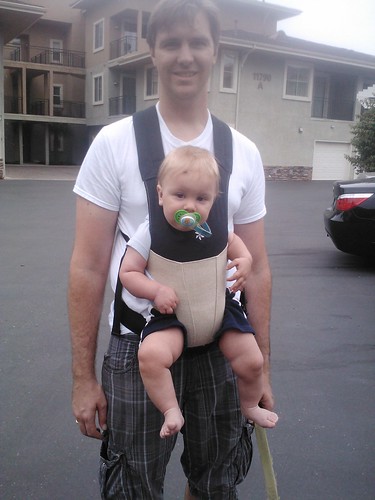
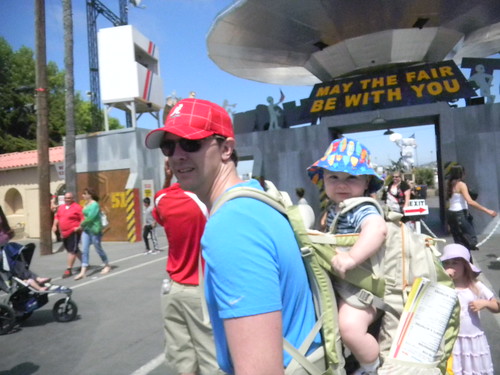
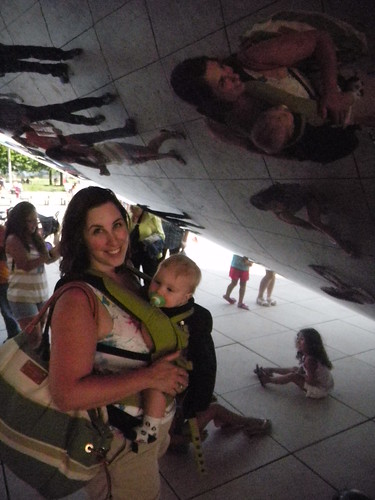
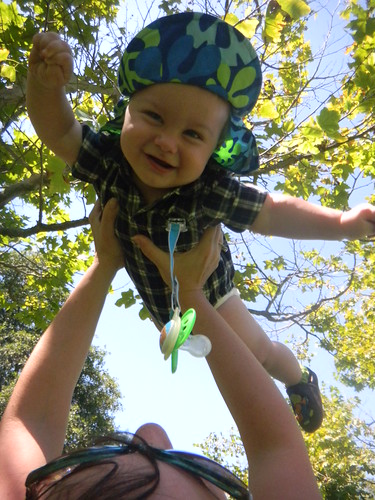
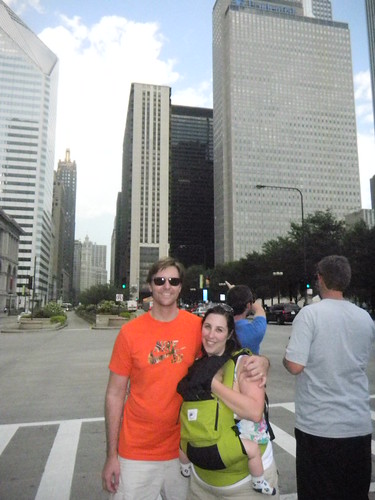
2) The babycarrier is THE way to go.  We got a lot of recommendations to stroller through the airport, but putting the baby in and out of the stroller and folding the stroller up is a big PITA.  We opted to check our stroller and then wear Thatbaby through the airport.  This means I didn't even have to take him off through security.  It also made him so easy to get on and off the plane.

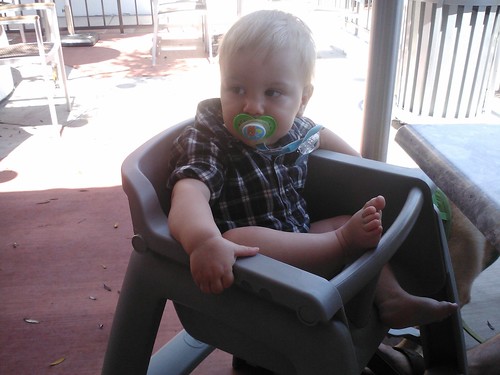
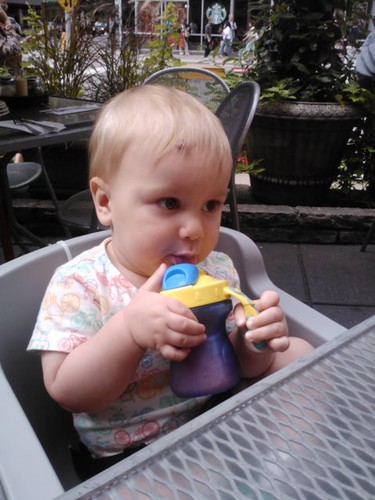
3) Make little "packs" for the plane.  We put our carry-on up above and had little gallon ziplock packs under the seat.  There was the "diaper" pack with some diapers and wipes for quick diaper changes.  The "toy" pack with new toys for Thatbaby (a Sqwish, an O-ball, and a new cloth book - the magnadoodle was up above in the big carryon).  And there was a "snack" pack with blueberries and dried raspberries.

4) Go with the flow when it comes to sleep.  I think Thatbaby was in bed by his "bedtime" once during the trip.  Usually he ended up going to sleep a little later, but it's a vacation, so I wasn't going to worry about it.  We brought the pack 'n play from home, and he slept there most of the night, but in the early mornings he ended up in bed with us so we could sleep a bit longer.  He loved the big fluffy bed and spent a lot of time throwing himself down on it over and over again.

5) Pick up some stuff once you get there.  We brought a handful of diapers and picked up the rest once we got there.  That way you don't have to pack mountains of diapers and wipers.  Once we checked into the hotel we made a diaper-wipe-dishwashing soap run.

6) Use the day you get to get oriented.  This is time for the diaper run, finding the nearest supermarket, subway stop, restaurants, places to get drinks.  Even though I overplan, I did this right.  Our first day in was also our most relaxing.  And it meant I knew where to pick up things when we ran out, where we could find buses and the metro, and get a lay of the land.

Friday, August 17, 2012

Chicago - The Food


So one of the major problems with traveling with a 10 month old is that it is much more difficult to whip out a camera at a restaurant.  There's far too much "do you want some more mango? No, leave your food on the table.  Don't put your hand down mommy's shirt.  Are you done?  Do you want some more? Shhhh, no screaming" to be taking pictures.

So you'll have to bear with me on these reviews.

Breakfast:

Yolk:  I think this might have been the favorite breakfast for both Thatboy and me.  I had red velvet french toast - I guess to make up for the lack of cake at the wedding.  Red velvet cake, rolled around a cream cheese filling, then dipped in egg and fried.  Served with a mound of fresh strawberries.


Thatboy had the good morning burger - which he thought was one of the best breakfasts ever.  A burger topped with American cheese, bacon, and egg.

The Bongo Room: This was a very special breakfast because I finally got a chance to meet Elly! I've "known" Elly for probably close to 6 years, and yet we've never met.  When I started planning our Chicago trip, she was the first (and only) person I emailed for recommendations.   "And of course, let me know if you want to hang at all while you're here,"  she casually threw in to the end of her recs.  I did want to hang out and meet her.  And for those of you who know Elly by reputation, she is just as sweet, wonderful, and warm as you would expect!  We met her on a coldish, rainy, morning, warmed by the conversation and pancakes!  Elly had raspberry oreo pancakes, Thatboy had blueberry pancakes.  And because I always have to be difficult, I had the breakfast burrito with chorizo.


Xoco: This was definitely Thatbaby's favorite breakfast.  It was the one meal of the trip where not a single crumb made it onto the floor.  While Thatboy and I each had delicious chilaquiles, Thatbaby had an empanada with eggs and poblano chiles.  He sat happily munching away while the table beside us mused at how lucky he was.  "I've waited 30 years to eat at a Bayless restaurant, and he gets to do it in his first year of life!"  We've always been big fans of Rick Bayless recipes, so it was good to see the restaurants carry on the yumminess!  Thatboy and I also indulged in some of their signature chocolate drinks.  He had a chocolate con leche (like a hot chocolate) while I had an iced chocolate drink with fresh mint from Bayless's garden.


Tempo Cafe:  It's funny to refer to a Greek diner from my childhood, given that I think it's probably the wrong era, but having family in New York meant I grew up going to Greek diners - and this reminds me of those breakfasts!  Giant egg dishes, big buttery pieces of toast, and their homemade marmalade is to-die-for.

Lunch:  We tend to skip lunch a lot, mostly because we end up eating giant breakfasts late.  But we did manage to squeeze in a couple.

Lincoln Park Green Market: Elly filled me in on the green market that occurs at Lincoln Park on Saturdays, so we planned our trip to be able to include a visit.  Of course, we ended up skipping breakfast, so when we got there, we were starving.  We headed straight to the food vendors where Thatboy had a burger topped with cheese and peppers (you're going to notice a trend here) and I had a bratwurst.  I haven't had bratwurst for ages.  Thatbaby had never had a bratwurst.  He was a big fan.  He barely got a piece in his mouth before asking for more.

Park Grill: Tuesday we met up with my cousin who works across from Millennium Park. He gave us a tour of the park that included lunch at the Park Grill.  It was a great atmosphere to sit and people watch.  Thatboy had a kobe burger with cambozola (a burger?  I know, you're shocked) while I had a Cuban sandwich.

Dinner:
Trenchermen:  This was Thatboy's favorite meal of the entire trip.  It started off rather horribly - I had the wrong directions, we were running late, it was raining, and we got lost multiple times.  Add to that Thatbaby was in his crazy playful mood which involved trying to climb the booth.  One of the problems with restaurants not having highchairs.  I had to hold him with one hand and try to eat with the other.  We had pickle-tots with chicken bresaola - Thatbaby's favorite part of the meal.  Potato and picke - what's not to like.  An heirloom tomato salad with white balsamic ice cream - Thatboy's favorite part of the meal, he talked about it for days after.  I'm going to have to try to figure out how to make it.  We followed that up with some sweet corn tortellini in eggplant consume and some roast duck breast.  This was the only place we ordered dessert because everything else was so good.  The blueberries with panna cotta was far more my kind of dish than Thatboy's.  But he enjoyed a variety of their fabulous cocktails, so he was happy.  Although we decided that my "Baby Mama" was the best drink of the evening - damiana, yuzu, tonic, and burnt lemon.

Mercat a la Planxa: We ended up eating here with AL, his new wife, his mom, and a couple of his friends.  I wish we hadn't.  I'd love to go back and try this place again.  I think it's difficult to go out for tapas with a big group of people.  You only get a bite of things and maybe don't order what you really want.  I couldn't even get at the cheese plate the way I ordinarily would have.  And AL spent most of the meal complaining about one thing or another (I don't think he likes when someone else picks the recipe.) I will say that the octopus was phenomenal, the lamb was delicious, and I wish I had more than a bite of the stuffed date!

And of course, the ubiquitous Chicago Pizza at Giordanos.


We let Thatboy do the ordering and he chose the Chicago classic which had peppers, onions, and pepperoni.  It was delicious.

It was my first real experience with Chicago pizza.  Out here, Chicago-style pizza is just a really thick crust, with the normal amount of topping.  In Chicago, it's really pie like - normal thickness crust with the fillings piled high inside.


 Thatbaby loved his slice!  Between the pizza and the empanada, Thatbaby thought Chicago was one killer food town.